We often need a distinct name to save our Excel files. This allows us to find our desired file among many other files. What could be more distinct than a specific date? In this article, we will discuss how to use Excel VBA to save a workbook in a specific folder with a date.
How to Save Workbook in Specific Folder with Date Using Excel VBA: 3 Easy Examples
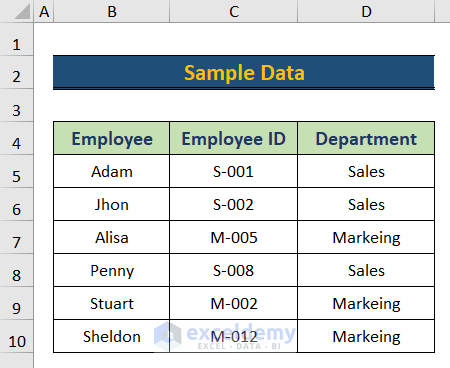
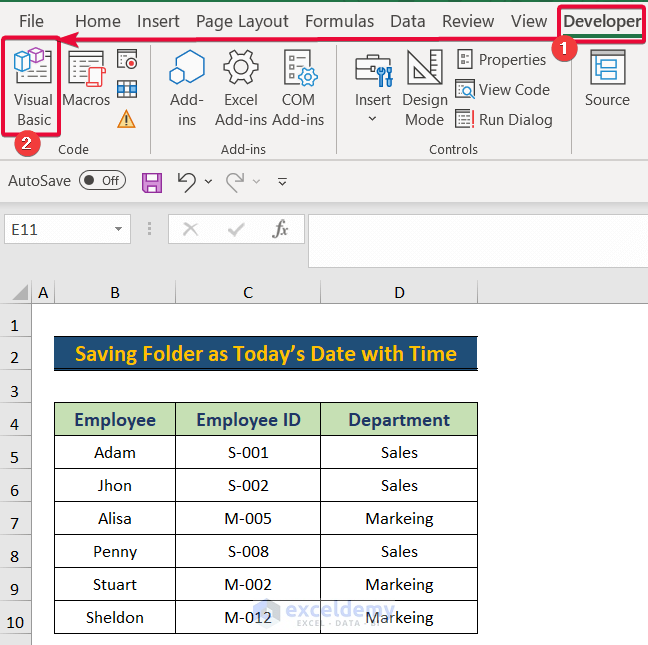
In this article, we will present 3 very easy VBA codes to save our Excel file as a date. Firstly, we will store our dataset as the current date. In the next one, we will conserve the Excel file as the date of the day before the current date. In the final example, we will apply a VBA to save our Excel file as the current date and time. We will use the following sample dataset to demonstrate the examples.
1. Saving Folder as Current Date
In this example, we will use a VBA code to save our Excel workbook as the current date. We will use the VBA Date function in the VBA code to do so.
Steps:
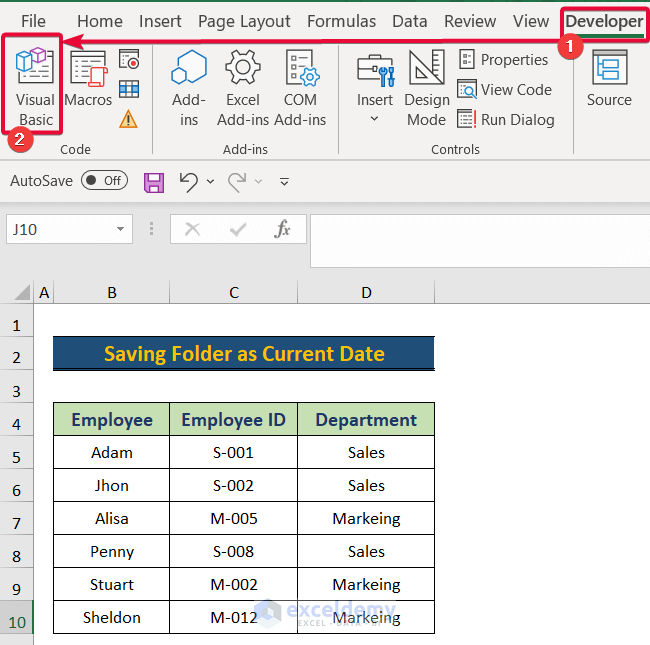
- Firstly, go to the Developer tab in the ribbon.
- From there, select the Visual Basic tab.
- Consequently, the Visual Basic window will be opened.
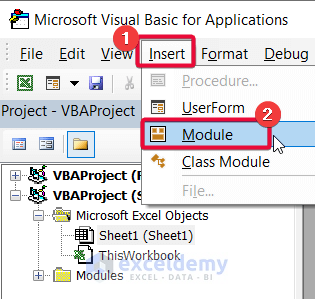
- After that, in the Visual Basic tab, click on Insert.
- Then, select the Module tab.
- Consequently, a coding module will appear.

- In the coding module, write down the following code.
- Make sure to give the proper path to the folder where you want to save your workbook.
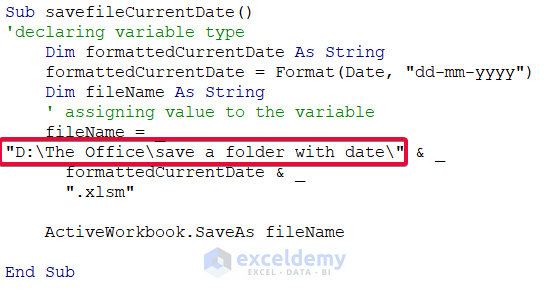
Sub savefileCurrentDate()
'declaring variable type
    Dim formattedCurrentDate As String
    formattedCurrentDate = Format(Date, "dd-mm-yyyy")
    Dim fileName As String
    ' assigning value to the variable
    fileName = _
"D:\The Office\save a folder with date\" & _
      formattedCurrentDate & _
      ".xlsm"
    ActiveWorkbook.SaveAs fileName
End Sub
- Then, save the code.

- Finally, go to the Run tab and click on it.
- From the drop-down option, select the Run command to run the code.

- Consequently, you will find that your file is saved as the current date.

Read More: Excel VBA: Save Workbook in Specific Folder
2. Saving Folder as Previous Day
In this instance, we will use a VBA code to save our Excel workbook as the previous date. We will subtract one from the Date attribute in the VBA code to do so.
Steps:
- To begin with, go to the Developer tab in the ribbon.
- After that, choose the Visual Basic toolbar.
- As a result, the Visual Basic window will appear.

- After that, select Insert from the Visual Basic window.
- Next, pick Module from the menu.
- As a result, a coding module will show up.
- Write the following code in the coding module.
- Make sure to provide the correct path to the folder where you want to save your workbook.
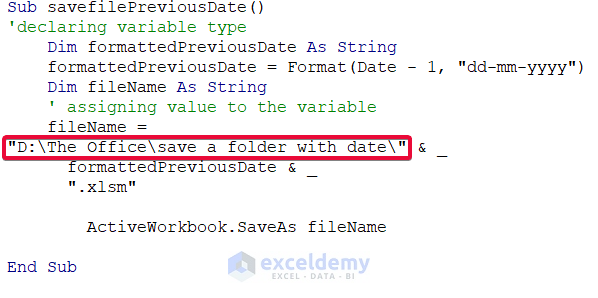
Sub savefilePreviousDate()
'declaring variable type
    Dim formattedPreviousDate As String
    formattedPreviousDate = Format(Date - 1, "dd-mm-yyyy")
    Dim fileName As String
    ' assigning value to the variable
    fileName = _
"D:\The Office\save a folder with date\" & _
      formattedPreviousDate & _
      ".xlsm"
        ActiveWorkbook.SaveAs fileName
End Sub
- After that, save the code.

- Finally, click on the Run tab.
- To run the code, choose the Run command from the drop-down menu.
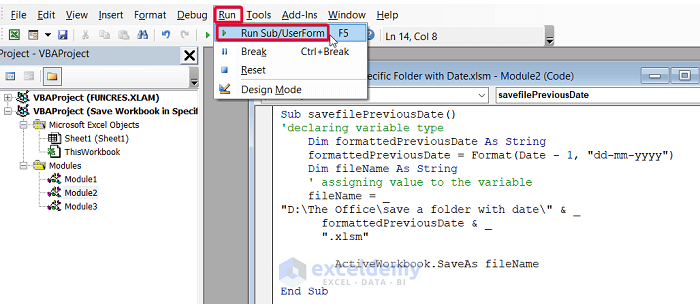
- As a result, you will discover that the file is saved with the previous date.

Read More: Excel VBA to Save File with Variable Name
3. Saving Folder as Today’s Date with Time
In this demonstration, we’ll save our Excel workbook with the current date and time using a VBA script. We will use the NOW function in the VBA code to do so.
Steps:
- First, select the Developer tab from the ribbon.
- Then, select the Visual Basic tab.
- The Visual Basic window will consequently be displayed.
- Then, click Insert in the Visual Basic tab.
- Next, pick Module from the options.
- As a result, a coding module will appear on the screen.

- After that, enter the following code into the coding module.
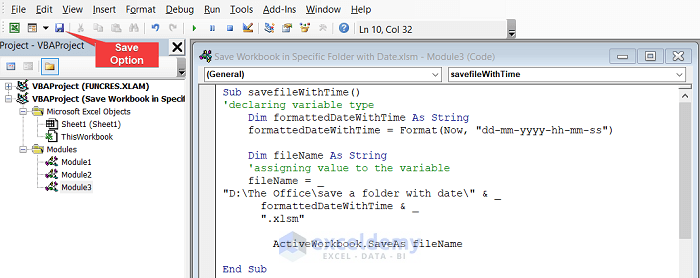
- Make sure to give the proper path to the folder where the workbook will be saved.
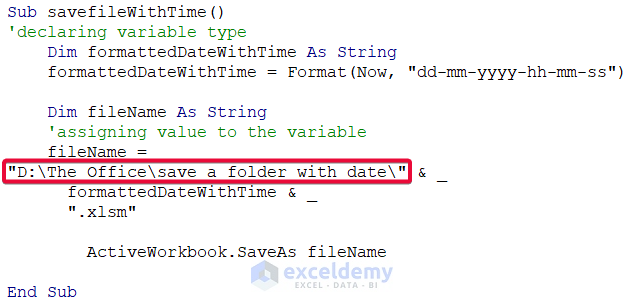
Sub savefileWithTime()
'declaring variable type
    Dim formattedDateWithTime As String
    formattedDateWithTime = Format(Now, "dd-mm-yyyy-hh-mm-ss")
    Dim fileName As String
    'assigning value to the variable
    fileName = _
"D:\The Office\save a folder with date\" & _
      formattedDateWithTime & _
      ".xlsm"
        ActiveWorkbook.SaveAs fileName
End Sub
- After that, save the code.
- Finally, choose the Run tab.
- From the available options, select the Run command to run the code.
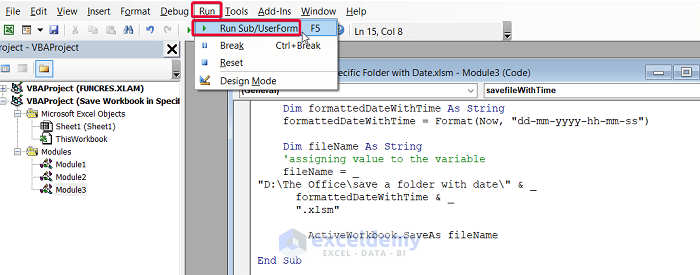
- Consequently, you will find that your file is saved with the current date and time.

Read More: Excel VBA: Save Workbook as New File in Same Folder
Download the Practice Workbook
You can download the practice workbook from here.
Conclusion
In this article, we have discussed three simple VBA codes that allow us to save our Excel workbook as a date in a specific folder. These will help the users to give their Excel files distinct names, so they can manage the files efficiently.
Related Articles
- How to Use Macro to Save Excel File with New Name
- How to Save Excel Macro Files as Filename from Cell Value
- How to Save a Copy as XLSX Using Excel VBA
- Excel VBA to Save as File Using Path from Cell
- Excel VBA: Save Workbook Without a Prompt
- Create New Workbook and Save Using VBA in Excel
- Excel VBA Save as File Format

