Method 1 – Keeping File in Current Location
- Press Ctrl+F11 to open the VBA.
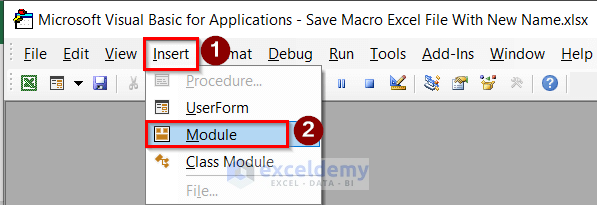
- Go to the Insert option and select the Module.
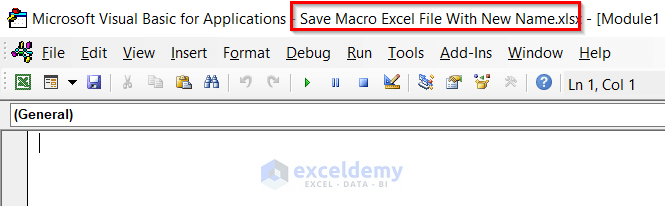
- The VBA window will open on the screen with the current Excel workbook name.
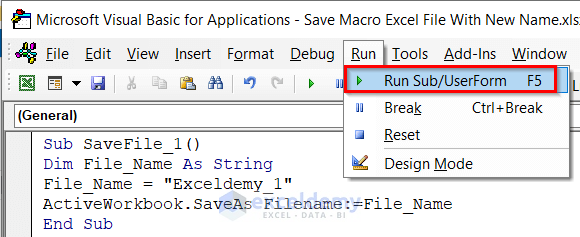
- Insert the following code into the window.
Sub SaveFile_1()
Dim File_Name As String
File_Name = "Exceldemy_1"
ActiveWorkbook.SaveAs Filename:=File_Name
End Sub
- Run the code.
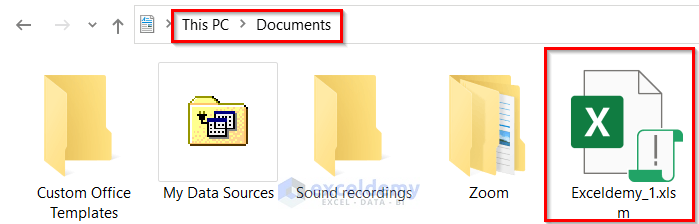
- You will see the changed name as shown in the following image.
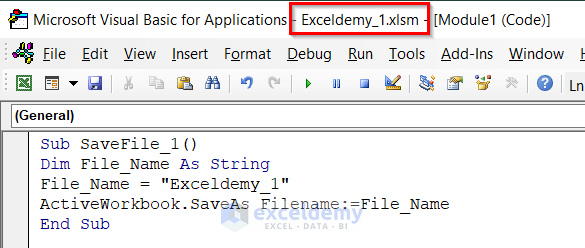
- You will get the desired result in the current location of your file.
Read More: How to Save Excel Macro Files as Filename from Cell Value
Method 2 – Saving File in New Location
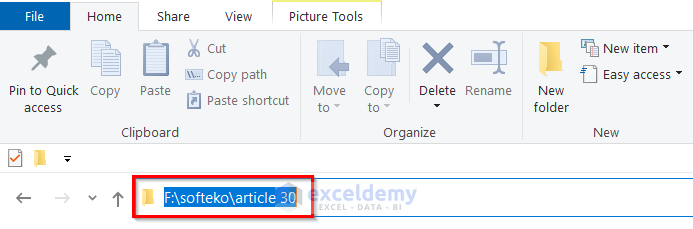
- Copy the new file location.
- Press Ctrl+F11 to open the VBA window and go to the Insert > Module option and enter the following code.
Sub SaveFile_3()
ActiveWorkbook.SaveAs Filename:="F:\softeko\article 30"
End Sub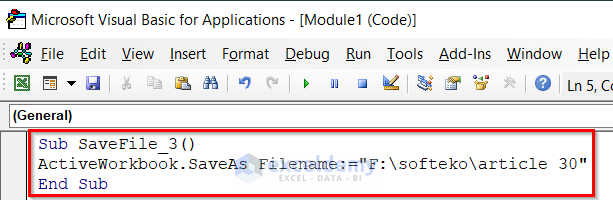
- Use the Run option or press F5 to run the code.
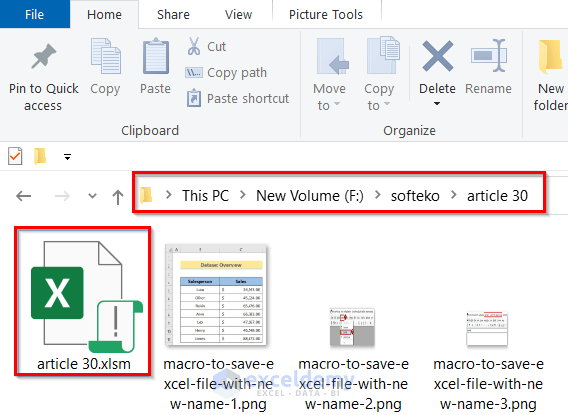
- You will get the desired result in your desired new location.
Read More: Excel VBA: Save Workbook as New File in Same Folder
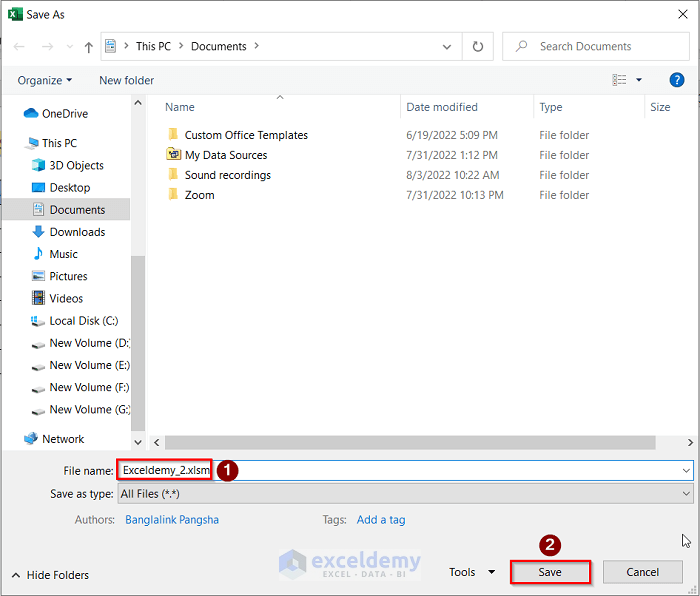
Method 3 – Use of GetSaveAsFilename Function
- Press Ctrl+F11 to open the VBA window and go to the Insert > Module
- Enter the following code.
Sub SaveFile_2()
Dim File_Name As Variant
File_Name = Application.GetSaveAsFilename
If File_Name <> False Then
  ActiveWorkbook.SaveAs Filename:=File_Name
End If
End Sub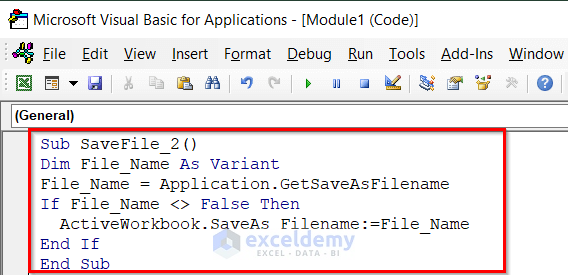
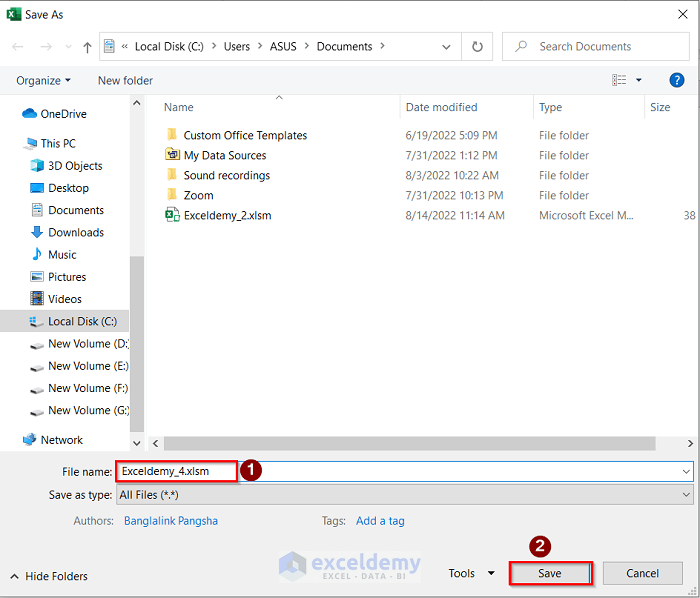
- In the File name option, enter the file the name and Save it.
Read More: Excel VBA Save as File Format
Method 4 – Specifying File Type Before Saving
- Press Ctrl+F11 to open the VBA window and go to the Insert > Module
- Enter the following code.
Sub SaveFile_4()
Dim File_Path As String
File_Path = Application.GetSaveAsFilename
ActiveWorkbook.SaveAs Filename:=File_Path & ".xlsm"
End Sub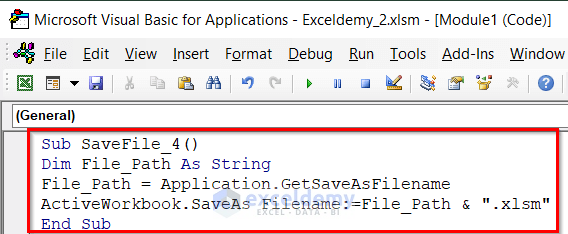
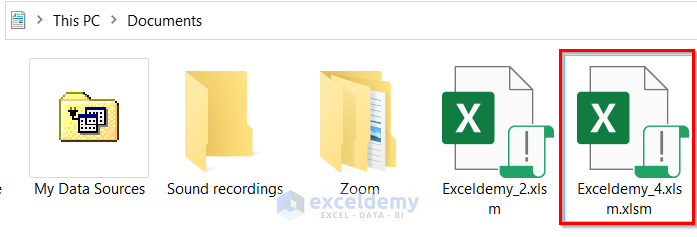
- Run the code.
- In the File name option, enter the file the name and Save it.
Read More: Excel VBA to Save Workbook in Specific Folder with Date
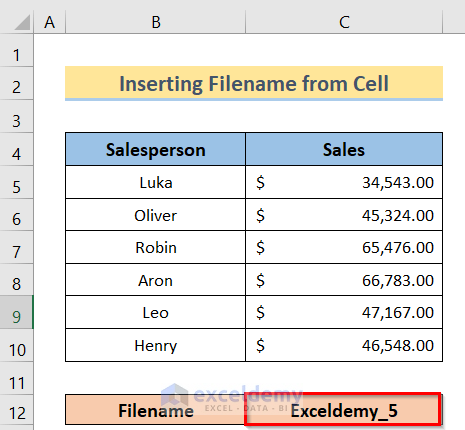
Method 5 – Inserting Filename from Cell
- Enter the desired filename in any blank cell( in this case cell C12).
- Press Ctrl+F11 to open the VBA window and go to the Insert > Module option and enter the following code.
Sub SaveFile_5()
Dim Shell_1 As Object
Dim File_name, Full_path As String
Set Shell_1 = CreateObject("WScript.Shell")
DeskTop_Path = Shell_1.SpecialFolders("Desktop")
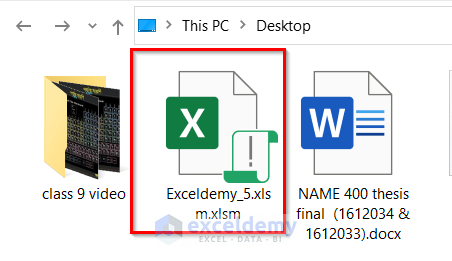
File_name = Range("C12").Value
Full_path = DeskTop_Path + "\" + File_name + ".xlsm"
ActiveWorkbook.SaveCopyAs Full_path
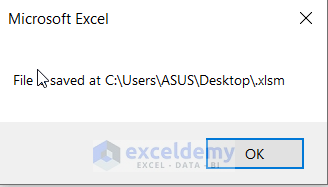
MsgBox ("File is saved at " + Full_path)
End Sub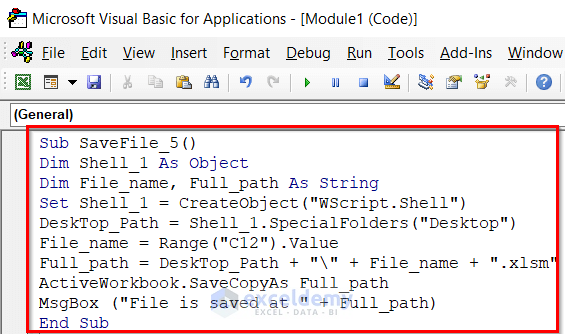
- Run the code and you will get the command on the screen as shown below. Press OK.
Read More: Excel VBA to Save as File Using Path from Cell
How to Save Worksheet in Separate File in Excel
- Right-click on the worksheet you want to separate.
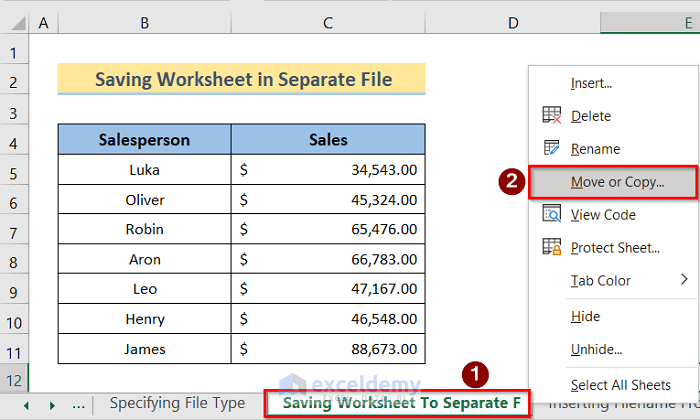
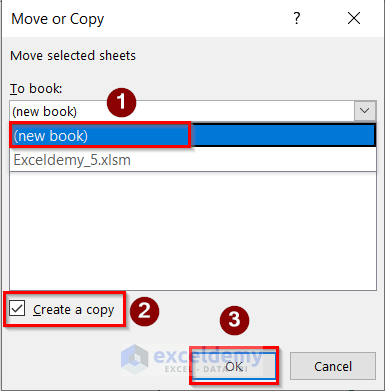
- The Move or Copy dialog box will open. Select the new book option click on Create a copy and press OK.

Things to Remember
- To run all the methods you have to save the files in the (.xlsm) mode. Otherwise, it won’t work.
- The first method is the easiest and most efficient to use.
- If you don’t want to use the VBA code option to change the name, you can save the file manually and later rename the file accordingly.
Download Practice Workbook
Related Articles
- Excel VBA: Save Workbook Without a Prompt
- How to Save a Copy as XLSX Using Excel VBA
- Excel VBA: Save Workbook in Specific Folder
- Excel VBA to Save File with Variable Name
- Create New Workbook and Save Using VBA in Excel

