Sub Choose_Location_and_Save_as_PDF()

PDF_Name = "MyPDF.pdf"

Set File_Dialog = Application.FileDialog(msoFileDialogFolderPicker)
File_Dialog.AllowMultiSelect = False
File_Dialog.Title = "Select the Desired Location"
If File_Dialog.Show <> -1 Then
    Exit Sub
End If

PDF_Name = File_Dialog.SelectedItems(1) & "\" & PDF_Name

ActiveWorkbook.ExportAsFixedFormat Type:=xlTypePDF, Filename:=PDF_Name

End Sub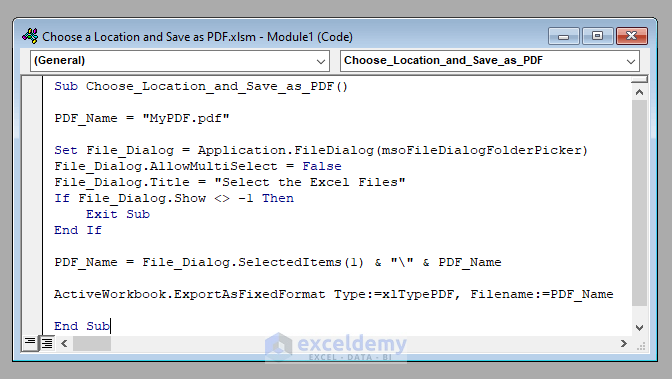
An Overview of the VBA Code to Choose a Location and Save the File as PDF: Step-by-Step Analysis
Steps:
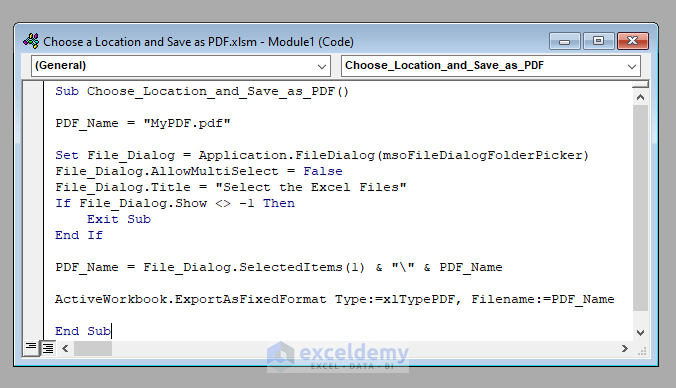
- Insert the necessary input into the code. Only one input is required in this code: the name of the PDF in which I want the file workbook to save.
- I’ve named it MyPDF.pdf.
PDF_Name = "MyPDF.pdf"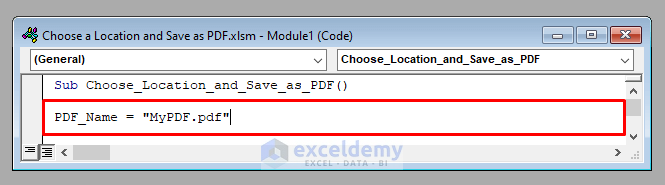
- Choose the location to save the PDF. We’ll use a VBA Filedialog object to choose the location.
Set File_Dialog = Application.FileDialog(msoFileDialogFolderPicker)
File_Dialog.AllowMultiSelect = False
File_Dialog.Title = "Select the Desired Location"
If File_Dialog.Show <> -1 Then
    Exit Sub
End If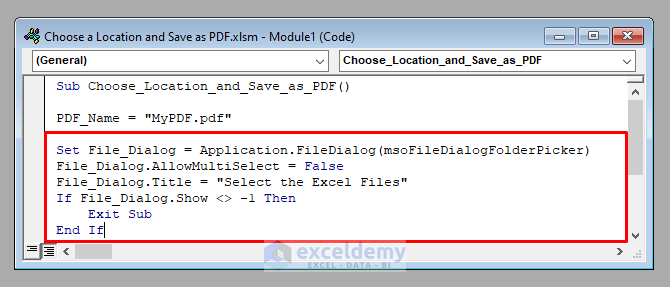
- Allocate it with the name of the file.
PDF_Name = File_Dialog.SelectedItems(1) & "\" & PDF_Name
- Save the active worksheet as a PDF file.
ActiveWorkbook.ExportAsFixedFormat Type:=xlTypePDF, Filename:=PDF_Name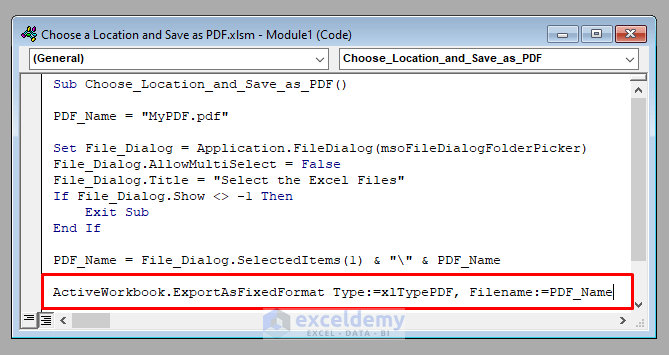
Note: If you want to save only a particular worksheet, not the whole workbook, use the name of that particular sheet in spite of ActiveWorkbook.
For example, to save Sheet1 only, use:
Worksheets("Sheet1").ExportAsFixedFormat Type:=xlTypePDF, Filename:=PDF_NameNow, the complete VBA code will be:
⧭ VBA Code:
Sub Choose_Location_and_Save_as_PDF()

PDF_Name = "MyPDF.pdf"

Set File_Dialog = Application.FileDialog(msoFileDialogFolderPicker)
File_Dialog.AllowMultiSelect = False
File_Dialog.Title = "Select the Desired Location"
If File_Dialog.Show <> -1 Then
    Exit Sub
End If

PDF_Name = File_Dialog.SelectedItems(1) & "\" & PDF_Name

ActiveWorkbook.ExportAsFixedFormat Type:=xlTypePDF, Filename:=PDF_Name

End Sub
Read More: Excel VBA Macro to Save PDF in Specific Folder
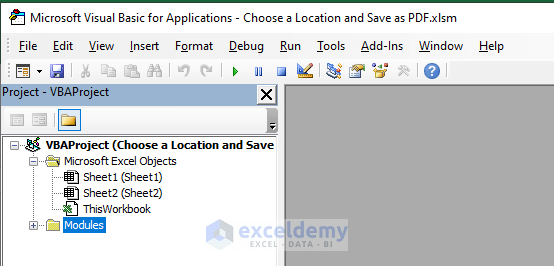
Developing a Macro to Choose a Location and Save the File as PDF
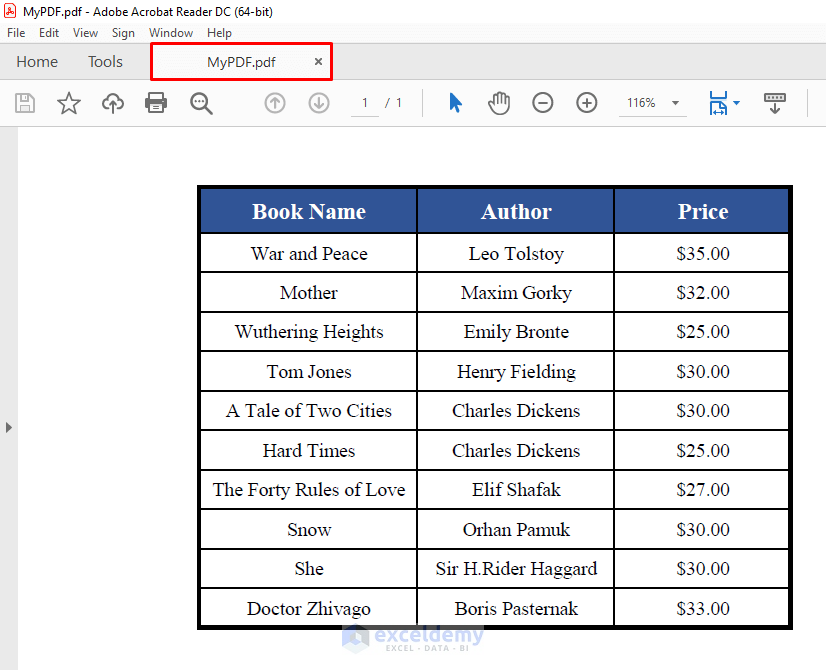
Here we’ve got a workbook with the names of some books, their authors, and the prices of a bookshop.

Steps:
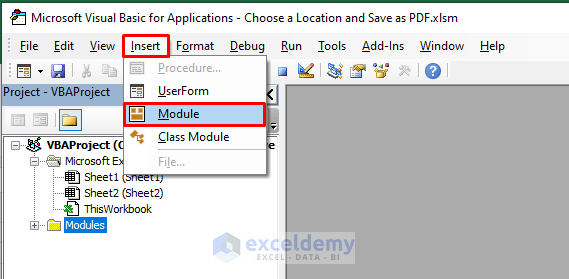
- Press ALT + F11 to open the Visual Basic window.
- Go to Insert > Module in the toolbar.
- Click on Module. A new module called Module1 (or anything else, depending on your history) will open.
- Insert the given VBA code in the module.
- Click on the Run Macro tool from the toolbar above.
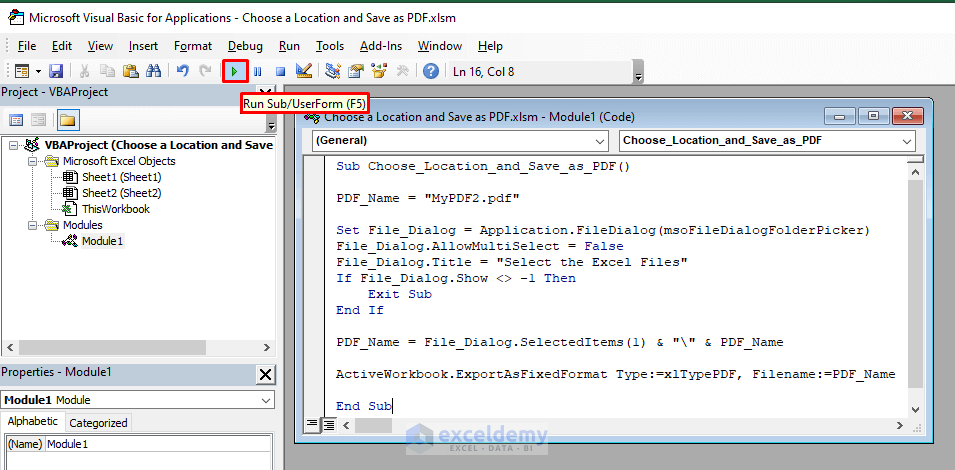
- The code will run. A file dialog will open, asking you to choose the desired location.
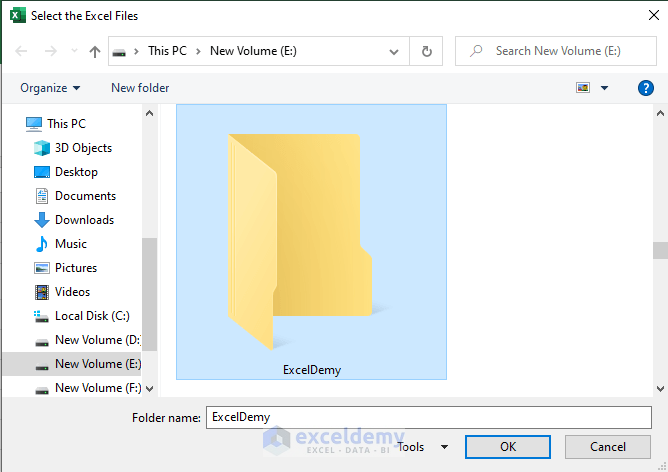
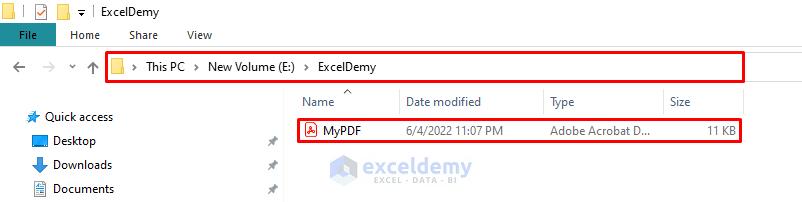
- Choose the location and click Open. You’ll find a PDF file created in your desired location (E:\ExcelDemy) with the desired name (MyPDF.pdf).
It contains the same content as the active workbook.
Read More: Excel Macro to Save as PDF
Things to Remember
Make sure that the workbook on which you are running the code – the workbook that you want to save as a PDF, is not empty. That is, at least one book cell needs to contain a value. Otherwise, the code will show an error, and it won’t be executed.
Download the Practice Workbook
Download this workbook to practice.
Related Articles
- Excel Macro to Save as PDF with Filename from Cell Value
- Excel VBA: Create Invoice and Save PDF Format
- Excel Macro: Save as PDF with Date in Filename


Hi there,
I am using this code to do exactly what it is meant to – save the excel tab as a PDF.
It runs brilliantly on windows users, but it keeps failing on mac users.
The mac users are using excel and not pages.
Is there any help you could offer?
Hello Michael, thank you for reaching out. We will be working on this matter in MAC and update the article with this information. Right now, please try the code below. Hope this will be useful for you.
The code should save the document as PDF and the name of the document will be followed by the text in the B4 cell of your Excel sheet.