While working on a dataset, sometimes you need to sum up numbers or do other operations. This is quite easy while you are working on a small dataset, but if you are doing this work repetitively, it will be better to use Microsoft Excel VBA and run a program regarding this issue. But if there is an error, you cannot run the program, and the program will terminate right after there is an error. In that case, you can use the On Error GoTo 0 handler in Excel VBA to continue this program.
The overview image shows the output after using the On Error GoTo 0. Go through the whole article for a better understanding.
What Is On Error GoTo 0 in Excel?
On Error GoTo 0 is a statement that disables error handling in VBA and allows the program to work with errors. If you do not use this statement, then the program will never run and, while processing, will be terminated. But this handler is used to propagate errors normally in the Excel VBA program. The program will run until it finds any errors.
How to Handle Excel VBA on Error GoTo 0: Step-by-Step Procedure
The dataset below represents the total marks in math and English of 2nd-grade students, but there are some errors in this dataset. Now we will use the Error GoTo 0 handler to avoid the error and complete the entire process of summarizing the marks of these two subjects. Follow the below steps to execute this process properly.
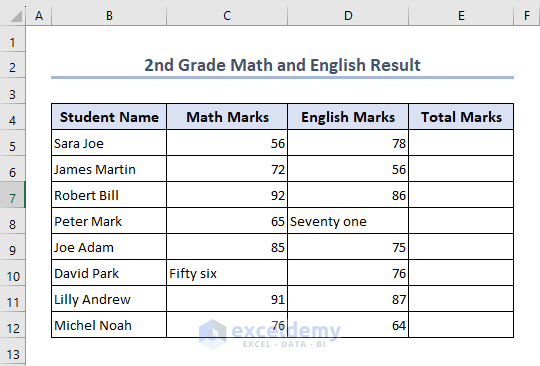
Step-1: Complete the Dataset
Here, we will sum up the marks of these two subjects and complete the dataset.
- Initially, select cell E5 and add the number of subjects to get the total marks.
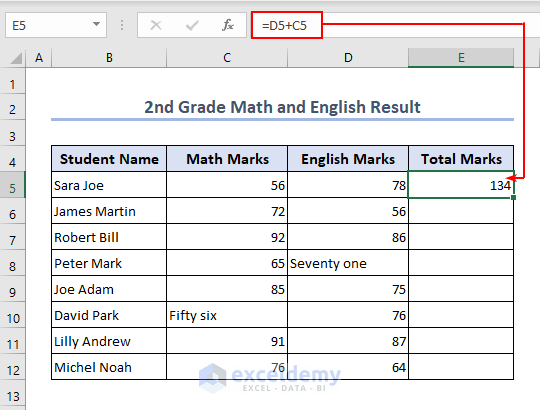
- Now drag down the Fill handle to get the total marks for all the students, as below.

Step-2: Write Down the VBA Code
As there are errors in the dataset and it’s showing the error, let’s run a VBA program to complete the full dataset despite all the errors and make all the errors 0 (Zero).
- First, go to the VBA Module Window to run the program.
- Now, write down the code to complete the dataset without showing errors.
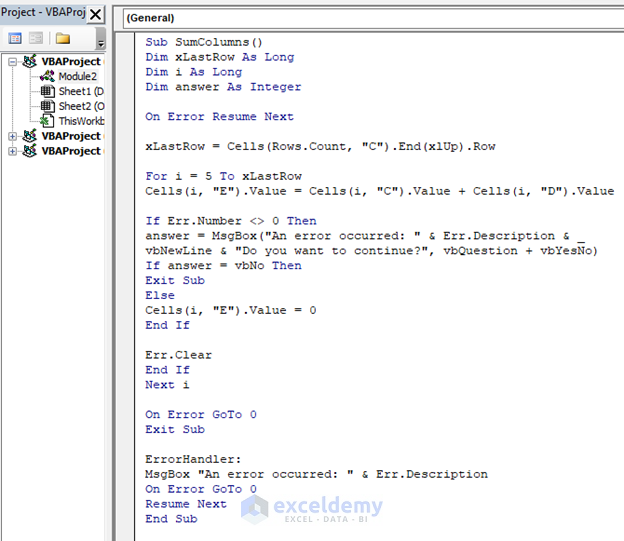
Code:
Sub SumColumns()
Dim xlastRow As Long
Dim i As Long
Dim answer As Integer
On Error Resume Next
xlastRow = Cells(Rows.Count, "C").End(xlUp).Row
For i = 5 To lastRow
Cells(i, "E").Value = Cells(i, "C").Value + Cells(i, "D").Value
If Err.Number <> 0 Then
answer = MsgBox("An error occurred: " & Err.Description & _
vbNewLine & "Do you want to continue?", vbQuestion + vbYesNo)
If answer = vbNo Then
Exit Sub
Else
Cells(i, "E").Value = 0
End If
Err.Clear
End If
Next i
On Error GoTo 0
Exit Sub
ErrorHandler:
MsgBox "An error occurred: " & Err.Description
On Error GoTo 0
Resume Next
End Sub
Code Breakdown:
Sub SumColumns()
Dim xlastRow As Long
Dim i As Long
Dim answer As Integer- This program initially declares the subroutine named SumColumns and the last row and i are declared as long.
- Therefore, the sum answer is declared as Integer.
On Error Resume Next
xlastRow = Cells(Rows.Count, "C").End(xlUp).Row
For i = 5 To lastRow
Cells(i, "E").Value = Cells(i, "C").Value + Cells(i, "D").Value
If Err.Number <> 0 Then
answer = MsgBox("An error occurred: " & Err.Description & _
vbNewLine & "Do you want to continue?", vbQuestion + vbYesNo)
If answer = vbNo Then
Exit Sub
Else
Cells(i, "E").Value = 0
End If
Err.Clear
End If
Next i- Here, On Error Resume Next statement is added to continue the program if there is an error.
- Therefore, this program will sum up the values in column C and column D and write down the output in column E
ErrorHandler:
MsgBox "An error occurred: " & Err.Description
On Error GoTo 0
Resume Next
End Sub- Lastly, On Error GoTo 0 ErrorHandler is added so that the program does not terminate if there is any error.
Read More: Excel VBA: Turn Off the “On Error Resume Next”
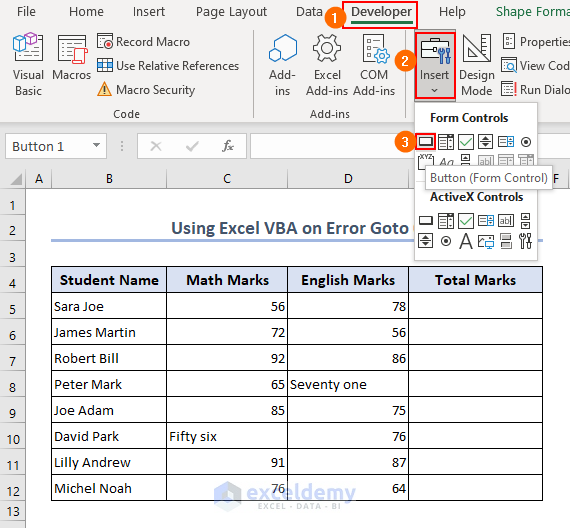
Step-3: Create a Button
Once you run the program, you will realize that pressing the Run button (icon) every time is double work and also quite a hassle. So, you can add a button to the current worksheet to complete the work with a simple click.
- In the beginning, select Developer >> Insert >> Button (Icon) from the Toolbar.
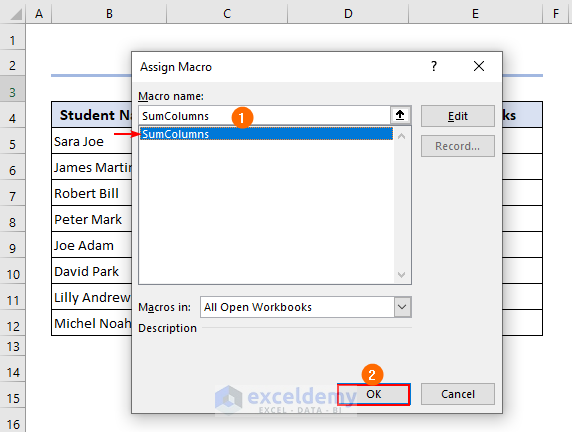
- Place the button in a random place, and the Assign Macro dialog box will pop up as below.
- Now, select the assigned macro and click OK.
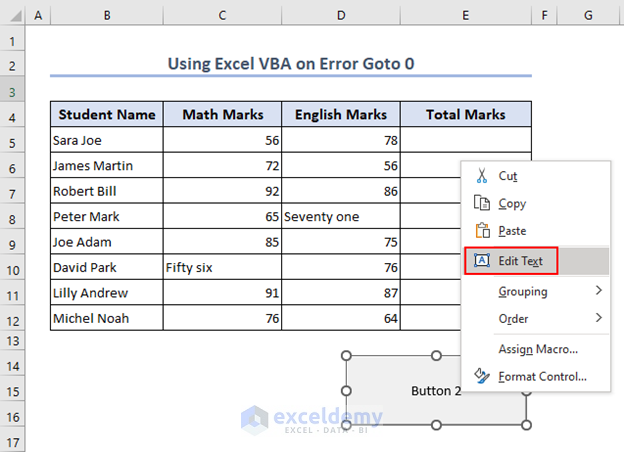
- After assigning a macro, place the cursor on the button and right-click the mouse to get the options menu.
- Select Edit Text to change the button name.
Note: You can change the format as well for a better look using the same procedure as Edit Text, but this part is completely optional.

- Finally, the button is added to simplify the process.
Step-4: The Final Output
After you add the command button to the active worksheet, you get the final output easily.
- Click the button to get the final result.
Difference Between On Error GoTo 0 VS On Error GoTo 1
There are some differences between On Error GoTo 0 and On Error GoTo 1. You will understand the differences once you go through the below discussion.
- On Error GoTo 0 is a statement that disables error handling in VBA and allows errors to propagate normally on the other hand, On Error GoTo 1 enables error handling in VBA and directs the program.
- On Error GoTo 0 shows a default message when there is any error in the program, and On Error GoTo 1 jumps in a different direction if there is any error.
What Is On Error Resume Next in Excel?
On Error Resume Next is also a statement that allows the program to propagate normally while there is an error, and this statement skips the error and completes the program. Suppose there is an error in cell B8 while the dataset range is B5:B12. If you add this statement, then your program will give an output in every cell except cell B8.
Things to Remember
- You can modify the program and avoid adding Msgbox and simply run the program.
- While working on Excel, make sure it supports VBA. If the VBA option is blocked then select File >> Option >> Trust Center >> Trust Center settings >> Macro settings >> Enable Macro >> OK.
Download Practice Workbook
You can find the practice sheet here.
Conclusion
In this article, we learned how to handle errors in Excel VBA with On Error GoTo 0 by following the steps shown earlier. We covered everything regarding this process. Hopefully, you can solve the problem shown in this article. Please let us know in the comment section if there are any queries or suggestions.
Related Articles
- How to Solve Overflow Error in VBA
- Excel VBA Error Handling Best Practice
- Excel VBA Error Handling in Loop

