In this article, we will show how to use Conditional Formatting on a Text Box in Excel. We often need text boxes to display a certain text or link the text box to a cell to display the data of that cell and so on. In all this usage, we often need to format the text box according to certain criteria. This allows users to display the data on the text boxes according to their needs.
Use Conditional Formatting on Text Box in Excel: 2 Ways
In this article, we will use 2 methods to use Conditional Formatting on Text Box in Excel. Firstly, we will use a VBA code to an ActiveX Controls Text Box and change the back color of the box by changing the cell values. Then, we will use another VBA Code to change the background of a Text Box according to the value inside the Text Box.
1. Conditional Formatting by Changing Cell Value
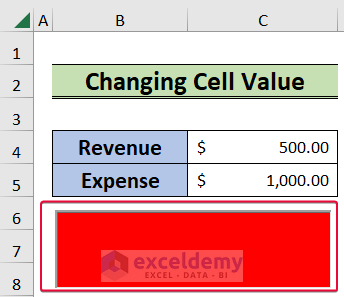
In the first method, we will write a simple VBA Code and assign it to the ActiveX Controls Text Box. Here, we have a revenue box and an expense box. If the revenue exceeds the expenses, then the Text Box will turn green. However, if it goes the other way around then the Text Box will turn red.
Steps:
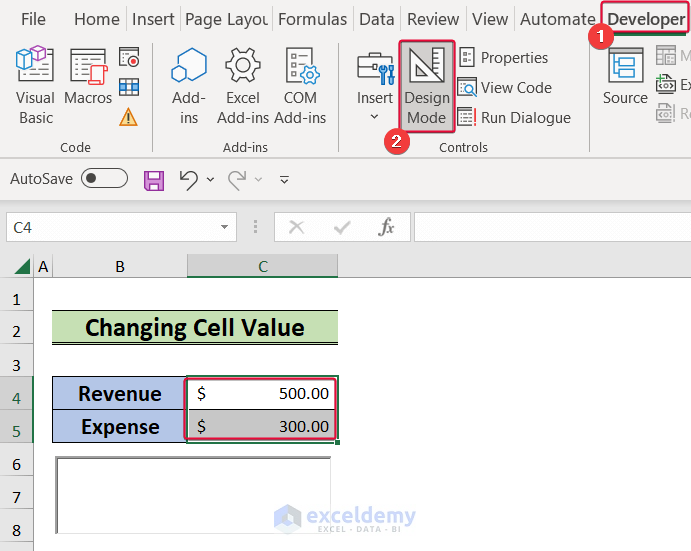
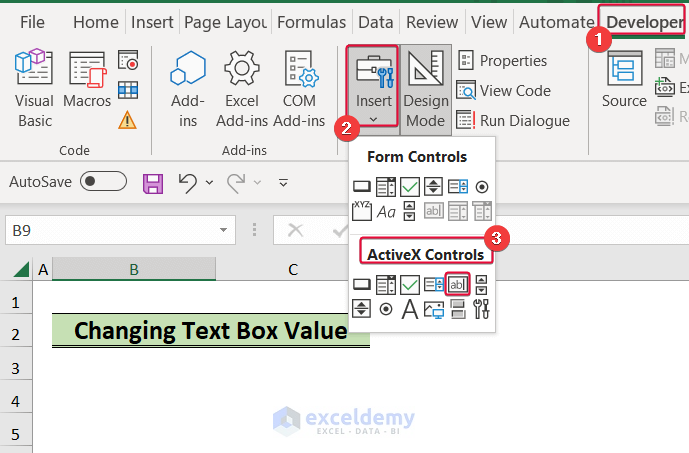
- Firstly, go to the Developer tab.
- Secondly, select the Insert option.
- Finally, from the drop-down list, choose the Text Box (ActiveX Controls) command under the ActiveX Controls
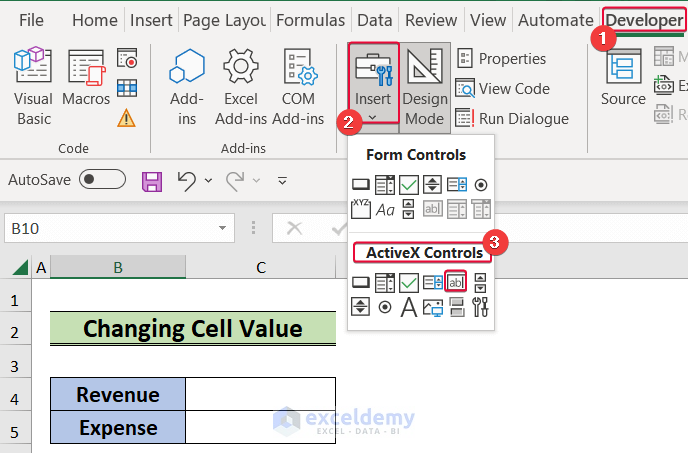
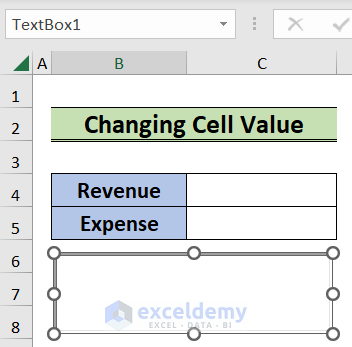
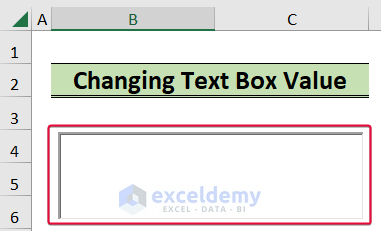
- Then, draw a Text Box in the worksheet.
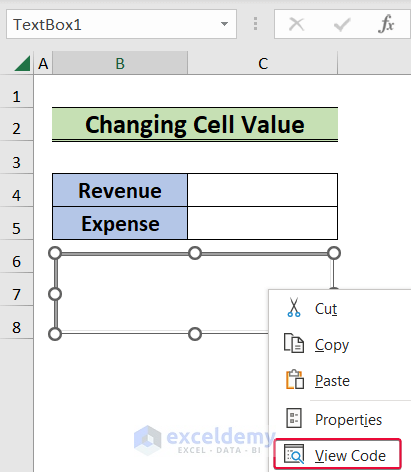
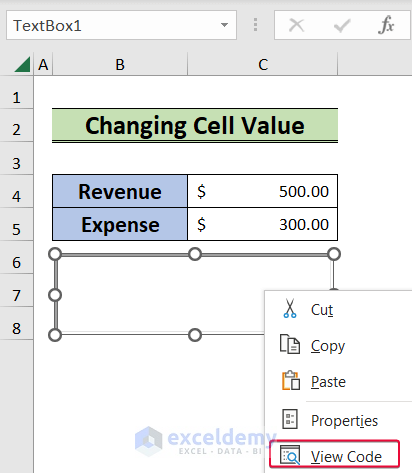
- Thereafter, right-click on the box and select View Code from the list.
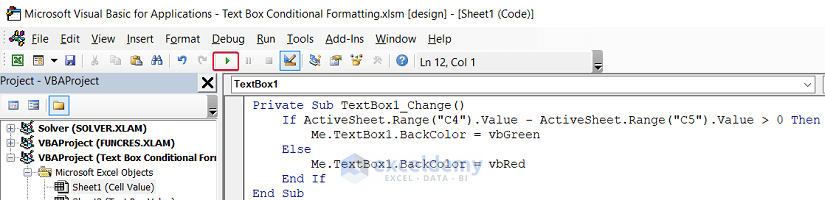
- As a result, the Visual Basics window will be opened.
- In the coding module, write the following code and save the code.
Private Sub TextBox1_Change()
    If ActiveSheet.Range("C4").Value - ActiveSheet.Range("C5").Value > 0 Then
        Me.TextBox1.BackColor = vbGreen
    Else
        Me.TextBox1.BackColor = vbRed
    End If
End Sub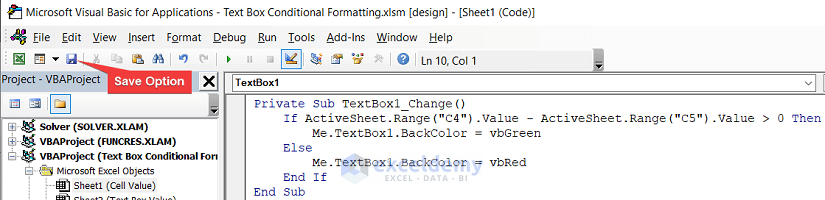
The VBA Code is quite simple. If the Revenue in the C4 cell is greater than the Expense in the C5 cell, then the box will turn green and otherwise the box will turn red.
- Now, insert values in the Revenue and Expense cells.
- After that, select the Developer tab.
- Next, click on the Design Mode.
- Then, choose the Text Box and right-click.
- From the available options, select View Code.
- Consequently, the Visual Basic window will appear on the screen again.
- Now, run the code by pressing the triangular shaped green button and then close the window.
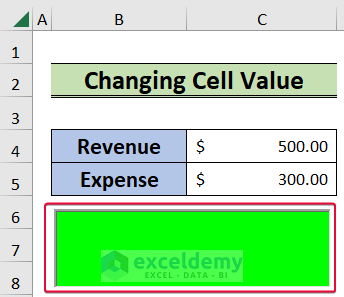
- Consequently, the Text Box will turn green as Revenue > Expense.
- Now, type an expense value that is greater than revenue and run the code.
- Consequently, we will see that the box is red.
2. Conditional Formatting by Changing Text Box Value
In this final method, we will write a VBA Code such that the color of the Text Box changes as we change the value inside it. The color will change according to the number we put into the box. The VBA Code will assign the conditions.
Steps:
- To begin with, select the Developer tab.
- After that, click on the Insert option.
- Finally, from the drop-down list, select the Text Box (ActiveX Controls) command under the ActiveX Controls section.
- Next, draw a Text Box in the worksheet.
- Now, right-click on the box and choose View Code from the available options.
- Consequently, the Visual Basics window will be on the screen.

- In the coding module, enter the following code and save it.
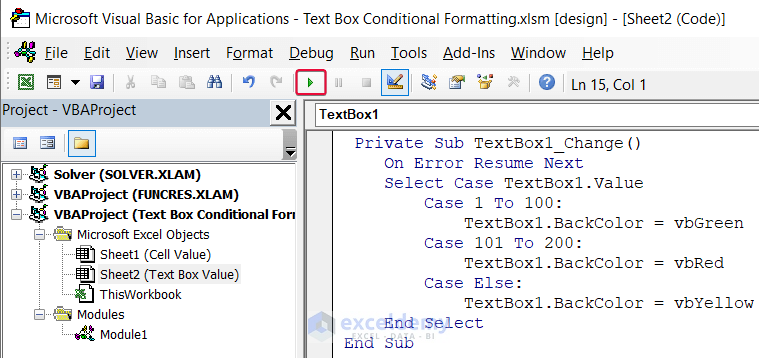
Private Sub TextBox1_Change()
    On Error Resume Next
    Select Case TextBox1.Value
        Case 1 To 100:
            TextBox1.BackColor = vbGreen
        Case 101 To 200:
            TextBox1.BackColor = vbRed
        Case Else:
            TextBox1.BackColor = vbYellow
    End Select
End Sub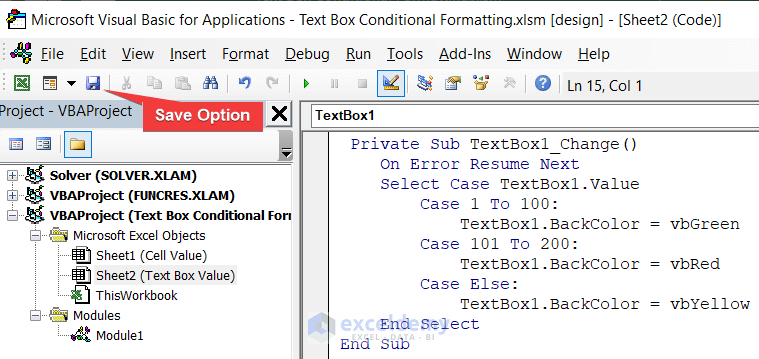
The code is very easy to understand. It states if the user enters any number between 1 to 100, then the color of the box will turn green. If the user enters any number in the range 101 to 200, the color will be red. And in case of any other number (except negative number) the box color will be yellow.
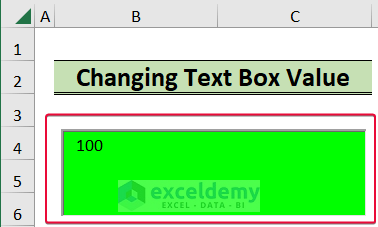
- Finally, run the code by pressing the green colored triangular shaped button.
- Now, type a number inside the box and the color will change accordingly.
Download Practice Workbook
You can download the practice workbook here.
Conclusion
In this article, we have discussed 2 ways to use Conditional Formatting on Text Box in Excel. These methods will allow users to conditional format the text box according to their needs and display their data more eloquently. If you have any questions regarding this essay, feel free to let us know in the comments.
Related Articles
- How to Make Yes Green and No Red in Excel
- How to Create a Rating Scale in Excel
- How to Apply Borders in Excel with Conditional Formatting
- How to Apply Alignment in Excel Conditional Formatting
- How to Copy Conditional Formatting to Another Cell in Excel
- How to Copy Conditional Formatting Color to Another Cell in Excel
- How to Copy Conditional Formatting to Another Sheet
- How to Copy Conditional Formatting to Another Workbook in Excel
- How to Copy Conditional Formatting with Relative Cell References in Excel
- How to Copy Conditional Formatting But Change Reference Cell in Excel
<< Go Back to Conditional Formatting | Learn Excel
Get FREE Advanced Excel Exercises with Solutions!
