Method 1 – Run a VBA Macro to Delete a Row If the Cell Is Blank in a Single Column with Excel VBA
We’ll develop a Macro that’ll delete rows with blank cells from a single column.
⧪ Step 1: Activating the Source Worksheet
The 1st step that we need to accomplish is to activate the source worksheet. The source worksheet is Sheet1. The line of code will be:
Worksheets("Sheet1").ActivateThis step isn’t mandatory if the source worksheet is active before running the code.
⧪ Step 2: Setting the Desired Range on the Active Worksheet
To capture all the cells used in the worksheet, you can use the UsedRange property of VBA.
Set Rng = ActiveSheet.UsedRange⧪ Step 3: Identifying the Column with the Blank Cells
Identify the column from which the blank cells will be removed. Remove the students who didn’t appear in the Physics exam.
Remove the rows with the blank cells in column 2.
The line of code will be:
Blank_Cells_Column = 4⧪ Step 4: Iterating through a Backward Loop to Remove the Rows with Blank Cells
The lines of code will be:
For i = Rng.Rows.Count To 1 Step -1
    If Rng.Cells(i, Blank_Cells_Column) = "" Then
        Rng.Cells(i, Blank_Cells_Column).EntireRow.Delete
    End If
Next i
So the complete VBA code will be:
⧭ VBA Code:
Sub Delete_Rows_with_Blank_Cells_in_Single_Column()

Worksheets("Sheet1").Activate

Set Rng = ActiveSheet.UsedRange

Blank_Cells_Column = 4

For i = Rng.Rows.Count To 1 Step -1
    If Rng.Cells(i, Blank_Cells_Column) = "" Then
        Rng.Cells(i, Blank_Cells_Column).EntireRow.Delete
    End If
Next i

End Sub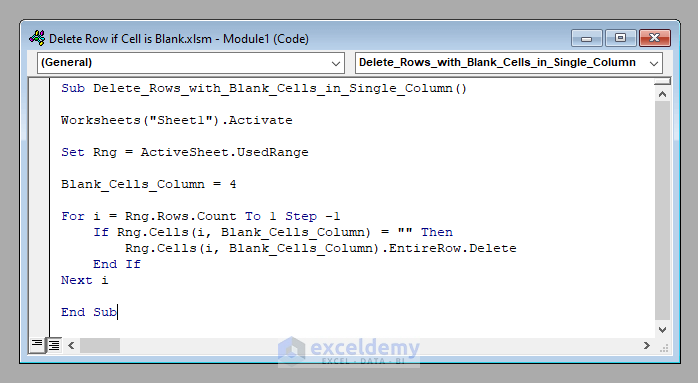
⧭ Output:
Run the code. It’ll remove the rows with the blank from Marks in Physics.
![]()
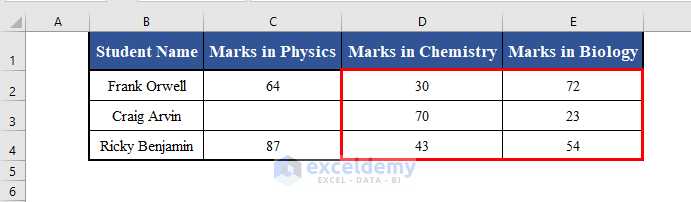
Method 2 – Create a Macro to Delete a Row If the Cell Is Blank in Multiple Columns with Excel VBA
We’ll remove the rows with blank cells in Chemistry and Biology.
The steps are the same as Method 1. In Step 1, we declare an array of columns instead of just one column from where the blank cells will be removed, which are columns 3 and 4.
Dim Blank_Cells_Columns As Variant
Blank_Cells_Columns = Array(3, 4)
In Step 4, we’ll iterate through two for-loops instead of one.
For i = Rng.Rows.Count To 1 Step -1
    For j = LBound(Blank_Cells_Columns) To UBound(Blank_Cells_Columns)
        If Rng.Cells(i, Blank_Cells_Columns(j)) = "" Then
            Rng.Cells(i, Blank_Cells_Columns(j)).EntireRow.Delete
            Exit For
        End If
    Next j
Next i
The complete VBA code will be:
⧭ VBA Code:
Sub Delete_Rows_with_Blank_Cells_in_Multiple_Columns()

Worksheets("Sheet1").Activate

Set Rng = ActiveSheet.UsedRange

Dim Blank_Cells_Columns As Variant

Blank_Cells_Columns = Array(3, 4)

For i = Rng.Rows.Count To 1 Step -1
    For j = LBound(Blank_Cells_Columns) To UBound(Blank_Cells_Columns)
        If Rng.Cells(i, Blank_Cells_Columns(j)) = "" Then
            Rng.Cells(i, Blank_Cells_Columns(j)).EntireRow.Delete
            Exit For
        End If
    Next j
Next i

End Sub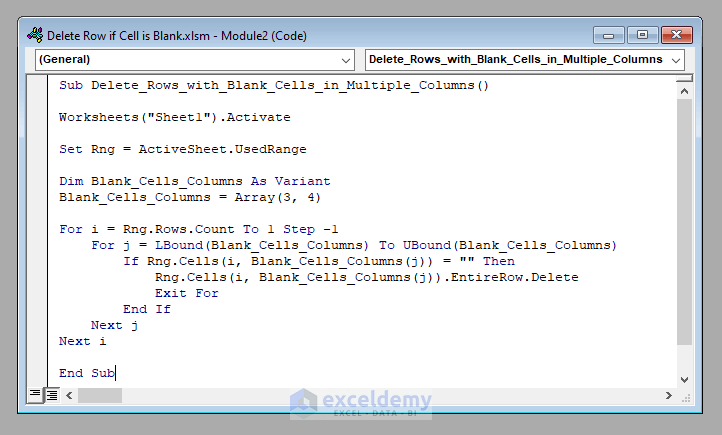
⧭ Output:
Run the code. It’ll remove the students who didn’t appear in either Chemistry or Biology exam.
Method 3 – Use a UserForm to Delete a Row If a Cell Is Blank with Excel VBA
⧪ Step 1: Inserting a New UserForm
Go to Insert > UserForm of the Visual Basic Editor to insert a new UserForm.
![]()
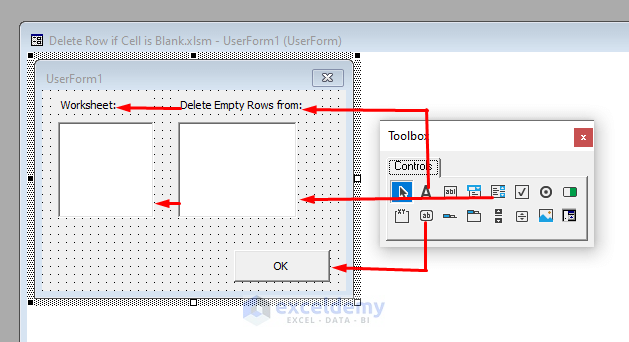
⧪ Step 2: Dragging the Necessary Tools
- A UserForm called UserForm1 will be created with a Toolbox called Control.
- Drag 2 Labels, 2 ListBoxes, and a CommandButton to the UserForm.
- Change the displays of the Labels to Worksheet: and Delete Empty Rows from.
- Change the display of the CommandButton to OK.
⧪ Step 3: Inserting Code for ListBox1
- Double click on ListBox1. A Private Subprocedure called ListBox1_Click will open.
- Insert the following code there.
Private Sub ListBox1_Click()

For i = 0 To UserForm1.ListBox1.ListCount - 1
    If UserForm1.ListBox1.Selected(i) = True Then
        Worksheets(UserForm1.ListBox1.List(i)).Activate
        ActiveSheet.UsedRange.Select
        UserForm1.ListBox2.Clear
        For j = 1 To ActiveSheet.UsedRange.Columns.Count
            UserForm1.ListBox2.AddItem ActiveSheet.UsedRange.Cells(1, j)
        Next j
        Exit For
    End If
Next i

End Sub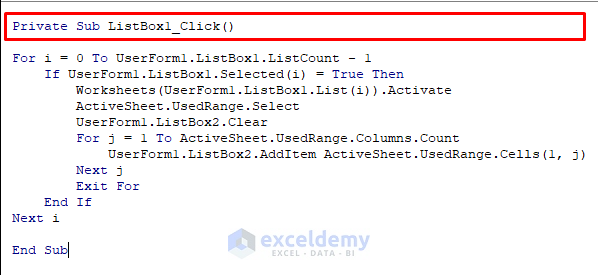
⧪ Step 4: Inserting Code for CommandButton1
Add this code for the CommandButton1 (CommandButton1_Click).
Private Sub CommandButton1_Click()

Set Rng = ActiveSheet.UsedRange

Dim Blank_Cells_Columns() As Variant
ReDim Blank_Cells_Columns(0)
Blank_Cells_Columns(0) = "ExcelDemy"

Count = 1

For i = 0 To UserForm1.ListBox2.ListCount - 1
    If UserForm1.ListBox2.Selected(i) = True Then
        ReDim Preserve Blank_Cells_Columns(Count)
        Blank_Cells_Columns(Count) = i + 1
        Count = Count + 1
    End If
Next i

For i = Rng.Rows.Count To 1 Step -1
    For j = LBound(Blank_Cells_Columns) + 1 To UBound(Blank_Cells_Columns)
        If Rng.Cells(i, Blank_Cells_Columns(j)) = "" Then
            Rng.Cells(i, Blank_Cells_Columns(j)).EntireRow.Delete
            Exit For
        End If
    Next j
Next i

Unload UserForm1

End Sub![]()
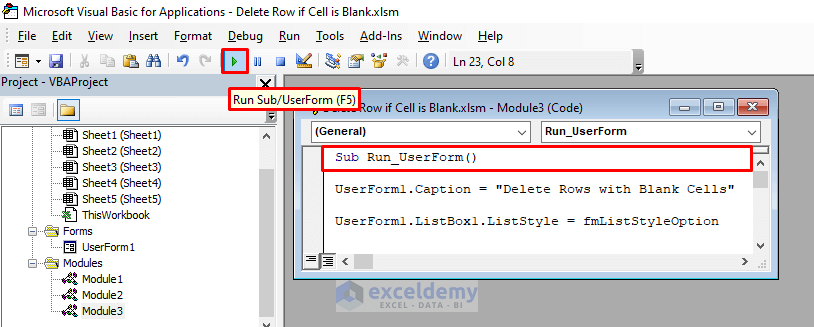
⧪ Step 5: Inserting Code for Running the UserForm
Insert a new Module and add this code for running the UserForm.
Sub Run_UserForm()

UserForm1.Caption = "Delete Rows with Blank Cells"

UserForm1.ListBox1.ListStyle = fmListStyleOption

UserForm1.ListBox2.ListStyle = fmListStyleOption
UserForm1.ListBox2.MultiSelect = fmMultiSelectMulti

For i = 1 To Sheets.Count
    UserForm1.ListBox1.AddItem Sheets(i).Name
Next i

For i = 0 To UserForm1.ListBox1.ListCount - 1
    If UserForm1.ListBox1.List(i) = ActiveSheet.Name Then
        UserForm1.ListBox1.Selected(i) = True
    End If
Next i

Load UserForm1
UserForm1.Show

End Sub
⧪ Step 6: Running the UserForm (The Final Output)
Run the Macro called Run_UserForm.
- The UserForm will load in the worksheet with the caption Delete Rows with Blank Cells.
- Select your worksheet and columns from the UserForm. We selected Sheet1 and Marks in all three subjects; Physics, Chemistry, and Biology.
![]()
- Click OK. The students absent from any of the 3 exams in Sheet1 will be removed automatically.
![]()
Things to Remember
In all the codes of this article, we’ve used the UsedRange property of VBA to cover all the used cells of the worksheet. If you want to capture a specific region, set the address of that specific range instead.
Download the Practice Workbook
Related Articles
- How to Filter and Delete Rows with VBA in Excel
- Excel VBA to Delete Row If Cell Contains Partial Text
- How to Apply VBA to Delete Rows with Specific Data in Excel
- How to Delete Row Using Macro If Cell Contains 0 in Excel

