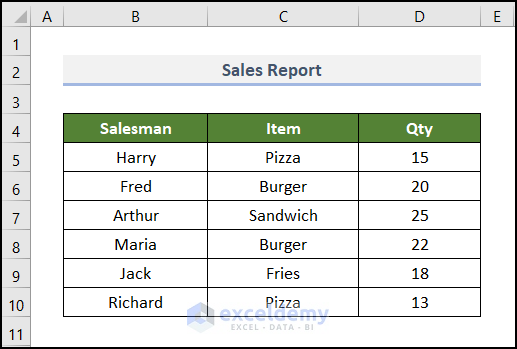
Let’s use a daily Sales Report of a fast-food shop to demonstrate vertical-to-horizontal copying. Columns B, C, and D of this dataset contain the names of Salesmen, Items, and their corresponding Qty.
Method 1 – Using Paste Special Option
Steps:
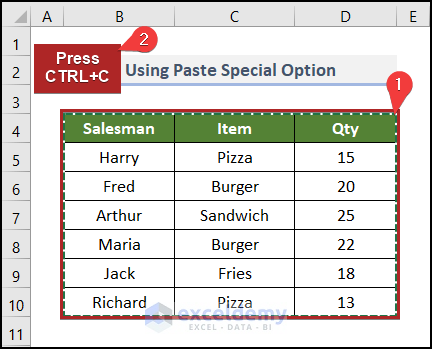
- Select cells in the B4:D10 range.
- Press Ctrl + C.
- Right-click on cell B12 where we want to paste the copied data.
- You will get a context menu. Select Paste Special on it.

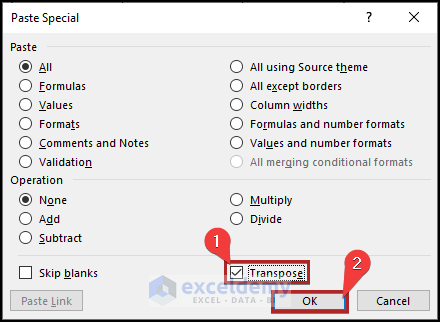
- Immediately, the Paste Special dialog box opens. Check Transpose at the bottom of the box.
- Click OK.
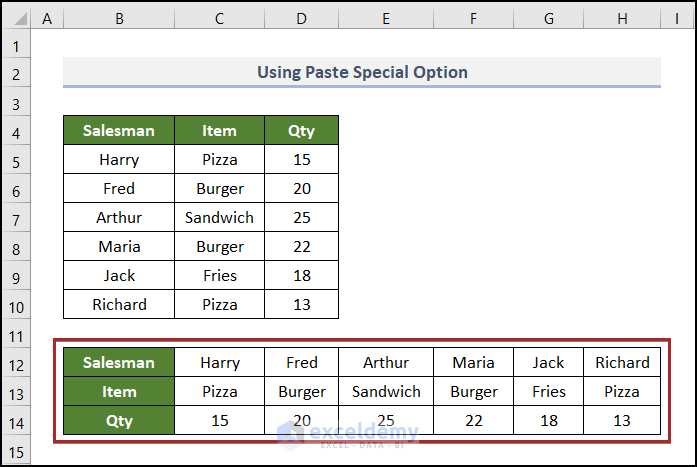
- Finally, you can see the data in horizontal rows in the B12:H14 range.
Read More: How to Copy Horizontal and Paste Vertical in Excel
Method 2 – Applying VBA Code
Steps:
- Right-click on the sheet named VBA. This opens a context menu.
- Select the View Code command.
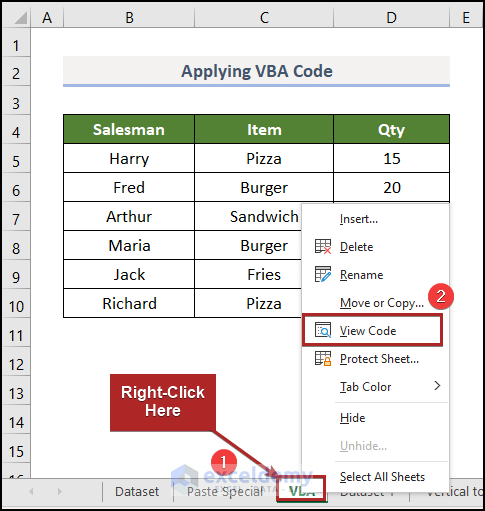
- Immediately, the Microsoft Visual Basic for Applications window appears. Also, we can see a code module inserted for Sheet3 (VBA) on the right side of the display.
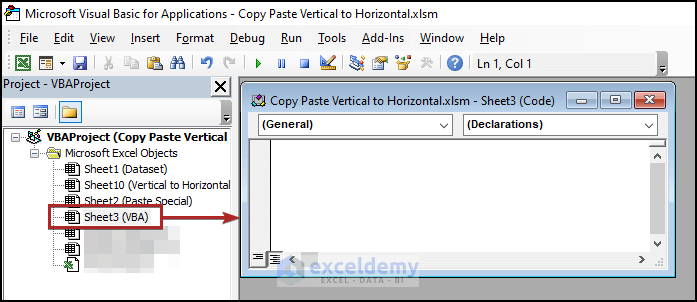
- Copy the following code and paste it into the module:
Public Sub Copy_Paste_Vertical_to_Horizontal()
Range("B4:D10").Copy
Range("B12").PasteSpecial Transpose:=True
End Sub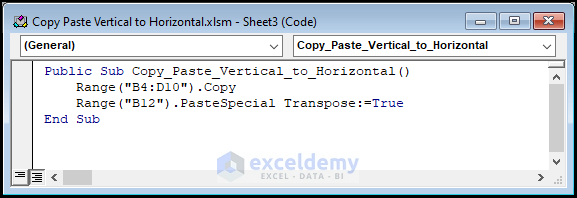
This creates a sub-procedure with the name Copy_Paste_Verticla_to_Horizontal. It copies all the cells in the B4:B10, then pastes them in cell B12 which is the starting cell of our pasted data. We put the status of Transpose as True.
- Run the code using the green play button or press F5.

- Return to the VBA worksheet and see the data arranged horizontally.

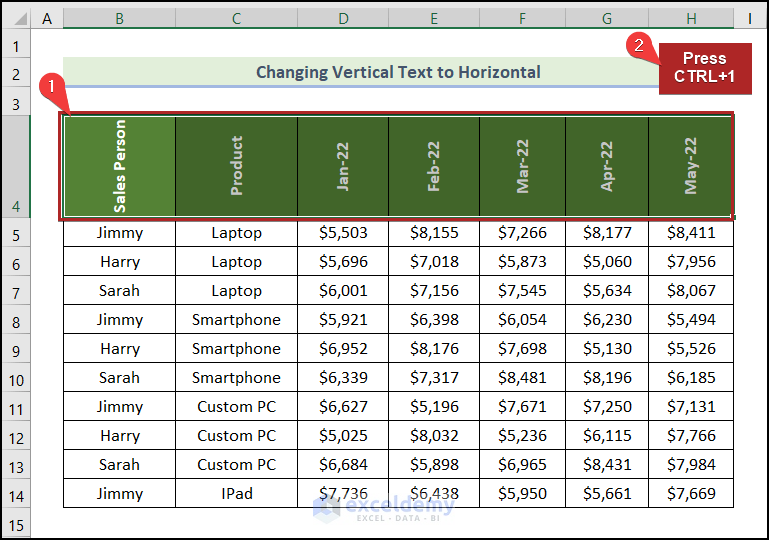
How to Change Vertical Text to Horizontal in Excel
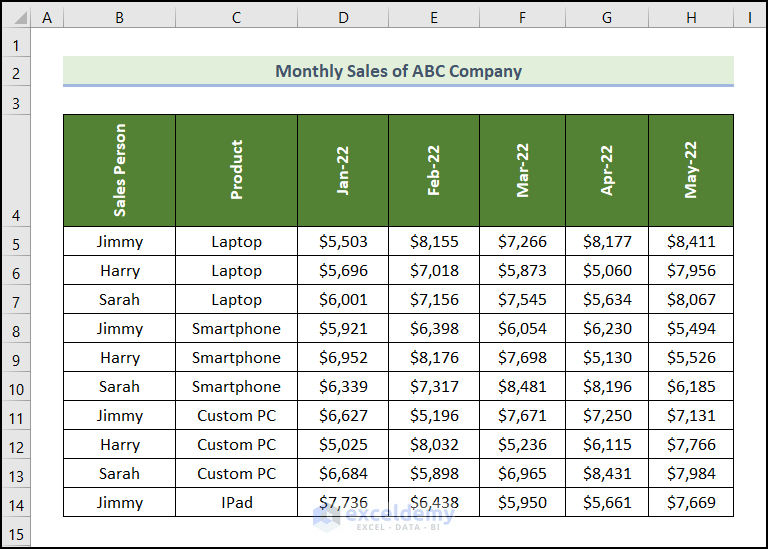
Consider the dataset with the names of the Sales Person, the names of the Product, and their consecutive sales amount for the months of January to May of the year 2022. All the text in the headings is in vertical alignment. Now, we’ll change these vertical texts to horizontal ones in Excel.
Steps:
- Select the cells containing the headings in the B4:H4 range.
- Press Ctrl + 1 on the keyboard.
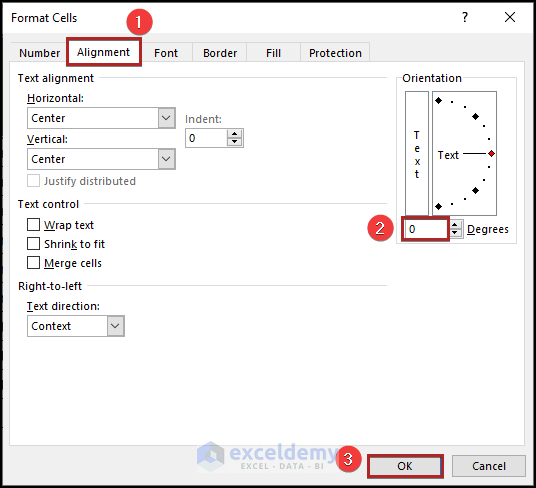
- The Format Cells dialog box should pop up.
- Go to the Alignment tab.
- Write down 0 in the box of Degrees.
- Click OK.
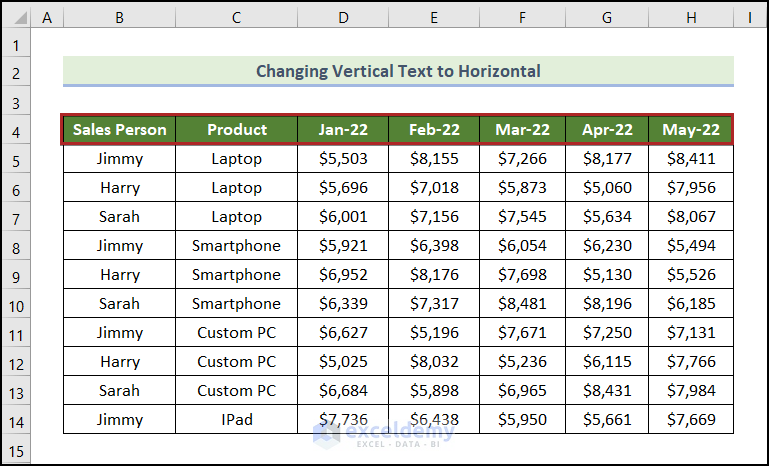
- All the vertical texts will get changed to horizontal ones.
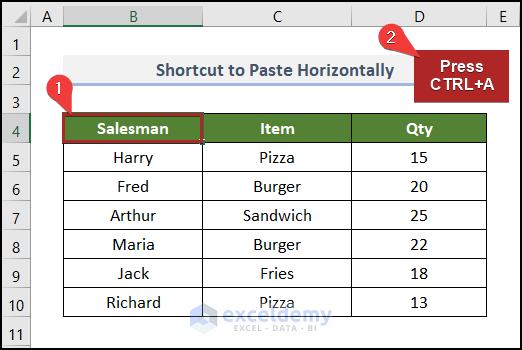
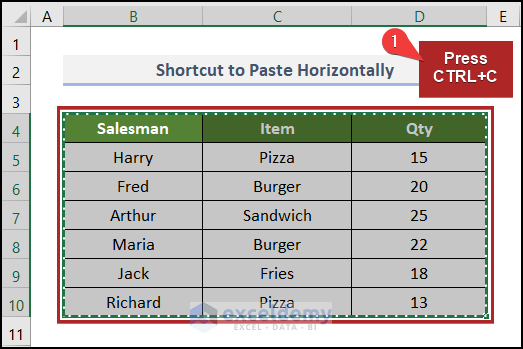
Using Keyboard Shortcut to Paste Horizontal in Excel
Steps:
- Select any cell inside the range. In this case, we selected cell B4.
- Press the Ctrl and A buttons simultaneously on the keyboard. This selects the whole range (here, it’s B4:D10).
- Press Ctrl + C on your keyboard. This command copies the entire selection.
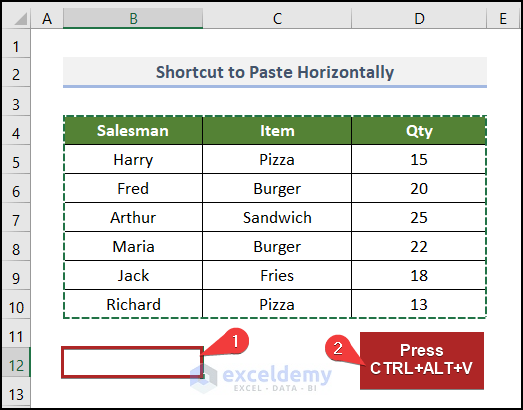
- Go to cell B12 where we want to paste the data.
- Press the Ctrl + Alt + V keys altogether.
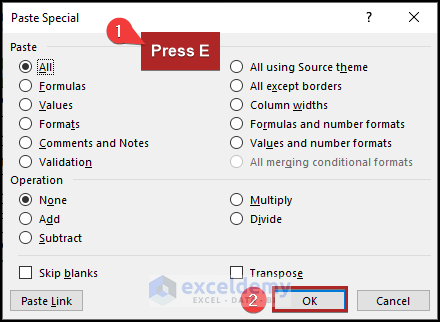
- The Paste Special dialog box pops up.
- Press the E key on the keyboard.
- Press Enter.
- You can see the data in horizontal rows.

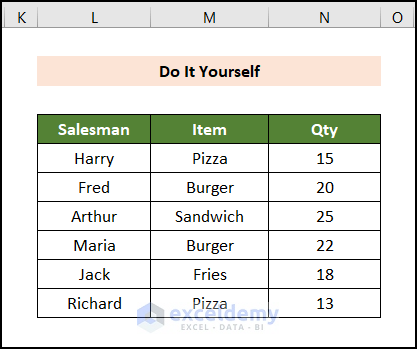
Practice Section
We have provided a practice section like the one below in each sheet on the right side.
Download Practice Workbook
You may download the following Excel workbook for practice.
Related Articles
- Copy and Paste in Excel When Filter Is On
- Copy and Paste in Excel with Merged Cells
- Copy and Paste in Excel and Keep Cell Size
- Copy Same Value in Multiple Cells in Excel
- Copy and Paste Formulas Without Changing Cell References
- Paste Image into Excel Cell from Clipboard
- Fill Across Worksheets in Excel
<< Go Back to Copy Paste in Excel | Learn Excel
Get FREE Advanced Excel Exercises with Solutions!
