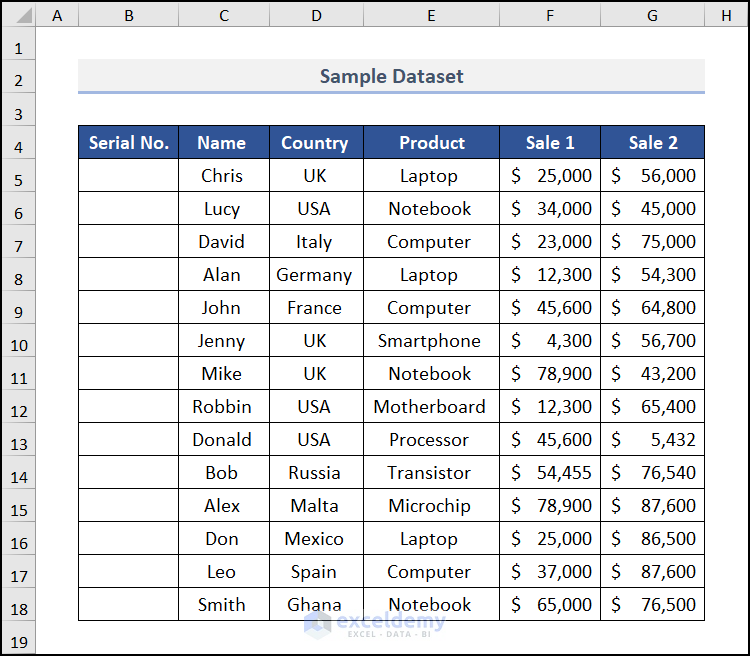
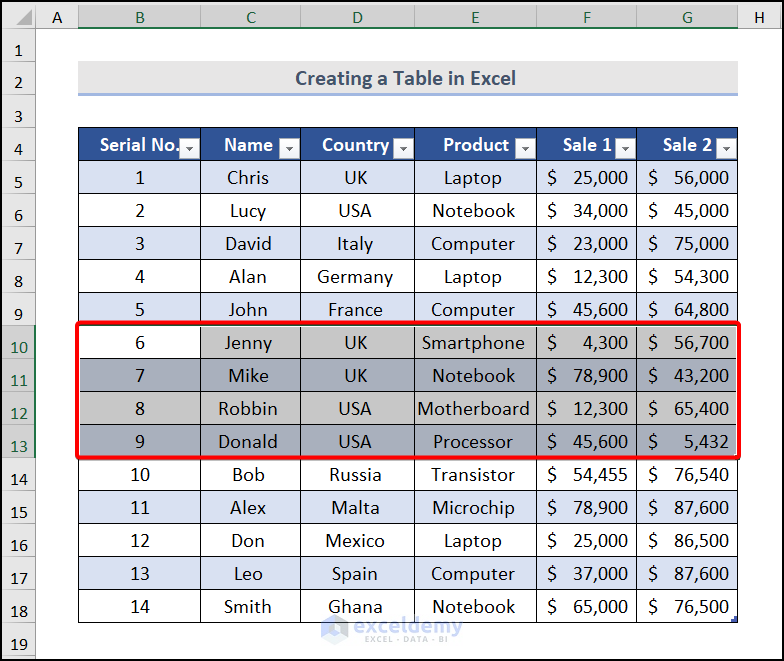
For automatic numbering, we will be working with a dataset of countrywide sales lists for different products.
Method 1 – Using Fill Handle Tool to Do Automatic Numbering in Excel
The Fill Handle feature in Excel is widely used and common. It allows you to automatically fill an entire column based on a pattern detected from a few filled cells.
- Open your Excel workbook and navigate to the sheet where you want to add automatic numbering.
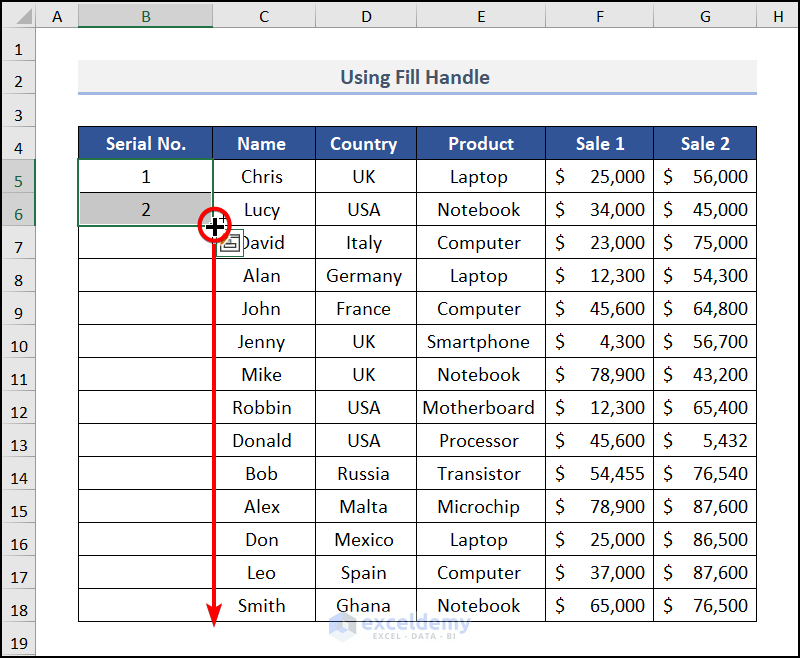
- In the Serial No. column (or any other column where you want to add numbers), manually enter the first two numbers (e.g., 1 and 2).
- Select both cells containing these numbers.
- Move your mouse cursor to the bottom right corner of the selected cell until you see the + sign (the Fill Handle).
- Double-click on the Fill Handle, and Excel will automatically fill the entire column with a sequential series of numbers.
- Alternatively, you can click and drag the Fill Handle down to extend the numbering to the desired range.
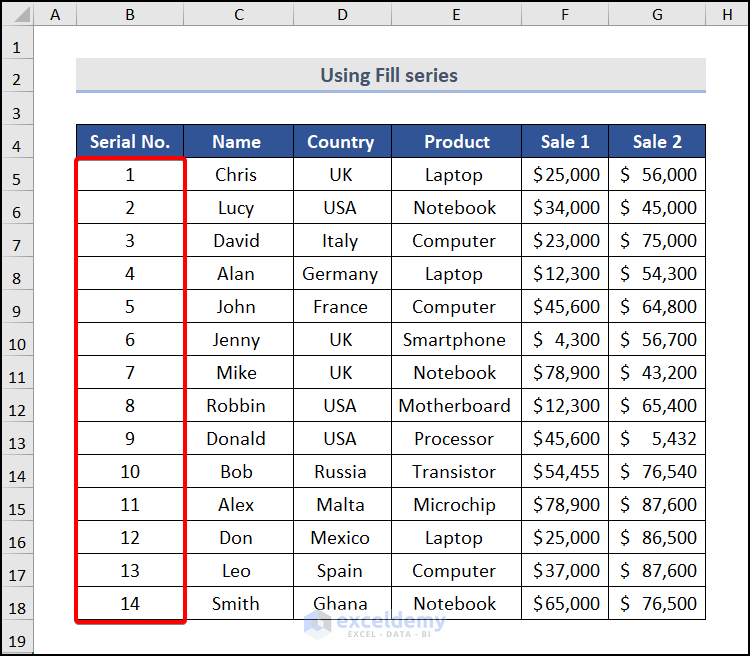
Here’s an example of how it works:
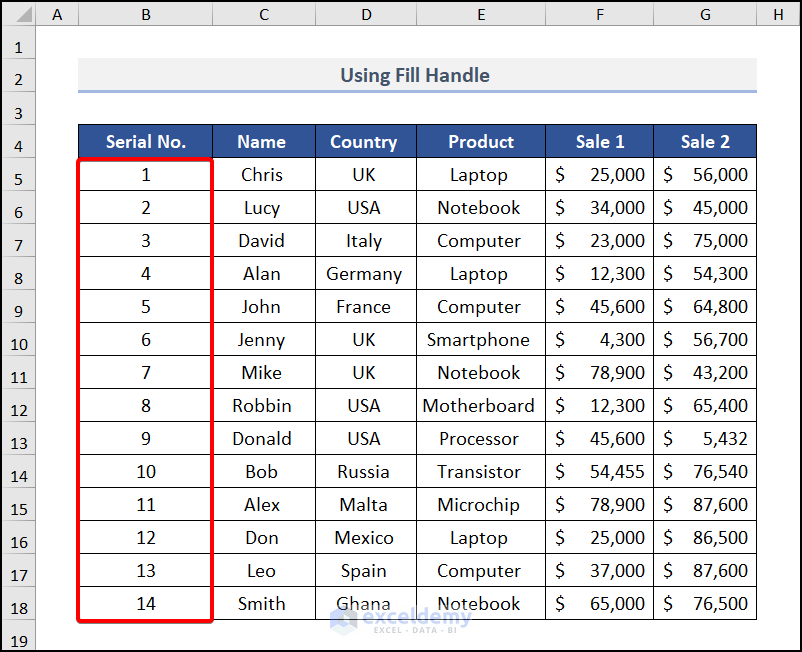
Remember to adjust the starting numbers and customize the range as needed for your specific dataset.
Method 2 – Using Fill Series Command in Excel for Automatic Numbering
The Fill Series feature in Excel provides more control over your datasheet than the Fill Handle. You can apply this operation to both columns and rows. Follow the steps below to create a number sequence without manually dragging:
- Insert 1: Start by entering the value “1” in the cell where you want to begin the automatic numbering.
- Access the Fill Series Command:
- Go to the Home tab.
- Click on the Fill option.
- Select Series from the dropdown menu.
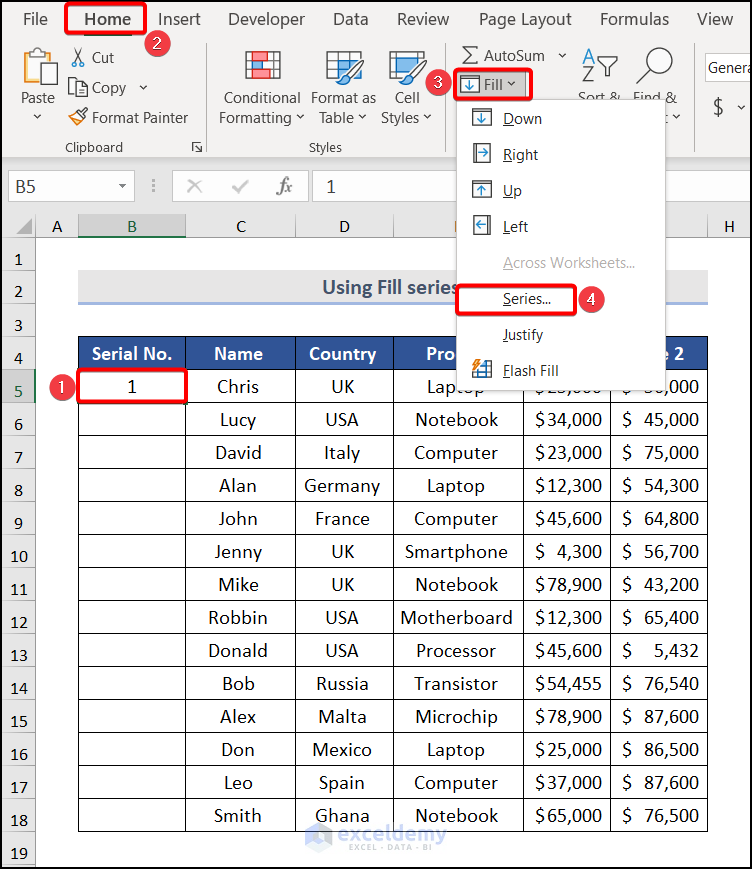
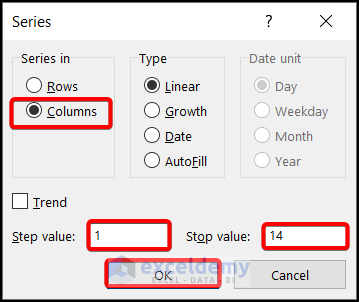
- Configure the Series Settings:
- A new Series window will appear.
- Choose Column since we want to auto-number the columns.
- Set the Step Value to 1.
- Specify the Stop Value as 14 (since we have 14 rows to number).
- Click OK to proceed.
Your automatic numbering sequence will now be generated.
Note: You can also apply the same procedure to auto-number rows by selecting Row instead of Column.
Method 3 – Adding 1 to the Previous Row Number for Automatic Numbering
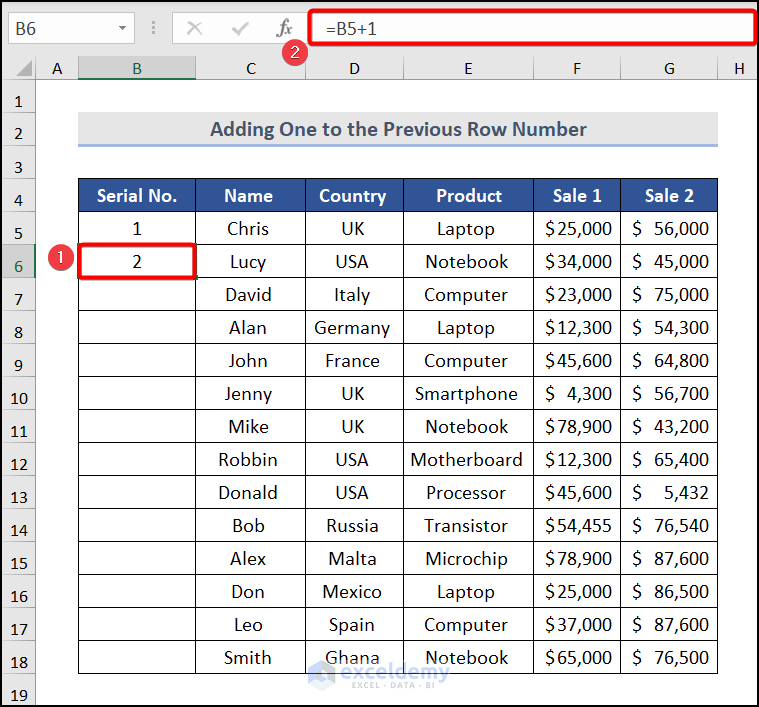
- Insert 1: Begin by entering the value 1 in the first cell where you want to start the automatic numbering (e.g., cell B5).
- Formula for Incrementing Row Numbers:
- In the second cell (e.g., the cell below B5), input the following formula:
=B5+1-
-
- This formula adds 1 to the value in the previous cell.
-
- Drag Down to Apply:
- Drag the formula down to fill the subsequent cells.
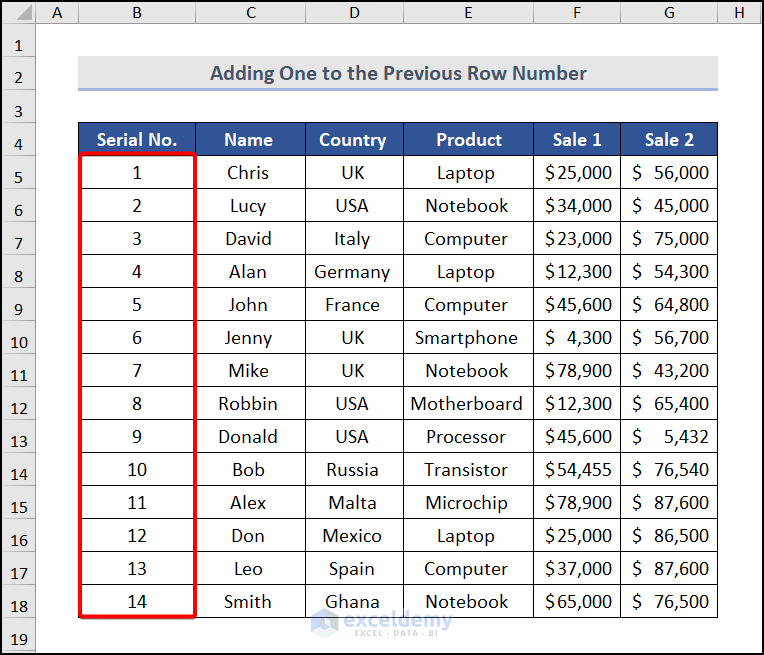
- As a result, each cell will automatically increment by 1 from the previous row.
You’ll achieve the desired automatic numbering sequence after performing these steps!
Read More: Automatically Number Rows in Excel
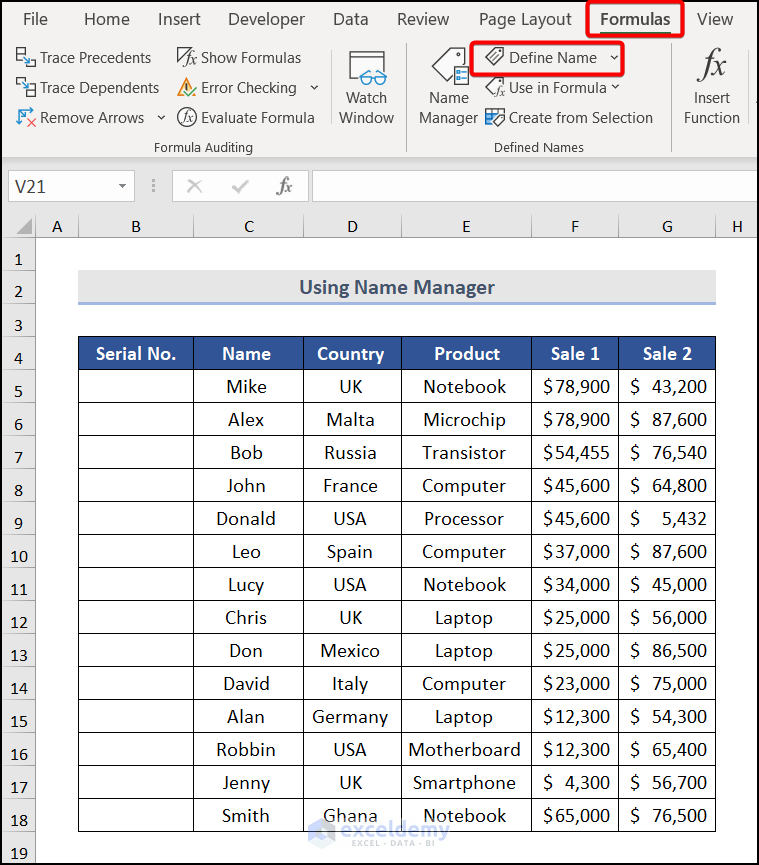
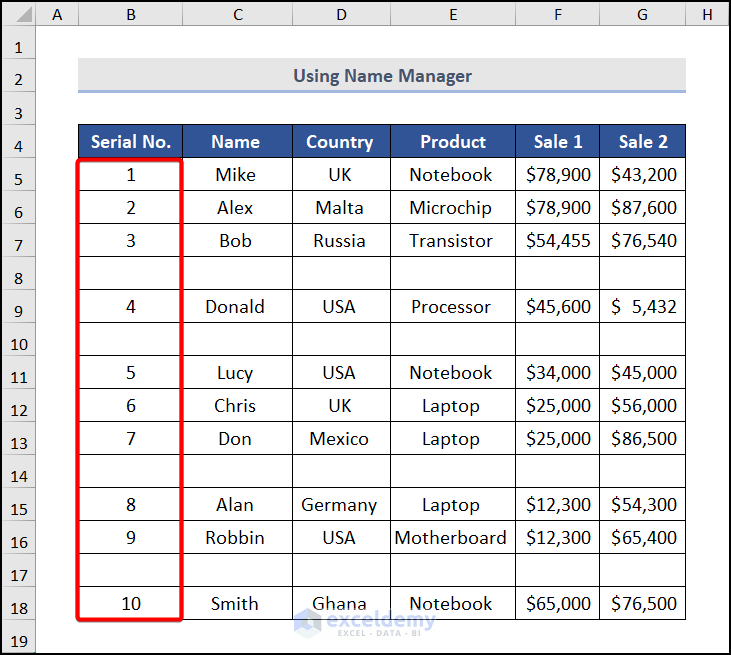
Method 4 – Using Name Manager for Automatic Numbering in Excel
- Set a Name for Your Worksheet:
- Go to the Formulas tab.
- Select Define Name from the Defined Names section.
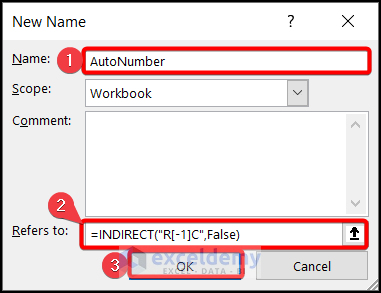
- Create a New Name:
- A New Name dialog wizard will appear.
- Enter a random name in the Name box (for example, AutoNumber).
- Define the Reference Cell:
- In the Refers to box, write the following code:
=INDIRECT("R[-1]C", FALSE)-
- The above function reference is for the active cell, and [-1] indicates one row above the reference cell.
- Press OK to save the defined name.
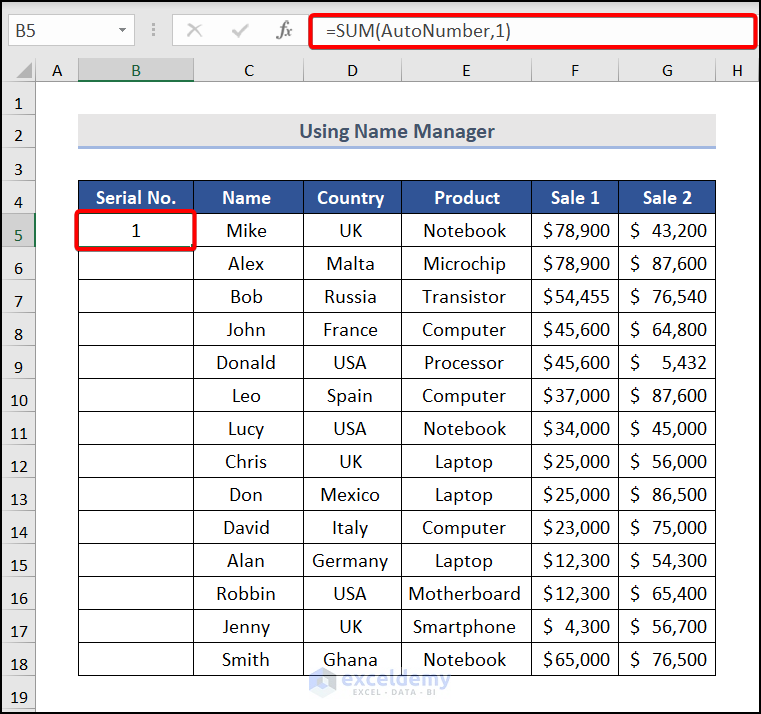
- Apply the Formula:
- Go to cell B5 (or any other cell where you want to start the automatic numbering).
- Insert the following formula:
=SUM(AutoNumber,1)This formula adds 1 to the previous number.
- Drag Down to Fill:
- Drag the formula down to fill the subsequent cells.
- As a result, each cell will automatically increment by 1 from the previous row.

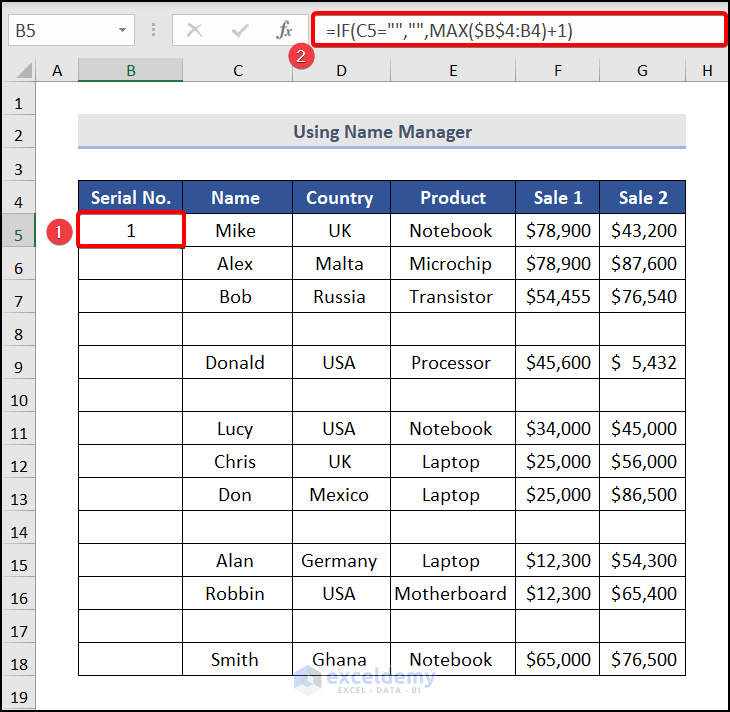
Method 5 – Combining IF and MAX Functions for Automatic Numbering
- Scenario: Sometimes, you may encounter blank cells in a column where you want to create automatic numbering. In such cases, you wouldn’t want to assign a number to those blank cells. This method combines the IF and MAX functions to handle this situation effectively.
- Steps:
- Start by going to cell B5 (or any other cell where you want to begin the automatic numbering).
- Insert the following formula:
=IF(C5="","",MAX($B$4:B4)+1)-
-
- Formula Breakdown:
- MAX($B$4:B4) + 1: This part of the formula returns the maximum value in the range from cell B4 to the cell above the current cell (B4 to the cell immediately above the active cell). If the cell above is blank (contains text), the function returns 0, and then we add 1 to it.
- IF(C5=“”, “”, …): The IF function checks whether cell C5 is blank. If it is, the result remains blank; otherwise, it calculates the next auto-number by adding 1 to the maximum value.
- Formula Breakdown:
-
- Press ENTER to apply the formula.
- Drag Down to Fill:
- Drag the formula down to fill the subsequent cells in the column.
- As a result, each cell will automatically increment by 1 from the previous row, excluding blank cells.
You’ll achieve the desired automatic numbering sequence, as shown in the image below:
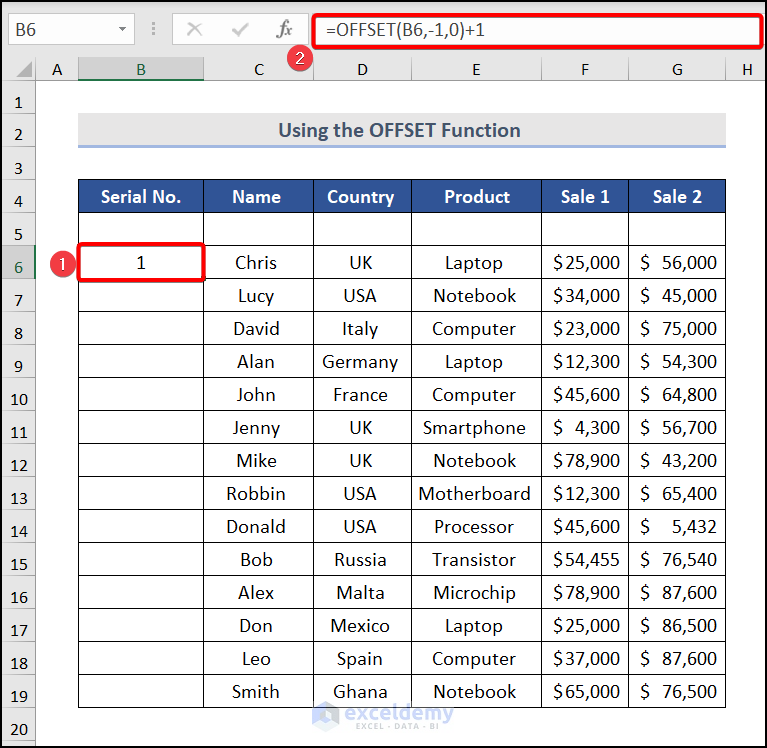
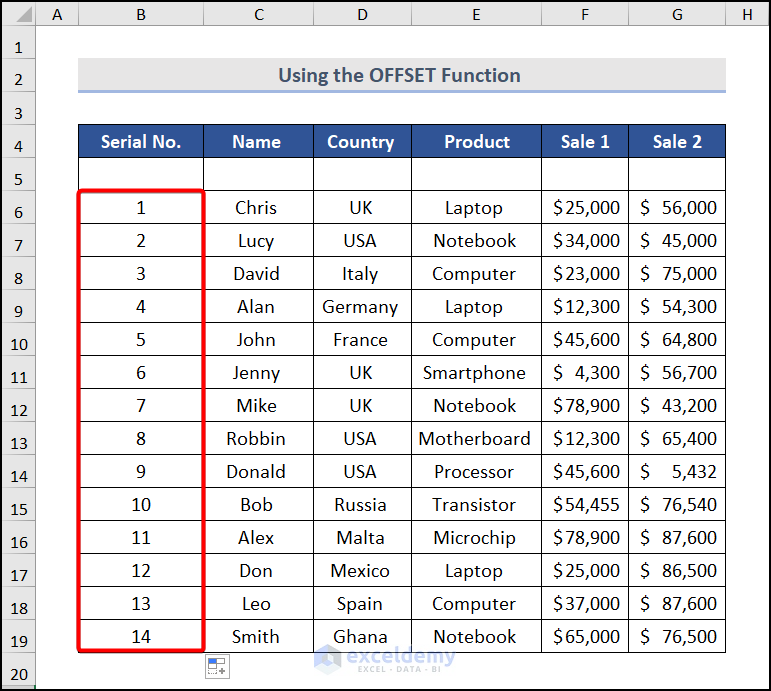
Method 6 – Using the OFFSET Function for Automatic Numbering in Excel
- Start by selecting cell B6.
- Enter the following formula:
=OFFSET(B6,-1,0)+1
-
- The B6 reference indicates the starting cell.
- The -1row offset means moving one row up from the starting cell (to cell B5).
- The 0 column offset keeps the same column (no horizontal movement).
The result will be a sequential numbering pattern, as shown in the image below:
Method 7 – Using the ROW Function for Automatic Numbering in Excel
- Begin by selecting cell B5.
- Enter the following formula:
=ROW()-4-
- The ROW( ) function returns the row number of the specified reference cell (in this case, B5).
- By subtracting 4 from the result, we obtain the desired numbering.
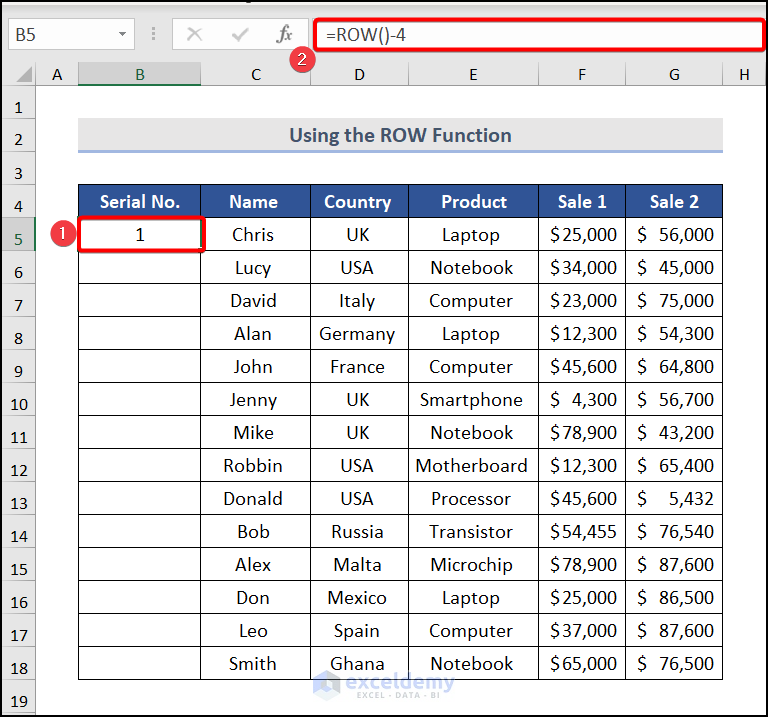
- The numbers will be automatically added to your dataset.

Read More: How to Add Automatic Serial Number with Formula in Excel
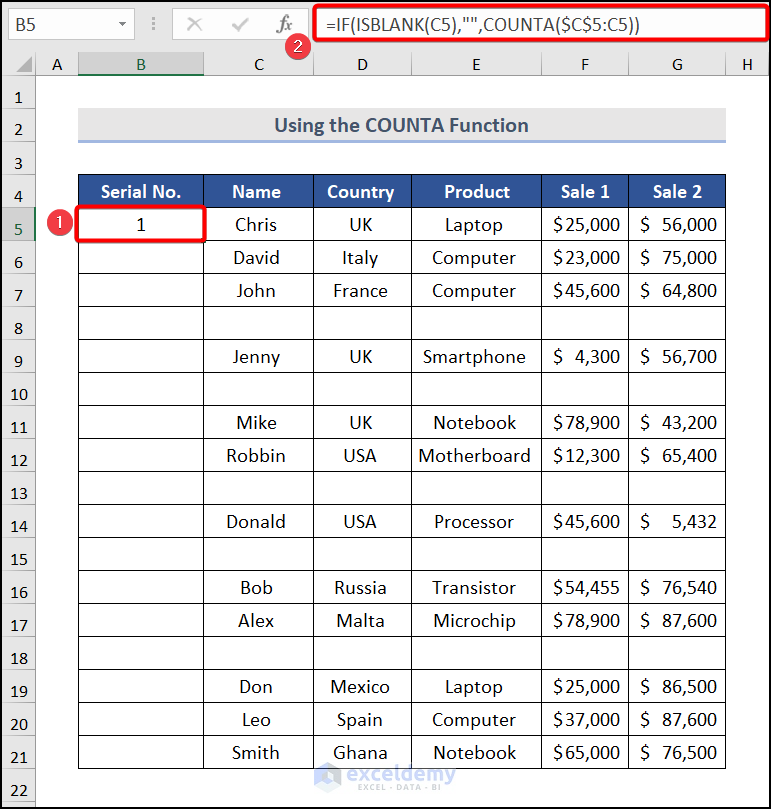
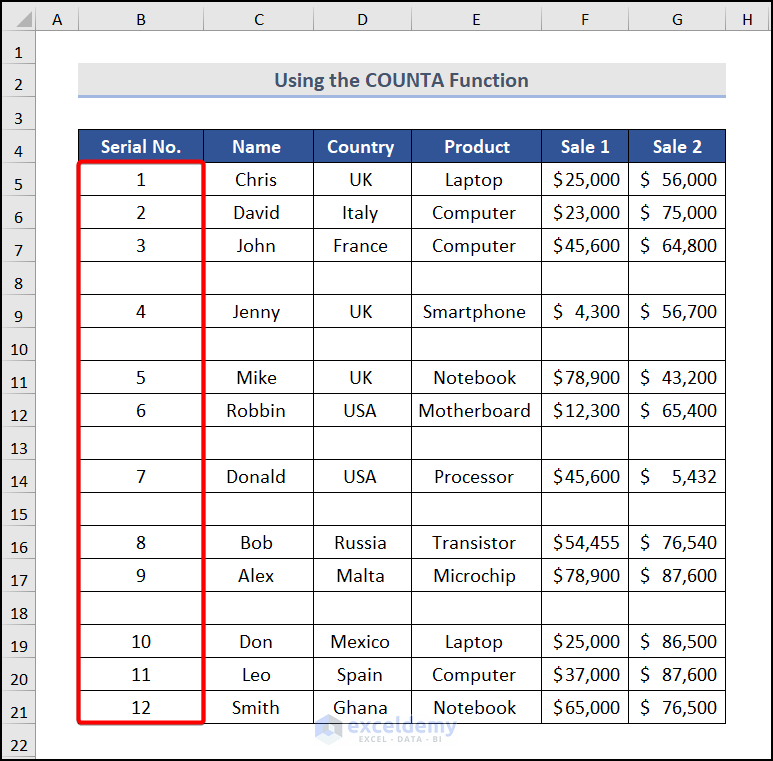
Method 8 – Using the COUNTA Function for Automatic Numbering in Excel
The COUNTA function allows you to automatically number only the filled cells while ignoring the blank ones. Here’s how to do it:
- Start by selecting cell B5.
- Enter the following formula:
=IF(ISBLANK(C5),"",COUNTA($C$5:C5))-
- The ISBLANK(C5) logical test checks whether the adjacent cell in column Serial No. (C5) is empty.
- If the cell is empty, the formula returns a blank space.
- If the cell is not empty, it returns the count of all filled cells in the range from C5 to the current row (C5 to C5).
- The result will provide automatic numbering based on the filled cells.
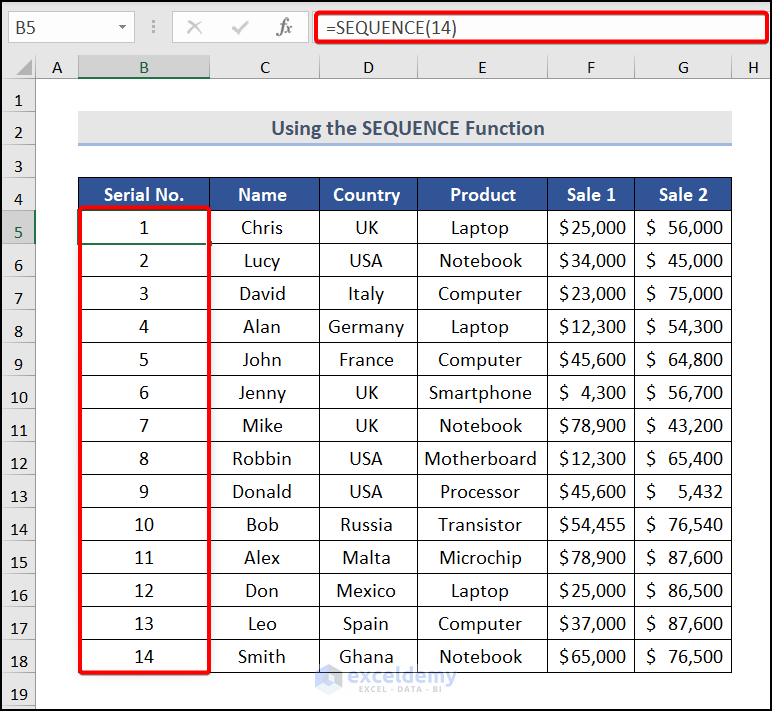
Method 9 – Using the SEQUENCE Function for Automatic Numbering in Excel
In this method, we’ll utilize the SEQUENCE function to automatically generate sequential numbers in an Excel worksheet. Follow the steps below to achieve this:
- Applying SEQUENCE to Rows:
- Open your Excel workbook containing the dataset.
- Navigate to cell B5 (or any other cell where you want the numbering to start).
- Enter the following formula:
=SEQUENCE(14)- Replace “14” with the desired number of rows. Press ENTER to get the result.
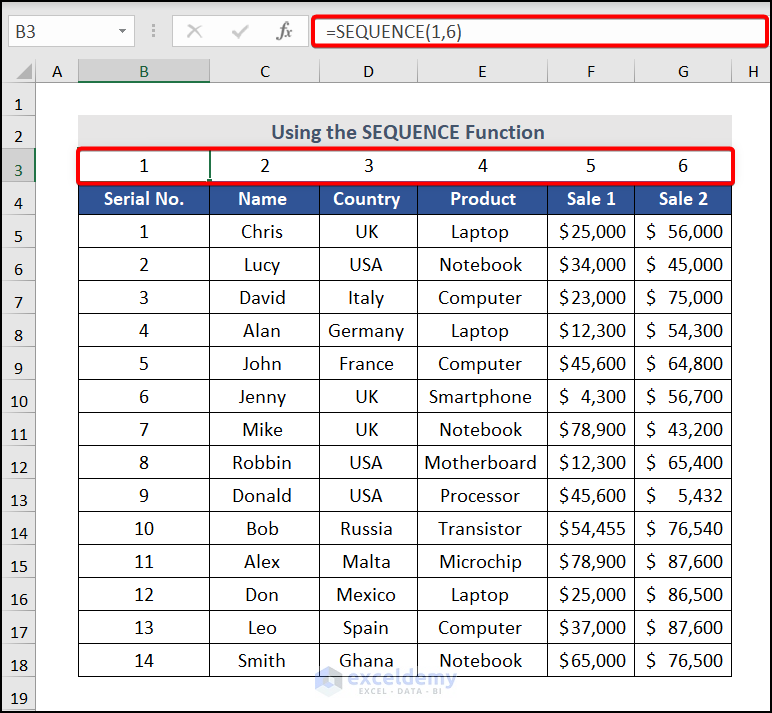
- Applying SEQUENCE to Columns:
- To generate a sequence of column numbers, go to cell B3 (or any other cell).
- Enter the formula:
=SEQUENCE(1,6)- Here, the syntax SEQUENCE(1, 6) produces a sequence of columns. The first argument (1) represents the row number (always 1 in this case), and the second argument (6) specifies the number of columns.
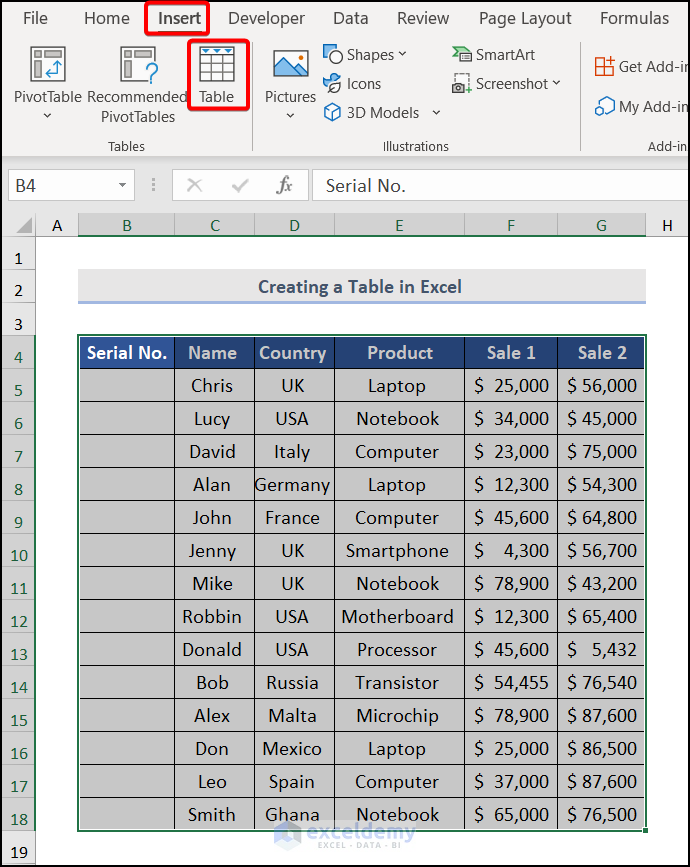
Method 10 – Creating an Excel Table for Automatic Numbering
Excel tables offer unique features, including automatic numbering. Let’s create a table:
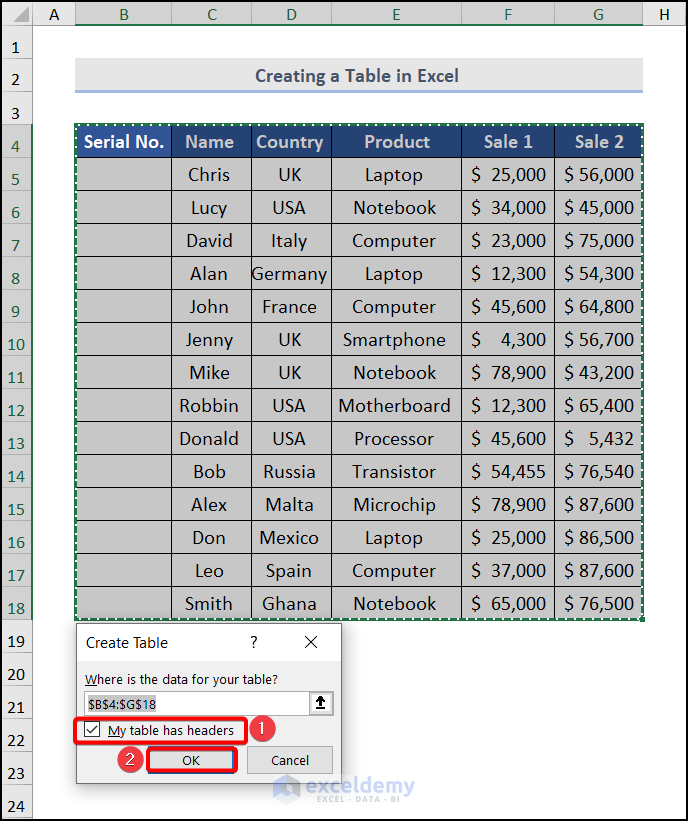
- Select the entire dataset.
- Go to the Insert tab and choose Table.
- In the Create Table dialog box, check the My table has headers option and click OK.
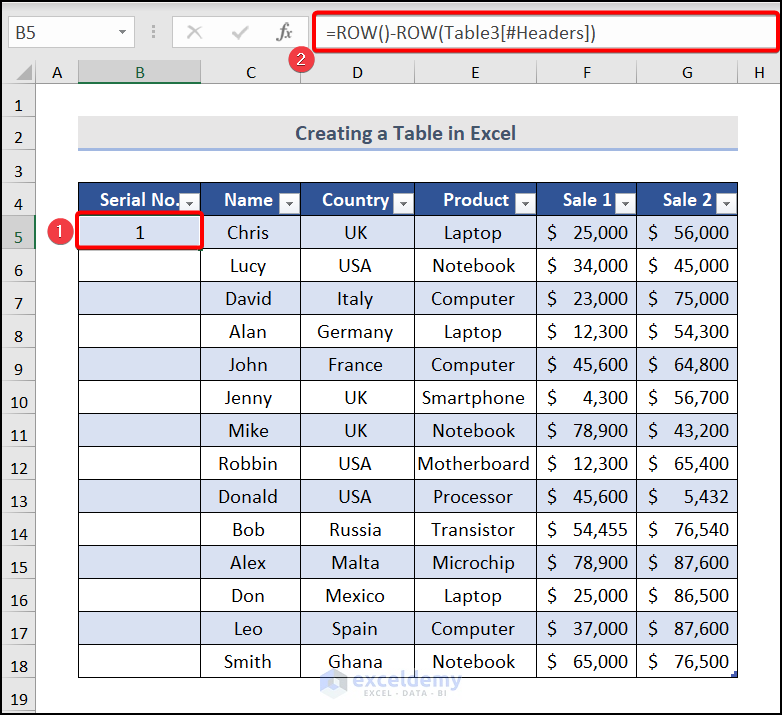
- Now, in cell B5 (or any other cell within the table), input the following formula:
=ROW()-ROW(Table3[#Headers])- This formula adds 1 to the Serial No. column.
- Drag the formula down to fill the entire column.
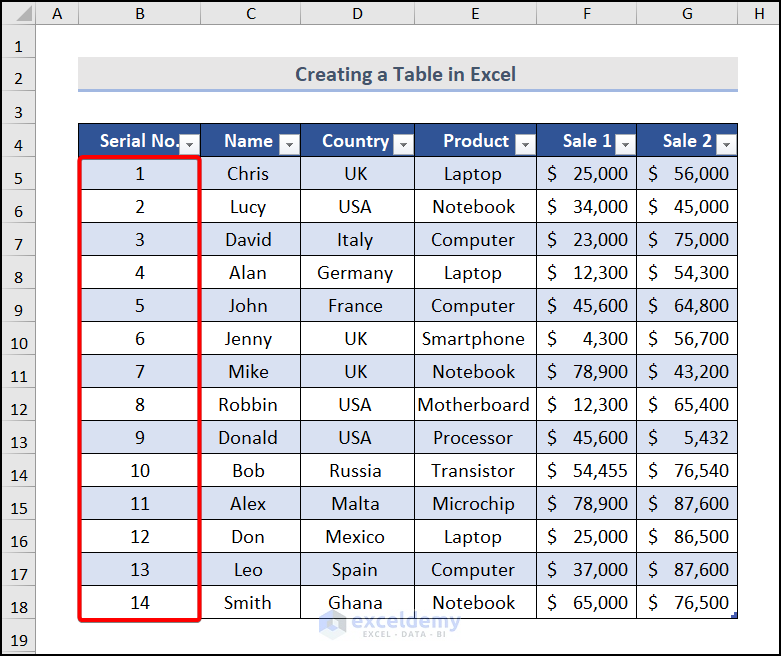
- The beauty of this method is that the table’s numbering will automatically update. Try deleting some rows from the table, and you’ll see the numbering adjust accordingly.
And there you have it! Your Excel table now handles automatic numbering seamlessly.

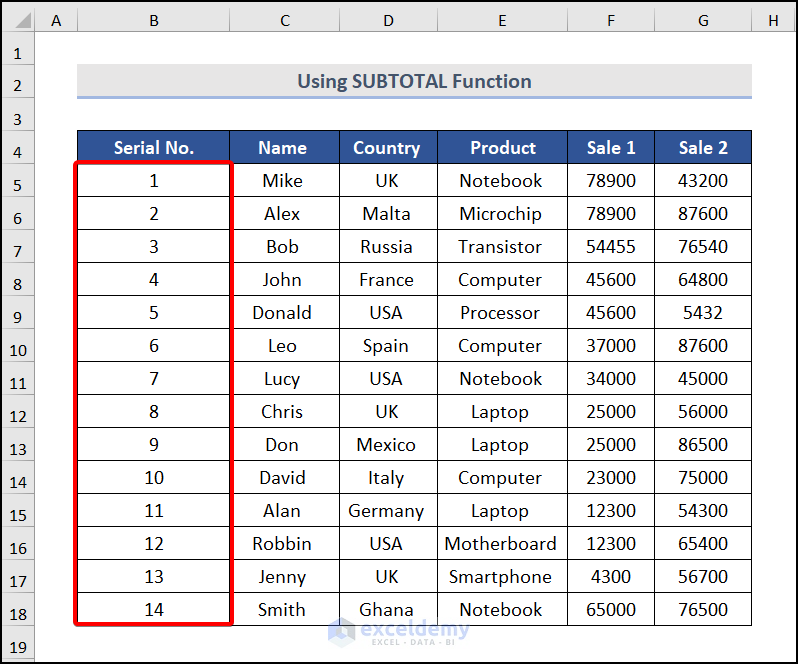
Method 11 – Using SUBTOTAL Function for Automatic Numbering in Excel
The SUBTOTAL function provides a way to count cells while allowing flexibility for different operations. Here’s how you can use it for automatic numbering:
- Setting Up the Formula:
- Open your Excel workbook containing the dataset.
- Go to cell B5 (or any other cell where you want the numbering to appear).
- Enter the following formula:
=SUBTOTAL(3,$C$5:C5)
In this formula:
-
-
- The 3 represents the func_num, which corresponds to the COUNTA function (i.e., counting non-empty cells).
- $C$5:C5 defines the reference range. The first part ($C$5:C5) is an absolute reference to the starting cell, and the second part (C5) is a relative reference that adjusts as you drag the formula down.
-
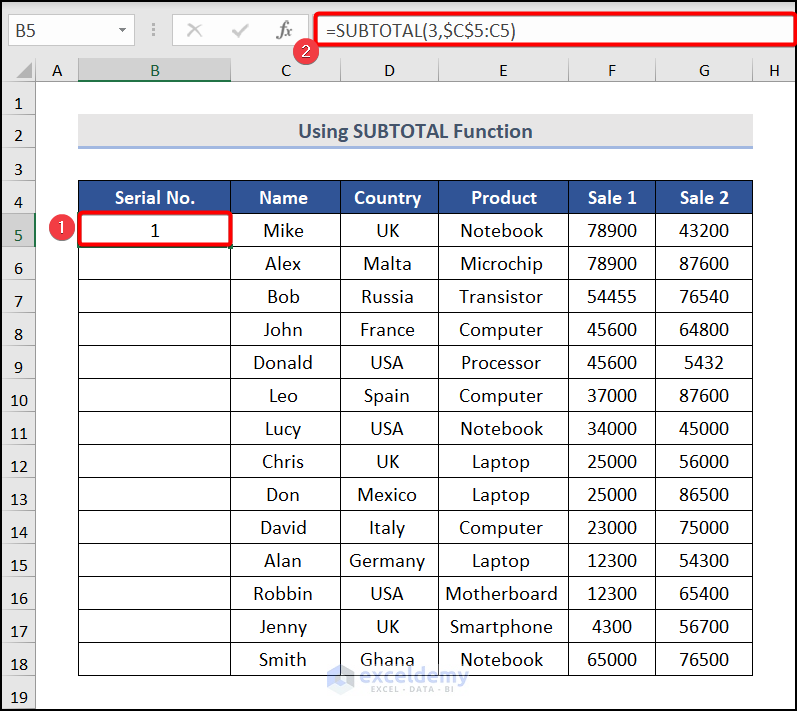
- Obtaining the Result:
- Press ENTER to calculate the result.
- The SUBTOTAL function will count the non-empty cells in the specified range, providing automatic numbering.
And there you have it! Your Excel sheet now handles automatic numbering using the SUBTOTAL function.
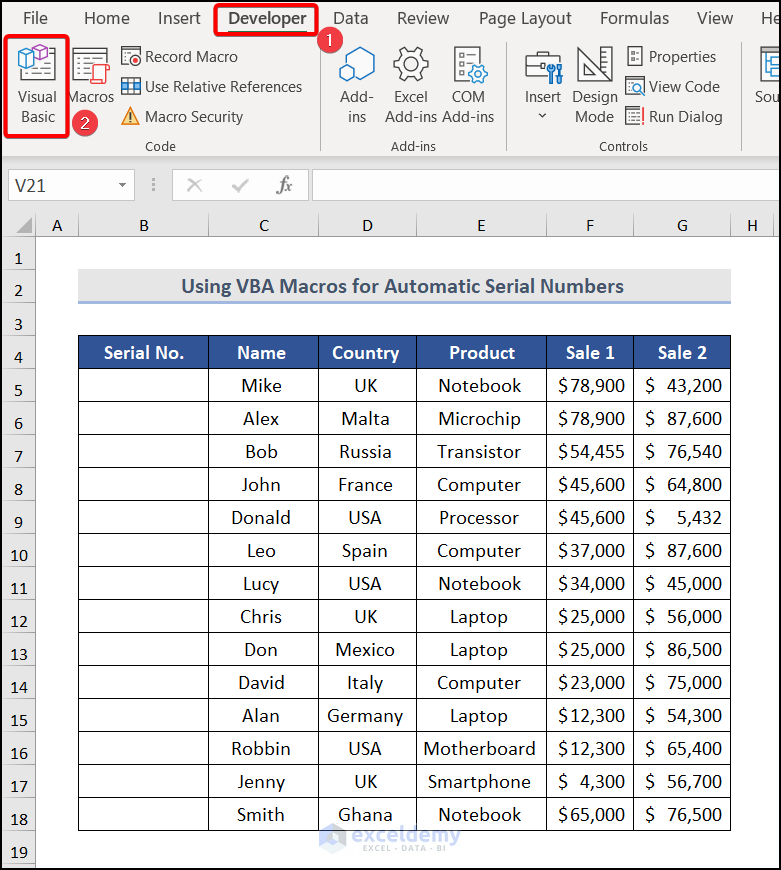
Method 12 – Using VBA Code for Automatic Numbering in Excel
A VBA macro simplifies the process of auto-numbering your dataset. By following these steps, you’ll be able to generate automatic serial numbers using Excel VBA:
- Accessing the Visual Basic Editor:
- Open your Excel workbook containing the dataset.
- Hover over to the Developer tab.
- Choose Visual Basic to open the Visual Basic for Applications (VBA) editor.
- Creating a New Module:
- In the VBA editor, select the Insert tab.
- Choose Module to create a new module (e.g., Module 1).
- Writing the VBA Code:
- Within the newly created module, write the following code in the General box:
Sub AutoNum()
Dim i As Integer
i = InputBox("Put Value", "Automatic Numbering")
For i = 1 To i
ActiveCell.Value = i
ActiveCell.Offset(1, 0).Activate
Next i
End Sub
- Running the Code:
- Press the F5 key to run the code.
- An Enter Serial Numbers dialog box will appear.
- Enter the last serial number (e.g., 14) in the box and click OK.
- Obtaining Auto-Numbers:
- The active cell will now display the auto-generated numbers.
- Drag the formula down to fill the desired range.
And there you have it! Your Excel sheet now handles automatic numbering using VBA.
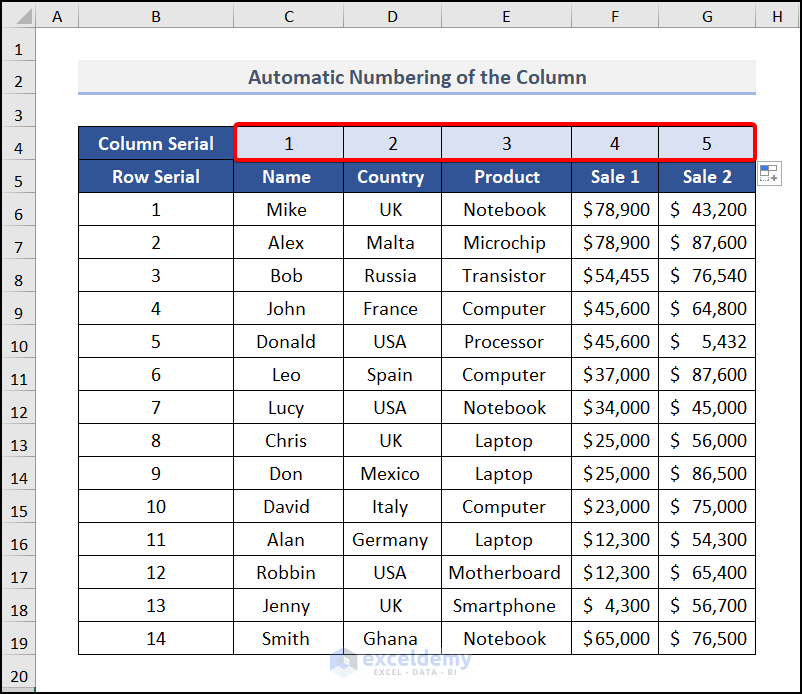
How to Automatically Number Columns in Excel
To automatically number columns in Excel, you can use the COLUMN function. Here’s how:
- Go to cell C4 (or any other cell where you want to start numbering).
- Insert the following formula:
=COLUMN(B4)-COLUMN($A$3)
This formula subtracts the column number of cell B4 from the column number of cell A3.
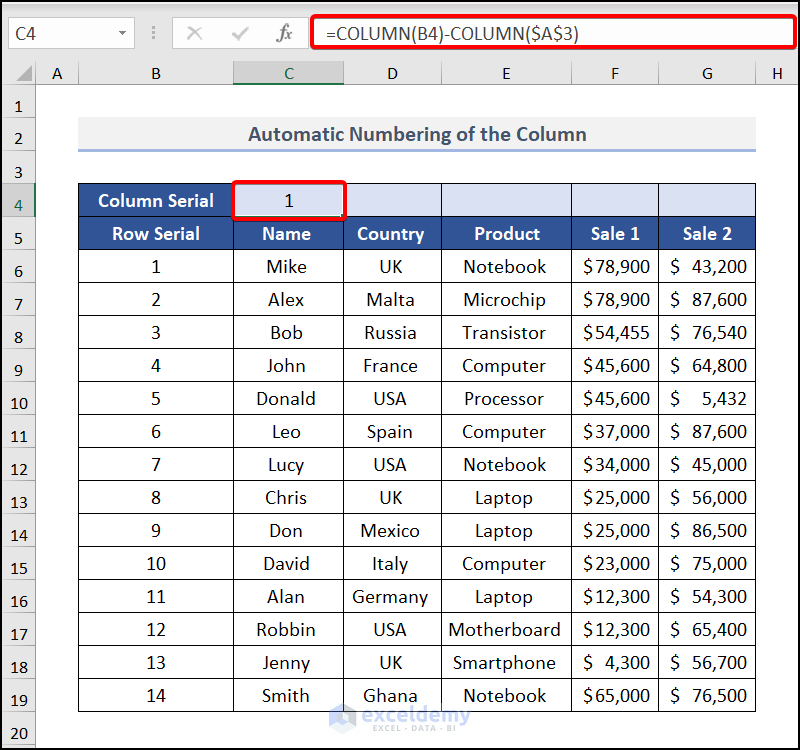
- Press ENTER.
- Drag the formula to the right across the columns where you want the numbering to continue.
That’s it! Your columns will now be automatically numbered.
Things to Remember
- Using the “OFFSET” Function:
- When using the “OFFSET” function, make sure to keep a blank cell above the starting cell. Otherwise, the function may not operate correctly.
- Using the “ROW” Function:
- To start automatic numbering at 1, subtract the number of rows from the starting row when using the “ROW” function.
- “SEQUENCE” Function Availability:
- The “SEQUENCE” function is available in Excel 365 and other updated versions.
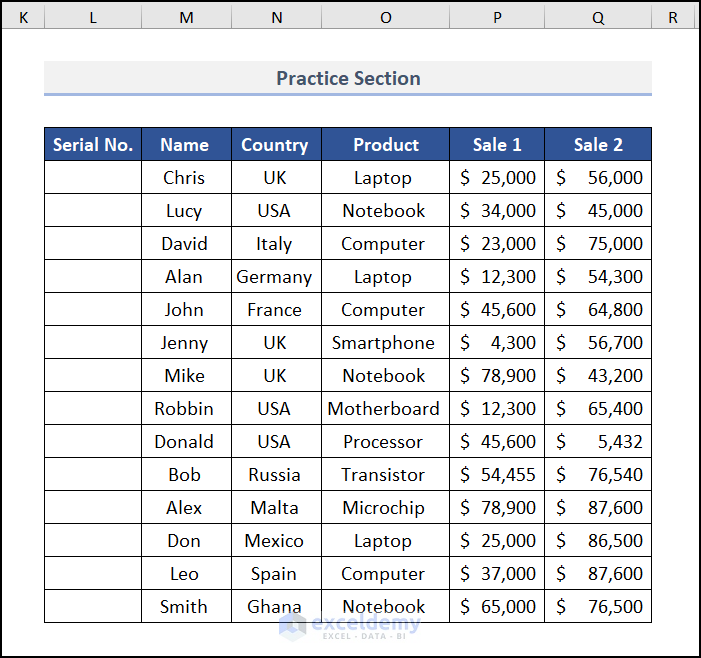
Practice Section
We have provided a practice section on each sheet on the right side for your practice. Please do it yourself.
Download Practice Workbook
You can download the practice workbook from here:
Related Articles
- How to Autofill in Excel with Repeated Sequential Numbers
- Auto Numbering in Excel After Row Insert
- How to Number Columns in Excel Automatically
- Auto Serial Number in Excel Based on Another Column
- Auto Generate Invoice Number in Excel
<< Go Back to Serial Number in Excel | Numbering in Excel | Learn Excel
Get FREE Advanced Excel Exercises with Solutions!
