Find and Install
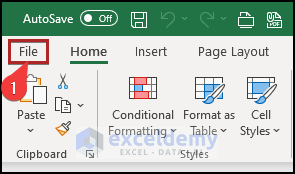
- Go to the File tab.
- Select Options.

- In Excel Options, select Add-Ins.
- Select Manage.
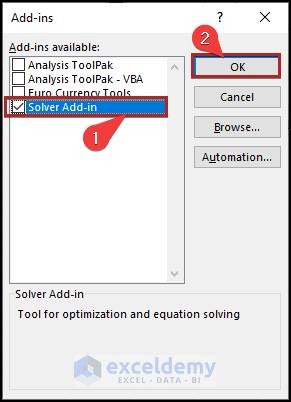
- Choose Excel Add-Ins and click Go.

Alternatively:
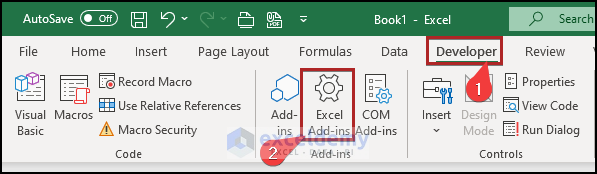
- Go to the Developer tab.
- Click Excel Add-ins in Add-ins.
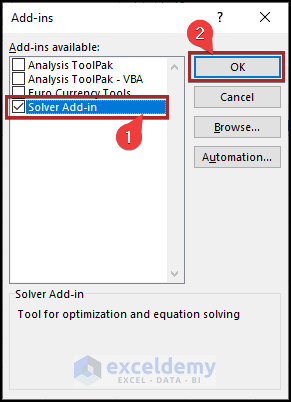
- Check Solver Add-In and click OK.
The add-ins will be visible on the ribbon.
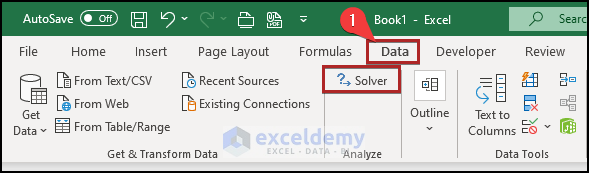
- Go to the Data tab.
You will find Solver in Analyze.
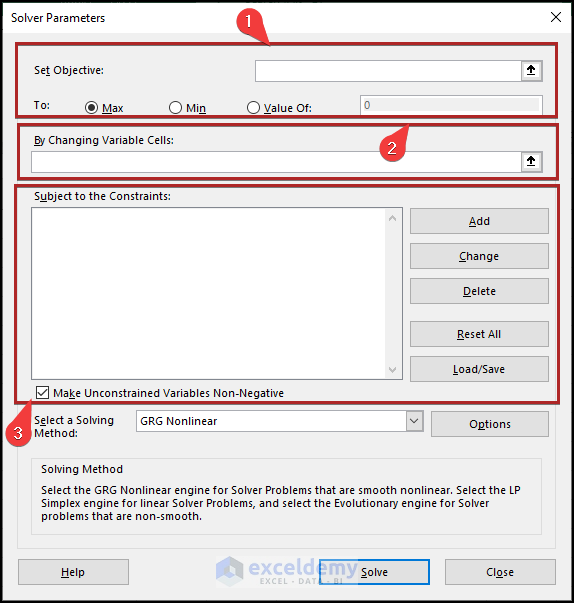
Solver Parameters
The Excel Solver determines the best solution to the formula in the target cell.
The Solver Parameters are:
- Objective Cell: The objective cell value can be decreased, increased, or fixed.
- Variable Cells: Contain variable data that the Solver modifies to accomplish the goal.
- Constraint Cells: The prerequisites that must be met.
How to Use Solver in Excel -2 Examples
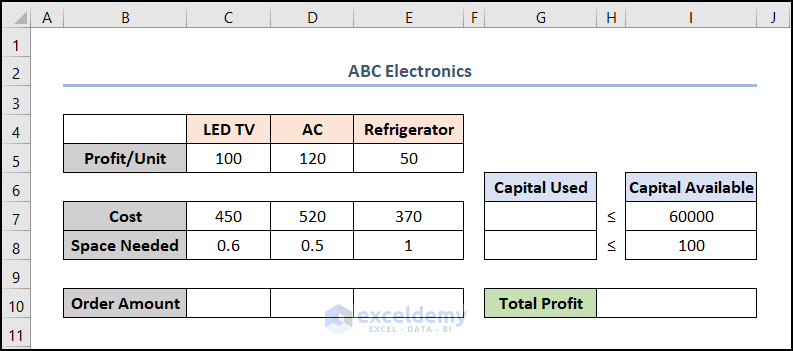
Example 1 – Using the Solver to Interpret Linear Programming in Excel
You have a decision model: each LED TV gives a Profit of $100, Costs $450, needs a Space of 0.6 units. The same parameters are defined for AC and Refrigerator. The company has a Capital of $60000 and 100 units of space available.
Steps:
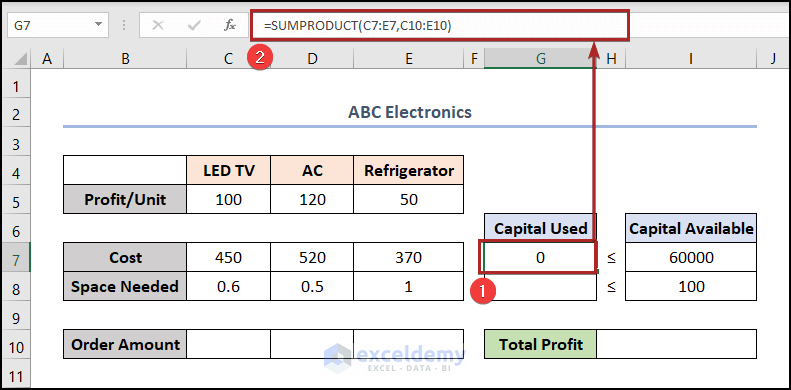
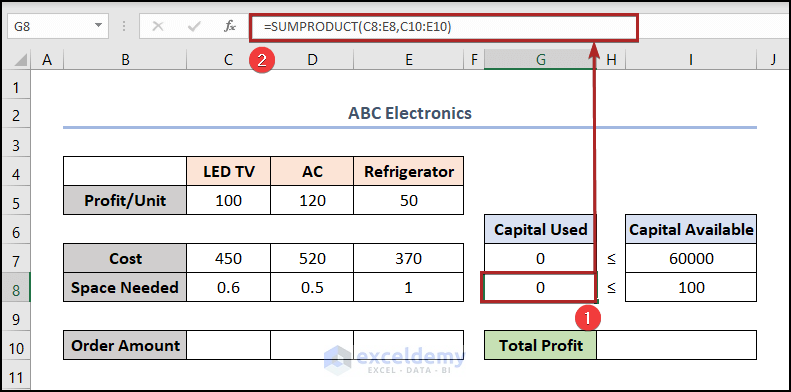
- Select G7 and enter the following formula.
=SUMPRODUCT(C7:E7,C10:E10)
C7:E7 represents the Cost of the three products and C10:E10 the Order Amount. The SUMPRODUCT function takes the two arrays as an argument, multiplies the values of the arrays, and returns the sum.
- Press ENTER.
- Select G8 and enter the following formula.
=SUMPRODUCT(C8:E8,C10:E10)
- Press ENTER.
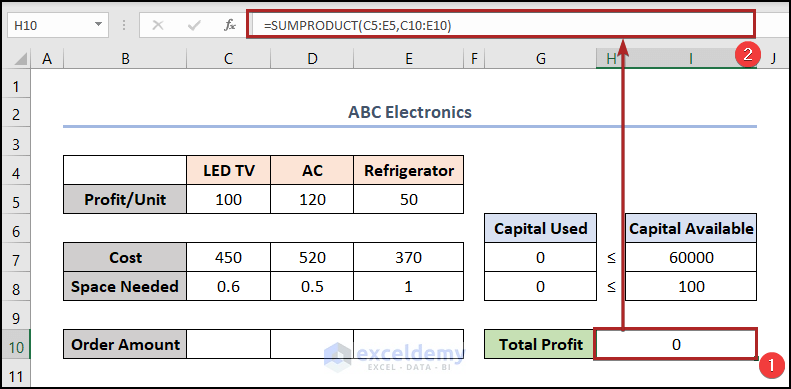
- Select H10 and enter the following formula.
=SUMPRODUCT(C5:E5,C10:E10)
It calculates the Total Profit by multiplying the Profit/Unit by the Order Amount.
- Press ENTER.
- To check the formulas, enter data in C10:E10:
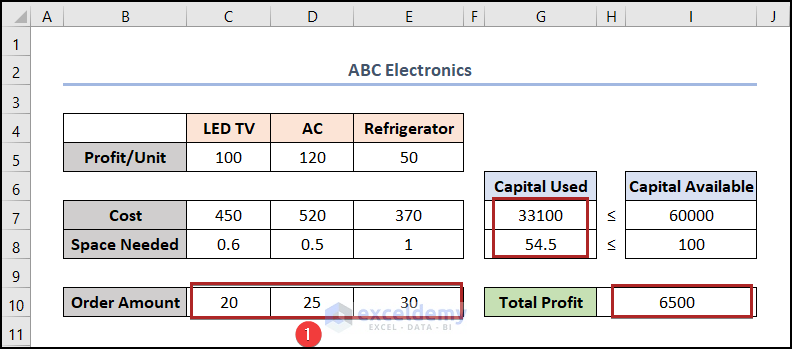
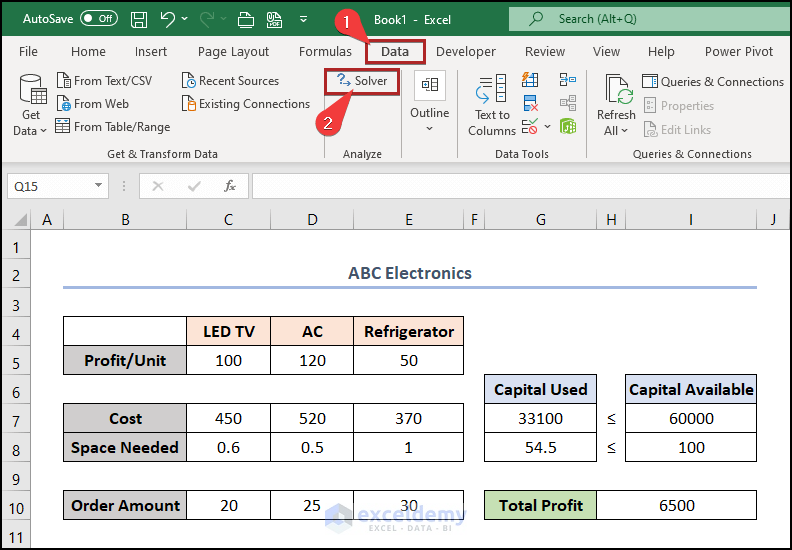
The Total Profit amount isn’t optimized. Use the Solver:
- Go to the Data tab.
- Select Solver in Analyze.
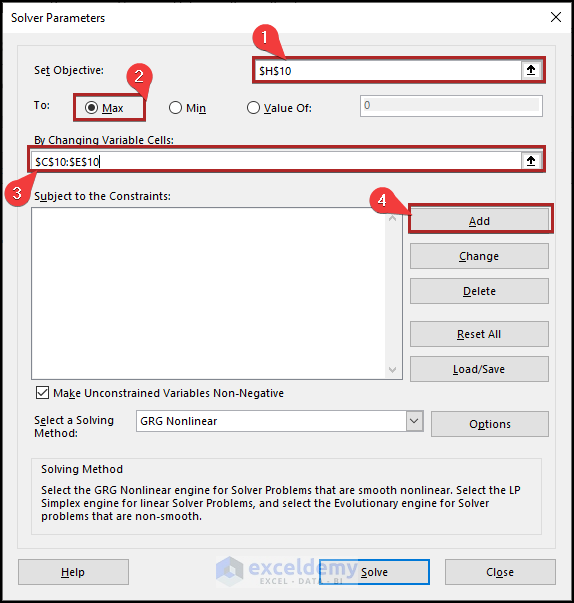
- In Solver Parameters, enter the cell reference H10 in Set Objective.
- Select Max in To.
- Enter the cell reference C10:E10 in By Changing Variable Cells.
- Click Add.
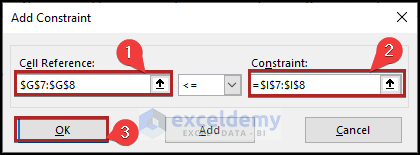
- In Add Constraint, enter G7:G8 in Cell Reference.
- In Constraint, enter I7:I8.
- Click OK.
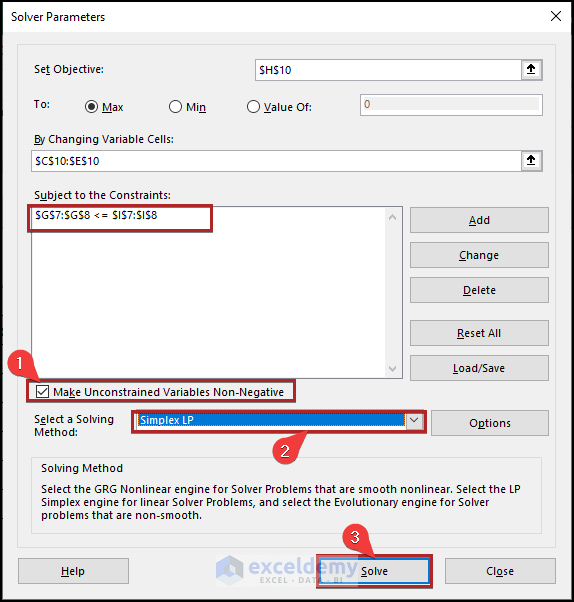
- In Solver Parameters, check Make Unconstrained Variables Non-Negative.
- Select Simplex LP in Select a Solving Method.
- Click Solve.
- In Solver Results, click OK.
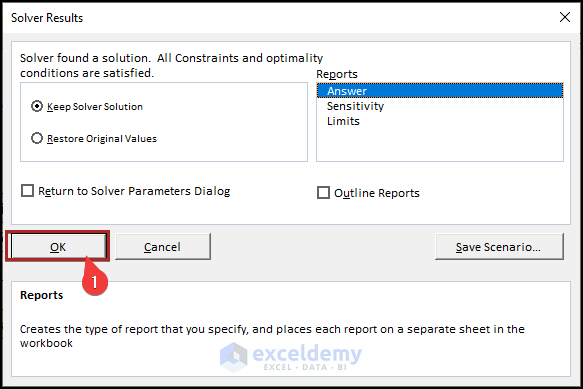
This is the output.
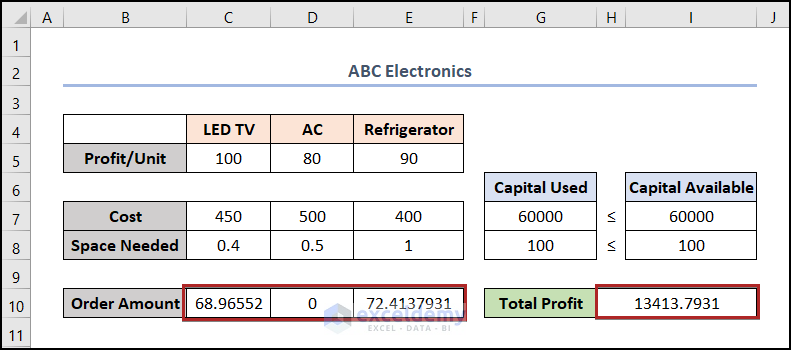
If 68 LED TVs and 72 Refrigerators are added to the inventory, the company will get the maximum profit.
Read More: How to Use Excel Evolutionary Solver
Example 2 – Utilizing the Solver to Solve Algebraic Equations with Multiple Variables in Excel
You have the following three equations:
2x + 5y + 2z = -38
3x – 2y + 4z = 17
-6x + y – 7z = -12
- Solve the equations using the Solver add-in.
Download Practice Workbook
Download the following Excel workbook.
<< Go Back to Solver in Excel | Learn Excel
Get FREE Advanced Excel Exercises with Solutions!
