The Solver Tool
The solver tool is used to find an optimum value for a formula in one cell, by changing decision variables. While solving linear programming problems the solver tool is essential.
To deliver a solution, the Solver needs a group of cells called the variable cells whose values are adjusted, to meet the target in the objective cell. These variable cells are subject to constraint criteria.
Adding the Solver Add-In
Solver is an Add-in of Excel. To add the Solver, follow these steps:
- Go to File and select Options.
- In the Excel Options window, choose Add-ins from the left side.
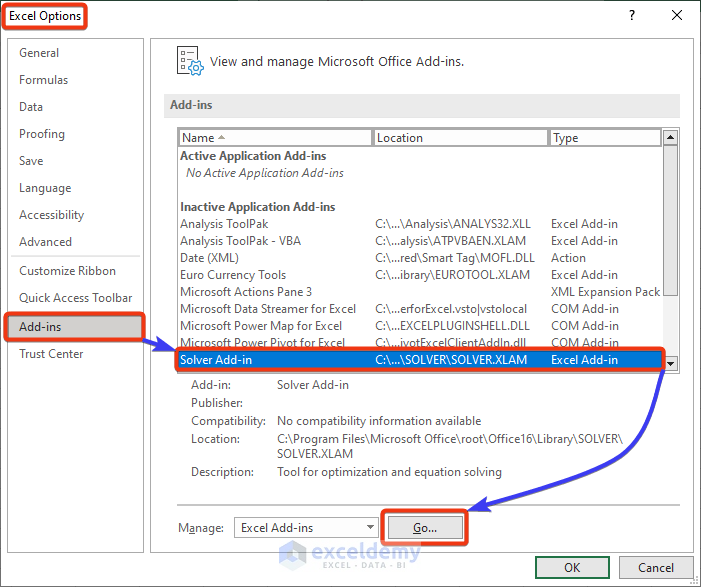
- On the right side, select Solver Add-in and click the Go button.
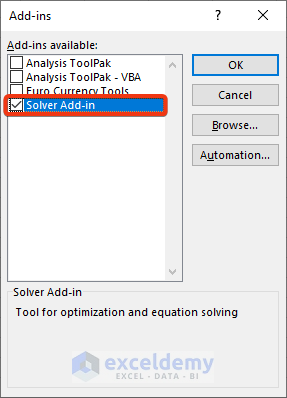
- Check the Solver Add-in from the available add-ins and press OK.
You’ll now have access to the Solver tool.
- Accessing the Solver
- Return to your worksheet.
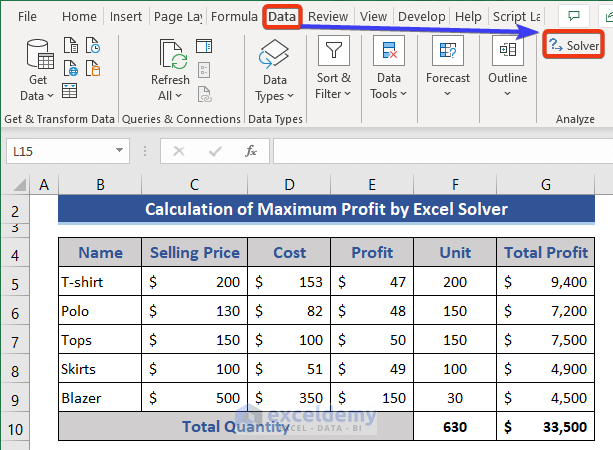
- Click on the Data tab.

You’ll find the Solver option on the right-most side.
Solver Algorithm
Excel Solver offers different algorithms for solving complex linear and non-linear problems:
- GRG Nonlinear: Used for smooth nonlinear problems with at least one smooth nonlinear constraint.
- LP Simplex: Ideal for linear programming problems characterized by linear relationships (e.g., minimizing loss or maximizing profit).
- Evolutionary: Tackles challenging optimization problems with functions that may be discontinuous or non-smooth.
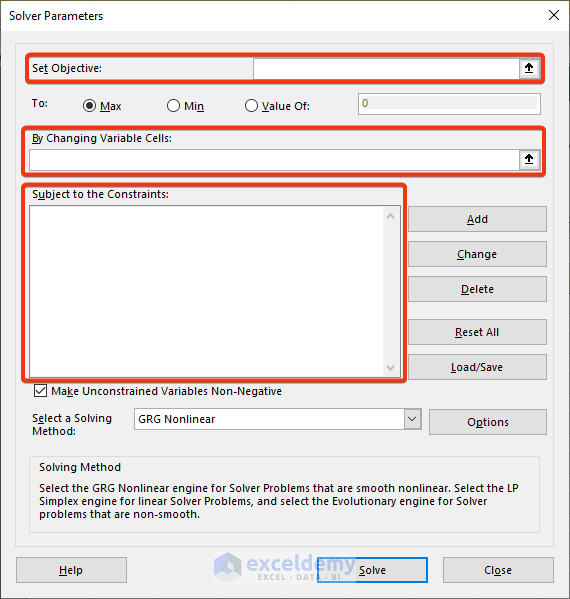
Components of a Solver Model
A solver model consists of three parts:
- Objective Cell: Contains the formula to optimize (e.g., minimum, maximum, or a specific value).
- Variable Cells: The range of cells serving as variables to solve the problem.
- Constraints: User-defined conditions that reflect real-world limitations.
Steps to Use the Solver Add-In
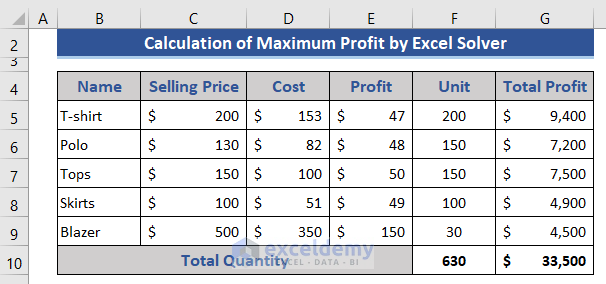
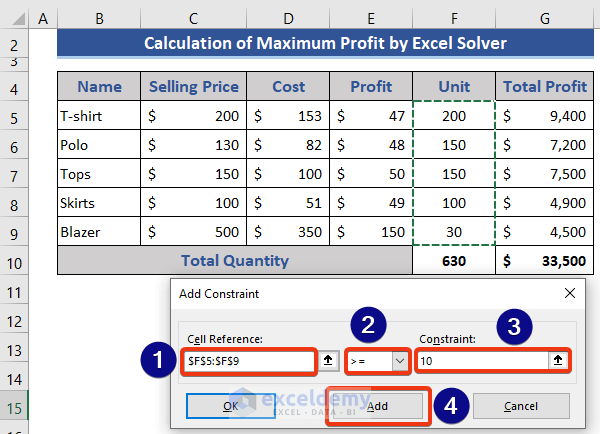
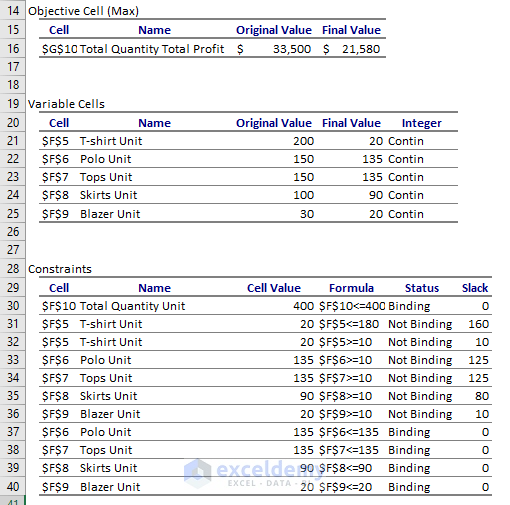
Example – Maximizing Profit for a Clothing Store
- Imagine a clothing store selling five specific products.
- Given data (cost, selling price, profit, available units), we want to maximize profit under certain constraints:
- Each item must have a minimum of 10 units and a maximum of 90% of total units.
- Blazer sales are capped at 20 units.
- Total units sold cannot exceed 400.
- Using Solver, we’ll calculate the optimal selling units for each item to achieve maximum profit.
Step 1 – Accessing the Solver Parameters Window
- Navigate to the Data tab.
- From the Analyze group, select Solver.
- The Solver Parameters window will appear.
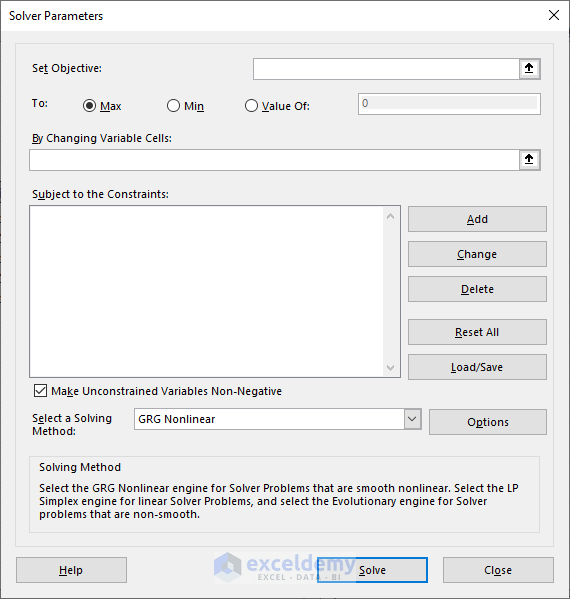
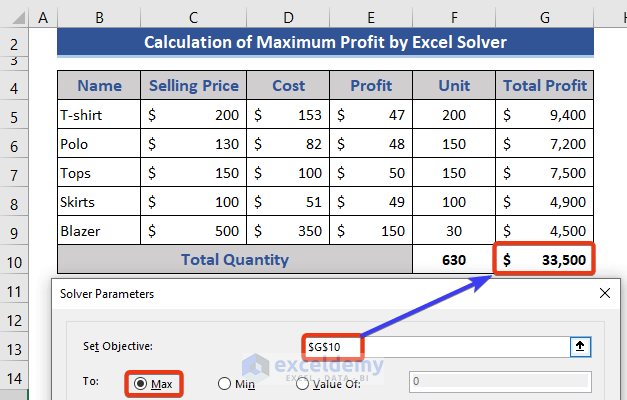
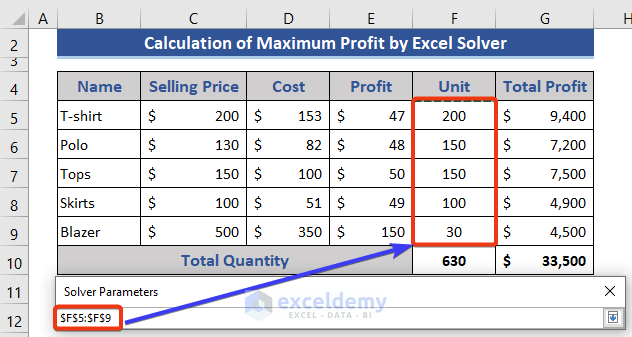
Step 2 – Setting the Objective and Choosing Variable Cells
- Choose the cell where you want to display the calculated value.
- Select the Max option.
- Click the arrow next to By Changing Variable Cells.
- Specify the range of cells (usually the Unit column) that represent the variables in your problem.
- To add constraints:
- Click Add in the Solver Parameters window.
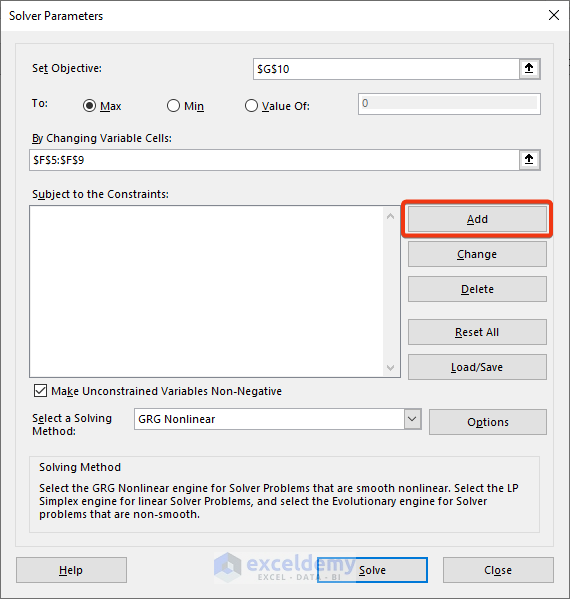
The Add Constraint window appears.
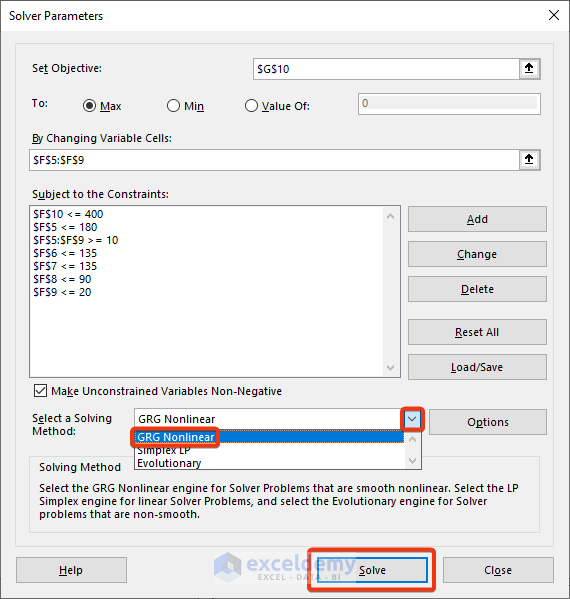
Step 3 – Adding Constraints and Selecting the Solving Method
- Define the Cell Reference, comparison operator, and Constraint.
- Repeat for additional constraints or click OK if you’re done.
- Choose the solving method (e.g., GRG Nonlinear for smooth nonlinear problems).
Step 4 – Solving and Viewing Results
-
- Press the Solve button.
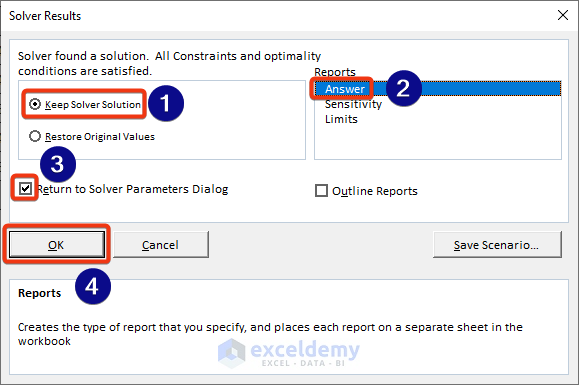
The Solver Results window appears.
- Choose appropriate options:
- Keep Solver Solution: Apply changes to the current worksheet.
- Answer: Generates a report with the solution.
- Return to Solver Parameters Dialog: Allows further adjustments if needed.
- Press OK.
Observing Changes and Answer Report
- Return to your worksheet.

- You’ll notice changes in the unit and total profit cells.
- An Answer Report tab will be added to your Excel file.
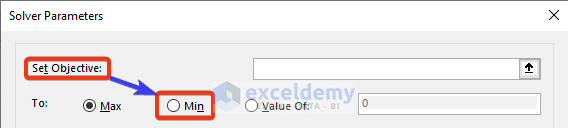
Remember, you can also use a similar process to minimize costs by selecting Min in the Set Objective section.
Download Practice Workbook
You can download the practice workbook from here:
Related Articles
<< Go Back to Solver in Excel | Learn Excel
Get FREE Advanced Excel Exercises with Solutions!

Fabulously SOLVED!
Glad to know, Sandeep!
-Mahdy
ExcelDemy team