By default, Excel cells store horizontally aligned text. But for our purposes, very often we need to change the orientation of the text in cells from its default horizontal alignment. Fortunately, Microsoft Excel has embedded some outstanding functionalities that you can use to rotate your text easily in Excel. Bearing that in mind, we have come up with 3 super easy techniques in this tutorial that you can use to rotate text in Excel with each.
Download the Practice Workbook
You are recommended to download the Excel file and practice along with it.
3 Techniques to Rotate Text in Excel
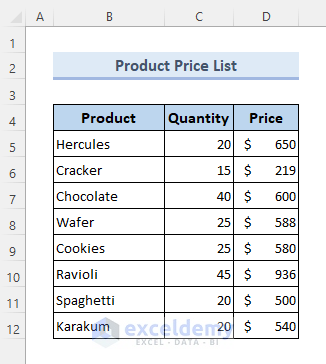
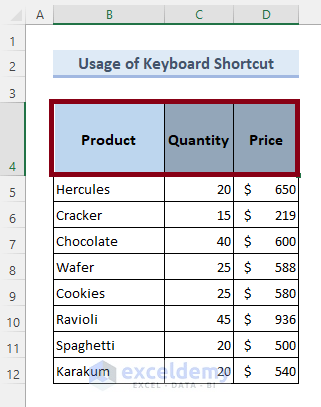
In this article, we will be using a sample product price list as a dataset to demonstrate all the methods. So, let’s have a sneak peek of the dataset:
So, without having any further discussion let’s dive straight into all the methods one by one.
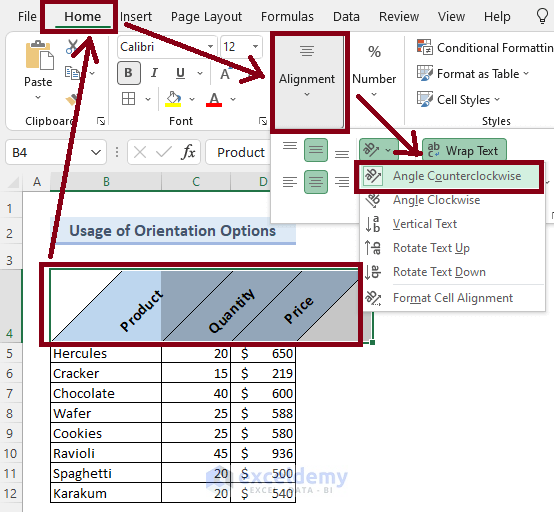
1. Rotate Text in Excel Using Orientation Options
We can easily rotate our text in Excel using the Orientation options under the Home ribbon. In this section, we will rotate the table headers of our dataset counterclockwise. You are recommended to follow the steps below to have a gesture of the general procedure about doing so.
🔗 Steps:
❶ First of all, select the range of cells to rotate the texts in them.
❷ Then go to the Home ribbon.
❸ After that, click on Orientation.
At this point, we will see a drop-down menu with multiple options as to the orientation of the text.
❹ Finally, select anyone from the drop-down menu as per your requirement.
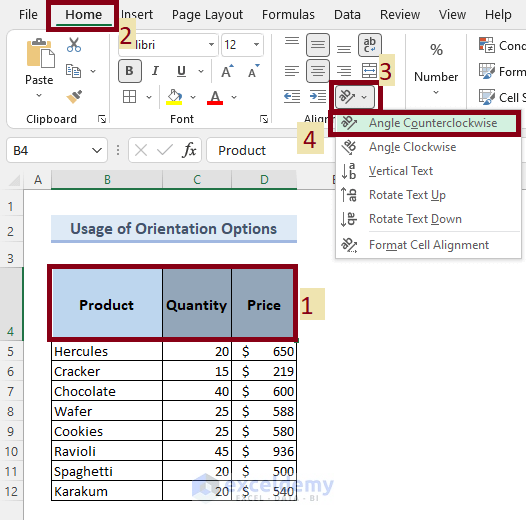
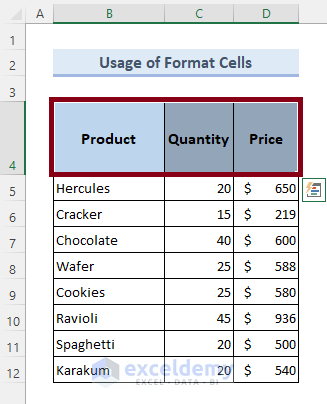
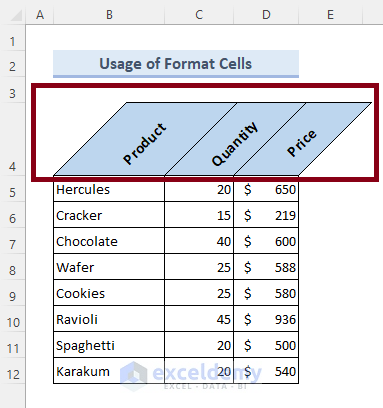
In this particular example, we have selected the Angle Counterclockwise option. If you follow so, you will see the result as follows:

Read More: Excel VBA to Rotate Text to 90 Degrees (4 Easy Examples)
2. Rotate Text Using Format Cells in Excel
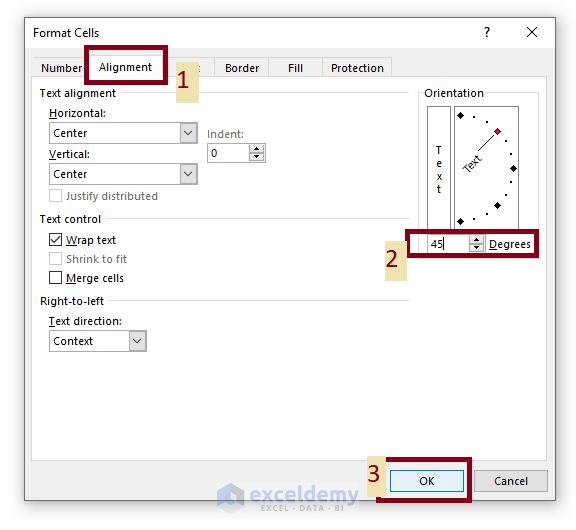
Format Cells is a super useful feature embedded in Excel that enables us to tweak the values in Excel cells with no boundaries. In this method, you will learn to rotate your text in Excel using the Format Cells feature with ease. Now here comes the steps to follows:
🔗 Steps:
❶ First of all, select the range of cells to rotate the texts in them.
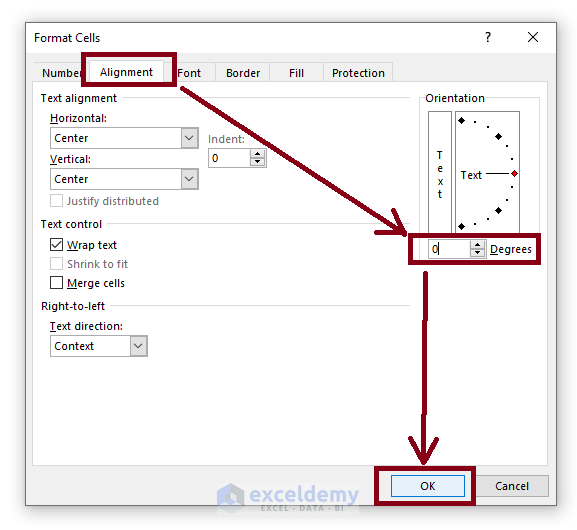
❷ After that, press CTRL +1 to open the Format Cells dialog box.
❸ Then go to the Alignment tab.
❹ Under this tab set any angles in the Degrees field.
We have inserted 45 degrees for instance.
❺ Finally hit the Ok option to finish this process.
As soon as you are done with all the steps above, you will find the result as follows:
Read More: How to Rotate Text by 180 Degrees in Excel
3. Rotate Text Using Keyboard Shortcut
This method can be a lifesaver for those who need to rotate text quite frequently in Excel. By using this keyboard shortcut, you can save a lot of time and effort while rotating text in Excel. So without any further delay, let’s get the keyboard shortcuts all at once.
🔗 Steps:
❶ First of all, select the range of cells to rotate the texts in them.
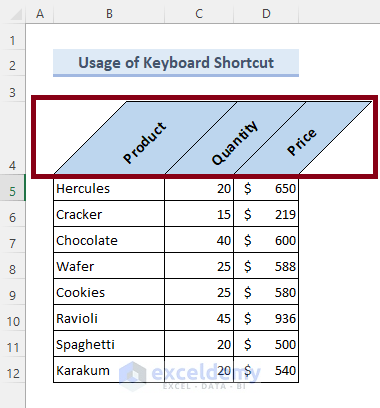
❷ Now press the ALT + H + F + Q keys all one after another.
At this point, you will see a drop-down menu featuring some orientation options with shortcuts to select each of them.

After that, you can press any of the keys instructed at the drop-down orientation list as per your requirement. For instance, we pressed the “O” key to rotate our selected texts counterclockwise.
If you follow the whole procedure with no errors occurring, then you will find the result as follows:
Read More: How to Rotate Text in an Excel Chart (2 Methods)
Rotate Text Back to the Default State
If you want to rotate back your text to the default states, then you can do any of the following:
1. CTRL + Z
You can undo the whole procedure by selecting the cells and then pressing the CTRL + Z keys.
2. Format Cells
All you need to do is
❶ Select the cells that you want to rotate back to the default state.
❷ Press the CTRL +1 keys together.
❸ Go to the Alignment tab.
❹ See the value 0 at the Degrees field.
❺ And hit the Ok option.
That’s it.
3. Orientation Option
You can use the Orientation option as a toggle switch option to rotate back your texts in their original state as before. Now follow the steps to see how to do so,
❶ Select the range of cells once again.
❸ Go to Home ▶ Alignment ▶ Angle Counterclockwise.
That’s simply it.
Things to Remember
📌 Press ALT + H + F + Q + O to rotate counterclockwise.
📌 Press ALT + H + F + Q + L to rotate clockwise.
📌 Press ALT + H + F + Q + V to rotate text vertically.
📌 Press ALT + H + F + Q + U to rotate text up.
📌 Press ALT + H + F + Q + D to rotate text down.
📌 You can press CTRL +1 keys to open the Format Cells dialog box.
Conclusion
To sum up, we have discussed 3 easy techniques to rotate text in Excel. You are recommended to download the practice workbook attached along with this article and practice all the methods with that. And don’t hesitate to ask any questions in the comment section below. We will try to respond to all the relevant queries asap.

