Method 1 – Remove the Password from an Excel File Using the Info Panel
Steps:
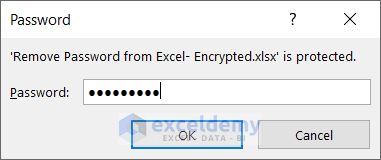
- Open the file.
- Insert the password (“exceldemy” for the file in the download section) and click on OK.
- Click on the File tab from your ribbon.

- Click on Info from the panel on the left-hand side.

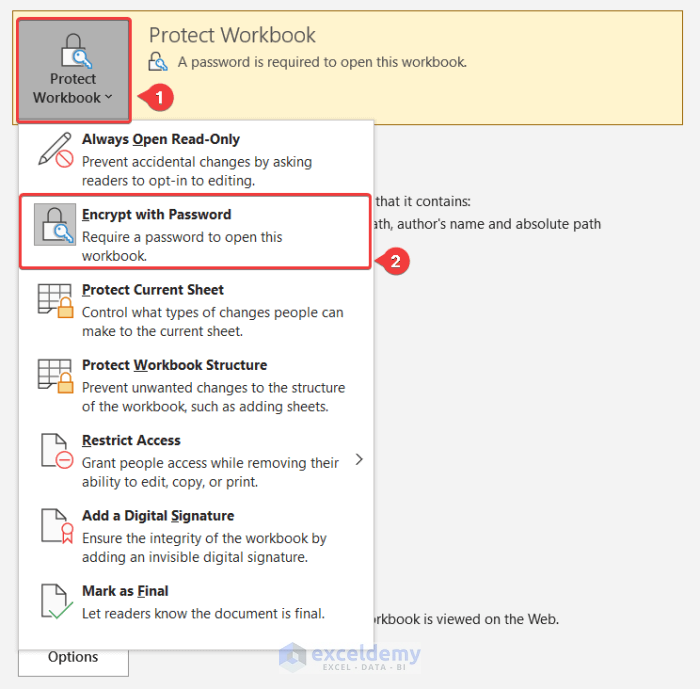
- Select Protect Workbook from the right.
- Click on Encrypt with Password from the drop-down menu.
- Remove the password from the Password field.
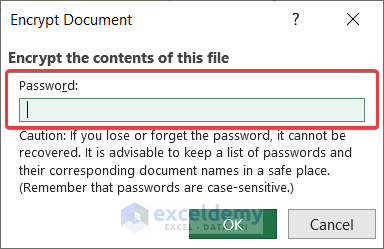
- Click on OK.
Method 2 – Using the Save As Option to Remove the Password from an Excel File
Steps:
- Open the file.
- Insert the password and click on OK. (The password is “exceldemy” for the file from the download section)

- Click on the File tab from the ribbon.

- Click on the Save As option from the panel on the left-hand side.

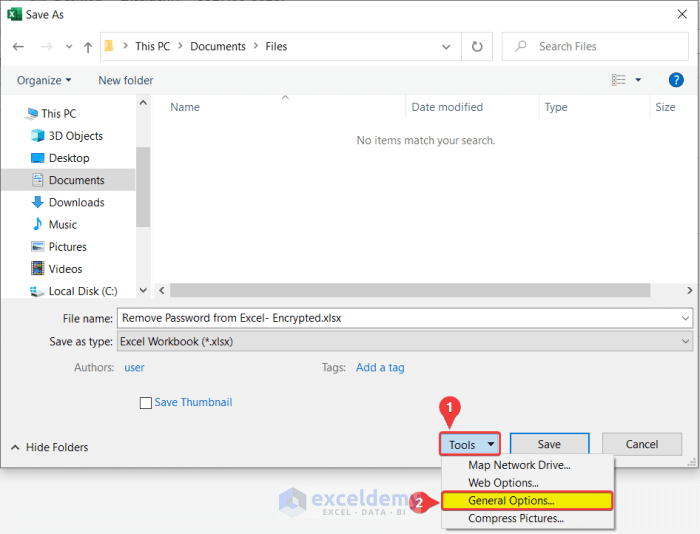
- In the Save As box, navigate to where you want to save the file.
- Click on Tools from the bottom as shown in the figure below.
- Click on General Options from the drop-down menu.
- The General Options box will appear. Remove texts (passwords) from Password to open and Password to modify fields.
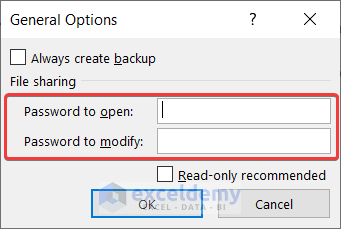
- Click on OK and then Save.
Method 3 – Zipping an Excel File to Remove the Password from a Protected Worksheet
If you have forgotten the password used to protect an Excel worksheet or workbook, you can unprotect it using this method. Here you only need to have software that can extract .zip files (eg: WinRAR).
Note: This method can only remove passwords from workbook level and worksheet level protection but not from File level protection. To know more about different types of Protection and security in Excel, read this.
Steps:
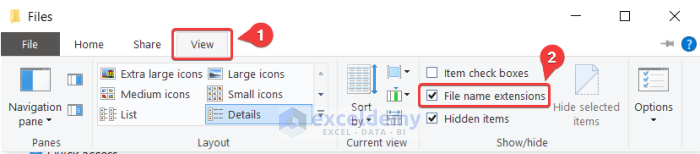
- Go to the View tab in your file explorer and make sure the File name extensions option is checked.
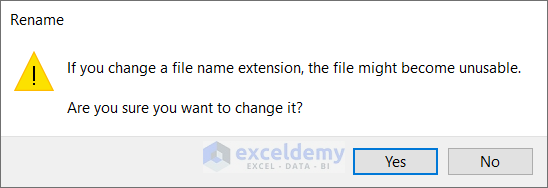
- Change the file extension of the file to .zip from .xlsx format.

- Windows will show you a warning box for changing the file extension. Click on Yes.
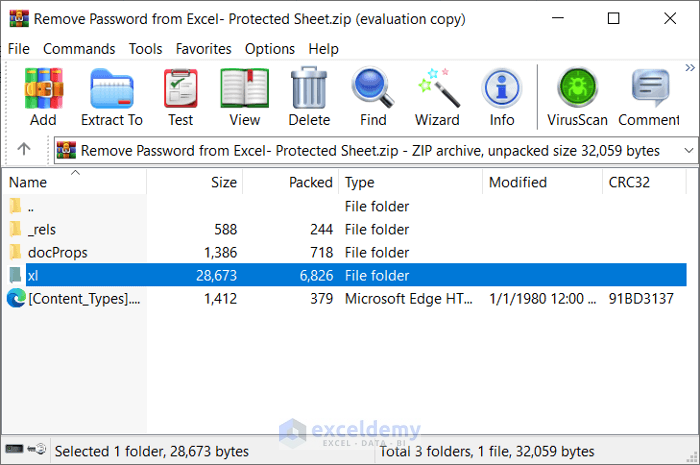
- Open the .zip file.
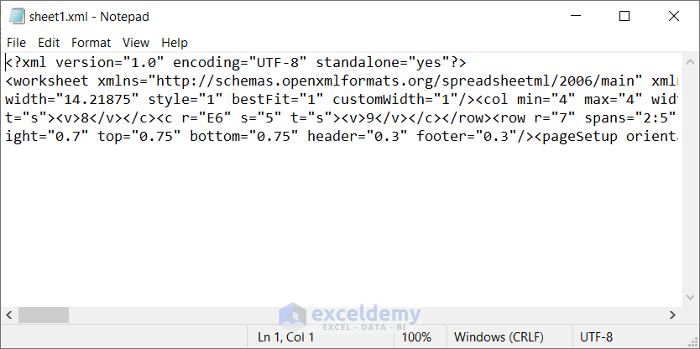
- Enter the file named xl.
- If the protection is on the workbook level, open the workbook.xml file in NotePad. Alternatively, if the protection is on the worksheet level, double-click on the worksheets file.

- Select the password-protected worksheet. Our workbook here has only one spreadsheet. so we are selecting the one as shown in the figure.

- Click and drag the file to copy it to the file explorer.
- Open the copied file in Notepad.
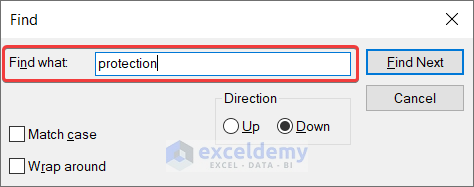
- Open the search tool in Notepad by pressing Ctrl + F on your keyboard.
- In the Find what field, type protection.
- Click on Find Next.
- Notepad will find the line where the word is written.
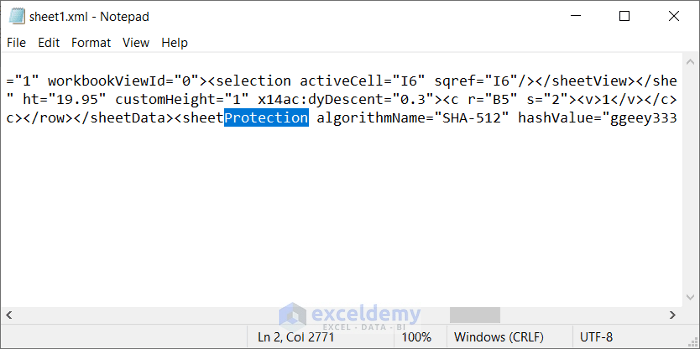
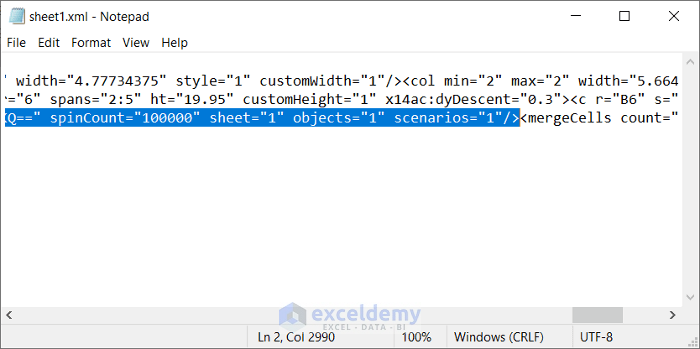
- Select the entire line starting with the less than sign (<) and ending with the greater than sign (>). Include the signs in the selection.
- It should start from here.
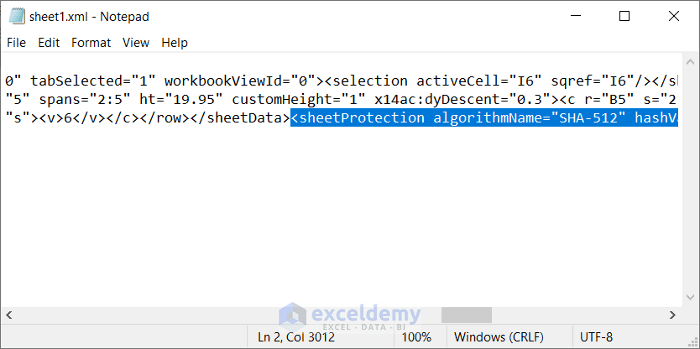
And end here.
- Press Backspace or Delete.
- Save and close the notepad.
- Copy the edited Notepad file into the .zip file where you took it from. (xl>worksheets>).
- Click on OK if an Archive name and parameter box appears.

- Close the .zip file.
- Change the file extension back to .xlsx.

- The warning box will appear again. Click Yes on it.

- You should be able to open the file in Excel and edit it without the password.
Remove a Password from a Protected Worksheet in Excel
Steps:
- Go to the Review tab in your ribbon.
- From the Protect group, select Unprotect Sheet.

- A box named Unprotect Sheet will appear. Put in the password of your spreadsheet (“exceldemy” if you are using the one from the download section).
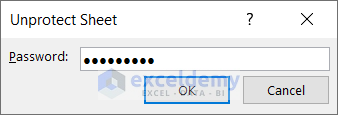
- Click on Ok.
Things to Remember
- Using the Save As feature method will save a different copy of the file without any password. The original file will stay password protected.
- For all the methods, except the last one, you need to know the password.
- The conversion method only works if spreadsheets are password-protected, not the files.
- Always back up your file before changing the extension of your files, in case the files get corrupted.
- Be careful while selecting the line and removing it from the text file in the last method. Selecting extra portions or leaving characters out may corrupt the file.
Download the Practice Workbook
Related Articles
<< Go Back to Unprotect Workbook in Excel | How to Unprotect in Excel | Learn Excel
Get FREE Advanced Excel Exercises with Solutions!

Sorry! for me not working …
I have follow you suggest using change extension to zip from xlsx but result file crashed and not open
Dear Amedeo,
Perhaps you are trying to break the file level protection. Unfortunately, the Zip method can only break the password on worksheet level or workbook level protection. Although this information may not have been highlighted earlier, is now included in a Note.
Regards
Aniruddah
Team Exceldemy