
Image by Editor
Microsoft Access is a powerful database management system that allows users to store, organize, and analyze data efficiently. Queries and filters allow you to extract specific information from your database, perform calculations, and analyze data in meaningful ways.
In this tutorial, we will show how to master queries in Access from basic filters to advanced joins.
Understanding Queries in Access
What is a Query?
In Microsoft Access, a query is a request for data results from your database. Queries allow you to ask specific questions from your Access database and retrieve precisely the data you need. Queries can also update, insert, or delete data.
Types of Queries in Access
- Select Queries: Retrieve data from one or more tables.
- Parameter Queries: Prompt for criteria when run.
- Action Queries: Make changes to data. You can create a table, append, update, and delete records.
- Cross-tab Queries: Display summarized values across rows and columns.
- SQL Queries: Use SQL (Structured Query Language) directly.
Create Your First Query
Use the Query Wizard
Let’s create a query to see all customers from the USA.
- Open your Access database.
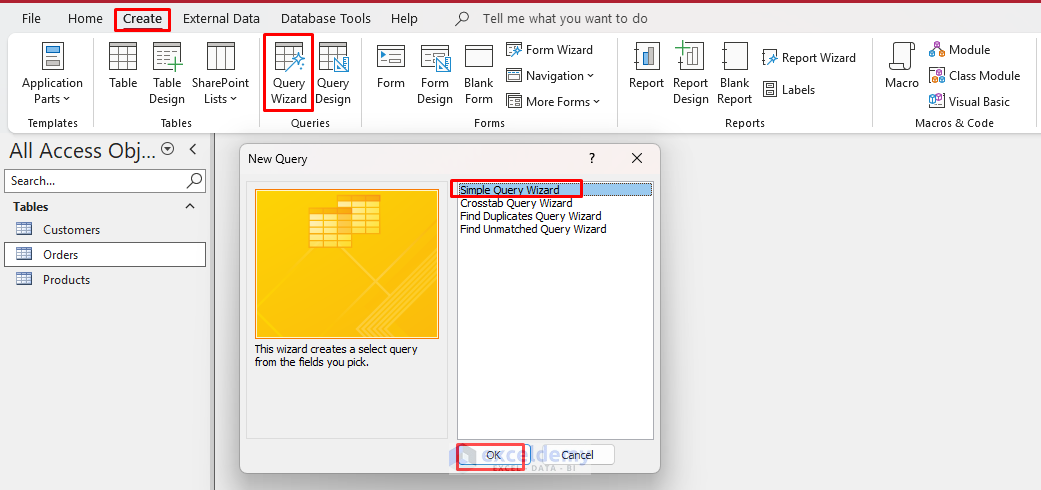
- Go to the Create tab >> click on Query Wizard.
- In the Query Wizard:
- Select the Simple Query Wizard >> click OK.
-
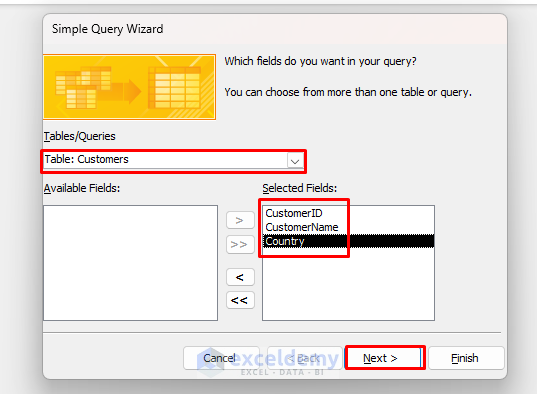
- From the Tables/Queries dropdown >> select Customers.
- Add fields: CustomerID, CustomerName, Country.
- Click Next.
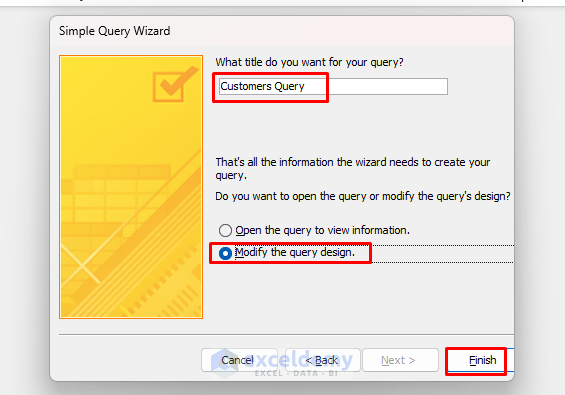
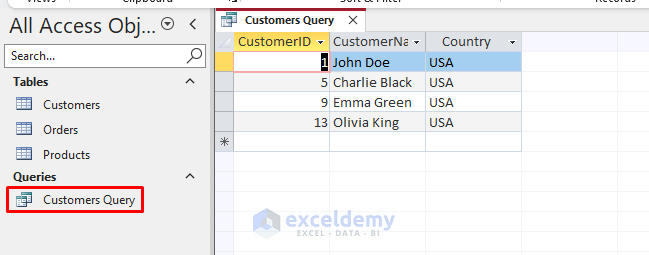
- Name your query Customers Query.
- Select Modify the query design.
- Click Finish.
- Now in Design View, add Criteria: Under the Country field.
USA
- Run the query by clicking the Run button (exclamation point icon).
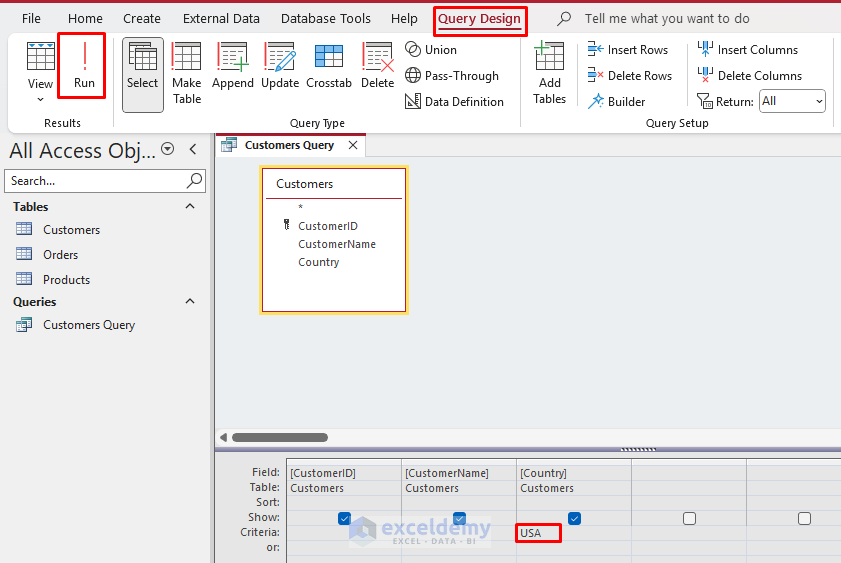
You’ll see only customers from the USA, with their ID, Name, and Country.
Use Query Design View
Let’s create the same query directly in Design View.
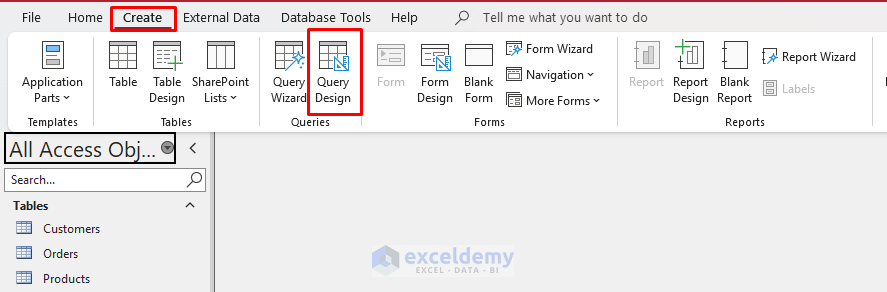
- Go to the Create tab >> select Query Design.
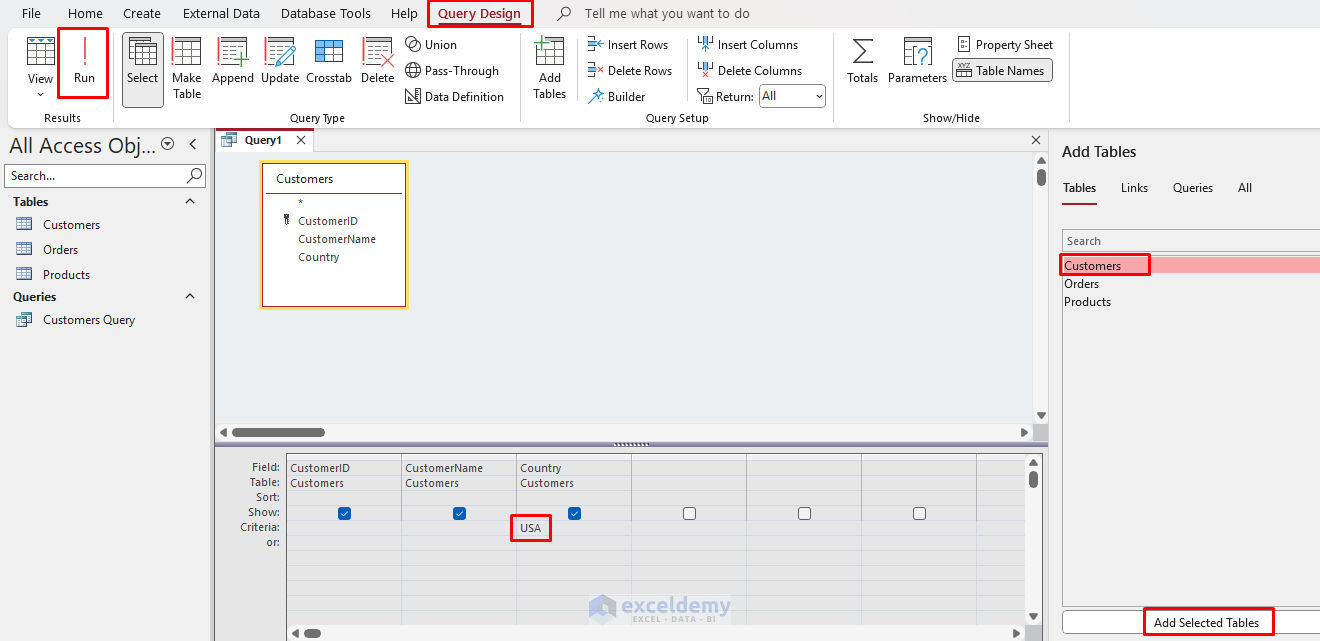
- Add the Customer table from the Show Table dialog.
- Drag the desired fields from tables into the query grid below.
- CustomID, CustomerName, Country.
- In the Criteria row under the Country row, type:
USA
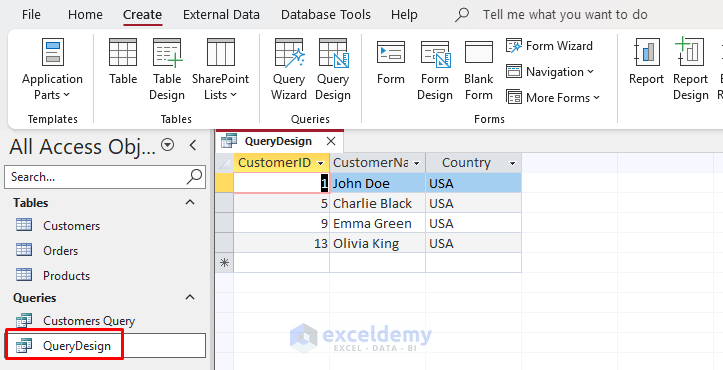
- Click Run to view results.
Output:
Basic Filtering Techniques
Setting Simple Criteria
Let’s explore various filtering techniques.
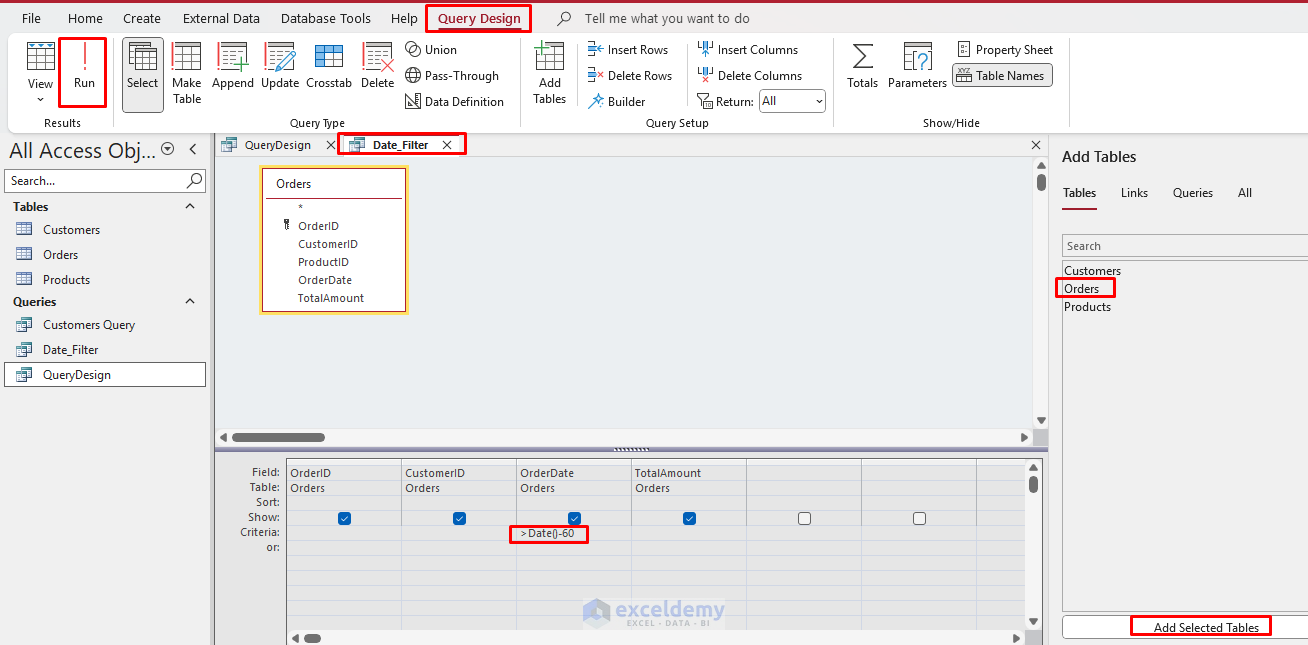
Filter Based on Date Criteria
Let’s find all orders placed within the last 60 days.
- Create a new query with the Orders table.
- Add fields: OrderID, CustomerID, OrderDate, and TotalAmount.
- In the Criteria row under the OrderDate row, enter:
>Date()-60
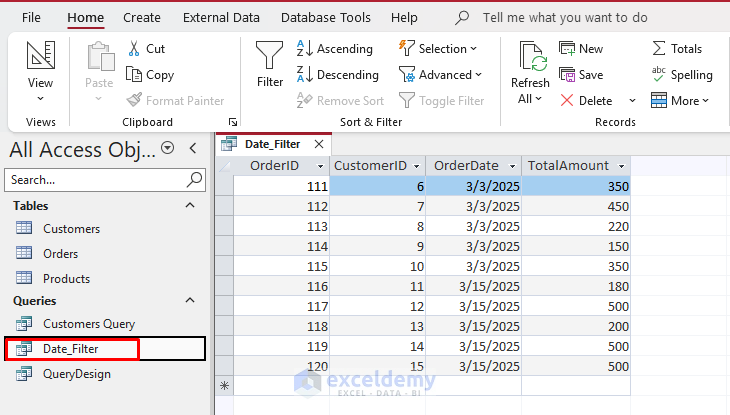
- Run the query.
Output:
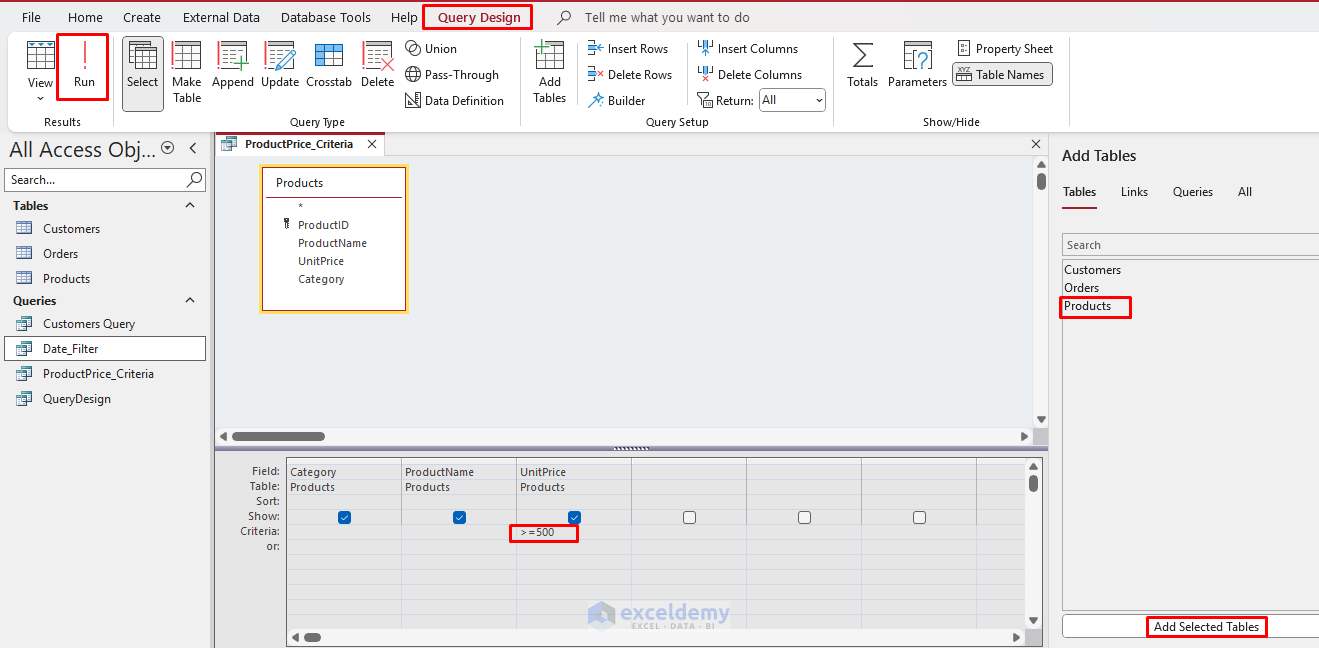
Filter Product Based on Price Criteria
Let’s find all premium products.
- Create a new query with the Products table.
- Add fields: ProductName, Category, UnitPrice.
- In the Criteria row under the UnitPrice row, enter:
>=500
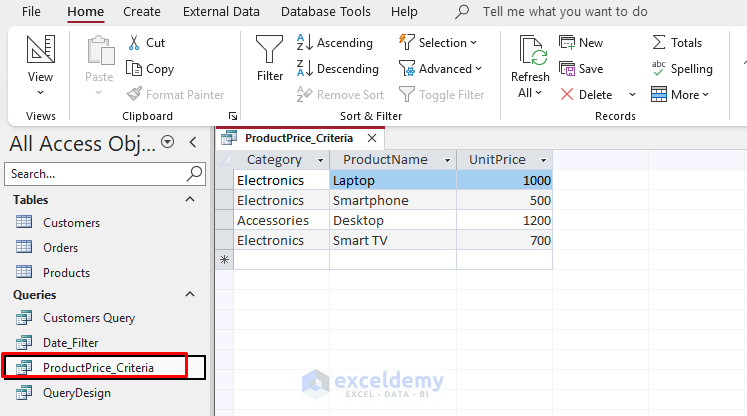
- Run the query.
Output:
Use Wildcards for Partial Matches
Find customers with last names starting with ‘J’.
- Create a new query with the Customers table.
- Add fields: CustomerID, CustomerName, CountryName.
- In the CustomerName, enter:
Like J*
- Run the query.

Output:

Use Multiple Criteria
Find products of a particular category that are expensive.
- Create a new query with the Products table.
- Add fields: ProductName, Category, UnitPrice.
- In the Criteria row under the Category row, enter:
Accessories
- In the Criteria row under the UnitPrice row on the same line, enter:
>500
- Run the query to find products meeting both conditions.

Output:

Sort and Organize Results
Basic Sorting
Sort products by price from highest to lowest.
- Create a new query with the Products table.
- Add fields: ProductName, Category, UnitPrice.
- In the Sort row under UnitPrice, select Descending.
- Run the query.

Output:

Multiple-Level Sorting
Let’s sort customers by country and then by customer name.
- Create a new query with the Customers table.
- Add fields: CustomerName, Country.
- In the Sort row under Country, select Ascending.
- In the Sort row under CustomerName, select Ascending.
- Run the query.

Results will first be grouped by country alphabetically, and within each country, customers will be sorted by last name.

Create Parameter Queries
Parameter queries prompt for input every time they run.
- Create a new query with the Customers table.
- In the Criteria row, add your parameter within square brackets [ ].
- In the Country field, add the following criteria:
[Enter Country:]
- Run the query.

- Access prompts you to enter a value each time.

Output:

Group and Summarize (Aggregate Query)
Let’s calculate total sales by customer.
- Create a new query with the Customers and Orders tables.
- Create a Relationship between the Customers and Orders tables.
- Click on the Totals button in the toolbar (it looks like the Greek sigma symbol Σ).
- Set the Total row:
- In the CustomerName, choose Group By.
- In the TotalAmount, choose Sum.
- Save and Run the query.

Now the query will be grouped by each customer and sum their total order values.

Create Calculated Fields
- Create a query with the Orders and Products tables.
- Create a Relationship between tables.
- Add fields: OrderID, CustomerID, ProductName, TotalAmount.
- In the next empty column in the grid, type this formula in the Field row:
DiscountedTotal: [TotalAmount] * 0.9
- Run the query to see the calculated results.

This gives the total after applying a 10% discount.

Advanced Joins
Inner Join Query (Combining Tables)
- Retrieves records where related fields match in both tables.
- Automatically created when adding tables with relationships.
Show full details of orders, including customer names and products.
- Create a new query.
- Add all three tables: Customers, Orders, Products.
- Create a Relationship between tables.
- Add fields:
- OrderID, CustomerName, ProductName, OrderDate, TotalAmount.
- Run the query.

Output:

Left Outer Join Query
Show all customers, including those without orders.
- Create a new query, add Customers and Orders.
- Create a Relationship between tables.
- Double-click or right-click the line joining Customer.CustomerID and Order.CustomerID.
- Select Join Properties.

- Select Option 3: Include ALL records from ‘Customers’ and only those records from ‘Orders’ where the joined fields are equal.
- Click OK.

- Add fields: CustomerName, OrderID, OrderDate.
- Run the query.
Output:

Each row shows a customer’s name with one of their orders. If a customer has multiple orders, they’ll appear in multiple rows.
Right Join
- Opposite of Left Join, includes all records from the right table.
- Follow the steps for Left Join, but select option 2.
- Option 2: Include ALL records from ‘Orders’ and only those records from ‘Customers’ where the joined fields are equal.

Create Cross Tab Queries (Advanced Summary)
Summarize the total order amount per customer per month.
- Cross-tab queries summarize data in a spreadsheet-like format.
- Go to the Create tab >> click on Query Wizard.
- Select the Cross tab Query Wizard >> click OK.

- In the Crosstab Query Wizard:
- Choose Orders if all required fields are in the Orders table.
- If the necessary fields are spread across multiple tables, first create a Select Query that joins Order, Customer, and Product.
- Click Next.

- Select CustomerID as the Row Heading.
- Click Next.

- Select ProductID as the Column Heading.
- Click Next.

- Choose Avg function to total the quantity.
- Click Next.

- Name your query, CustomerProductCrossTab.
- Select View the query.
- Click Finish to run the query.

Output:

Action Queries (Update, Delete, Append)
Always back up your data before using action queries.
- Open a Query Design View.
- Right-click on the join line >> select Query Type.
- Explore the following options:
- Make-Table Query: Creates a new table from existing data.
- Update Query: Modifies existing records based on criteria.
- Append Query: Inserts records from one table/query into another.
- Delete Query: Removes records matching the criteria.

Conclusion
Mastering queries in Access enhances data retrieval, analysis, and manipulation, providing precision and control for database management tasks. By understanding queries, filters, calculated fields, grouping, and advanced joins, you will be able to efficiently query and manipulate your database, making your tasks simpler and faster. Explore each query type thoroughly and always test queries in a controlled environment to ensure accurate results.
Get FREE Advanced Excel Exercises with Solutions!
