This is an overview of Excel row and column limit.
Download Practice Workbook
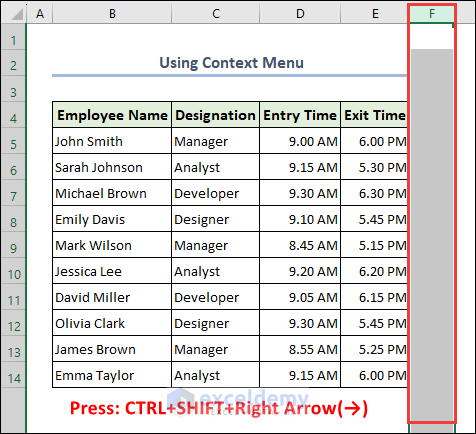
Tip 1 – Use the Context Menu to Limit Excel Rows and Columns
- Select a column (F).
- Press CTRL+SHIFT+Right arrow(→) to select all the columns in the workbook starting from the selected one.
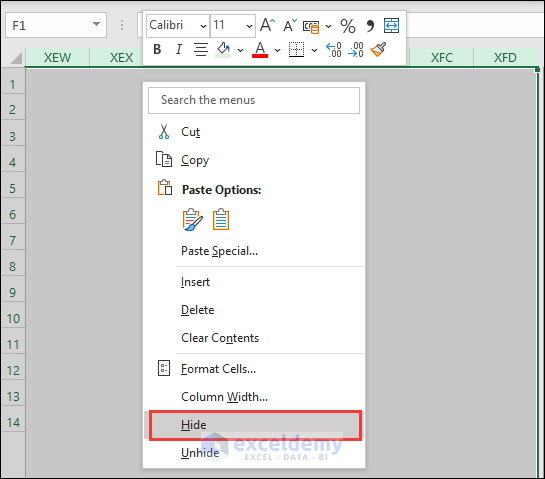
- Right-click to open the Context Menu.
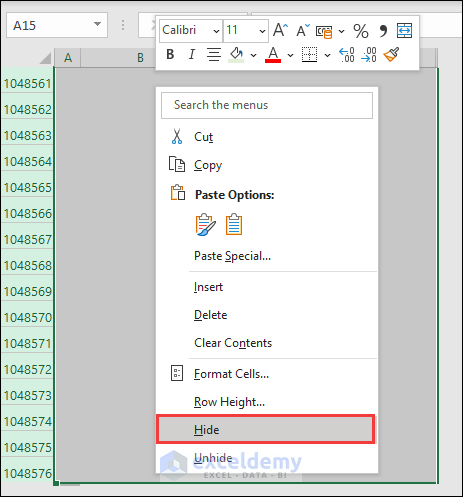
- Select Hide.
- Select a row (15).
- Press CTRL+SHIFT+Down Arrow(↓) to select all the rows downwards.
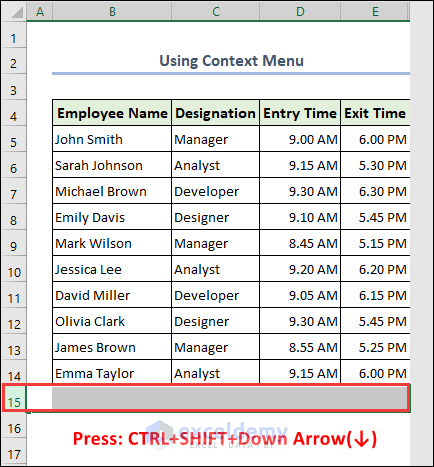
- In the Context Menu, choose Hide.
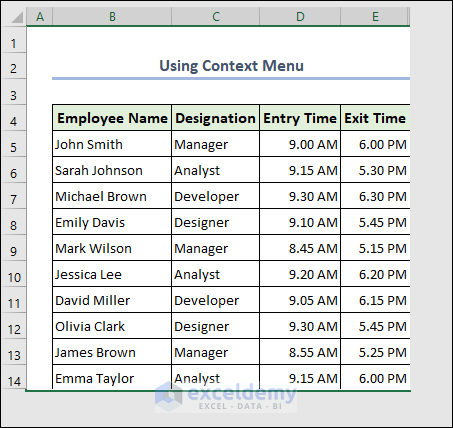
This is the output.
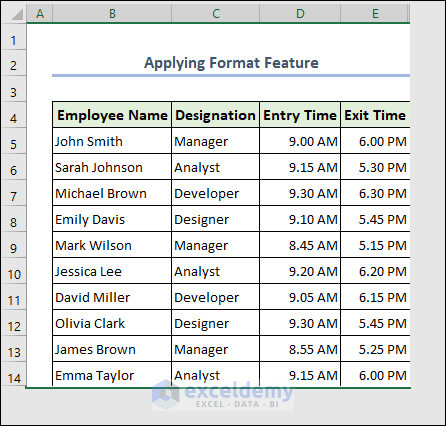
Tip 2 – Apply the Format Feature to Limit Excel Rows and Columns
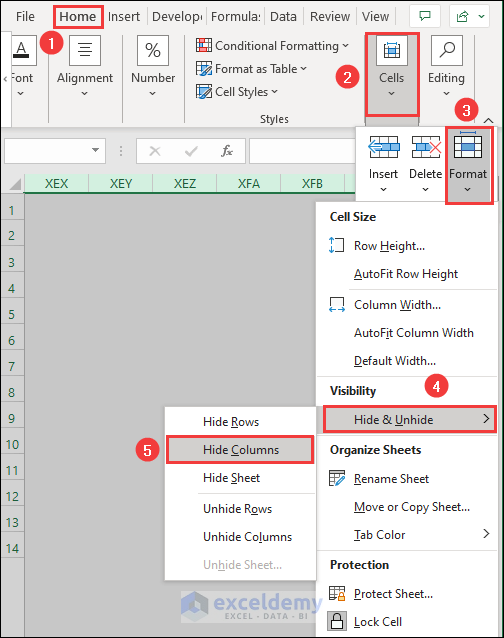
- Select a column and press CTRL+SHIFT+Right Arrow(→) to select all columns.
- Click Hide Columns in Format.
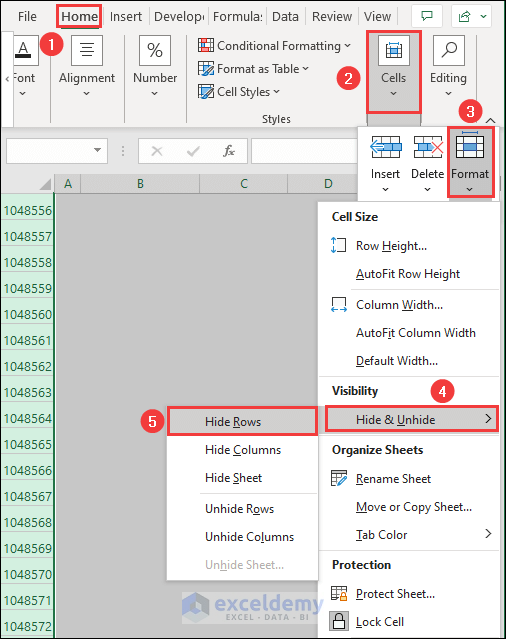
- Select all the rows by pressing CTRL+SHIFT+Down Arrow(↓).
- Choose Hide Rows in the Home tab.
This is the output.
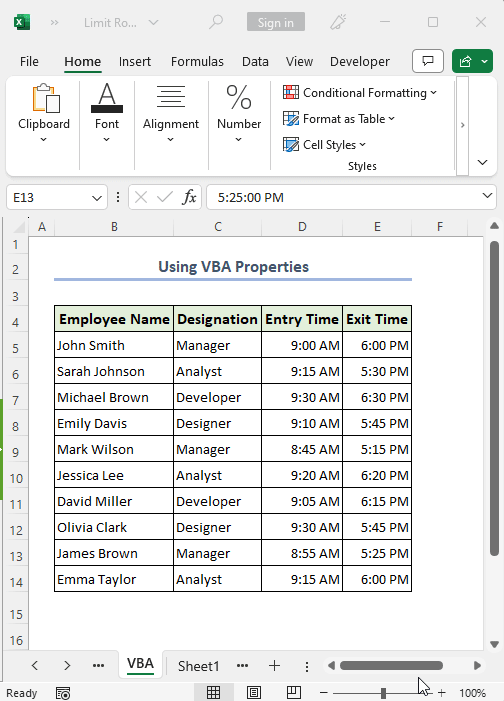
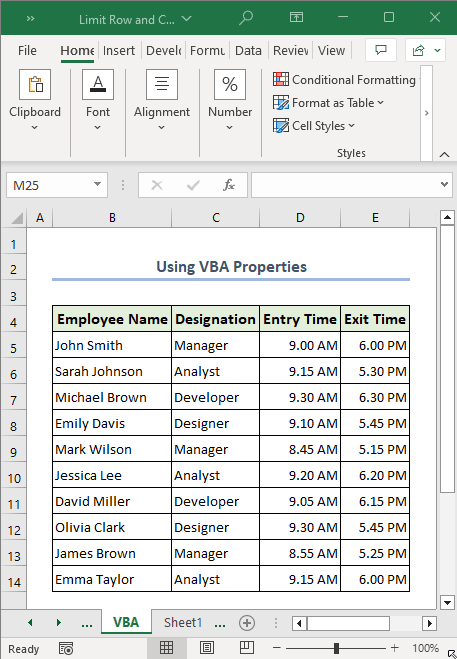
Tip 3 – Use the VBA Properties to Limit Excel Rows and Columns
- Open the VBA window by right-clicking the sheet name
- Enter a cell range in the Scroll Area to lock the cell range.
What Happens When Excel Loads More than One Million Rows?
Data is lost. To handle larger datasets, use Microsoft Power BI or database management systems.
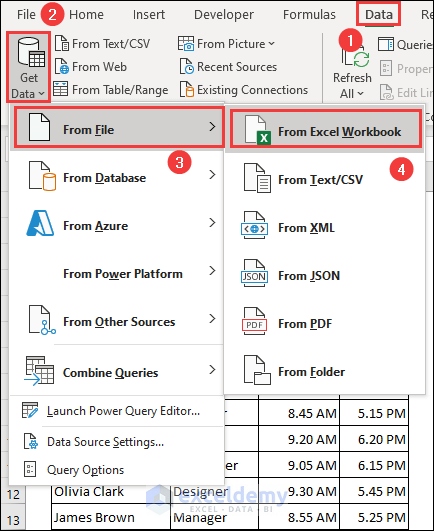
How to Overcome Row Limit in Excel?
- To combine data from another workbook, go the Data tab.
- Click Get Data>>From File>>From ExcelWorkbook.
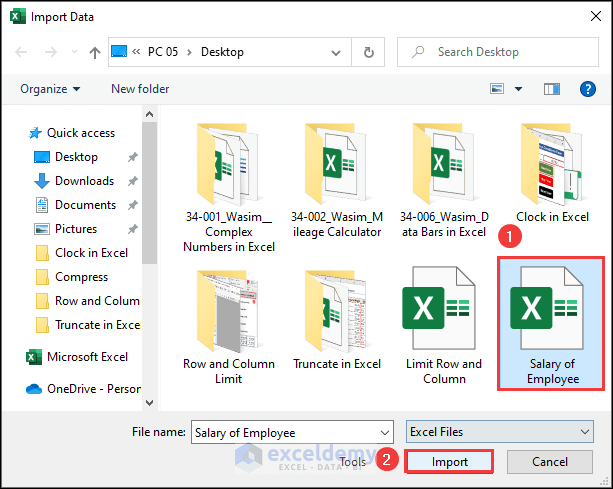
- Select a file and press Import.
- In the Power Query editor, choose Load to in Navigator.
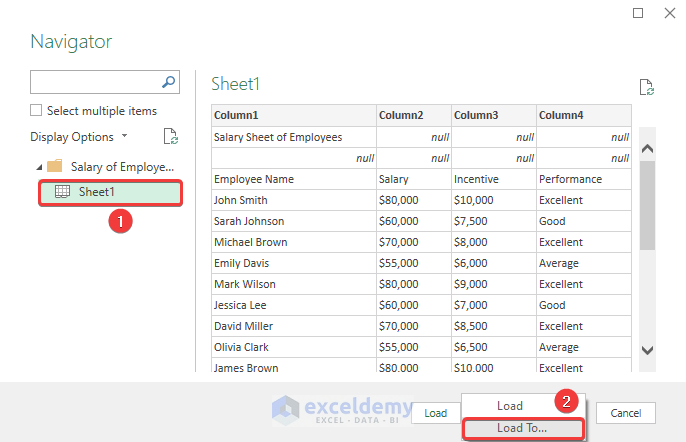
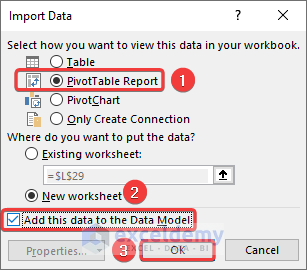
- Choose PivotTable Report to quickly create a pivot table.
- Check Add this data to the Data_Model.
With the PivotTable Report you can handle more than 1M rows by using filters.
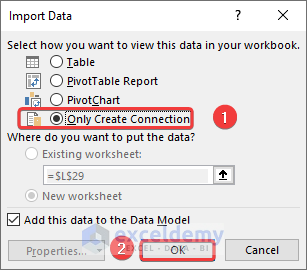
- You can also choose Only Create Connection to deal with multiple sheets that have 1M rows.
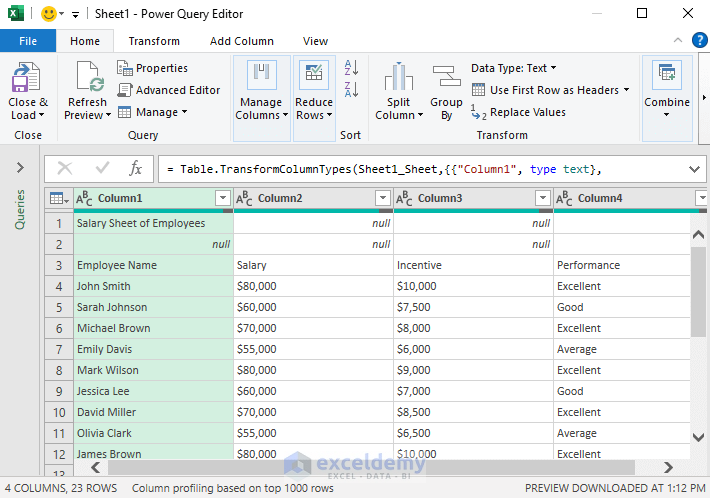
- In the right pane, double-click the query to open it.
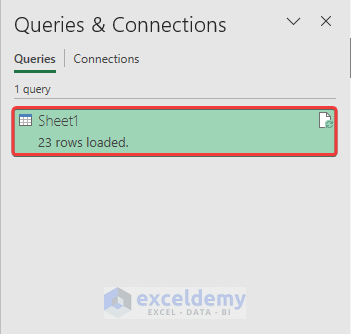
- Import data from multiple worksheets and handle them in Power Query.
Frequently Asked Questions
1. What is the maximum number of rows and columns in Excel?
Answer: The maximum number of rows in Excel is 1,048,576 and the maximum number of columns is 16,384.
2. Can I combine multiple Excel files to handle more data?
Answer: Yes, you can combine multiple Excel files using tools like the Power Query or formulas like VLOOKUP or INDEX-MATCH.
Excel Row and Column Limit: Knowledge Hub
- How to Limit Number of Rows
- How to Limit Columns in Excel
- How to Set the End of a Spreadsheet
- How to Handle More Than 1048576 Rows in Excel
<< Go Back to Rows and Columns in Excel | Learn Excel
Get FREE Advanced Excel Exercises with Solutions!
