Method 1 – Using Keyboard Shortcut
You can use keyboard shortcuts to add adjacent & non-adjacent columns or rows in Excel.
Here are 4 cases to add adjacent and non-adjacent rows and columns in Excel:
Case 1 – Adding Adjacent Rows
Rows that are next to each other, sharing a common border are known as adjacent rows. For example, row 5 and 6. The number of rows you select, will be added above the selection.
To add adjacent rows, follow the steps below:
- Select the row numbers by dragging the mouse.
- Press the CTRL key and Plus key (+).
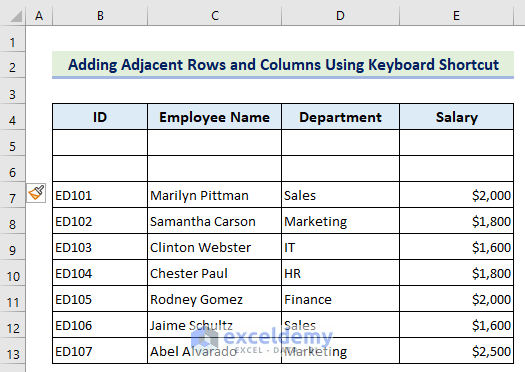
 Two rows will be added above the selected rows.
 - To change the format, click on the Format Painter icon and select Format Same As Below.
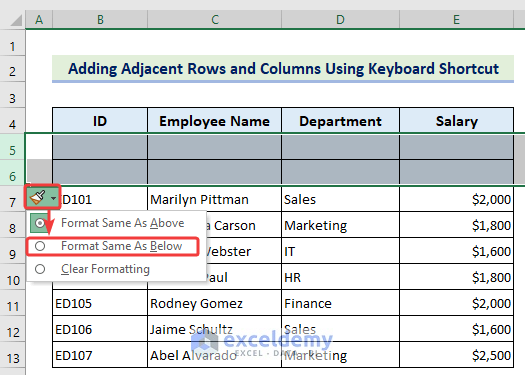
The two new rows will have the same format as of the rows below them.
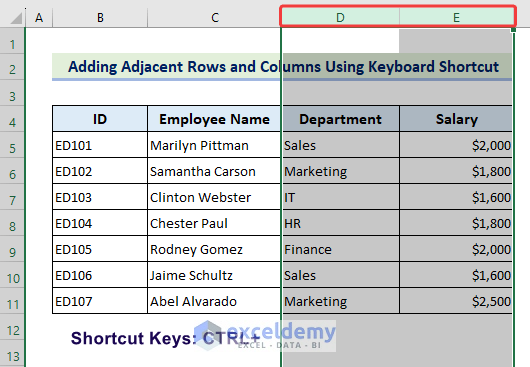
Case 2 – Adding Adjacent Columns
Adding adjacent columns is the same as adding adjacent rows.
To add two columns before Column D,
- Select the columns by dragging the mouse.
- Press the CTRL key and Plus key (+).
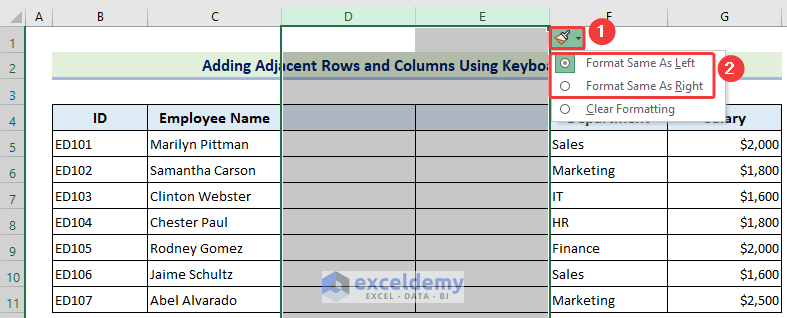
- To change the format of the new columns, use the options of the Format Painter.
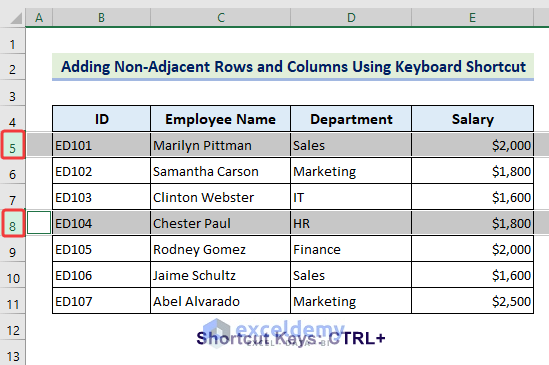
Case 3 – Adding Non-Adjacent Rows
Rows that are not directly next to each other are known as non-adjacent rows. You can add non-adjacent rows by following the steps below:
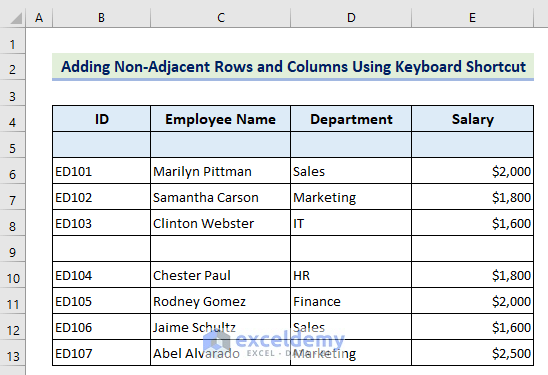
- Press and hold the CTRL key and click on the row numbers one by one.
- Press the CTRL and Plus key (+) together to add new rows.
Two new rows will be added to the sheet (one row above each selected row).
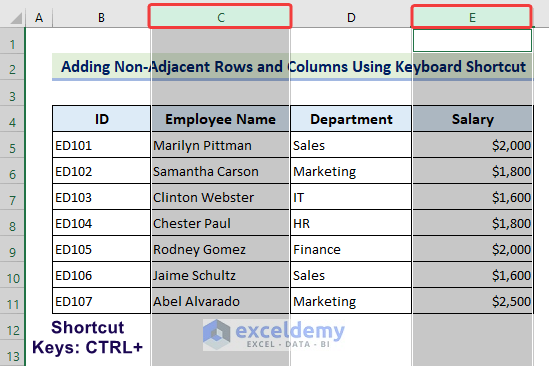
Case 4 – Adding Non-Adjacent Columns
To add non-adjacent columns, follow the steps below:
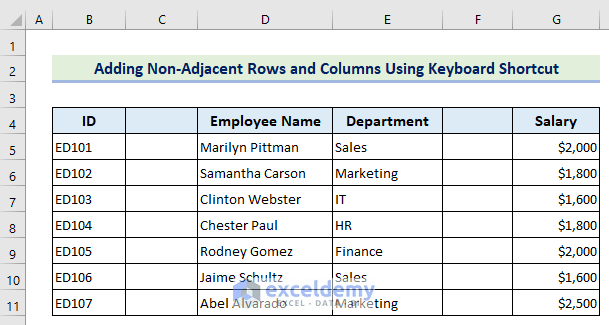
- Press and hold the CTRL key and click on the column names one by one.
- Press the CTRL key and Plus key (+) together to insert columns.
Two new columns will be added to the sheet (one column each before the selected columns).
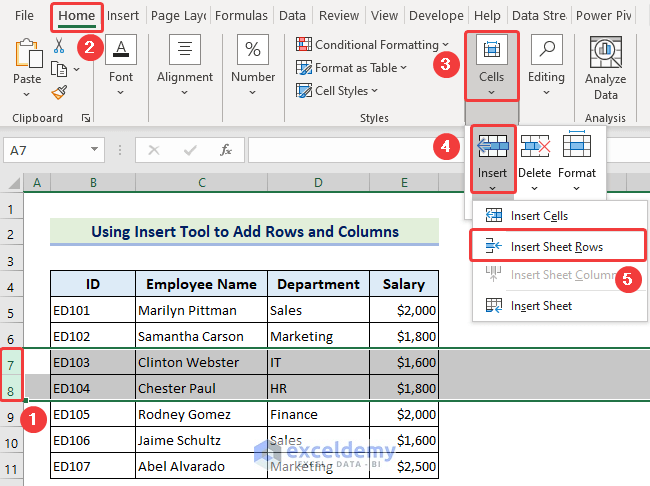
Method 2 – Using Insert Tool
- Select the row numbers before which you want to add rows.
- Go to the Home tab > Cells > Insert > Insert Sheet Rows.
To add columns using the Insert tool in Excel:
- Select the column numbers above which you want to add columns.
- Click on the Home tab > Cells > Insert > Insert Sheet Columns.

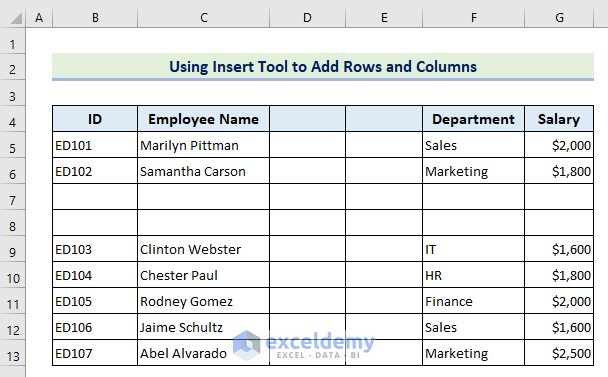
New rows and columns will be added.
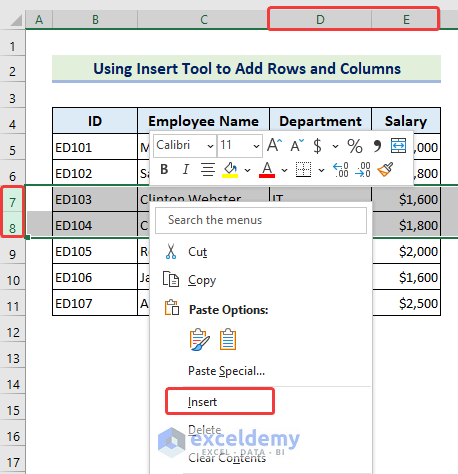
Alternatively, you can use the Insert option from the context menu to add new rows or columns.
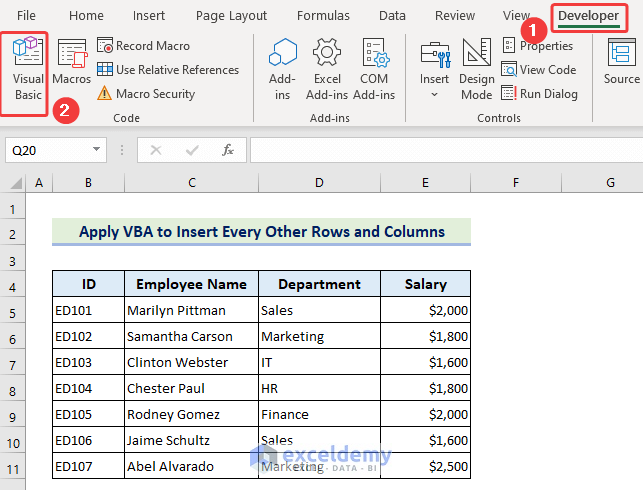
Method 3 – Using VBA Macro to Add Every Other Rows or Columns
Using VBA can save time and make the task of adding rows and columns automatic. It is helpful when you have to repeat the task multiple times.
Case 1 – Inserting Every Other Row
- Select Visual Basic from the Developer tab.
- Go to Insert > Module.
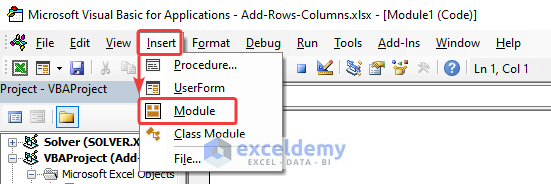
- Enter the following code in the Module:
Sub Insert_Every_Other_Rows ()
Dim mRange As Range
Dim Count_Rows As Integer
Dim i As Integer
Set mRange = Selection
Count_Rows = mRange.EntireRow.Count
For i = 1 To Count_Rows
ActiveCell.Offset(1, 0).EntireRow.Insert
ActiveCell.Offset (2, 0).Select
Next i
End Sub- Select the data range and click on the Run command.
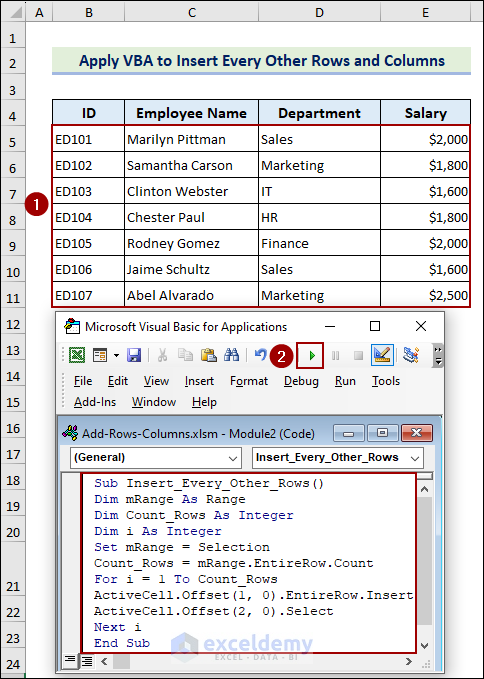
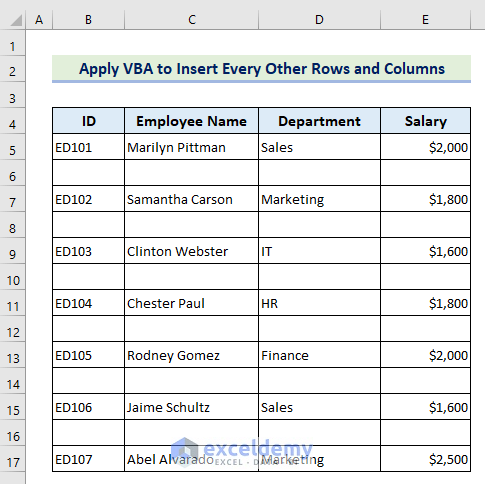
New rows will be inserted after each row.
Case 2 – Inserting Every Other Columns
- Go to the Developer tab > Visual Basic.
- Select Insert > Module.
- Enter the following code in the Module:
Select the data range and click on the Run command.
Sub Insert_EveryOther_Column()
Dim colNum, c_Start, c_Finish, c_Step As Long
Dim Range_Insert As Range
c_Step = 2
c_Start = Application.Selection.Cells(1, 1).Column + 1
c_Finish = (ActiveSheet.UsedRange.SpecialCells( _ xlCellTypeLastCell).Column * 2) - c_Start Application.ScreenUpdating = False
Application.Calculation = xlCalculationManual
For colNum = c_Start To c_Finish Step c_Step ActiveSheet.Cells(1, colNum).EntireColumn.Insert
Next
Application.ScreenUpdating = True
Application.Calculation = xlCalculationAutomatic
End Sub- Select the data range and click on the Run command.
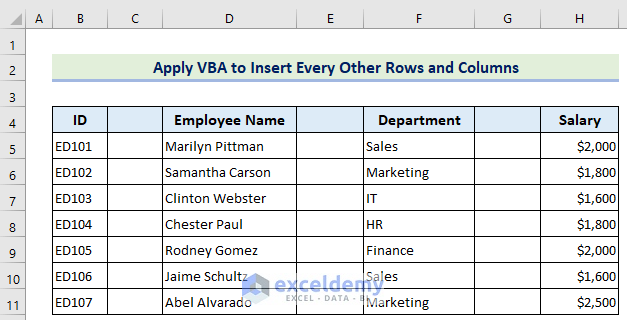
After running the code, blank columns will be added after every column.
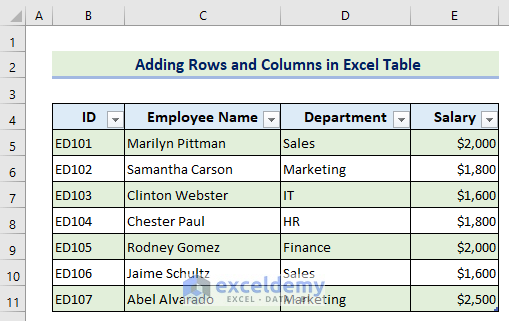
How to Add Rows and Columns in Excel Table
You can add rows and columns to an Excel table by following the same procedure from the above methods. For example, we have the following sample Excel table.
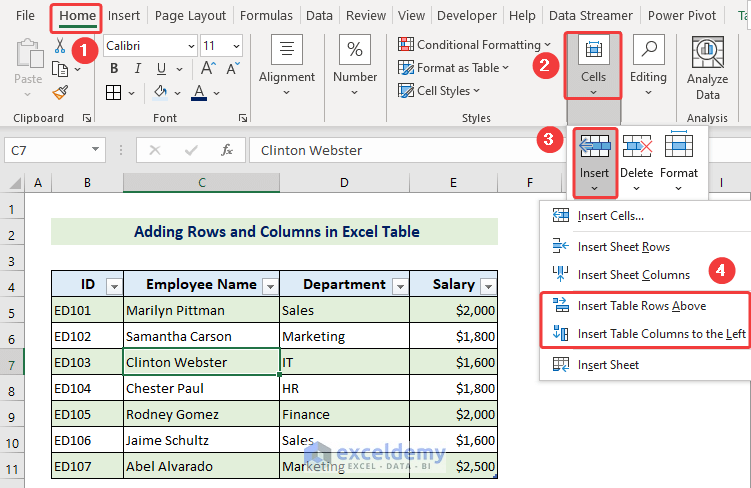
Follow the steps below to add rows and columns in the table:
- Select the row numbers or column names.
- Click Home > Cells > Insert.
- Select Insert Table Rows Above to add columns or select Insert Table Columns to the Left to add rows.
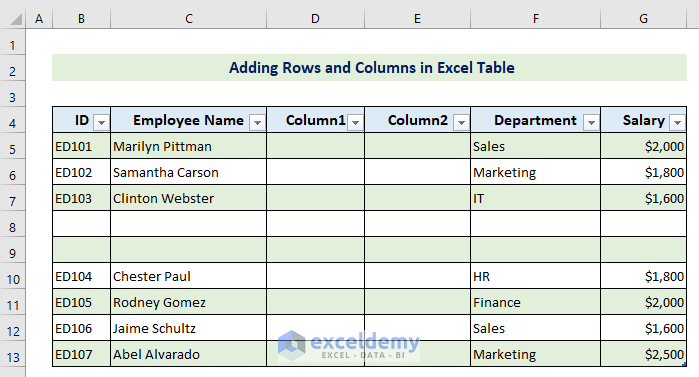
Here are the newly added blank rows and columns in the table.
Download Practice Workbook
Frequently Asked Questions
What Is the shortcut key to add a single row or column in Excel?
The shortcut key to add a single row or column in Excel is- CTRL + ‘+’
How to insert columns or rows quickly in Excel?
After inserting a column or row, press the F4 key as many times as per your requirements to insert columns or rows.
How to remove rows and columns in Excel?
To remove rows and columns in Excel:
- Select the row numbers or column name.
- Go to Home > Cells > Delete.
- Select Delete Sheet Rows to delete rows and select Delete Sheet Columns to delete columns (Or press the shortcut key CTRL + ‘-’).
Related Articles
- [Fixed!] Missing Row Numbers and Column Letters in Excel
- How to Lock Column Width and Row Height in Excel
- How to Switch Rows and Columns in Excel
- [Fixed!] Rows and Columns Are Both Numbers in Excel
- Excel VBA to Set Range Using Row and Column Numbers
<< Go Back to Rows and Columns in Excel | Learn Excel
Get FREE Advanced Excel Exercises with Solutions!
