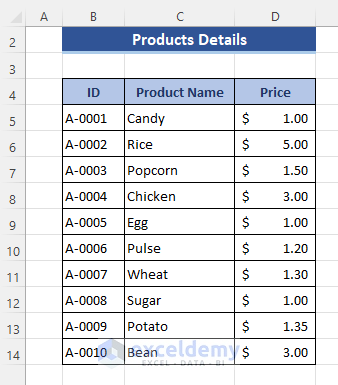
This is the sample dataset.
Download Practice Workbook
Download this practice workbook.
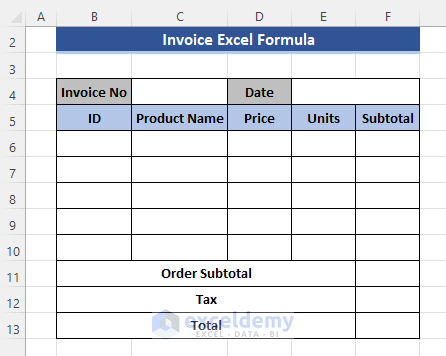
Include: Invoice number, Date, ID, Product Name, Price, Units, Subtotal in the Invoice.
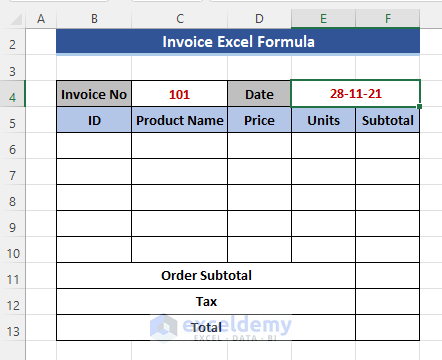
Step 1- Enter Invoice Number and Date
- Enter Invoice Number and Date.
Read More: How to Create Fully Automatic Invoice in Excel (with Easy Steps)
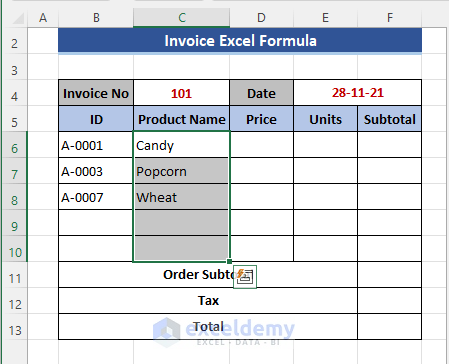
Step 2 – Add Product Names and ID
To enter product name and ID:
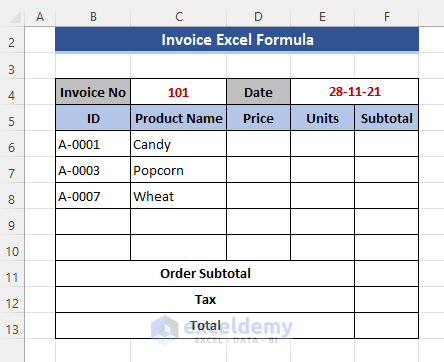
=IF(ISBLANK(B6),"",VLOOKUP(B6,Products!$B$5:$D$14,2,FALSE))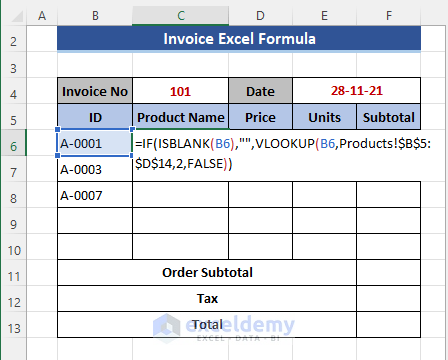
- Press Enter to see the product name.

Formula Breakdown
- VLOOKUP(B6,Products!$B$5:$D$14,2,FALSE)
searches B6 in B5:D14 in the Product Sheet and returns the output from the 2nd column in the range.
- IF(ISBLANK(B6),””,VLOOKUP(B6,Products!$B$5:$D$14,2,FALSE))
- Drag down the Fill Handle to see the result in the rest of the cells.
Step 3 – Enter the Price Based on the Product ID using a Formula
- Follow the same procedure to show the Price in column D. The formula is:
=IF(ISBLANK(B6),"",VLOOKUP(B6,Products!$B$5:$D$14,3,FALSE))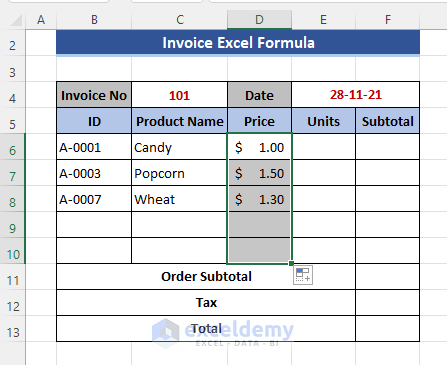
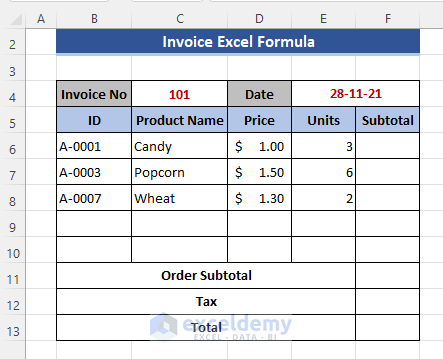
Step 4 – Enter the Unit Numbers of the Products Manually
- Enter units in Column E.
Similar Readings
- How to Create a Cash Bill Format in Excel (A step-by-step Guideline)
- Tax Invoice Format in Excel (Download the Free Template)
- Create GST Invoice Format in Excel (Step-by-Step Guideline)
- Excel Invoice Tracker (Format and Usage)
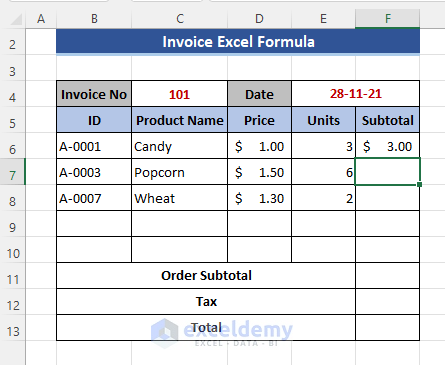
Step 5 – Calculating the Subtotal for Each Item with a Formula
- Use the formula:
=IF(ISBLANK(B6),"",D6*E6)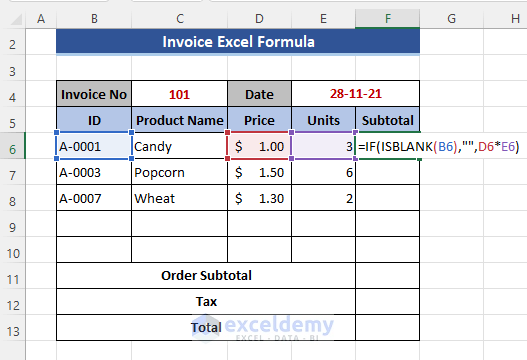
- Press Enter.
Formula Breakdown
- IF(ISBLANK(B6),””,D6*E6)
Checks if B6 is blank. If it is blank, the cell will be blank. Otherwise, it will show the product in D6 and E6.
- Drag down the Fill Handle to see the result in the rest of the cells.
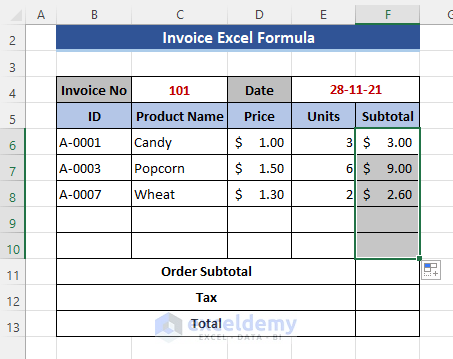
The subtotal is displayed in rows containing a product ID.
Step 6 – Calculate the Total Price
- Use the SUM function in F11 to get the order subtotal and press Enter. The formula is:
=SUM(F6:F10)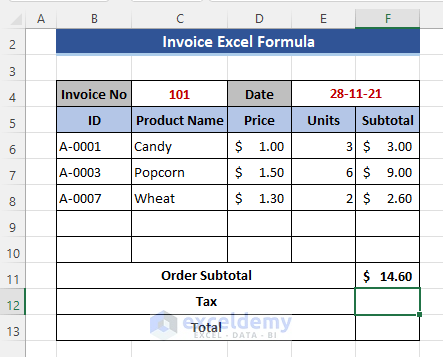
Step 7 – Include the Tax Amount using a Formula
- Add a 7.5% tax to the subtotal. The formula is:
=F11*7.5%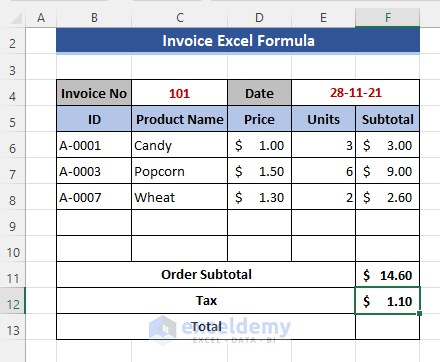
Step 8 – Show the Output
- Use the formula:
=SUM(F11:F12)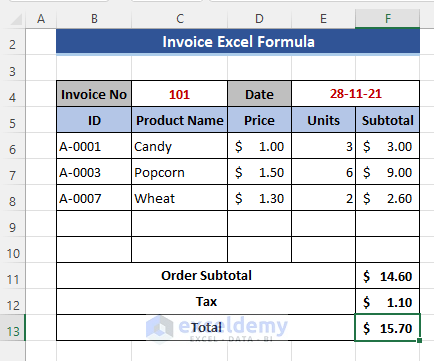
Modify the Formula and Use a Table and Data Validation in Excel
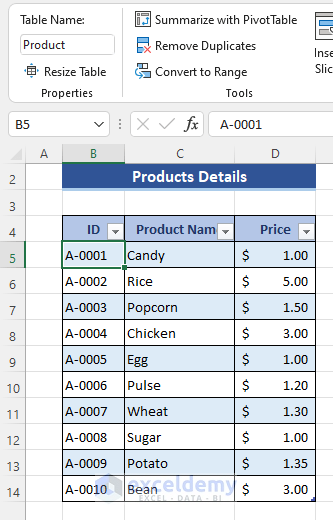
Step 1 – Declare Data Range as Table in Excel
- Go to the Products sheet.
- Select the range.
- Go to Insert and select Table.
- The dialog box will show the range.
- Check My table has headers.
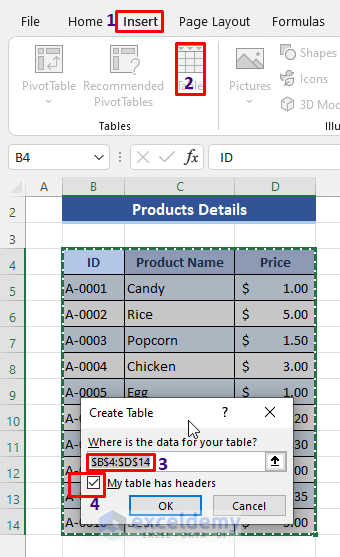
- Click OK to see the table name.
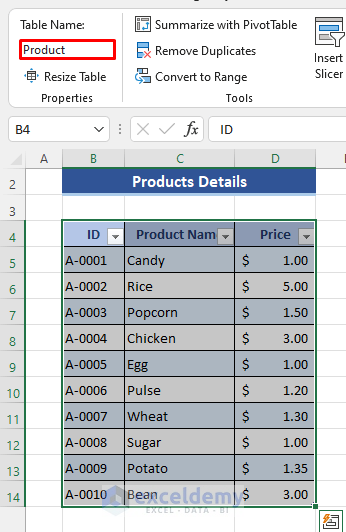
- Press Enter.
Step 2 – Modify the Formula
- Change the formula used in Step 3:
=IF(ISBLANK(B6),"",VLOOKUP(B6,Product,2,FALSE))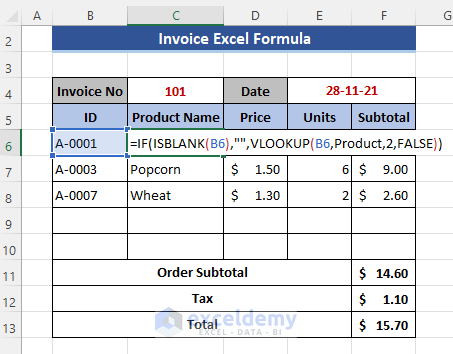
- Change the price formula:
=IF(ISBLANK(B6),"",VLOOKUP(B6,Product,3,FALSE))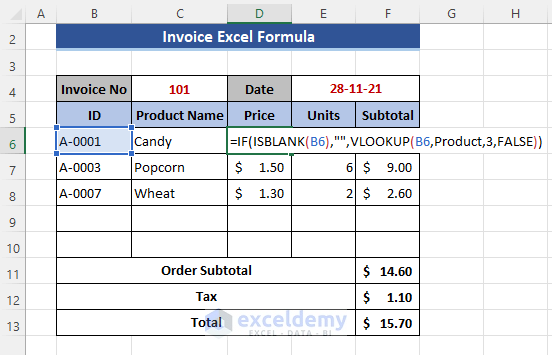
Formula Breakdown
- VLOOKUP(B6,Product,2,FALSE)
searches B6 in the Product table and shows the output from the 2nd column of the table.
- IF(ISBLANK(B6),””,VLOOKUP(B6,Product,2,FALSE))
If a match is found, it shows the result. Otherwise, the cell will be blank.
Step 3 – Apply Data Validation
- Select the ID column.
- Go to the Data tab.
- Select Data validation.
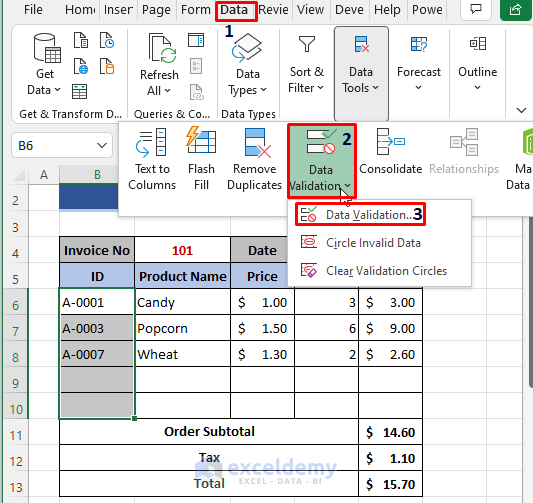
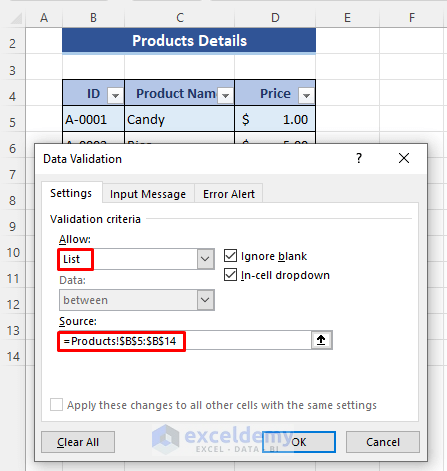
- Select List in Allow.
- Enter the ID range in the Product sheet in Source.
- Click OK.
- Go to the ID column. Select an ID in the drop-down list. Here, A-0002.
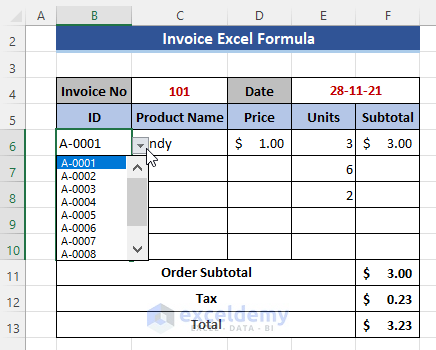
- Press Enter.
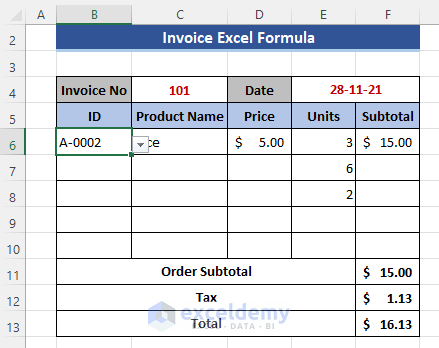
This is the output.
Further Readings
- Transport Bill Format in Excel (Create in 4 Simple Steps)
- Labour Contractor Bill Format in Excel (Download Free Template)
- Hotel Bill Format in Excel (Create with Easy Steps)
- Tally Bill Format in Excel (Create with 7 Easy Steps)

