While working in Excel, we may need to insert rows automatically in our dataset. Excel provides some features to do that job. Today, in this article, we will learn some methods to insert rows automatically in Excel.
How to Insert Rows Automatically in Excel: 4 Useful Methods
Consider a situation where you are given the Name, Region, and Rank of some sales representatives. We need to add some extra data to the dataset. So we need to insert rows into the dataset automatically.
In this article, we will discuss 4 different methods to insert rows automatically.
1. Inserting Rows Manually
One of the easiest ways to insert rows is to use the mouse. Using the mouse, we can insert rows variously. Let’s learn those ways!
Steps:
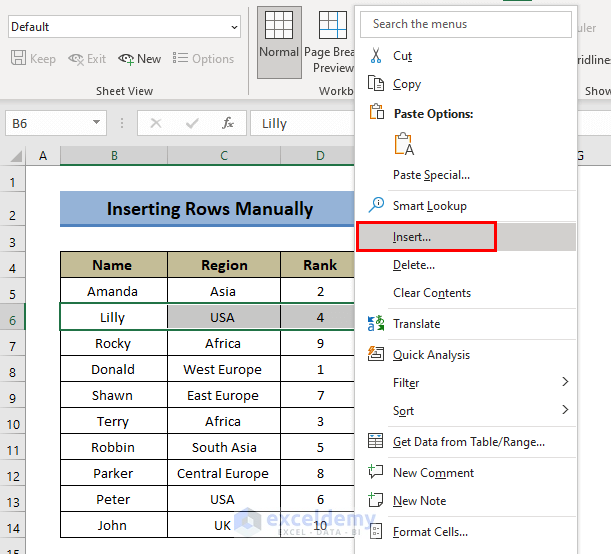
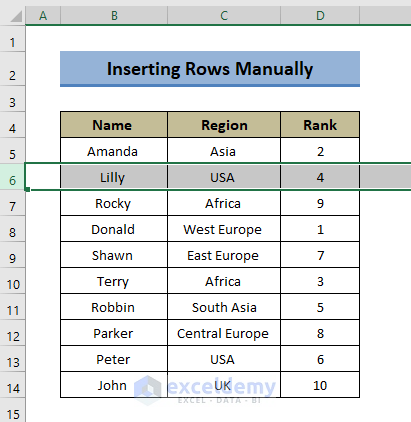
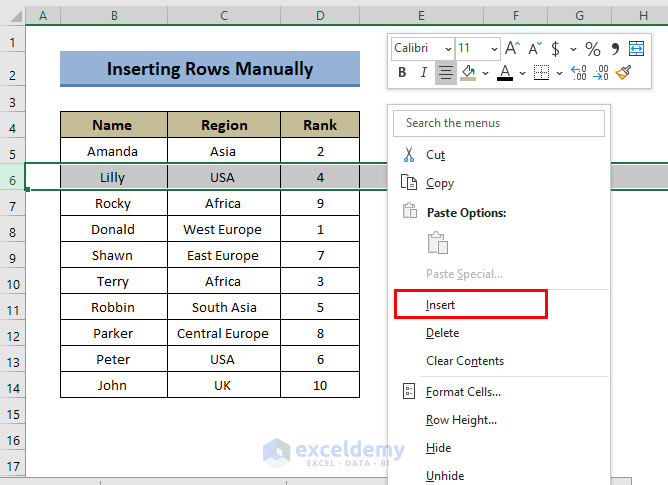
- First, select a row where you want to insert a new row. Right-click on the mouse to open the options. From the available options, click on Insert.
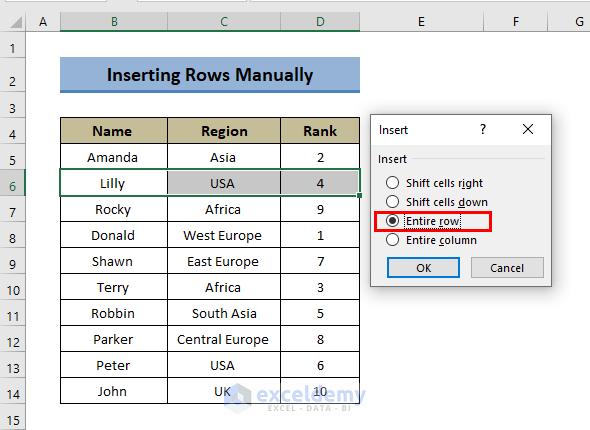
- Then, a dialog box will open up. Select the Entire row radio button because we want to insert an entire row. Click OK to continue.
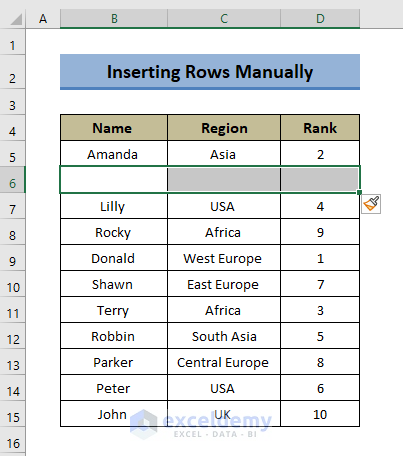
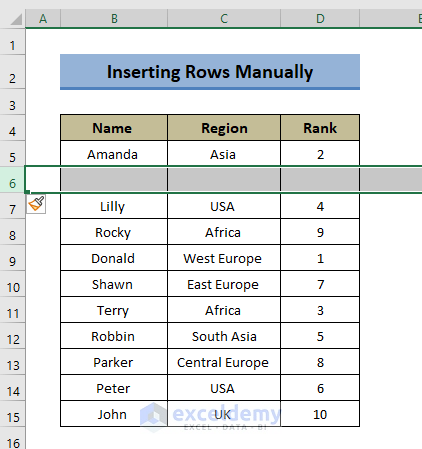
- As a result, a new row is inserted automatically!
Alternate 1:
Using a mouse you can insert rows in another way. For this:
- Click on the row serial numbers.
- Then right-click on the mouse to open options.
- From the options, select Insert.
- Excel will insert a new row instantly!
Alternate 2:
The third way to create rows using a mouse is also as simple as the previous ones.
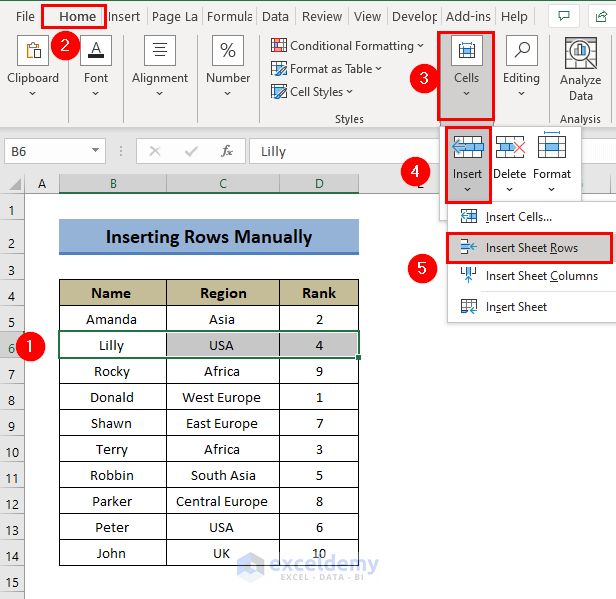
- Select a row where you want to insert a new blank row.
- In the Home Tab, go to the Cells ribbon and click on Insert.
- From the options, select Insert Sheet Rows.
- And a new row is created automatically.
Read More: How to Insert a Total Row in Excel
2. Inserting Multiple Rows Automatically
If you want to insert multiple rows in your data table, it’s not a smart approach to insert them individually. Rather you can insert multiple rows at the same time.
Steps:
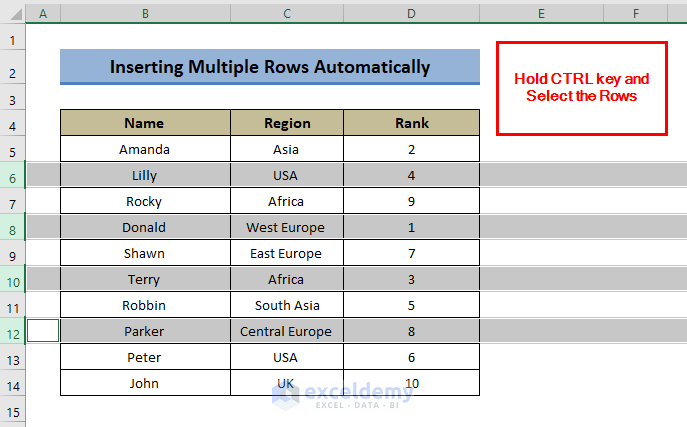
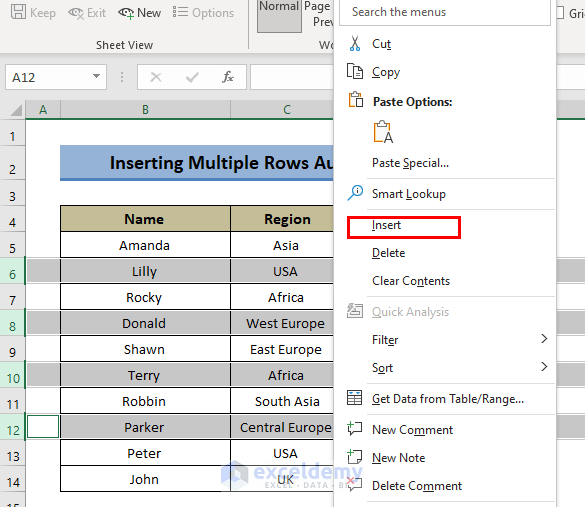
- First, press the CTRL key, hold it and keep selecting the rows before which you want to insert rows.
- Then right-click on your mouse and a menu list will appear like the image below. From here, select Insert.
- Hence, multiple rows will be inserted automatically just to the upper position of the selected rows.
Read More: How to Insert Multiple Blank Rows in Excel
3. Use Keyboard Shortcut to Insert Rows Automatically
It is a great time saver when you want to insert rows with keyboard shortcuts automatically. This procedure is much quicker than the previous ones.
Steps:
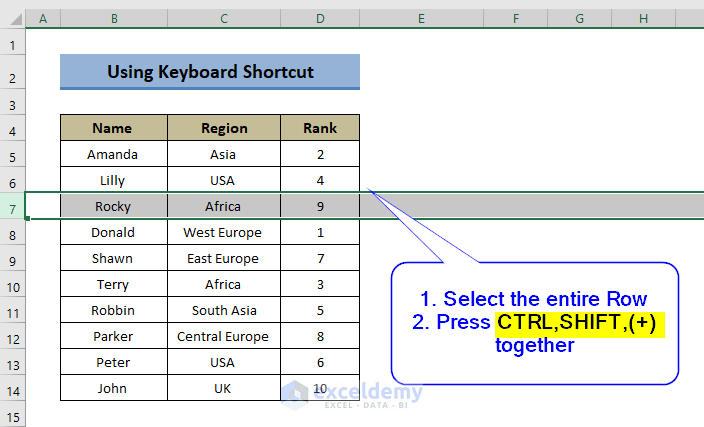
- Click on a row above where you want a new row.
- Press “CTRL, SHIFT, (+)” to insert a new row.
- Look at the dataset. We have got our new row.
Alternate:
There is another shortcut to insert rows automatically.
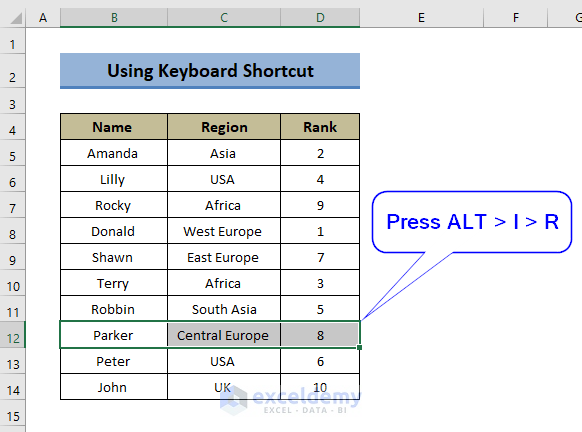
- Click on the row in the dataset.
- Press “ALT+I+R”.
- We have a new row in our dataset just up to the selected row.
4. Assign VBA Code to Insert Rows Automatically in Excel
We can use a simple VBA macro to insert rows automatically. Let’s learn this method by following these steps.
Steps:
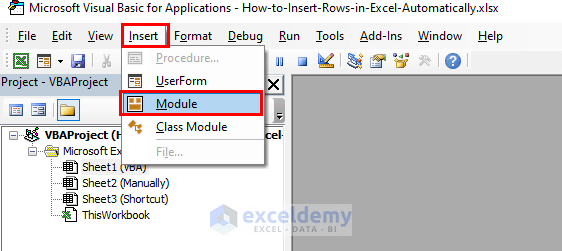
- First of all, press ALT+ F11 to open the Visual Basic Editor window.
- In the VBA window, click on Insert > and select Module from the option.
- A new module window appears. Write the corresponding code here to insert rows. You can insert the following code.
Public Sub Inserting_Row()
ActiveCell.Offset(1, 0).Rows("1:1").EntireRow.Insert SHIFT:=xlDown
End Sub- Next, press ALT+Q to close the module window.
- After that, press ALT+F8.
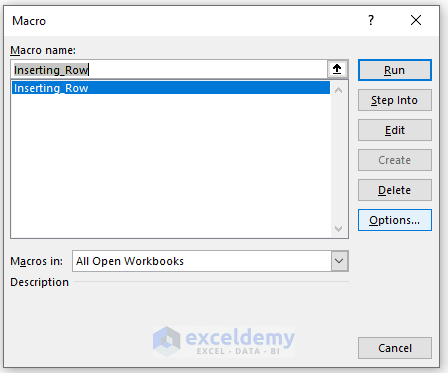
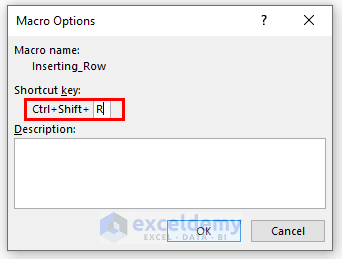
- Another pop-up named Macro will appear on the worksheet. Click click on Options on the pop-up.
- Write the shortcut key for inserting new rows automatically. We have chosen “CTRL + SHIFT + R”
- Continue by clicking OK.
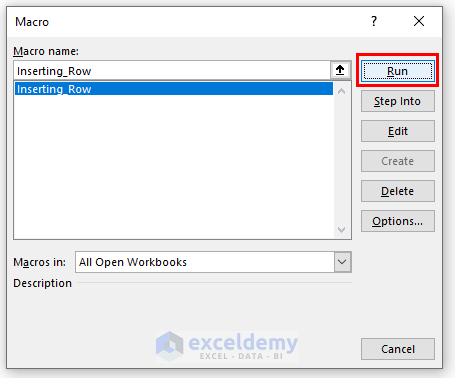
- Click on Run to run the code.
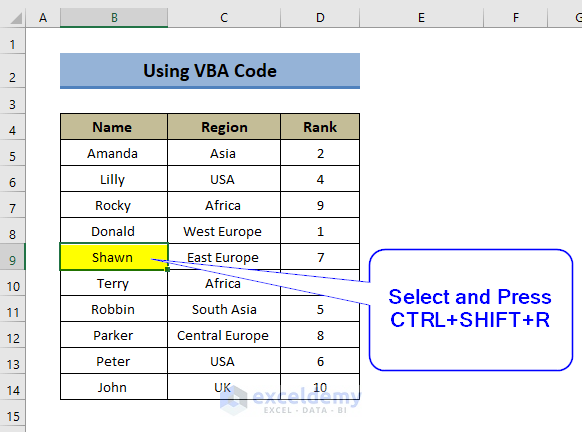
- While the code is now active, Press “CTRL + SHIFT + R” to create new rows.
- Hence, you will see a new row has been inserted to your data table.
Read More: How to Insert Row Below in Excel
Things to Remember
⏩ You have to select the cell above where you want to insert a row automatically.
Download Practice Workbook
Download this practice book to exercise the task while you are reading this article.
Conclusion
Inserting rows automatically in Excel is one of the easiest tasks to do if done correctly. We hope this article proves useful to you. Do comment if you have any questions or queries.
Related Articles
- Excel Insert Blank Row Every Nth Row
- Excel Insert Multiple Rows Every Other Row
- Excel Formula to Insert Rows Between Data
- Cannot Insert Row in Excel
- Excel Fix: Insert Row Option Greyed Out in Excel
<< Go Back to Insert Rows | Rows in Excel | Learn Excel
Get FREE Advanced Excel Exercises with Solutions!
