
Image by Editor
Microsoft Access provides powerful features for importing and linking external data sources. Access stores, retrieves, and manages data efficiently. One of its key features is the ability to import and link data from various sources, including Excel, CSV files, and other databases. In this tutorial, we will show how to import and link data from Excel and other sources.
Importing: Creates a copy of data within your Access database.
- Pros: Better performance, works offline, independent from source.
- Cons: Not automatically updated when source changes.
Linking: Creates a connection to the external data file.
- Pros: Always show current data, save space, single source of truth.
- Cons: It requires access to source files and can be slower.
Let’s use a sample Products.xlsx file containing product information and a customer data.csv file containing customer details to show the practical steps.
Importing Excel Data into Access
Step 1: Open the Import Wizard
- Open your Access database.
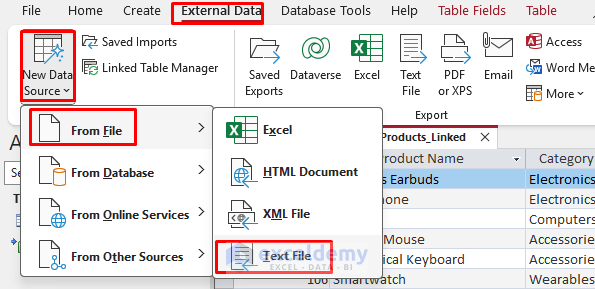
- Go to the External Data tab >> select New Data Source >> select From File >> select Excel.

Step 2: Select Your File
- In the Get External Data – Excel Spreadsheet dialog box, click Browse to select your Excel file.
- Locate your Products.xlsx file.

- Choose one of the following options:
- Import the source data into a new table in the current database (creates a copy of the data).
- Append a copy of the records to an existing table (adds data to an existing table).
- Click OK to proceed.

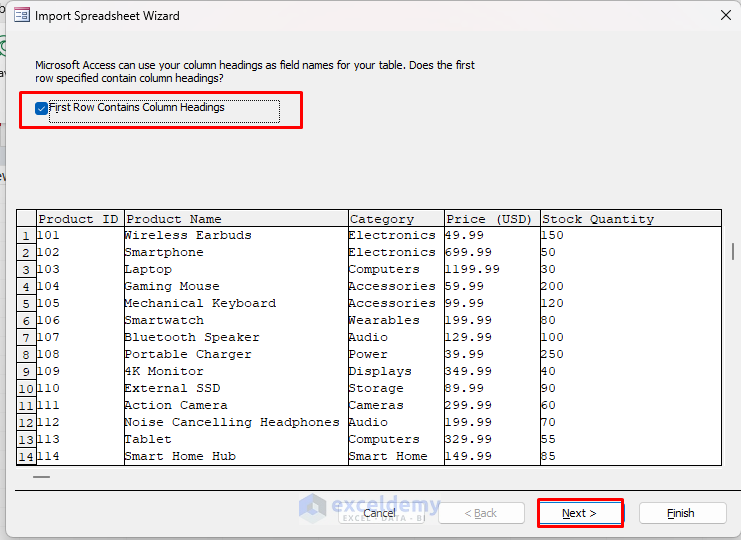
Step 3: Select Sheet and Set Header Options
- Select the worksheet containing your data.
- Check First Row Contains Column Headings.
- Click Next.
Step 4: Field Options
- Review each field’s data type:
- Product ID: Select Short Text.
- Product Name: Keep as Short Text.
- Category: Keep as Short Text.
- Price (USD): Set as Currency.
- Stock Quantity: Select Integer.
- Click Next.

Step 5: Choose the Primary Key
- Select Choose my own primary key.
- Select Product ID from the dropdown.
- Click Next.

Step 6: Name and Finish
- Name your table Product_Table.
- Click Finish.

- On the final dialog, you can select Save import steps and name it Import-Products.
- Click Save Import.

- Or click Close on the save import steps dialog box.
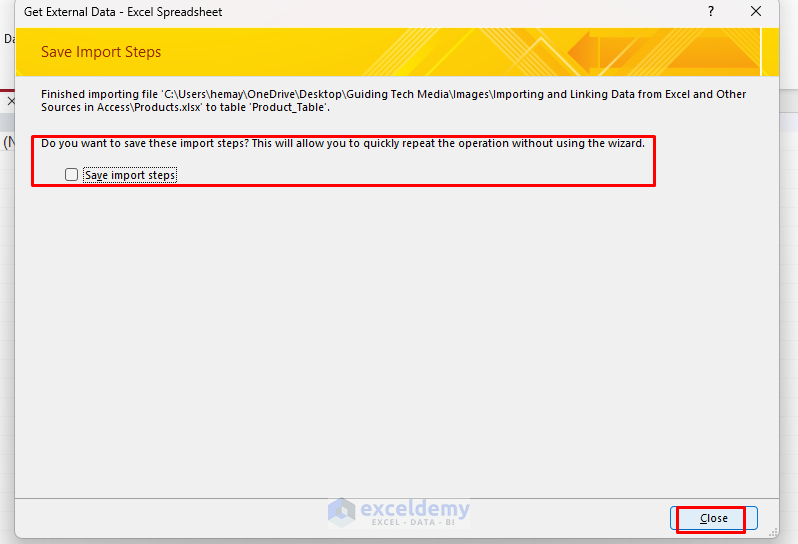
Output:

Linking to Excel Data
Let’s create a linked table with the same Excel file:
Step 1: Start Link Wizard
- Go to the External Data tab >> select New Data Source >> select From File >> select Excel.

Step 2: Choose the Link Option
- In the Get External Data – Excel Spreadsheet dialog box >> click Browse to select your Excel file.
- Locate your Products.xlsx file.
- Select Link to the data source by creating a linked table.
- Click OK.

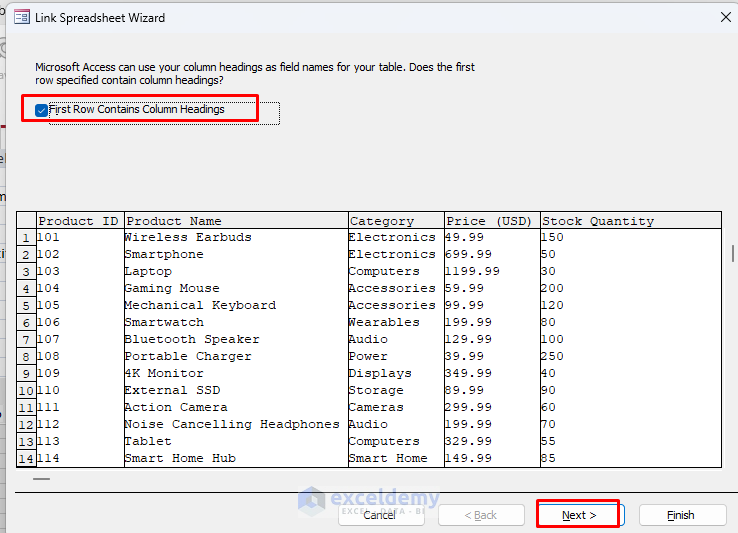
Step 3: Configure Link
- Select the worksheet.
- Ensure First Row Contains Column Headings is checked.
- Click Next.
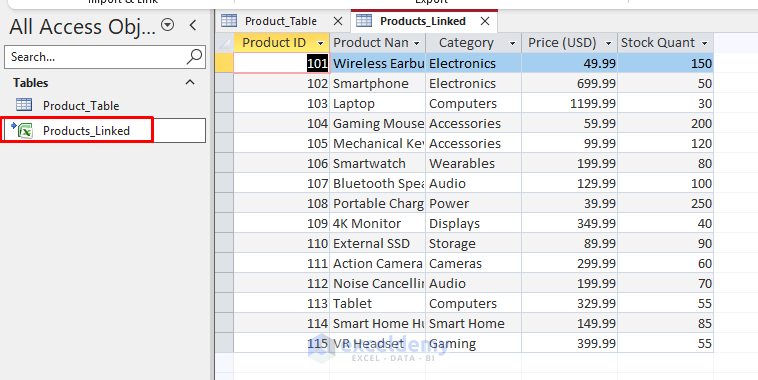
Step 4: Name and Finish
- Name the linked table Products_Linked.
- Click Finish.

- A notification will appear stating Finished Linking Table.
- Click OK.

Output:
Step 5: Verify the Linking
If your Excel file changes, refresh the linked table.
- Add, Delete, or Update any value in the Excel file.

- Click Refresh from the Home tab or Re-open the table in Access.
- The linked table will be updated automatically.

Refreshing Linked Data:
- Right-click Products_Linked in Navigation Pane.
- Select Linked Table Manager.
- Check the box next to the Data Source Name.
- Click Refresh.

Importing from Other Database Formats
Importing From CSV/Text Files
- Go to the External Data tab >> select New Data Source >> select From File >> select Text File.
- Browse and select the CSV file.
- Locate the Customers Details.csv file.
- Choose to import or link the file.
- Select Import the source data into a new table in the current database.

- If importing, define delimiter settings (comma, tab, etc.).
- Select the Delimited option >> click Next.

- Check Comma as delimiter.
- Select First Row Contains Field Names >> click Next.

- Review data types for each field >> click Next.
- Select Choose my own primary key >> select CustomerID.
- Click Next.
- Name the table Customers Details.
- Click Finish >> click Close.

Importing From Another Access Database
- Go to the External Data tab >> select New Data Source >> select From File >> select Access.
- Browse the source database.
- Choose the import or link option.
- Select tables to import.
- Click OK to complete the process.
Importing From Other Databases (SQL Server, MySQL, etc.)
- Go to the External Data tab >> select New Data Source >> select From Database.
- Select the database type (e.g., SQL Server).
- Enter connection details (server name, database, authentication method).
- Choose import link tables.
- Click OK to complete the process.
Importing From Other Sources
- Go to the External Data tab >> select New Data Source >> select From File >> select ODBC Database.
- Choose import or link option.
- Select data source or create a new connection.
- Follow the wizard to complete the process.
Troubleshooting Common Issues
- Data type mismatches: Ensure compatible types between source and Access.
- Missing headers: Always use column headings in source files.
- Broken links: Use Linked Table Manager when files move.
- Date format issues: Standardize date formats in source data.
Conclusion
Importing and linking data in Microsoft Access allows users to manage data efficiently while maintaining flexibility. Importing creates a static copy of the data while linking maintains a dynamic connection with the source. By following these simple steps, you can integrate Excel, CSV, and other database sources into Access, improving your data management capabilities. Start with these basics, and as you become more comfortable, you can explore more advanced features and complex data relationships.
Get FREE Advanced Excel Exercises with Solutions!
