Method 1 – Using Copy and Paste Commands
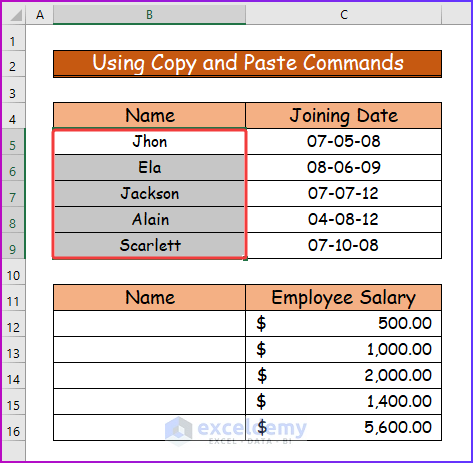
Step 1:
- Select the cell range B5:B9, as I want to copy the employees’ names rather than write them again.
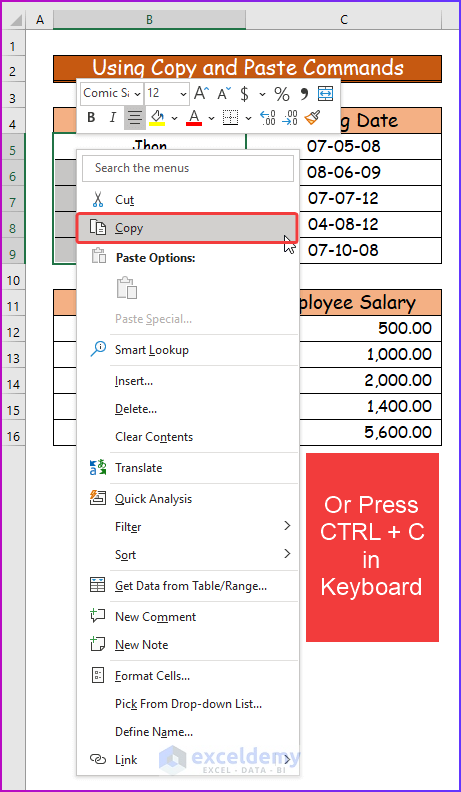
Step 2:
- Right-click on the mouse after selecting the cell range and then choose Copy from the context menu.
- You can press the keyboard shortcut CTRL + C to copy the cell range.
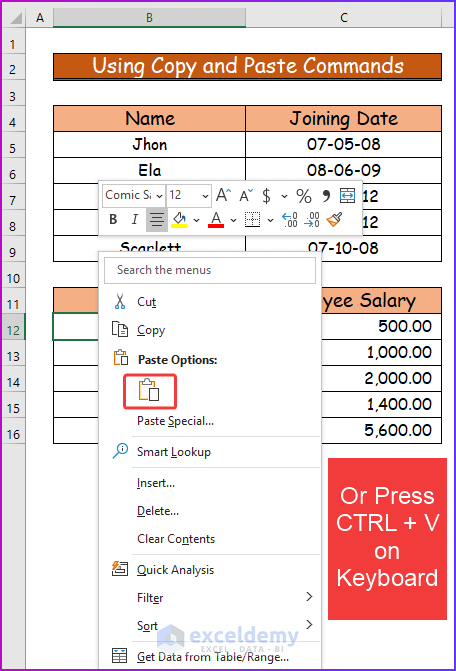
Step 3:
- Select a cell from the destination cell range and then again right-click on the mouse and select the Paste icon like the following image.
- Press CTRL +V on your keyboard to do the same.
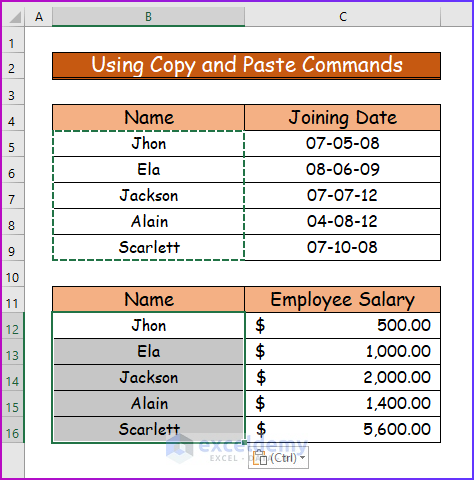
Step 4:
- Find the copied data in cell range B12:B16.
Notes:
- If you want to move cells in Excel with a keyboard and use shortcuts, then select any cell with data, then press CTRL + X, thirdly with the help of the arrow keys of the keyboard go to the desired location and press CTRL + V.
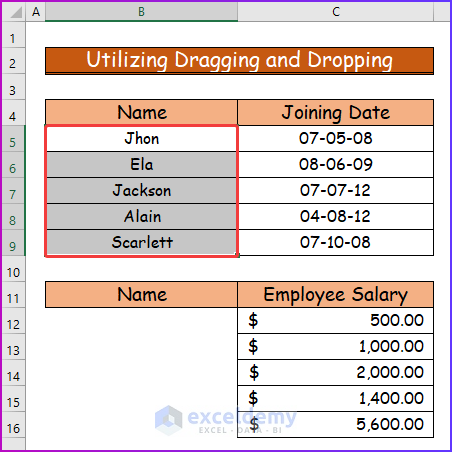
Methods 2 – Utilizing Dragging and Dropping
Step 1:
- Select the cell range (B5:B9) for shifting.
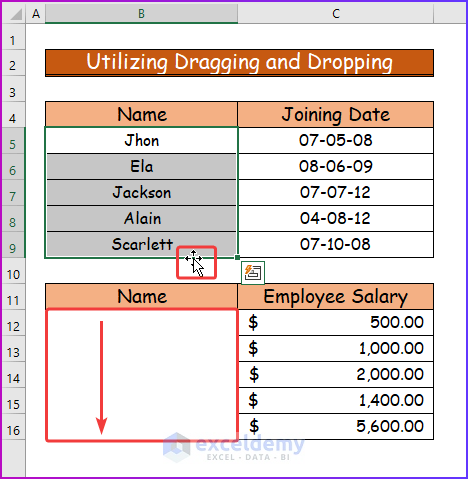
Step 2:
- Move your mouse to the border of any side of the selected cell range, and you will find your mouse with a double cross arrow like the following image.
- Drag the mouse icon to the desired cell location and drop it there.
Step 3:
- Fnd the dragged cell range in the destination.
- Follow this method to shift any cells in an up, down or sideward positions.

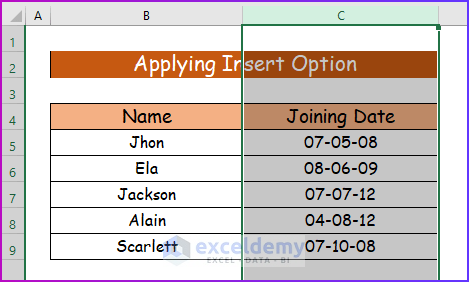
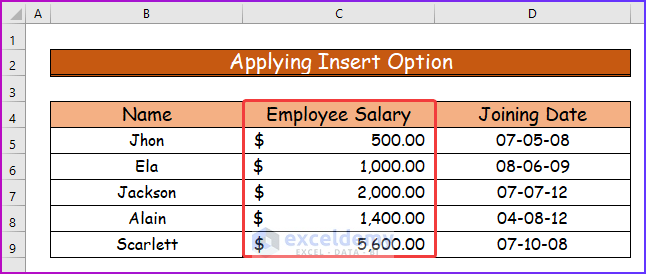
Method 3 – Applying Insert Option to Shift Cells in Excel
Step 1:
- Show you the process to shift an entire column.
- Select the desired column header at the top of the data set in the worksheet.
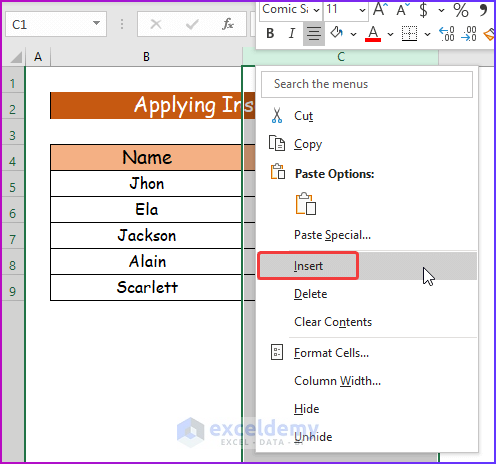
Step 2:
- Right-click on the mouse and select Insert.
Step 3:
- Shift the existing column to the right and create a new one.
- Fill up that column with the required data.
Step 4:
- Select the desired row header on the right side of the data set to shift rows in Excel.
- Again right-click on the mouse and select Insert.
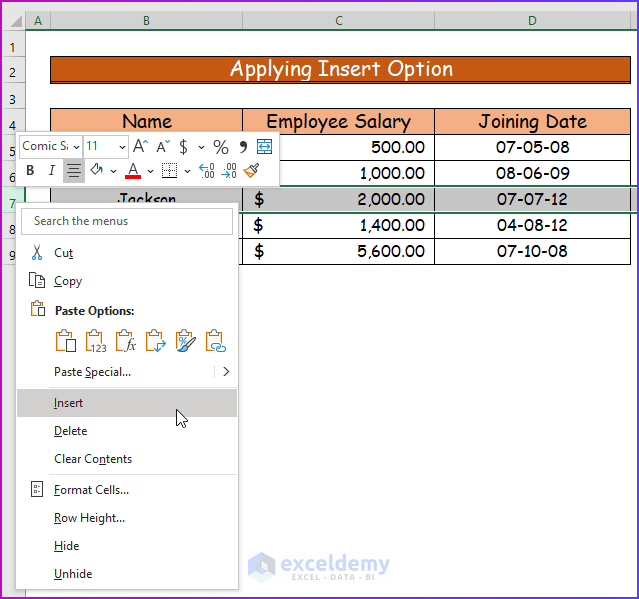
Step 5:
- Consequently, you will see the newly created row at row number 7.
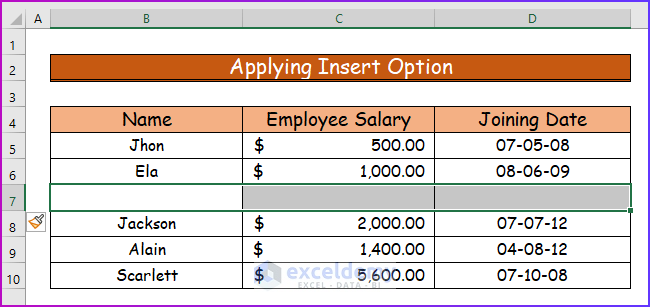
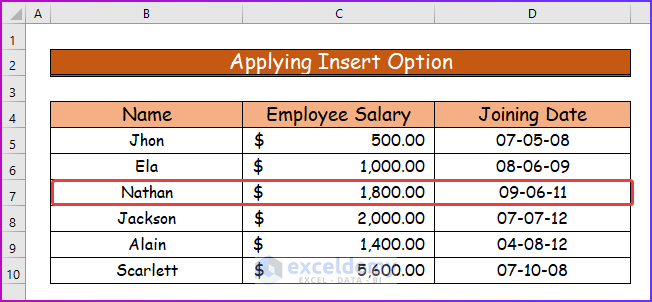
Step 6:
- Fill up the newly created row with the necessary data.
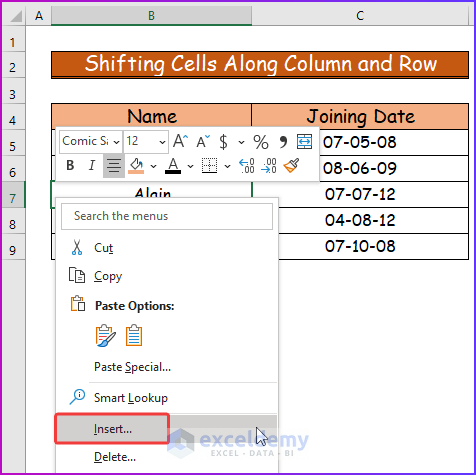
Method 4 – Shifting Cells Along Column and Row
Step 1:
- Select any cell from the data set and right-click on the mouse.
- From the context menu, choose the Insert command.
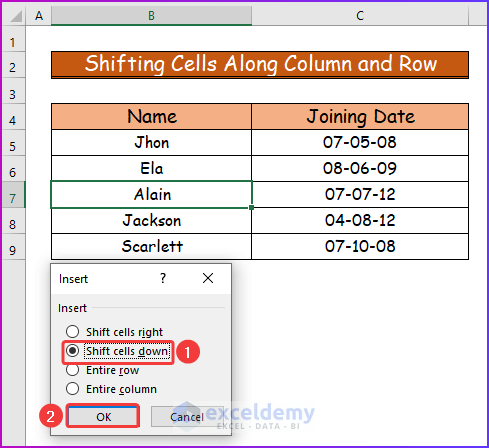
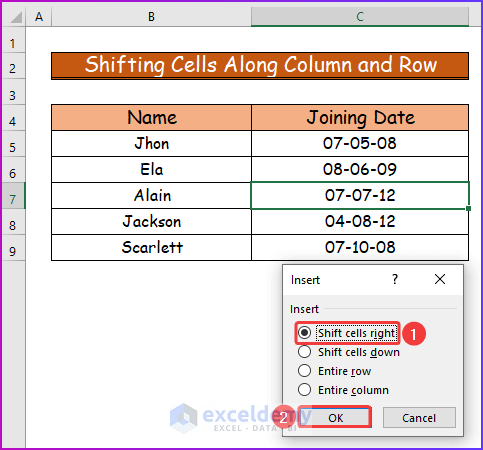
Step 2:
- Shift cells along the row, choose Shift cells down from the Insert dialog box.
- Press OK.
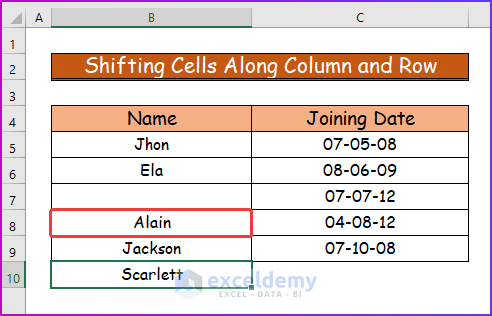
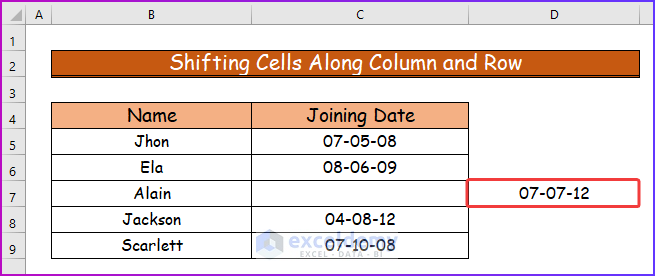
Step 3:
- See the selected cells have been shifted along the row by one row.
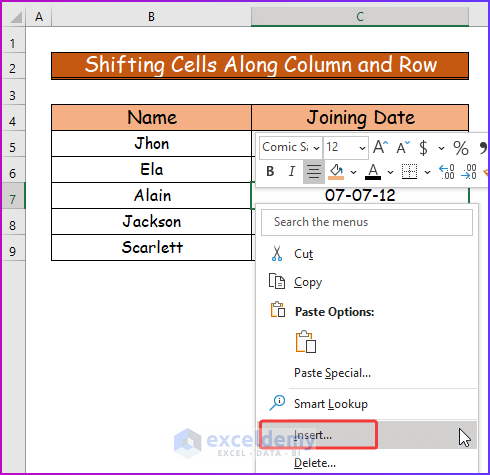
Step 4:
- To shift the cell along the column, select any cell from the data set.
- Choose Insert from the context menu after right-clicking on the mouse.
Step 5:
- Select the Shift cells right command from the Insert dialog box.
- Press OK.
Step 6:
- This will shift the cells along the column by one column.
Method 5 – Applying VBA to Shift Cells in Excel
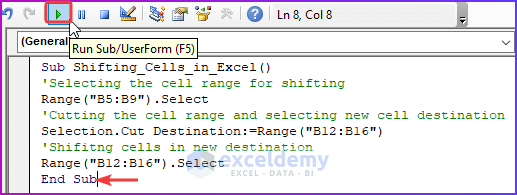
Step 1:
- Shift the value of the cell range B5:B9 to the cell range B12:B6 through VBA.
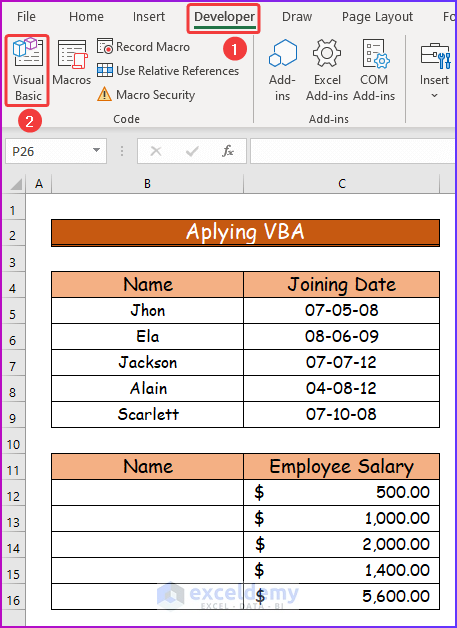
- Go to the Developer tab and select Visual Basic.
Step 2:
- See the VBA window after the previous step.
- Fom the Insert tab use Module.

Step 3:
- Copy the following VBA code and paste it into the module.
Sub Shifting_Cells_in_Excel()
'Selecting the cell range for shifting
Range("B5:B9").Select
'Cutting the cell range and selecting new cell destination
Selection.Cut Destination:=Range("B12:B16")
'Shifting cells in new destination
Range("B12:B16").Select
End Sub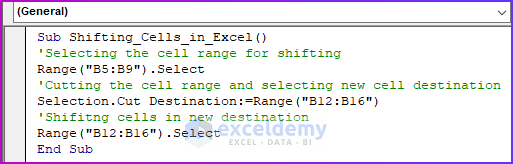
VBA Breakdown
- Set the name of the sub-procedure.
Sub Shifting_Cells_in_Excel()- Select the cell range for shifting.
Range("B5:B9").Select- Cut the selected cell range and paste them into the desired cell range location.
Selection.Cut Destination:=Range("B12:B16")
Range("B12:B16").Select
Step 4:
- Save the code in the module.
- Keeping the cursor in the module, press F5 or the Play button.
Step 5:
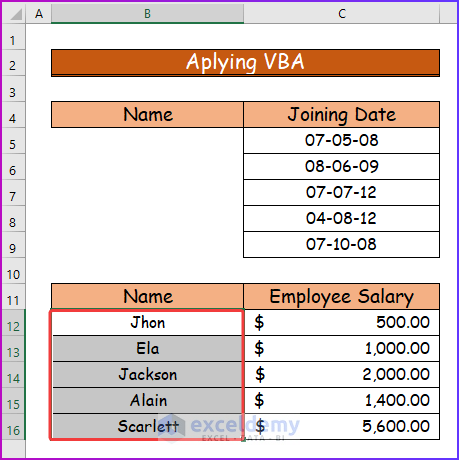
- Find the cell range in the desired destination after playing the code.
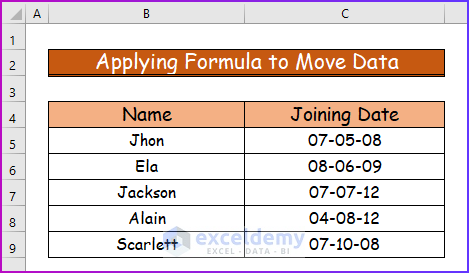
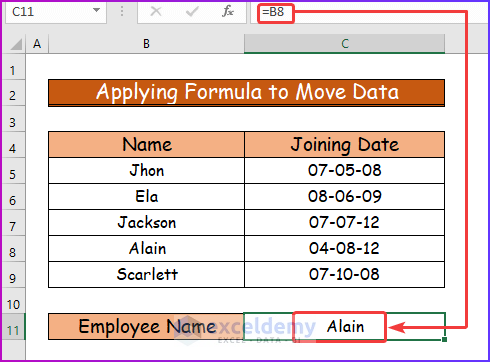
Applying Formula to Move Data from One Cell to Another
Step 1:
- Take the following data set to perform the procedure.
- Apply a formula to move the employee name.
Step 2:
- To do that, write the following formula in cell C11 to copy the data of cell B8.
=B8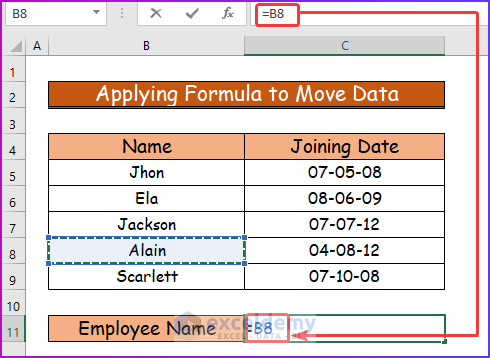
Step 3:
- After pressing Enter, it will show the same data as cell B8.
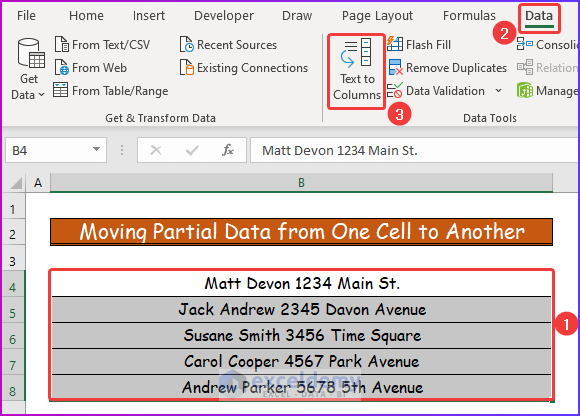
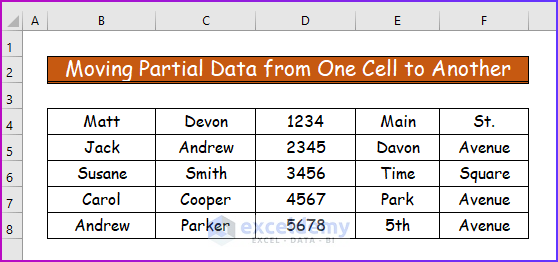
Easy Way to Move Partial Data from One Cell to Another in Excel
Step 1:
- Look at the following data set, where each cell contains more than one value.
- I will demonstrate the way to move partial data from these cells.
- To do that, select the cell range B4:B8 and then go to the Data tab of the ribbon.
- From the Data Tools group select Text to Columns.
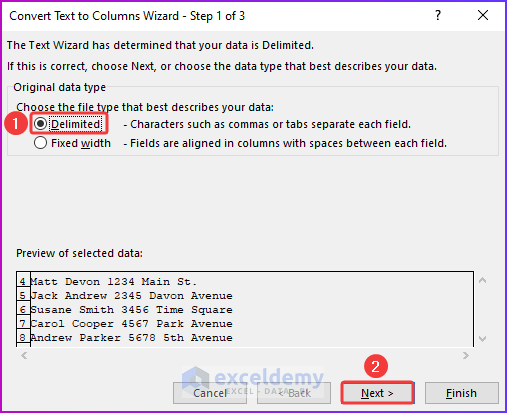
Step 2:
- See the Convert Text to Columns Wizard dialog box with steps 1 to 3.
- In Step 1 of the dialog box, firstly, choose Delimited and then Next.
Step 3:
- In the Step 2 dialog box, select Space to adjust them in different cells.
- Press Next.

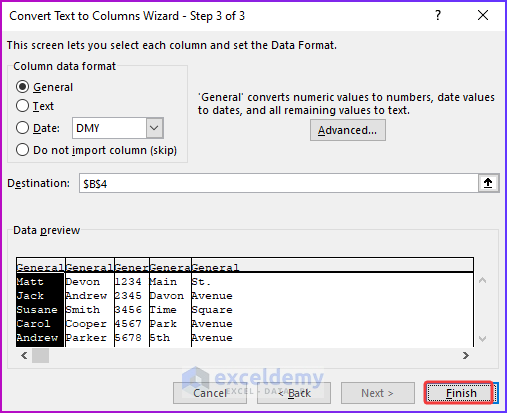
Step 4:
- In Step 3 of the dialog box press Finish.
Step 5:
- After performing all the steps, you will find the values of the cells separated in various cells.
Download Practice Workbook
You can download the free Excel workbook here and practice on your own.
Further Readings
- How to Lock a Group of Cells in Excel (7 Different Methods)
- Select All Cells with Data in a Column in Excel (5 Methods+Shortcuts)
- How to Move Cells Down in Excel (7 Methods)
- Multiple Excel Cells Are Selected with One Click (4 Causes+Solutions)

