While working in Excel, we often have to rename a sheet. Properly named and organized worksheets are important for the look of the spreadsheet. For those who are lazy like me, this article will be very helpful for them. Because I will show you how to rename a sheet in Excel without using a mouse. Microsoft Excel offers you a keyboard shortcut and Visual Basic Application (VBA) helps you to rename a sheet without using a mouse. This is an easy and time-saving task as well.
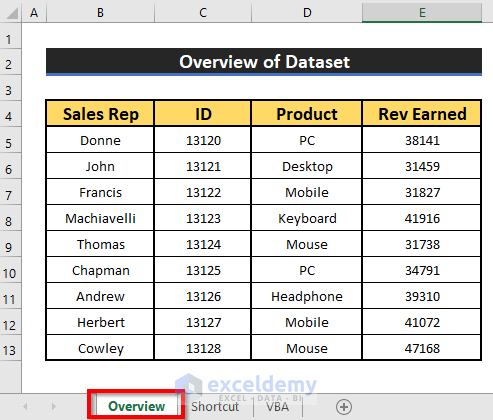
Let us have a dataset like this. We have a record of the revenue earned by the sales representatives of XYZ group. Our Excel workbook contains several sheets. We will rename those sheets as we want, using keyboard shortcuts and Excel VBA code as well. Here’s an overview of the dataset for today’s task.
1. Applying Keyboard Shortcuts to Rename Sheet Without Using Mouse
In this section, we will apply the keyboard shortcuts to rename a sheet without using a mouse in Excel. We can easily rename a sheet without using a mouse. We will change a sheet name from “Shortcut” to “Keyboard Shortcut“. Let’s follow the instructions below to learn!
Steps:
- First of all, open an Excel Hence, press Alt + H + O + R one after one on your keyboard.

- As a result, the sheet’s name will be selected. Hence, you can change the sheet’s name as you want. We changed it from Shortcut to Keyboard Shortcut.

- Finally, you will be able to rename a sheet without using a mouse which been given in the below screenshot.

2. Running Excel VBA Code to Rename Sheet Without Using Mouse
Now I’ll show you how to rename all sheets without using a mouse in Excel by using a simple VBA code. It’s very helpful for some particular moments. From our dataset, we will rename all sheets without using a mouse in Excel. Let’s follow the instructions below to learn!
Step 1:
- First of all, open a Module, to do that, firstly, from your Developer tab, go to,
Developer → Visual Basic

- After clicking on the Visual Basic ribbon, a window named Microsoft Visual Basic for Applications – Rename a Sheet will instantly appear in front of you. From that window, we will insert a module for applying our VBA code. To do that, go to,
Insert → Module

Step 2:
- Hence, the Rename a Sheet module pops up. In the Rename a Sheet module, write down the below VBA
Sub Rename_Sheets()
For R = 1 To Worksheets.Count
   Sheets(R).Name = UCase(Sheets(R).Name)
Next R
End Sub
- Hence, run the VBA To do that, go to,
Run → Run Sub/UserForm
- You can also do that by pressing the F5 Function key.

- After running the VBA Code, go back to your worksheet and you will be able to Rename Sheets without using the mouse which has been given in the below screenshot.

Rename a Worksheet in Excel
In this section, you can rename a sheet using the mouse. We will rename a sheet name from Mouse to Sales. Let’s follow the instructions below to learn!
Steps:
- First of all, right-click on the mouse.
- As a result, a window will appear in front of you. From that window, select the Rename option.

- After that, the sheet’s name will be selected. Hence, you can rename the sheet’s name as you want. We changed it from Mouse to Sales.

Read More: How to Rename Multiple Sheets in Excel
Bottom Line
👉 You can pop up the Microsoft Visual Basic for Applications window by pressing Alt + F11 simultaneously.
👉 If a Developer tab is not visible in your ribbon, you can make it visible. To do that, go to,
File → Option → Customize Ribbon
Download Practice Workbook
Download this practice workbook to exercise while you are reading this article.
Conclusion
I hope all of the suitable methods mentioned above to rename a sheet without using a mouse will now provoke you to apply them in your Excel spreadsheets with more productivity. You are most welcome to feel free to comment if you have any questions or queries.
<< Go Back to Rename Worksheet | Worksheets | Learn Excel
Get FREE Advanced Excel Exercises with Solutions!
