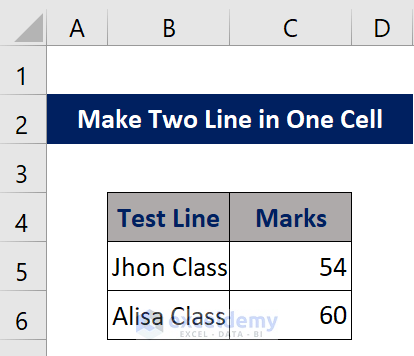
Dataset Overview
In our dataset, within the first column labeled Test Line, we encounter longer text that doesn’t fit neatly into individual cells. Let’s explore how to address this issue.
Method 1 – Insert Line Breaks
We can make two lines in Excel by inserting a line break. The process is explained below:
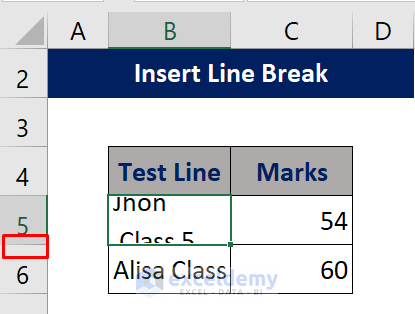
- Choose the cell where the complete text is not fully visible. For example, let’s say we’re working with Cell B5 in our dataset.
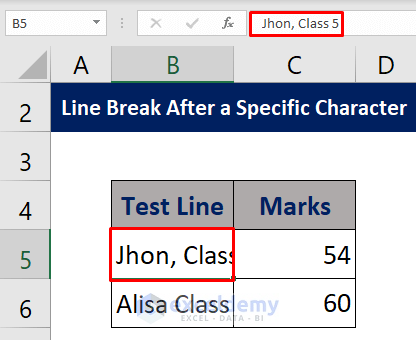
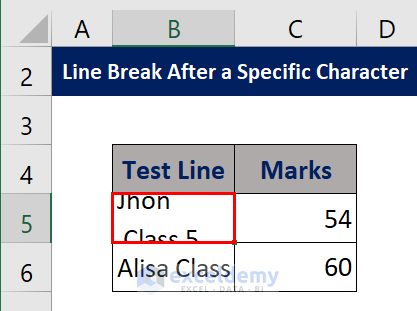
- In the formula bar, you might see something like John Class 5, but in the actual sheet, only John Class is displayed.

- Press Alt + Enter within the cell. This action adds a line break, allowing you to split the content into two lines.

- The two lines may not display correctly due to the limited cell height.
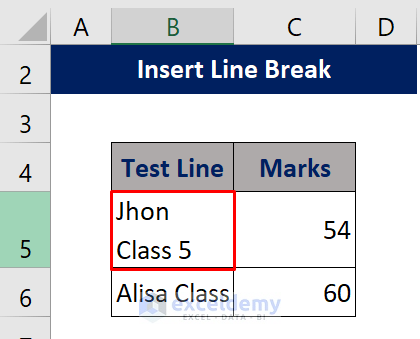
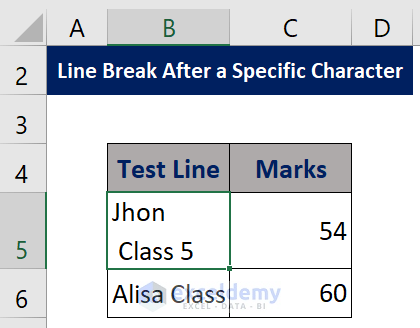
- Double-click the bottom bar of the row number corresponding to the cell (as shown in the image) to adjust the cell height.
- After adjusting the cell height, both lines should now be visible and properly formatted.
Adding More Lines: To add additional lines, simply press Alt + Enter whenever you need a new line within the same cell.
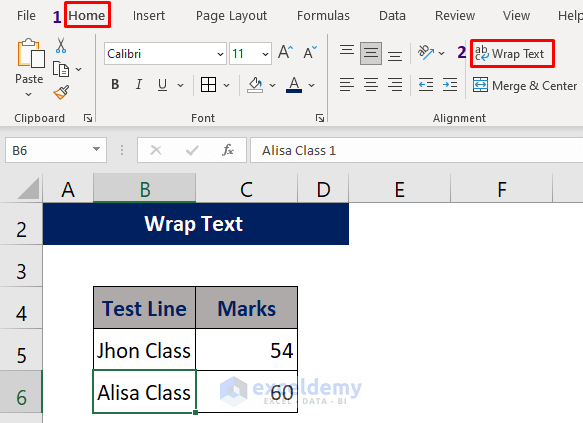
Method 2 – Using “Wrap Text” to Create Two Lines in a Single Excell Cell
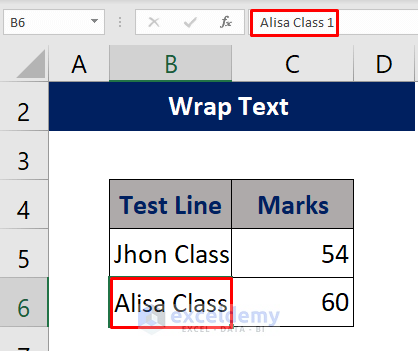
- Choose the cell where the complete text is not fully visible. For instance, let’s consider Cell B6 in our dataset.
- In the formula bar, you might see something like Alisa Class 1, but in the actual sheet, only Alisa Class is displayed.
- Navigate to the Home tab. From the group of commands, select Wrap Text.
- After applying the Wrap Text command, the cell will now display two lines. However, due to the fixed cell height, the lines may not show properly.
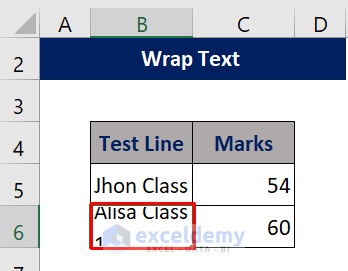
- Double-click the bottom bar of the corresponding row number (as shown in step 3 of the first method) to adjust the cell height. This ensures that both lines are visible and properly formatted.
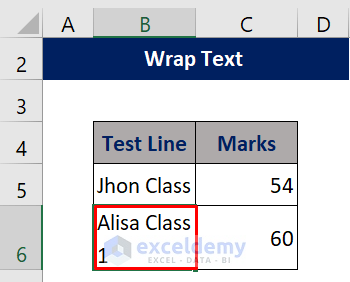
Desired Outcome: By following these steps, you’ll achieve the desired result of having two lines within a single cell.
Method 3 – Creating a Line Break After a Specific Character in Excel
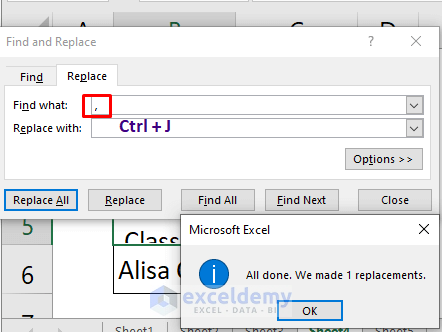
- Insert a comma (“,”) after John in Cell B5.
- Press Ctrl+H to open the Find and Replace window.

-
- In the Find what box, enter a comma (“,”).
- In the Replace with box, press Ctrl + J to represent a line break.
- Click Replace All.
- A pop-up will indicate how many replacements were made.
- Press OK.
- You’ll notice that a new line has been created, but the full sentence isn’t displayed.
- Adjust the row height as shown in the previous method to ensure proper visibility.
Desired Outcome: After following these steps, you’ll have a new line within the same cell, displaying the full text correctly.
Method 4 – Using Merge & Center to Create Two Lines in a Single Cell
- When the text doesn’t fit within a single cell (as seen in Cell B5), it extends beyond the cell boundaries.
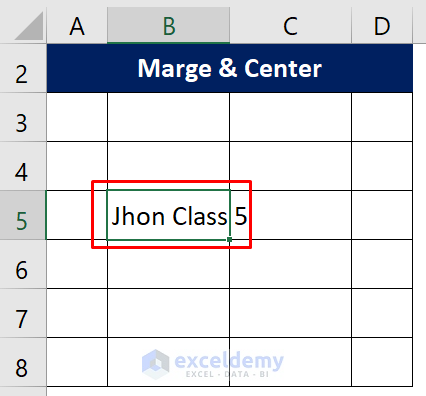
- Highlight both Cells B5 and B6.
- Go to the Home tab.
- Choose Merge & Center from the commands.
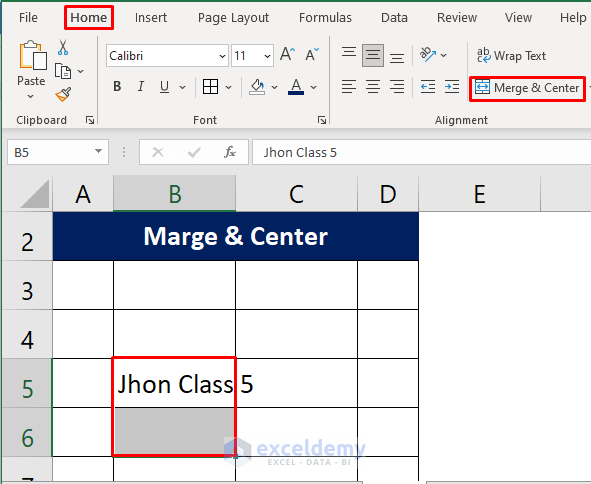
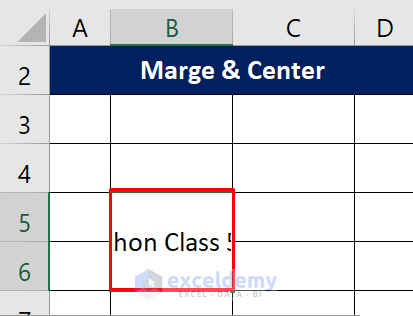
- After selecting Merge & Center, the cell will display the return value.
- Similar to the previous method, all words may not show properly due to fixed cell height.
- Select Cells B5 and B6.
- Go to the Home tab.
- Choose Wrap Text from the commands.
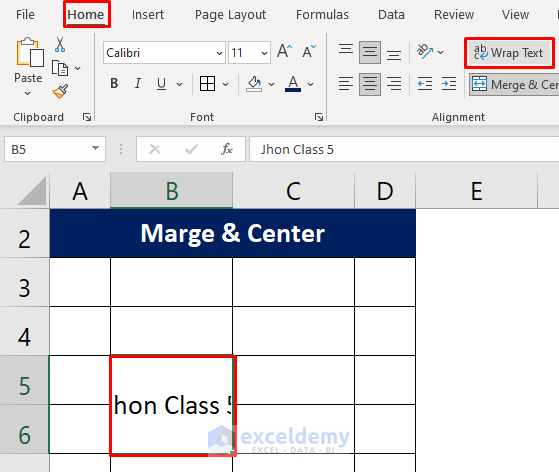
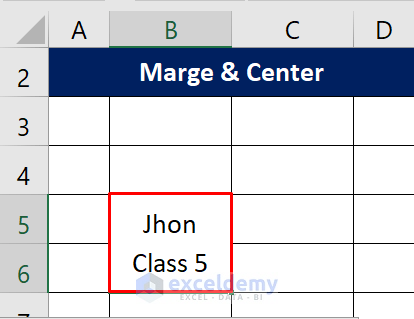
- By applying Wrap Text, you’ll achieve the desired result of having two lines within a single cell.
Download Practice Workbook
You can download the practice workbook from here:
Related Articles
- How to Enter within a Cell in Excel
- Excel: Inserts New Line in Cell Formula
- How to Add New Line with CONCATENATE Formula in Excel
- How to Put Multiple Lines in Excel Cell


should be renamed “How not to spell John” =)
Hello Sysfs,
Or maybe ‘Creative Ways to Misspell John’ . Though, to be fair, everyone needs a bit of variety in their name game—keeps things interesting! Who knows, maybe ‘Jhon’ or ‘Jonh’ is the next big trend in baby names!
Regards
ExcelDemy