Let’s first introduce our sample dataset, which contains text too long to fit inside the cell on one line.
Here are 2 ways to put extra lines in a cell, to display the contents of the cell more effectively.

Method 1 – Using ALT+ENTER Key
We can add lines inside a cell by inserting line breaks.
Steps:
- Click the cell where you want to insert extra lines, for example cell D5.
- Place the cursor at the point inside the text where you would like to add a new line.

- Press ALT+ENTER.
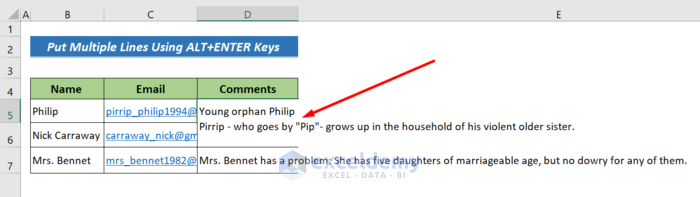
- A line break is added at the selected point in the text.
- Use ALT+ENTER to insert more line breaks into the text as desired.
Here is the result:

Read More: How to Enter within a Cell in Excel
Method 2 – Using the Wrap Text Feature
The Wrap Text feature is the easiest and most frequently used method to automatically add new lines in an Excel cell.
Steps:
- Select the cells containing the text you need to wrap, B5:D7 here.
- Click the Home tab on the top menu.
- In the Alignment section, click the Wrap Text button.
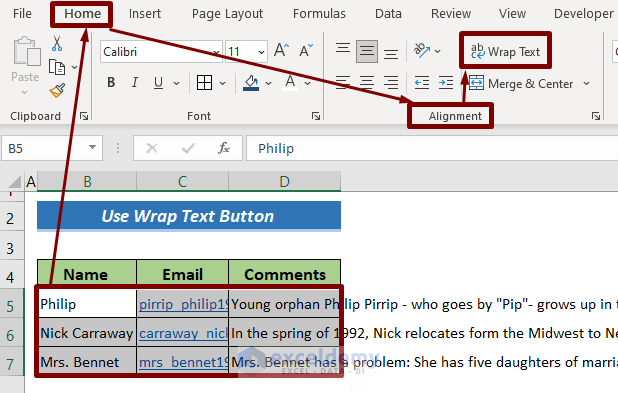
- To make the text visible within the wrapped cells, press the hotkeys Alt+H+O+A on your keyboard.
Here is the final output:

Read More: Excel: Inserts New Line in Cell Formula
Download Practice Workbook
Related Articles
<< Go Back to New Line | Text Formatting | Learn Excel
Get FREE Advanced Excel Exercises with Solutions!

Thank you for this helpful guide! I always struggled with formatting text in Excel cells, and your tips on using Alt + Enter and the wrap text feature made it so much easier. Can’t wait to implement these in my next project!
Hello,
You are most welcome. Thanks for your appreciation. Glad to hear that our article is helpful to you. Keep exploring Excel with ExcelDemy!
Regards
ExcelDemy