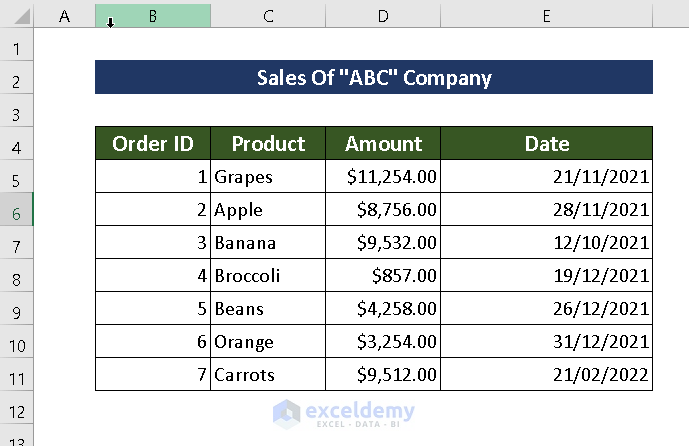
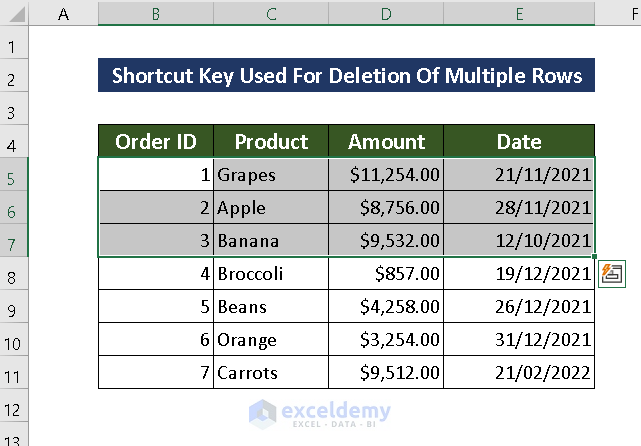
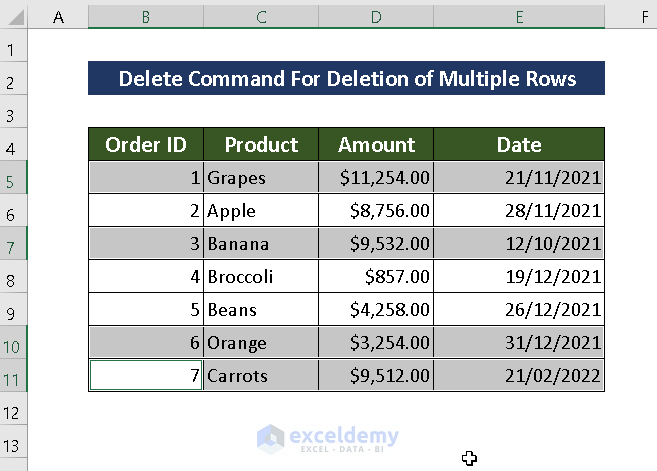
The dataset below, Sales of “ABC” Company, shows sales information for products on various dates. It has four columns: Order ID, Product, Amount, and Date.
Method 1 – Using the Context Menu
Steps:
- Highlight the rows by dragging the mouse over those we want to delete at once.
OR
- Hold CTRL and select the rows you want to Delete.

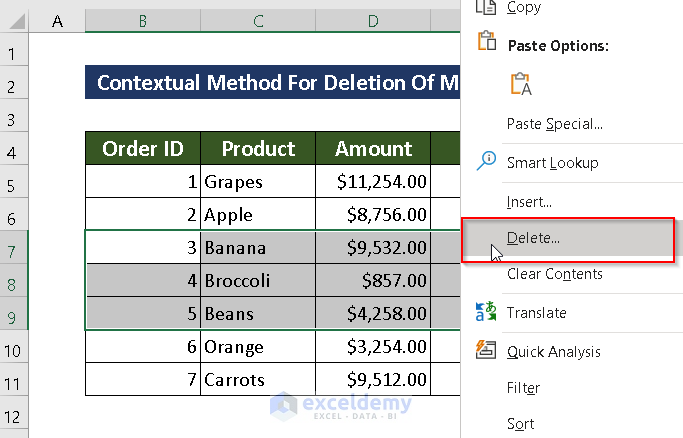
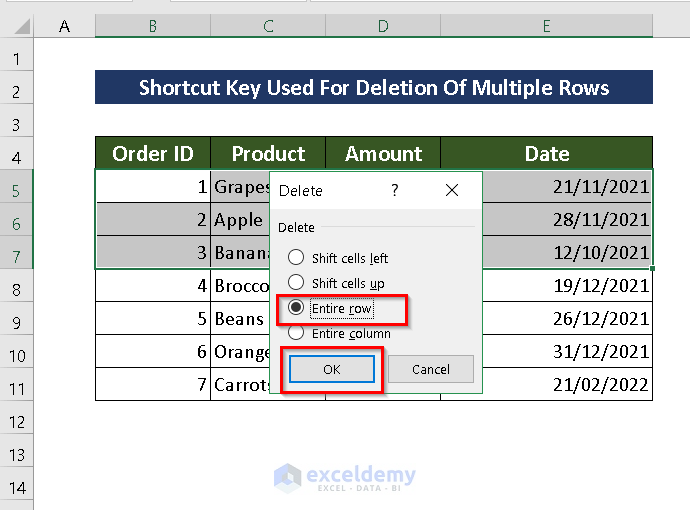
- Right-click on the selection to open the Context menu.
- Click Delete.
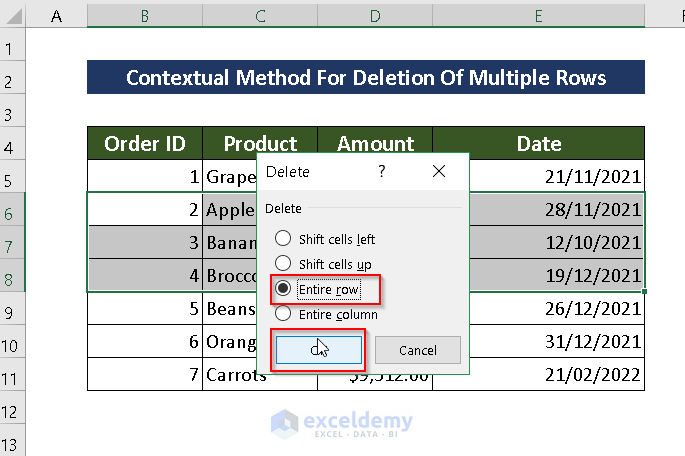
A dialog box of Delete will appear.
- Select the Entire row and click OK.
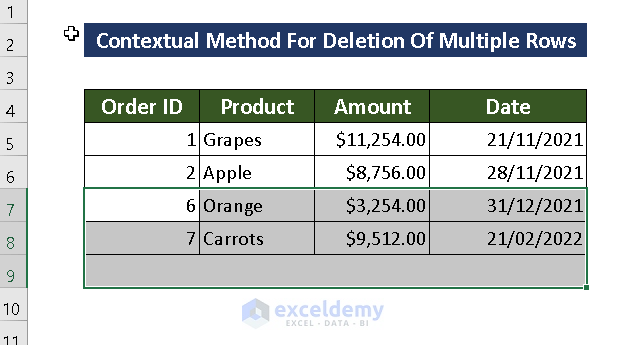
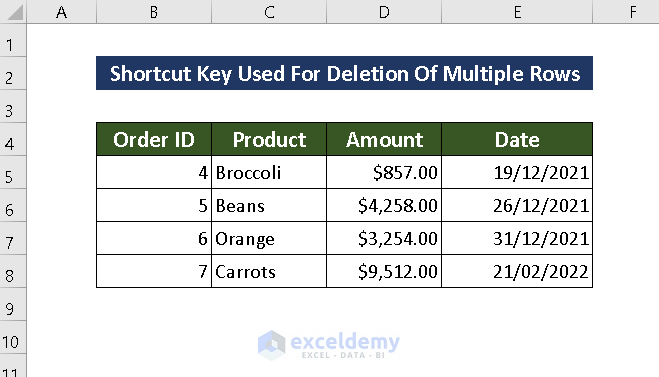
The result will look like the image below.
Method 2 – Using a Keyboard Shortcut
The shortcut is CTRL + Minus(-).
Steps:
- Select the required rows using the mouse and pull across or separately with the CTRL key.
- Hit the CTRL + Minus(-) buttons.
- A dialogue box for deletion will appear.
- Select the Entire row and press OK.
The result will look like the image below.
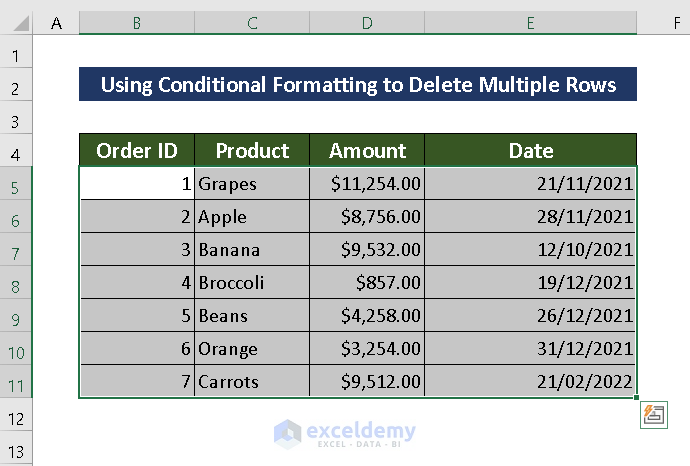
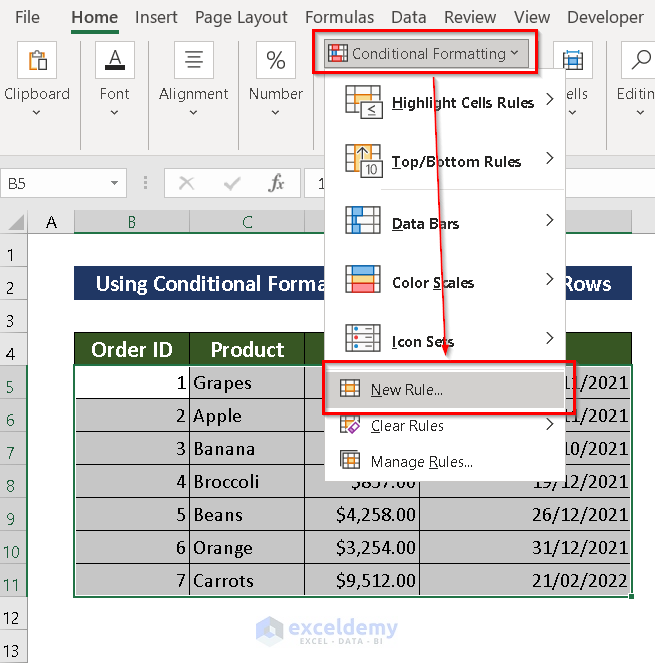
Method 3 – Applying Conditional Formatting
Steps:
- Select all the rows. (i.e., range B5 to E11)
- Open the Home tab >> from the Conditional Formatting >> select the New Rule option.
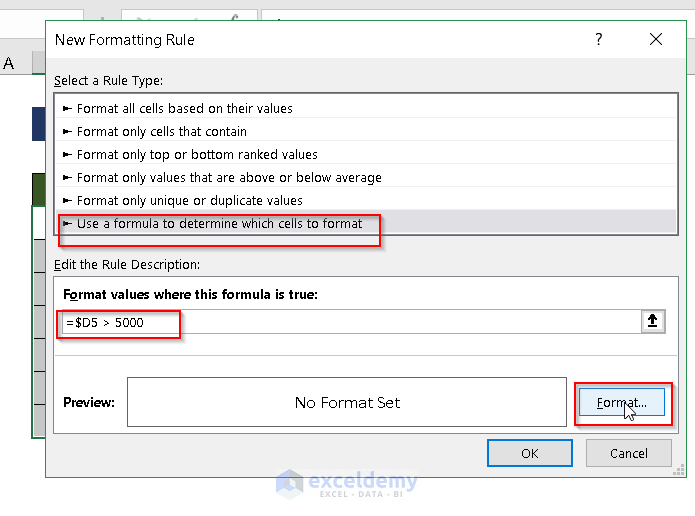
- From the Select a Rule Type box, select Use a formula to determine which cells to format.
- Enter the following formula in the Format values where this formula is true:
=$D5 > 5000Here, it will Highlight the values greater than 5000.
- Select Format.
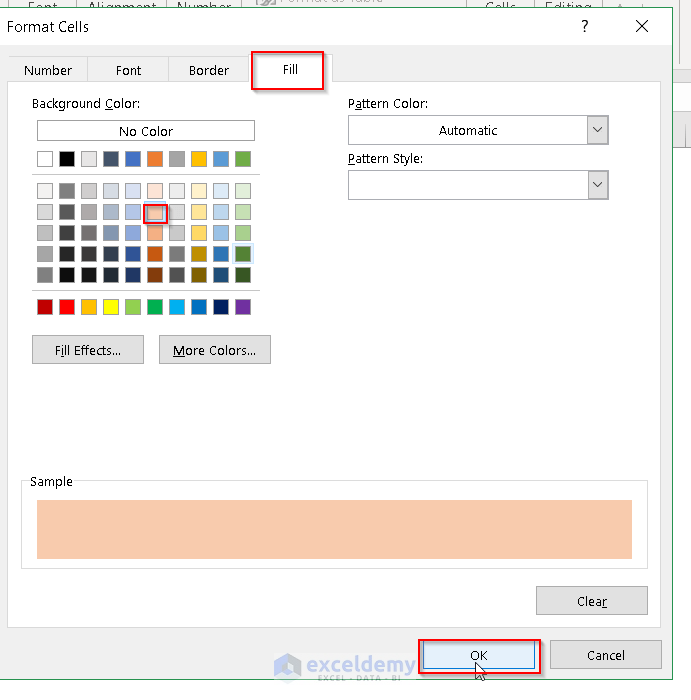
 A dialogue box named Format Cells will appear.
- Click on the Fill.
- Select a color of your choice.
- Press OK.
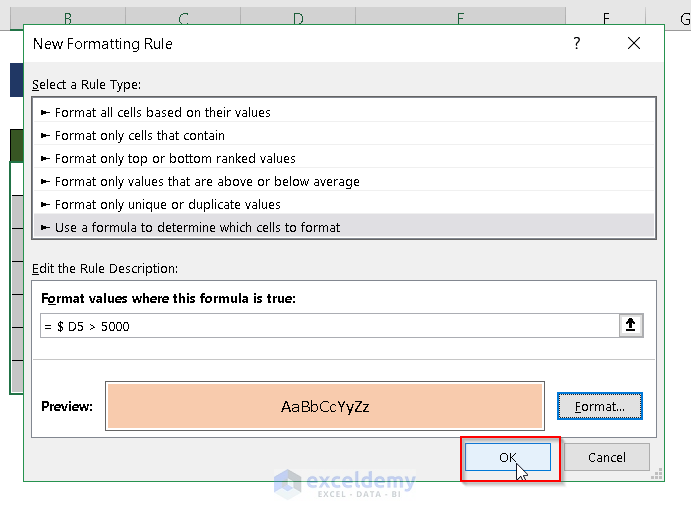
 A New Formatting Rule box will appear.
- Hit the OK button.
 You can now see the colored rows according to the condition.
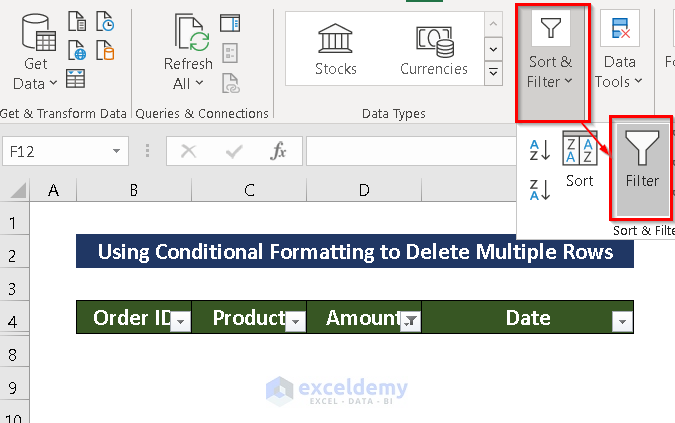
- Go to the Data option.
- Select Filter from the Sort & Filter.

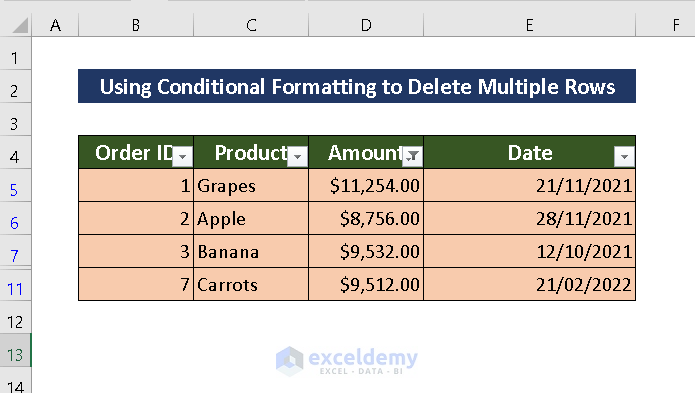
We will be able to see the Filtered data.
- Go to the column according to the condition and select the Filter.
- Select Filter by Cell Color and press OK.
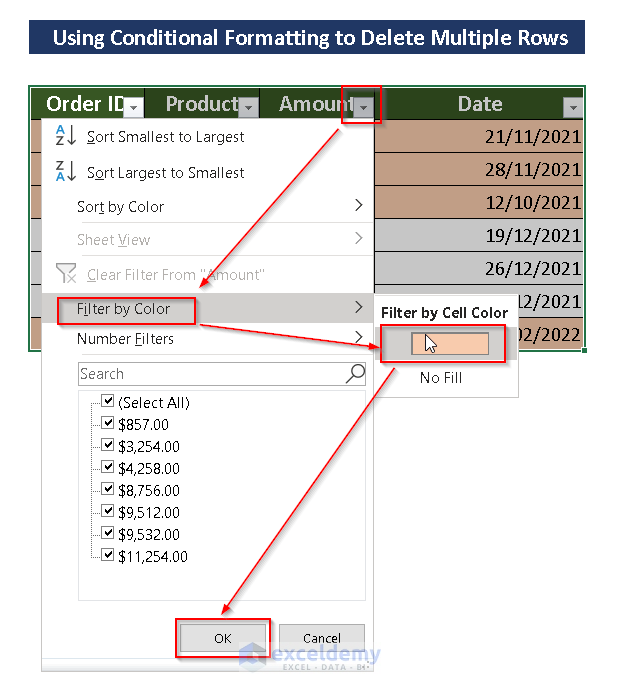
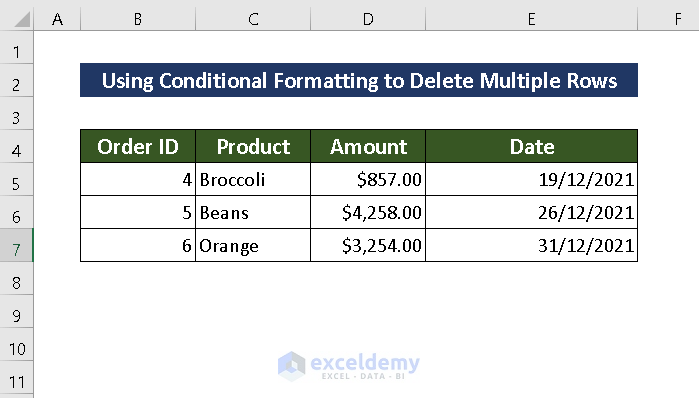
We will be able to see the Colored rows only.
- Select the rows that you want to delete (i.e., the range B5:E11).
- Right-click on the mouse and select Delete Row.
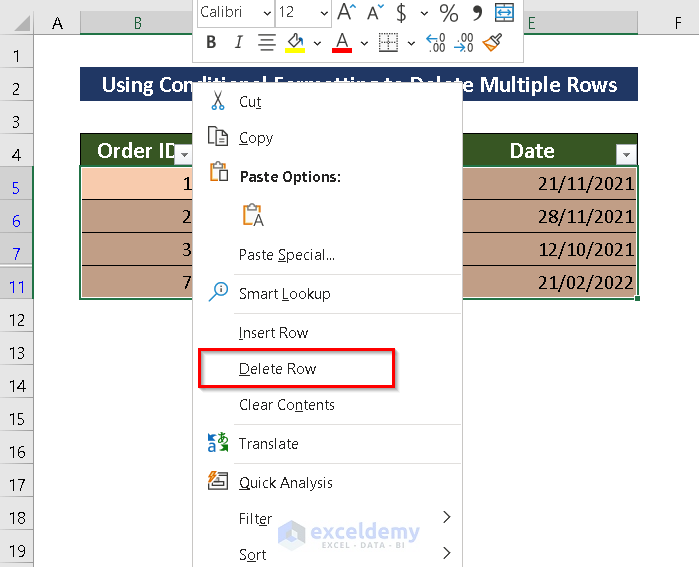
A warning message will appear.
- Press OK.
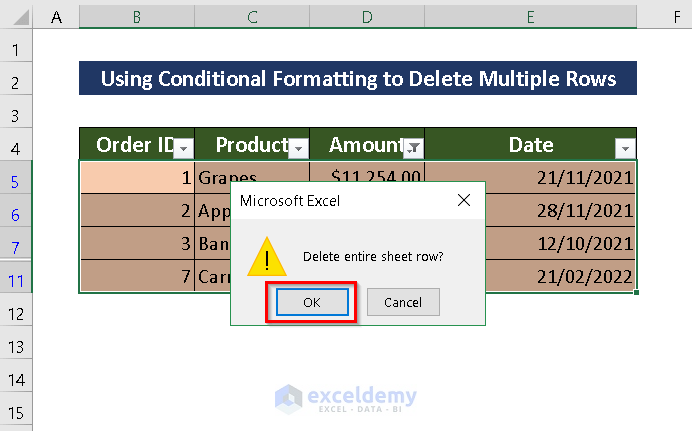
- The selected row will be deleted.
- Click on the Filter icon to remove Filter from the dataset.
You now have the desired result.
4. Using Excel VBA
Steps:
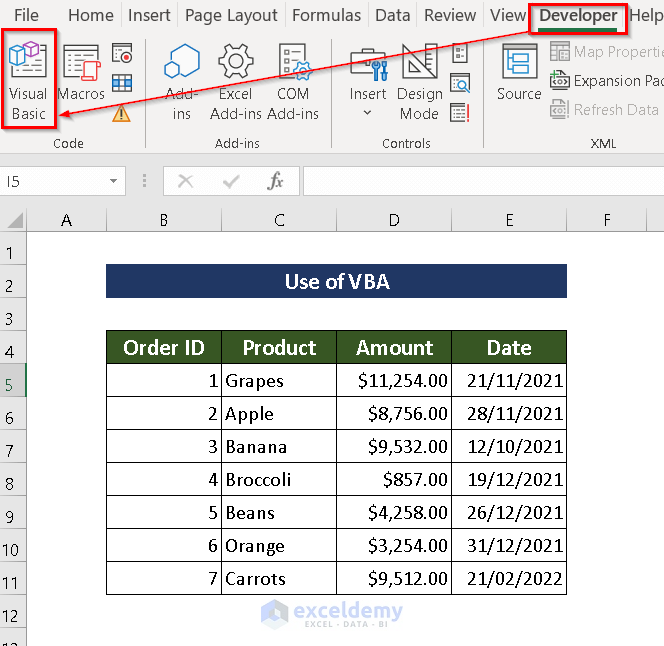
- Go to the Developer tab and select Visual Basic.
OR
- Press Alt + F11 .
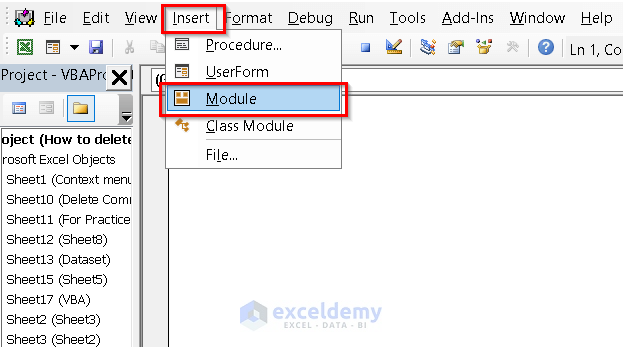
- From the Insert option, select Module.
- Enter the following code in the Module:
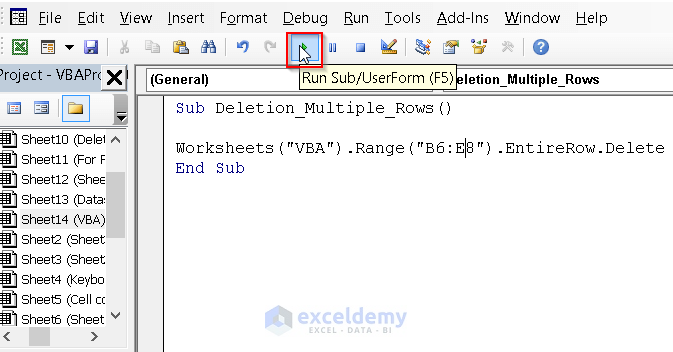
Sub Delete_Multiple_Rows()
Worksheets("VBA").Range("B6:E8").EntireRow.Delete
End Sub
- Here, I’ve created a Sub procedure Delete_Multiple_Rows, then used the Worksheets object to mention my sheet name.
- Next, I used the Range.EntireRow property to select the Entire row, then used the Delete method to delete multiple rows.
- Save the code.
- Press F5 or select Run Sub/UserForm (F5) to Run the code.
The Code will be applied. The results should look like the image below.

Method 5 – Applying Delete Command
Steps:
- Select the rows that need to be deleted by pressing the CTRL key and using the mouse simultaneously.
- Open the Home tab >> go to Cells >> from Delete >> select Delete Sheet Rows.
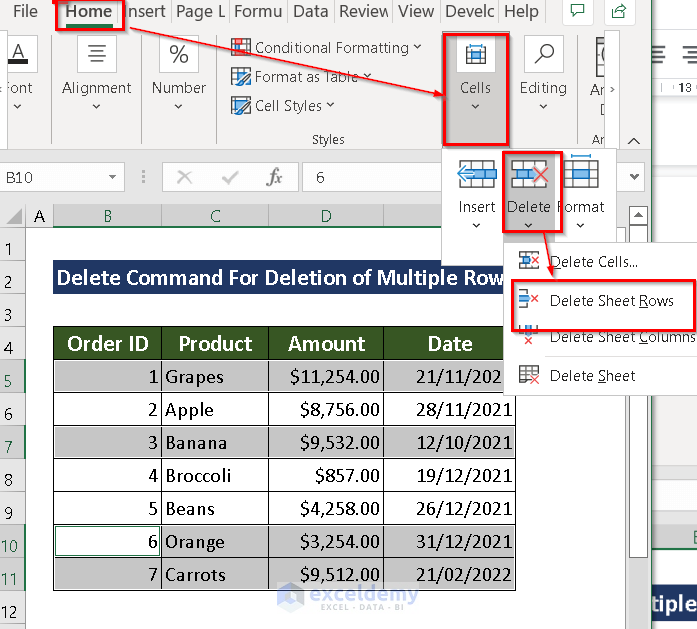
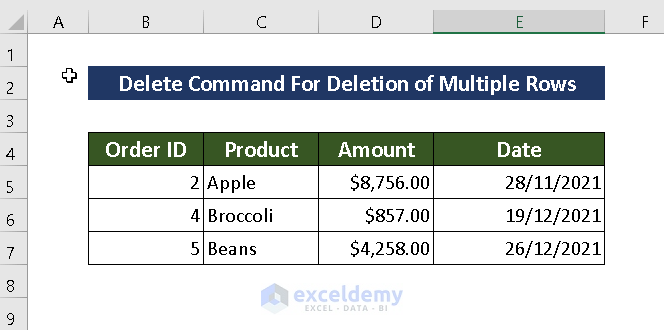
The selected rows will be deleted.
Download the Practice Workbook
Related Articles
<< Go Back to Delete Rows | Rows in Excel | Learn Excel
Get FREE Advanced Excel Exercises with Solutions!
