
Image by Editor
A table of contents (TOC) is an essential navigation tool for longer documents, making it easy for readers to find the information they need. Microsoft Word allows users to create automated Tables of Contents that update dynamically as the document changes. In this article, we will show how to create automated tables of contents in Word.
Step 1: Apply Heading Styles
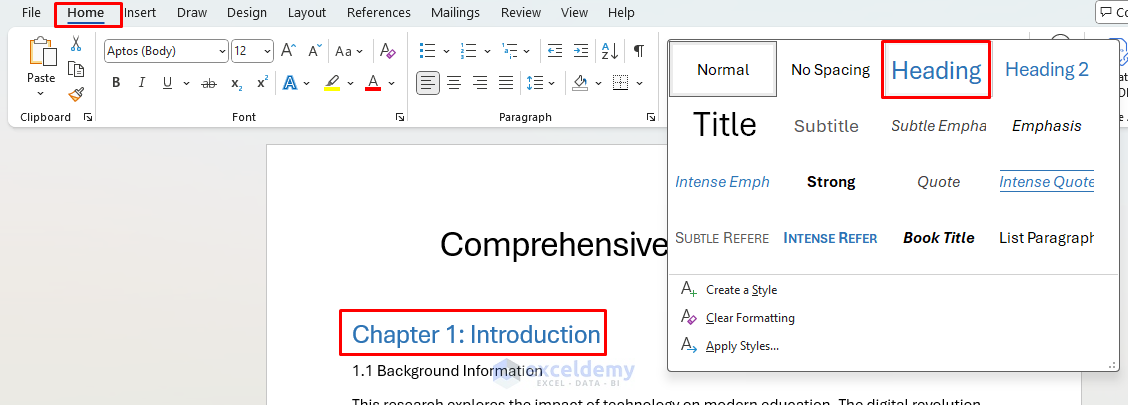
Heading styles are the foundation of an automated table of contents. Word uses these styles to identify which text should be included in your TOC and at what level.
- Select the text you want to appear in the TOC.
- Go to the Home tab >> from the Styles group >> select Heading 1, Heading 2, or Heading 3, depending on the hierarchy.
- Heading 1: Main sections or chapters.
- Heading 2: Subsections.
- Heading 3: Sub-subsections.
- And so on (Word supports up to Heading 9).
Formatted Document:

Modifying Heading Styles:
You can customize the appearance of heading styles to match your document’s design:
- Go to the Home tab >> from the Styles group >> select Headings.
- Right-click on the Heading style >> select Modify.
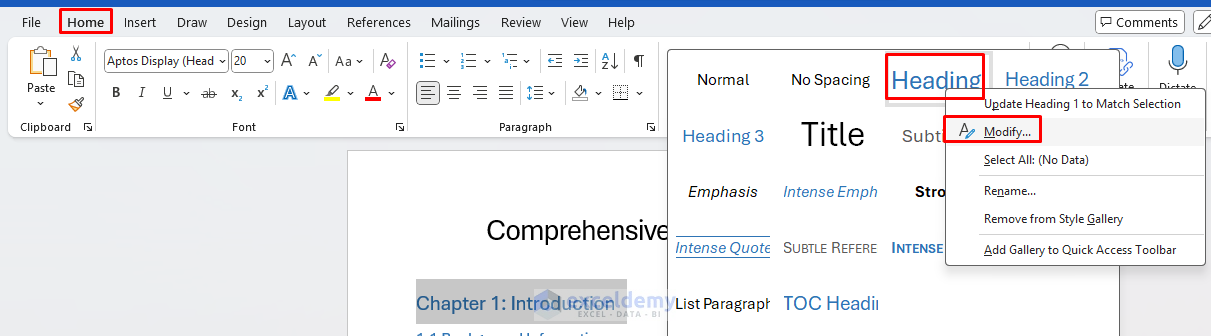
- Change the Formatting such as font, size, color, spacing, etc.
- Choose New documents based on this template if you want these changes to apply to future documents.
- Click OK to save your changes.
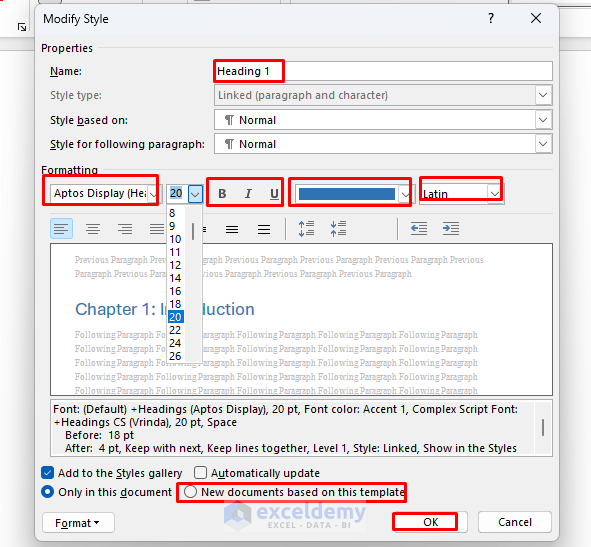
All text with that heading style will automatically update to reflect your changes.
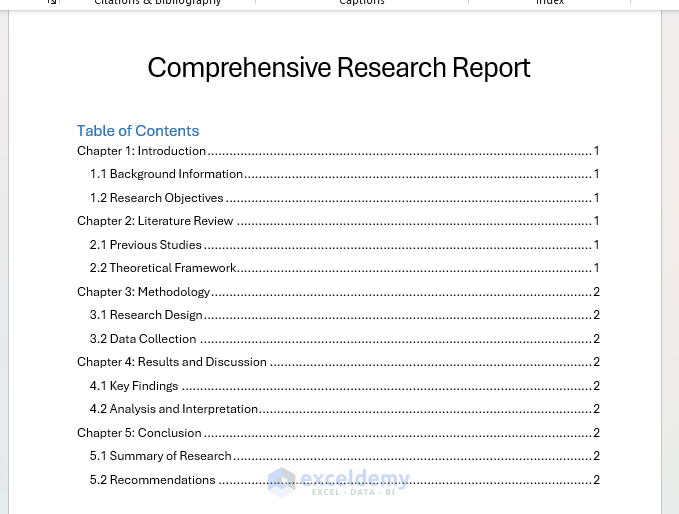
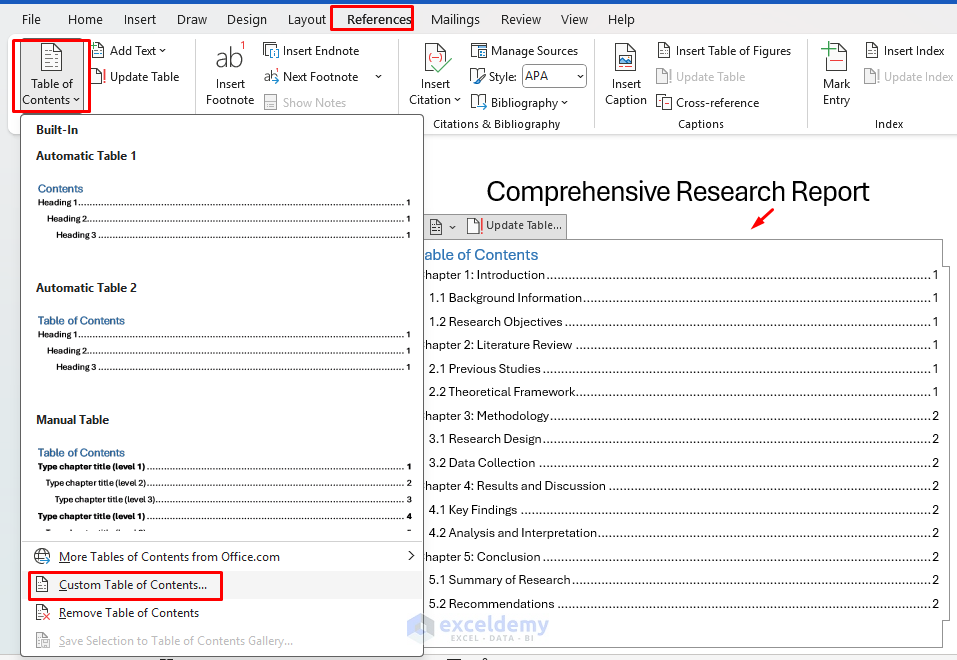
Step 2: Insert a Table of Contents
Once headings are applied, follow these steps to insert a TOC.
- Place your cursor where you want the TOC (usually at the beginning of the document).
- Go to the References tab >> from the Table of Contents group >> select Table of Contents.
- Choose from the built-in TOC style from the dropdown menu.
- Automatic Table 1 (includes the title “Contents”).
- Automatic Table 2 (includes the title “Table of Contents”).
- Manual Table (which you can customize from scratch).

- We selected Automatic Table 2 >> a TOC will appear in the selected place.
Step 3: Customize the Table of Contents
For greater control over your TOC, you can modify TOC formatting.
- Click on the TOC.
- Go to the References tab >> select Custom Table of Contents.
- In the dialog box, you can adjust formatting options.
- Show page numbers: Either show or hide page numbers in the TOC.
- Right align page numbers: Whether page numbers align at the right margin.
- Tab leader: The character that fills the space between the entry and its page number (dots, dashes, or none).
- Formats: Choose from built-in TOC formats (Template, Classic, Distinctive, Fancy, Modern, Formal, Simple).
- Show levels: Specify how many heading levels to include (1-9).
- Options: Assign TOC levels to specific styles.
- Modify: Customize the formatting of TOC entries.
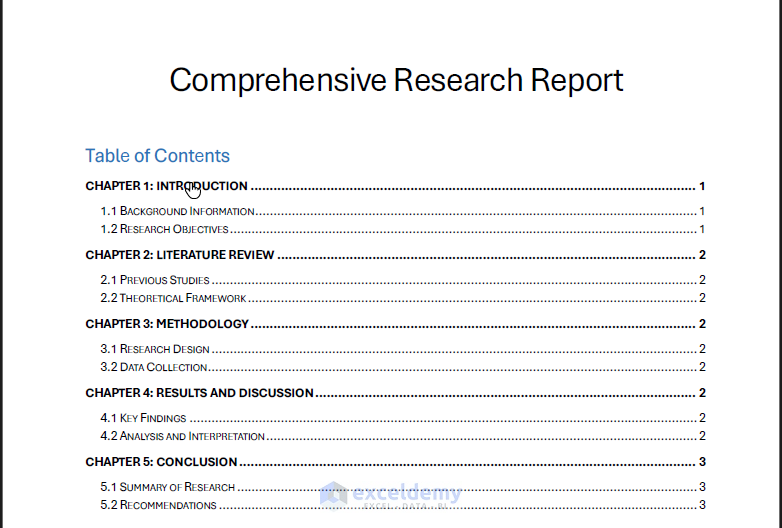
- We selected the Formal format and Dashes tab leader.
- Click OK to apply changes.

Output:

Step 4: Update the Table of Contents
When making changes to the document, update the TOC:
- Click anywhere inside the TOC.
- Select the Update Table from the TOC.
- Press F9 or go to the References tab >> click Update Table.
- Choose either:
- Update page numbers only (if only the pagination has changed).
- Update entire table (if new headings were added or removed).
- Click OK to refresh the TOC.

Output:
Best practice: Always update your TOC as one of the final steps before completing your document.
Step 5: Save & Export to Verify
- Click on File tab >> select Save As >> select PDF as the file type for a professional look.
- Click Save.
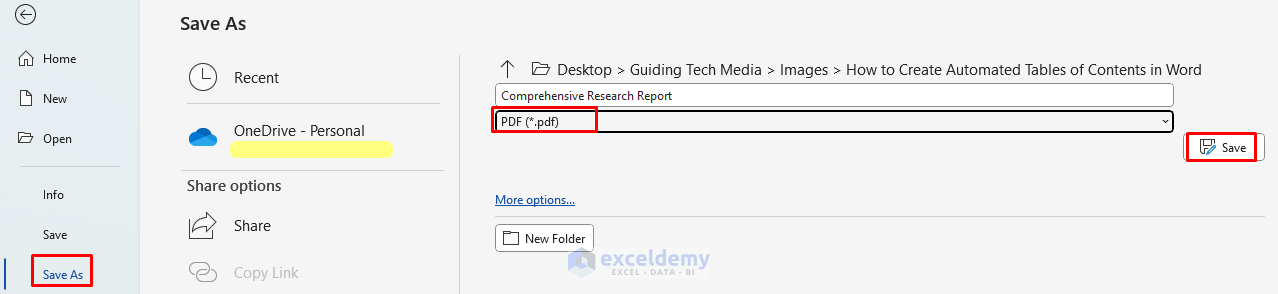
- Navigate to the required section from the TOC.
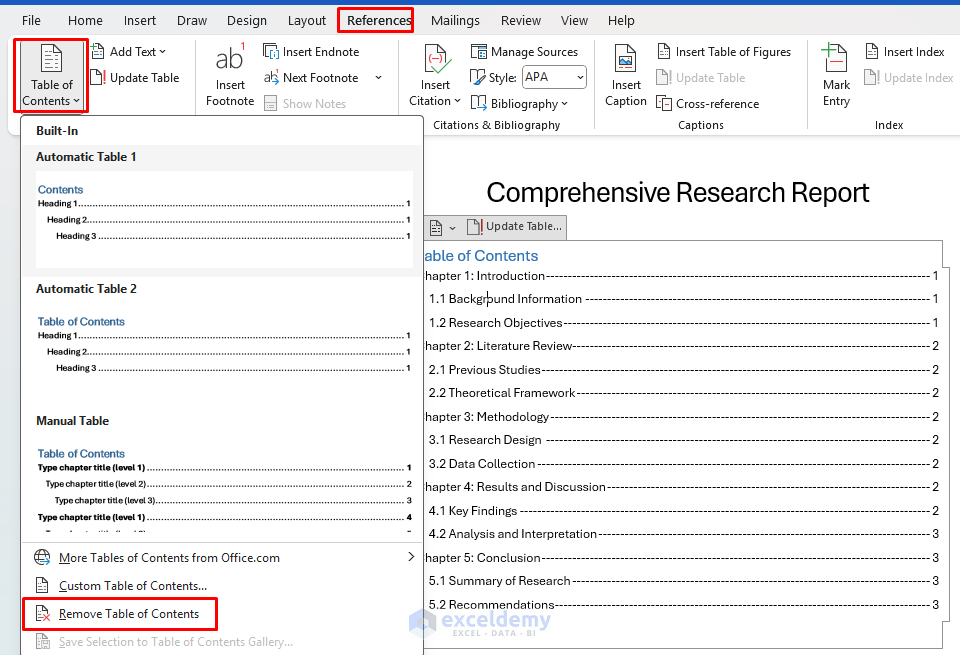
Step 6: Remove Table of Contents
If you no longer need the TOC:
- Click inside the TOC.
- Go to the References tab >> click Table of Contents.
- Select Remove Table of Contents.
Troubleshooting Common Issues
TOC Not Updating Correctly:
If your TOC doesn’t update properly:
- Verify that you’re using proper heading styles, not just manual formatting.
- Try deleting the TOC and inserting a new one.
- Check if Track Changes is on, which can interfere with TOC updates.
Missing Entries:
If headings don’t appear in your TOC:
- Make sure they’re formatted with heading styles, not just manually formatted to look like headings.
- Check that the heading level is included in your TOC settings (Show levels).
- Verify the heading is not set to Hidden in the Font dialog box.
Incorrect Formatting:
If your TOC formatting looks wrong:
- Modify the TOC styles (TOC 1, TOC 2, etc.) rather than manually formatting the TOC.
- Remember that manual formatting of the TOC will be lost when you update it.
Conclusion
An automated table of contents enhances document navigation, saves time, and increases readability. TOC maintains professional consistency and user-friendly document structure. By following the above steps you can create an automated TOC that is both polished and user-friendly. Explore Word’s endless possibilities to modify your automated TOC based on your specific requirements.
Get FREE Advanced Excel Exercises with Solutions!
