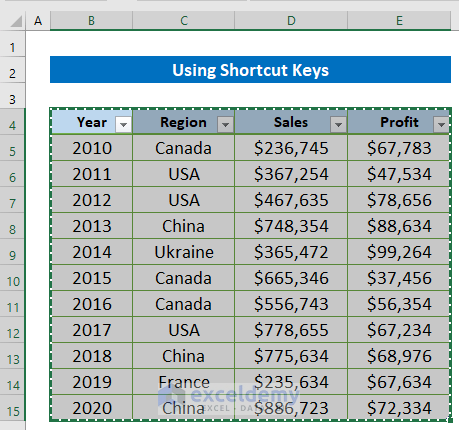
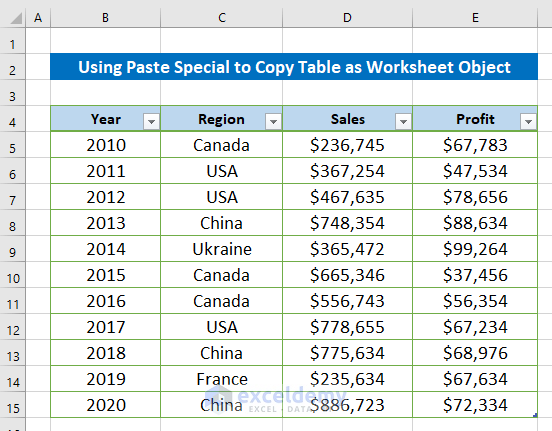
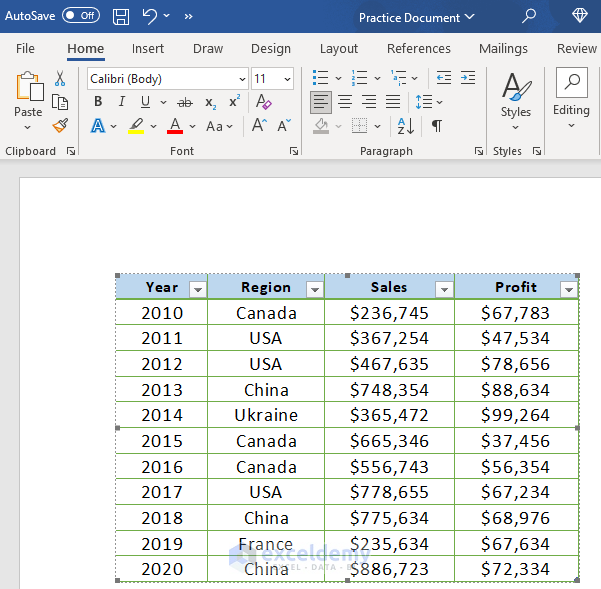
In this article, we’ll demonstrate 3 easy methods to copy a table from Excel to Word. To illustrate our methods, we’ll use the following dataset, a table that contains the sales and profits of a company for 10 years in different regions.
Method 1 – Using Shortcut Keys
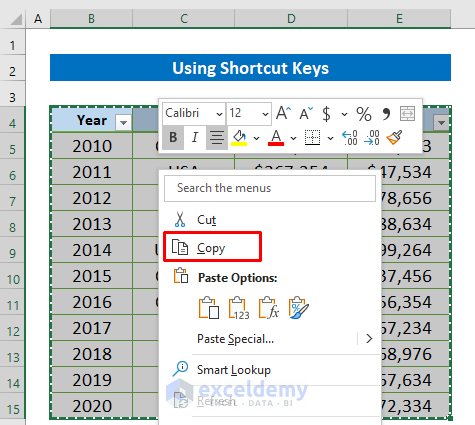
Let’s start with the traditional way to copy tables from Excel to Word, good old copy and paste. For copying anything generally, we use the Ctrl + C and Ctrl + V keys.
Steps:
- Select the whole table.
- Press Ctrl + C to copy it.
- Or, right-click your mouse and select Copy from the context menu.
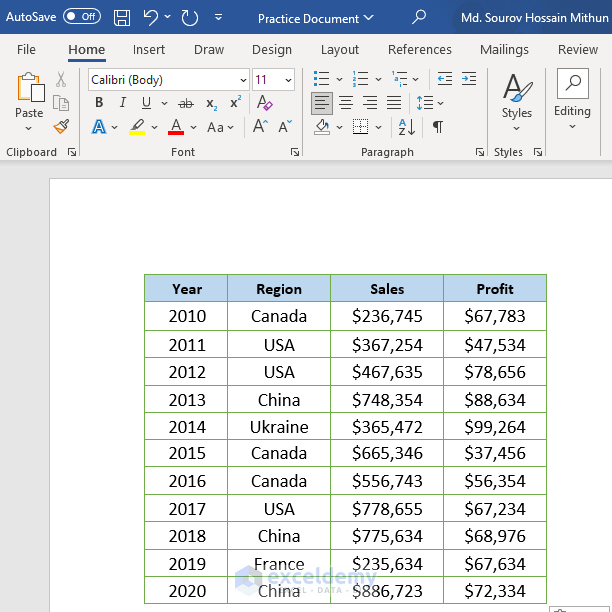
- Open your Word file, place the cursor where you want to place the table, and press Ctrl + V.
This will paste a plain table including formats, but there will be no connection with the source data. So if you change any data, the table won’t update.
Read More: How to Insert Excel Table into Word
Method 2 – Using Paste Special to Copy with Gridlines as a Worksheet Object
We can also use the Paste Special option to copy the table from Excel to Word with Gridlines as a worksheet object, in two different ways.
2.1 – As Linked Object
We can copy a table as a linked worksheet object, so changes in the source data will be updated in the Word file too.
Steps:
- Select the range of the table and copy using Ctrl + C.
- Open a Word file and click Paste > Paste Special.
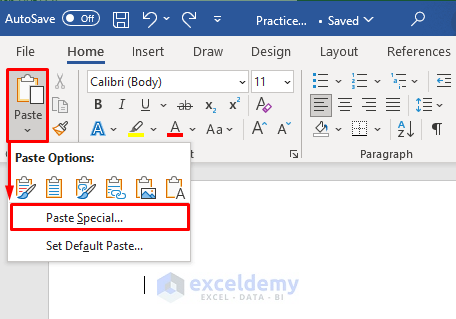
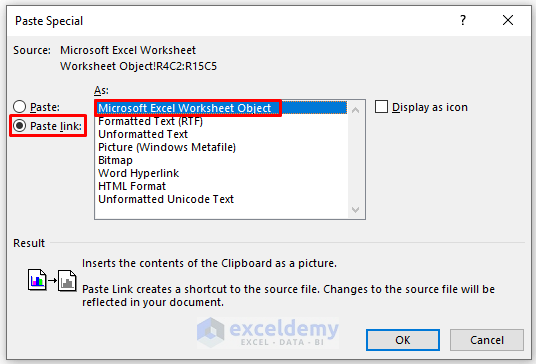
- In the Paste Special dialog box that opens, mark Paste link and select Microsoft Excel Worksheet Object.
- Click OK.
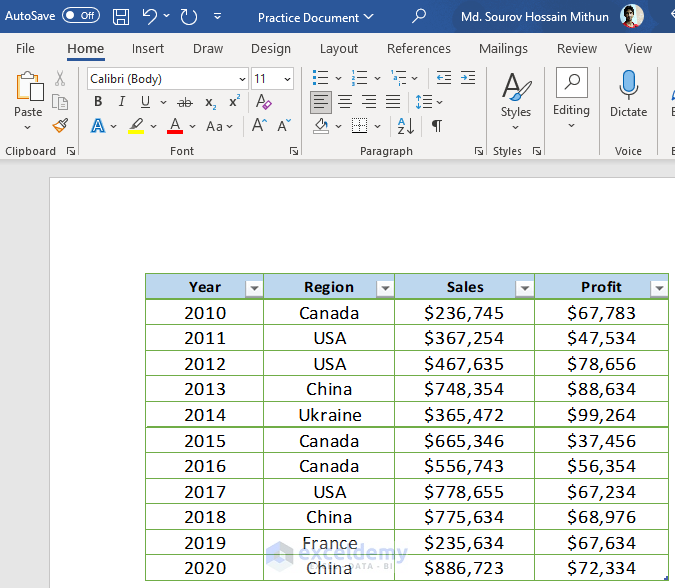
The table will be inserted in your Word file.
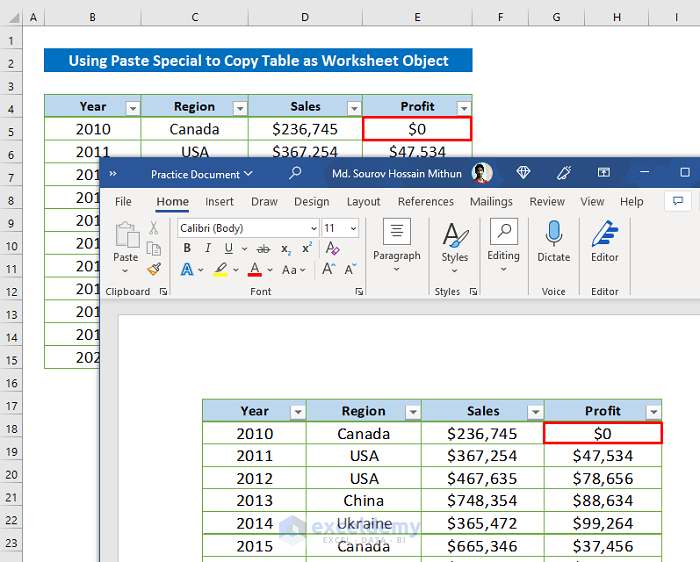
Now if you change a value in the source Excel file, it will be updated automatically in this Word table. We changed the value of cell E5 and it synchronized with the table in the Word file. This means that if you send the Word file, you will have to send the Excel file too.
Read More: How to Insert Excel Table into Word with Formulas
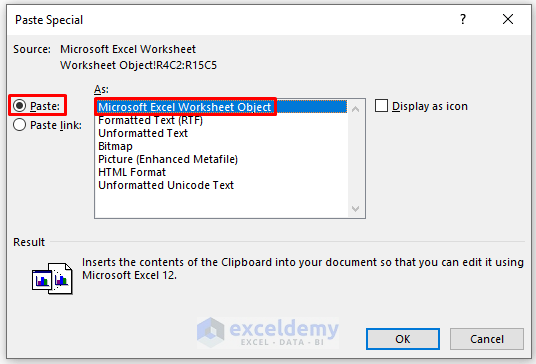
2.2 – As Static Object
We can copy and paste a table without linking, such that it copies with gridlines too. Basically, an Excel window is embedded within the Word file with gridlines intact.
Steps:
- Follow the first two steps from section 2.1 to open the Paste Special dialog box.
- Mark Paste and select Microsoft Excel Worksheet Object.
- Click OK.
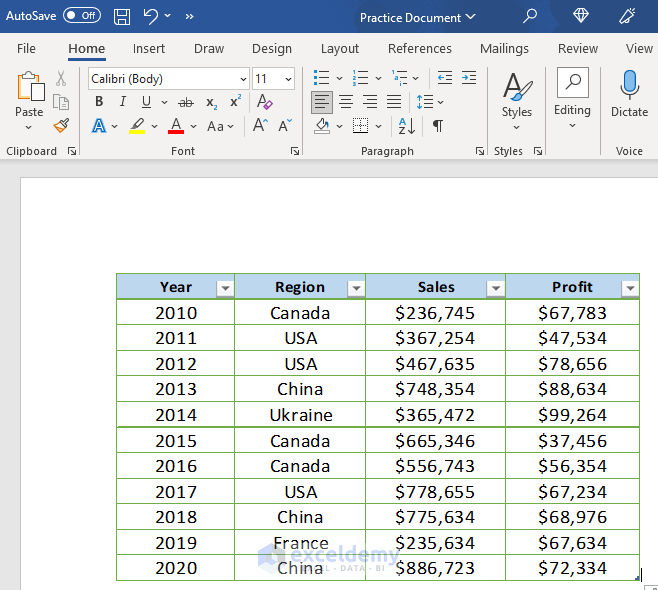
The table will be inserted into the Word file like the image below.
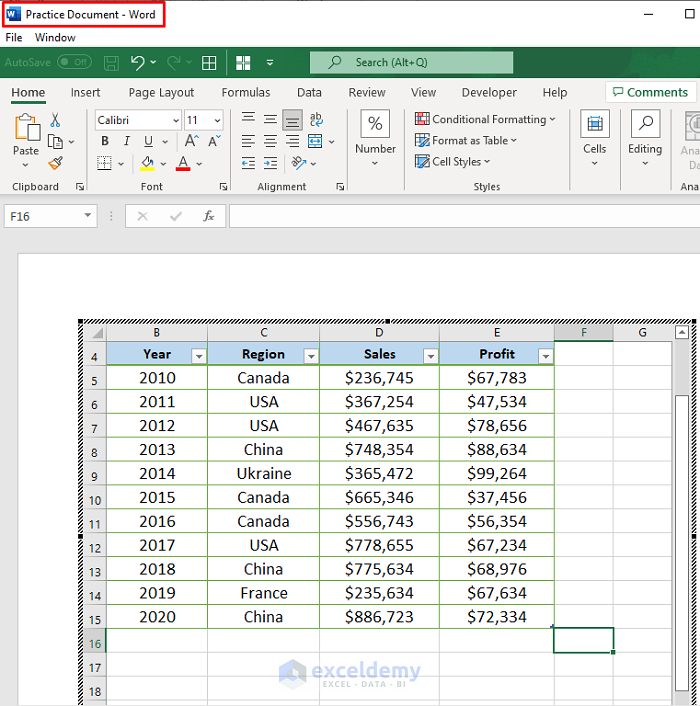
- Double-click on the table.
After a while, an embedded Excel window will be inserted into the Word File.
The gridlines are visible now. Now, if you send the Word file, you won’t need to send the Excel file too.
Read More: How to Put a Large Excel Table into Word
Method 3 – Using Paste Special to Copy as Picture and Keep Formatting
We can also copy tables from Excel as pictures, and paste into Word keeping the formatting. There are two options to accomplish this:
3.1 – As Linked Picture
If we paste the table keeping the source link, then whatever we change in the source will be updated automatically in the picture in the Word file.
Steps:
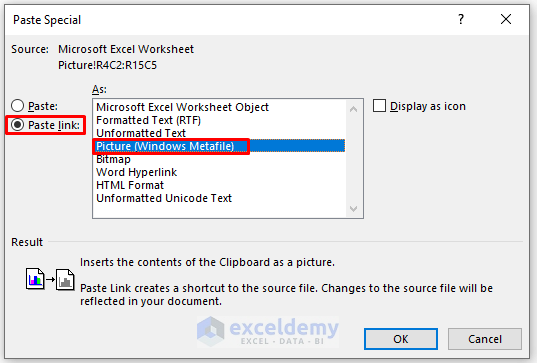
- Follow the first two steps from section 2.1 to open the Paste Special dialog box.
- Mark Paste link and select Picture (Windows Metafile).
- Click OK.
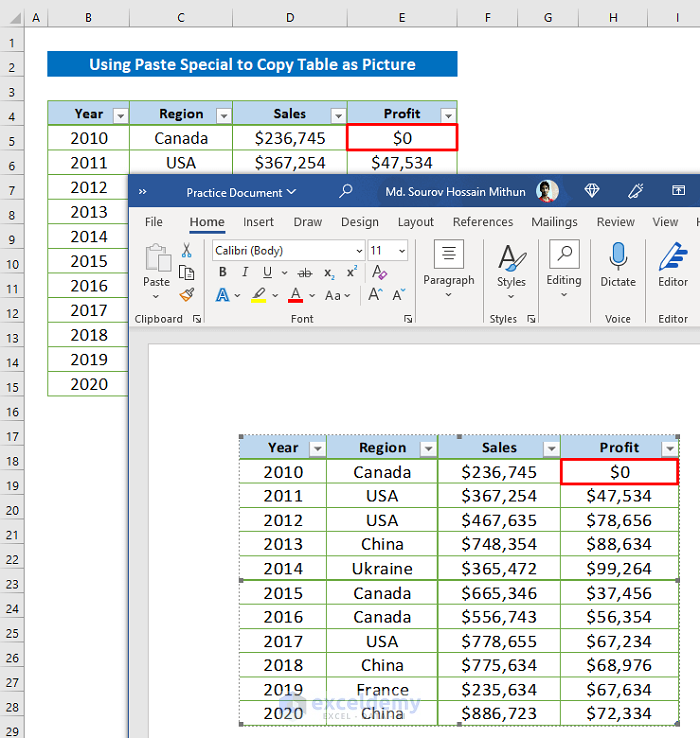
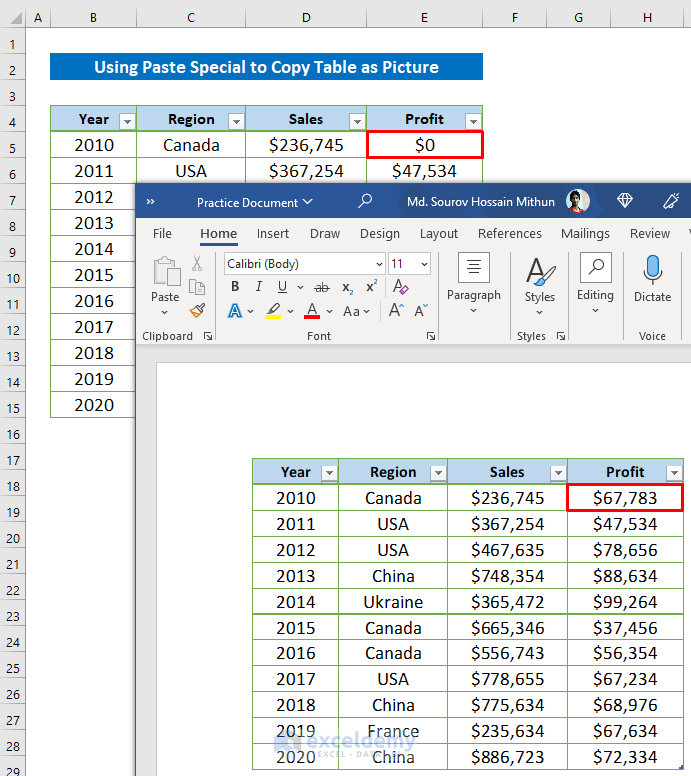
A few months later, an image of the table will appear in your Word file.
The formatting of the table is preserved in the picture. To test synchronization, we inserted 0 in cell E5 and it updated in the picture too.
3.2 – As Static Picture
To simply paste a picture without linking to the source, use Paste with the Picture option.
Steps:
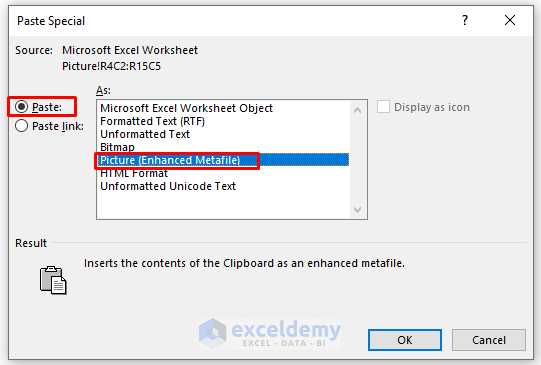
- Follow the first two steps from section 2.1 to open the Paste Special dialog box.
- Mark the Paste option and select Picture (Enhanced Metafile).
- Click OK.
An image of the table is pasted into the Word file. When we change a value in the Excel file, the image remains static.
Read More: How to Paste Excel Table into Word in Landscape
Download Practice Workbook
Related Articles
- How to Paste Excel Table into Word Fit to Page
- How to Add Drop-Down List in Word from Excel
- How to Auto Populate Word Document from Excel
- How to Create Multiple Word Documents from Excel
<< Go Back to Export Excel to Word | Export Data from Excel | Learn Excel
Get FREE Advanced Excel Exercises with Solutions!
