In this article, I’ll show you how you can turn off auto calculate using in Excel.
Excel VBA: Turn Off Auto Calculate (Quick View)
Sub Turn_Off_Automatic_Calculation()
Application.Calculation = xlManual
'Write Your Code Here
End Sub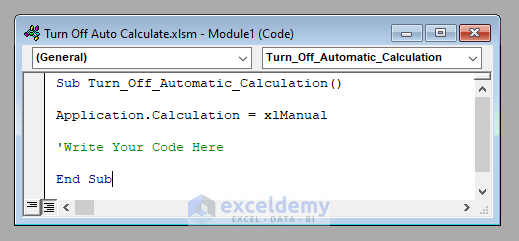
How to Turn Off Auto Calculation Using VBA in Excel: Step-by-Step Analysis
Turning off auto-calculation using Excel VBA is easy. To accomplish this, we need only one line of code. It’s a better approach to turn off auto-calculation at the beginning of your code and then write the code.
For a better understanding, I am showing you the step-by-step analysis to accomplish this.
⧪ Step 1: Turning Off Auto-Calculation
We said earlier that it’s normally a better approach to turn off auto calculation at the beginning of your code.
Application.Calculation = xlManual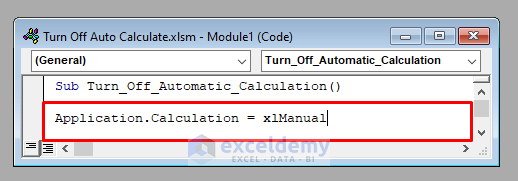
⧪ Step 2: Writing the Main Code
Next, write your main code. Here I’ve written a code to insert a series of 1 to 10 in the first column of the active worksheet.
For i = 1 To 10
    Cells(i, 1) = i
Next i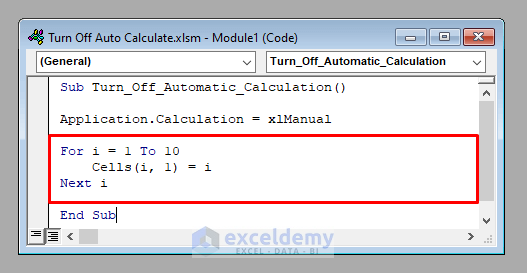
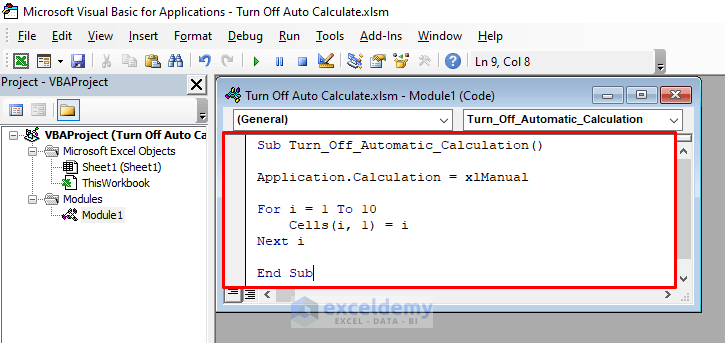
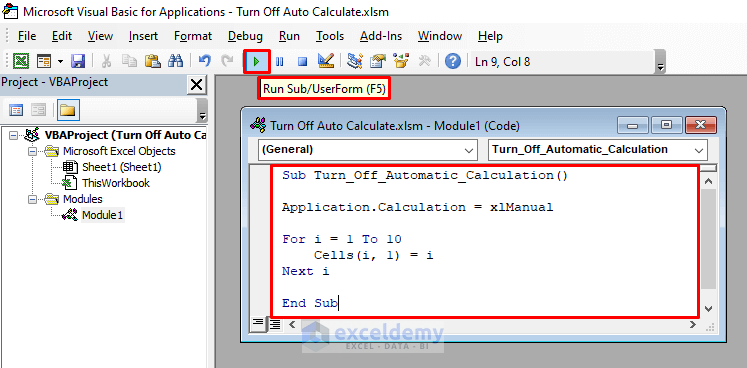
Therefore, the complete VBA code will be:
⧭ VBA Code:
Sub Turn_Off_Automatic_Calculation()

Application.Calculation = xlManual

For i = 1 To 10
    Cells(i, 1) = i
Next i

End Sub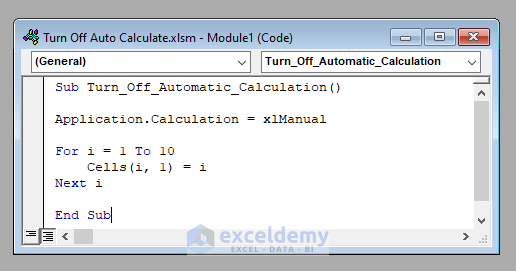
Developing the Macro to Turn Off Auto Calculation Using Excel VBA
We’ve seen the step-by-step analysis to turn off to auto-calculate using Excel VBA.
Now let’s see how to develop a Macro to run the code.
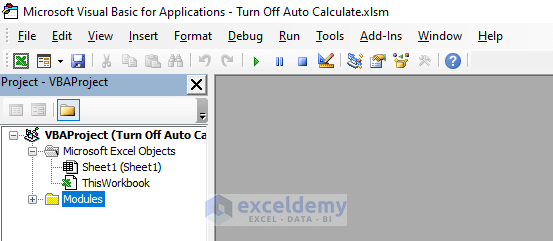
⧪ Step 1: Opening the VBA Window
Press ALT + F11 on your keyboard to open the Visual Basic window.
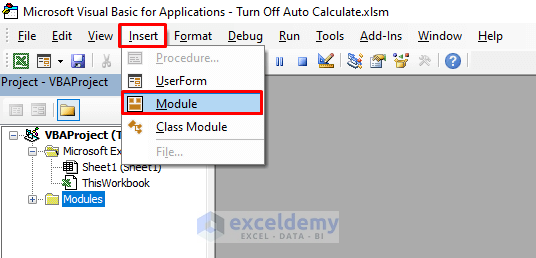
⧪ Step 2: Inserting a New Module
Go to Insert > Module in the toolbar. Click on Module. A new module called Module 1 (or anything else depending on your past history) will open.
⧪ Step 3: Putting the VBA Code
This is the most important step. Insert the given VBA code in the module.
⧪ Step 4: Checking the Output
We’ll check the output twice. First, we’ll check the output of the code without turning off the auto calculation.
Here in the active worksheet, in cell A11, we have a formula:
=SUM(A1:A10)It contains the sum of the cells from A1 to A10. When there is no value in the cells, it shows 0.

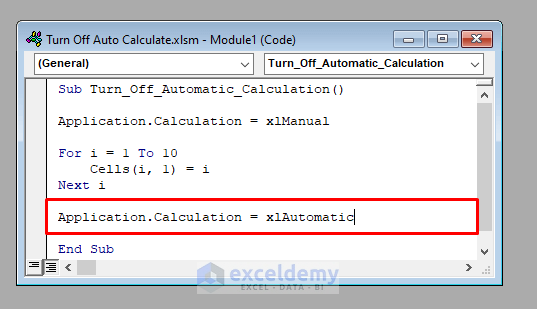
Now, we’ll eliminate the line Application. Calculation = xlManual from our code, and then run the code from the Run Sub / UserForm option in the Visual Basic toolbar.
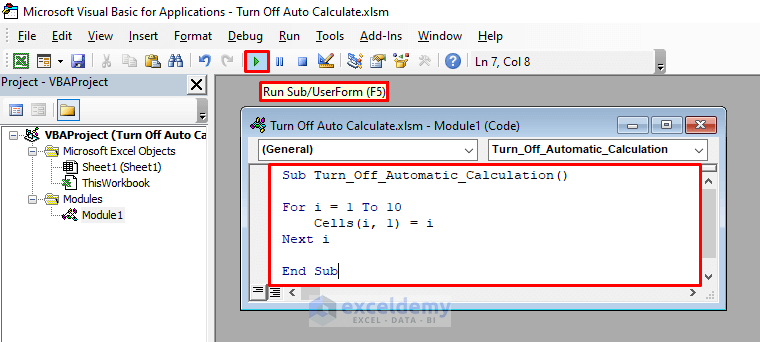
A series of 1 to 10 will be entered in the range A1:A10. And cell A11 will automatically show 55, their sum.

Then we’ll clear the contents from cells A1 to A10. The sum in cell A11 will go back to 0 automatically.
Now, we’ll insert the line Application. Calculation = xlManual at the beginning of our code, and then again run the code.
A series of 1 to 10 will be entered in the range A1:A10, but cell A11 will not show 55, it’ll keep the previous value of 0.
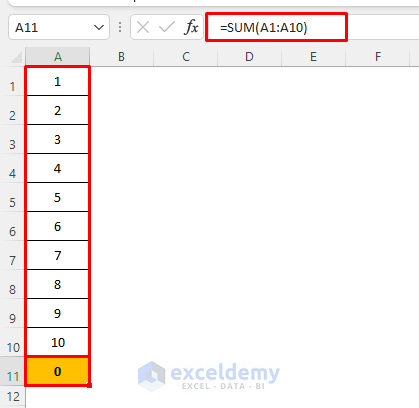
This is because we turned off auto-calculation before the execution of the code.
Read More: How to Turn on Auto Calculate in Excel
Things to Remember
It’s a better approach to turn off auto-calculation at the beginning of the code, then write your main code, and then finally turn on auto-calculation again. Therefore, after writing the code, insert the line Application. Calculation = xlAutomatic before sending the code.
Download Practice Workbook
Download this practice workbook to exercise while you are reading this article.
Conclusion
Therefore, this is the process to turn off auto-calculation using VBA in Excel. Do you have any questions? Feel free to ask us.
Related Articles
- [Fixed:] Excel Spreadsheet Formulas Not Updating Automatically
- How to Make Excel Auto Calculate Formulas
<<Go Back to Excel Auto Calculate | How to Calculate in Excel | Learn Excel
Get FREE Advanced Excel Exercises with Solutions!
