If you use Excel frequently, you are likely aware of how difficult it can be to handle. After you have more than a couple of worksheets, you need to manually order these. Although there isn’t a built-in feature to achieve this, VBA can be used to accomplish this easily. In this article, we’ll show you how to sort worksheet using VBA code in Excel.
How to Open VBA Macro Editor in Excel
VBA is a programming language that may be used for various tasks, and different types of users can use it for those tasks. You can launch the VBA editor using the Alt + F11 keyboard shortcut. In the last section, we will generate VBA code that makes it easy to perform Vlookup with multiple criteria in Excel. Therefore, you can follow the simple steps accordingly to open the VBA editor.
Steps:
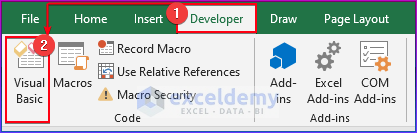
- Firstly, we will open the Developer tab.
- Then, we will select the Visual Basic command.
- Here, the Visual Basic window will open.
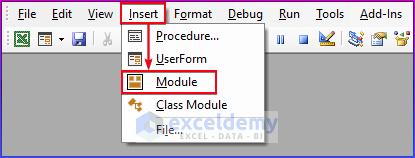
- After that, from the Insert option, we will choose the new Module to write the VBA code.
Excel VBA to Sort Worksheet: 3 Examples
This article will demonstrate how to sort worksheets in Excel VBA by giving 3 practical examples with explanations. Here, we will apply VBA which sorts sheets alphabetically first, then in ascending and descending order, and lastly, by using the sheet’s tab color, we have sorted all the available sheets in our workbook. Now, you can review a sample video of our work on sorting worksheets in Excel VBA.
Example 1: Sort Worksheets Alphabetically in Excel
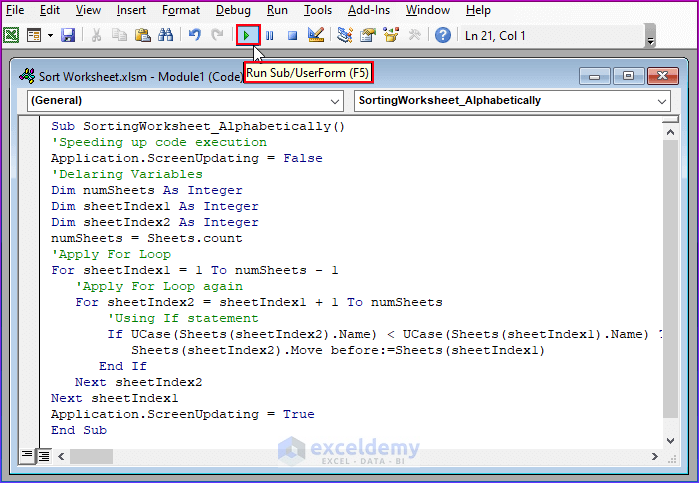
Now, in this section, we will generate the following VBA code in the Module by opening the new Module, which we have discussed in the above section on how to launch the VBA Macro Editor. Then, copy the following code and paste it into the above Module. After that, click on Run to see the output.
Sub SortingWorksheet_Alphabetically()
'Speeding up code execution
Application.ScreenUpdating = False
'Delaring Variables
Dim numSheets As Integer
Dim sheetIndex1 As Integer
Dim sheetIndex2 As Integer
numSheets = Sheets.count
'Apply For Loop
For sheetIndex1 = 1 To numSheets - 1
'Apply For Loop again
For sheetIndex2 = sheetIndex1 + 1 To numSheets
'Using If statement
If UCase(Sheets(sheetIndex2).Name) < UCase(Sheets(sheetIndex1).Name) Then
Sheets(sheetIndex2).Move before:=Sheets(sheetIndex1)
End If
Next sheetIndex2
Next sheetIndex1
Application.ScreenUpdating = True
End Sub
VBA Code Breakdown
- Firstly, this code starts with the Sub statement and the name of the subroutine, “SortingWorksheets_Alphabetically()”.
Sub SortingWorksheets_Alphabetically()- Secondly, it turns off the application’s screen updating and it helps to increase the speed of the code. Then it declares three variables: numSheets, sheetIndex1 , and sheetIndex2 . Sheet_Count stores the number of worksheets in the workbook.
Application.ScreenUpdating = False
Dim numSheets As Integer
Dim sheetIndex1 As Integer
Dim sheetIndex2 As Integer
numSheets = Sheets.count- The worksheet names are then compared by the code using nested “For loop”. The worksheet in”sheetIndex2 ” gets moved in front of the worksheet in “sheetIndex1 ” if the names of the two worksheets are alphabetically arranged differently. The code then restarts the application’s screen refreshing.
For sheetIndex1 = 1 To numSheets - 1
For sheetIndex2 = sheetIndex1 + 1 To numSheets
If UCase(Sheets(sheetIndex2).Name) < UCase(Sheets(sheetIndex1).Name) Then
Sheets(sheetIndex2).Move before:=Sheets(sheetIndex1)
End If
Next sheetIndex2
Next sheetIndex1
Application.ScreenUpdating = True- Finally, this VBA macro ends with an End statement.
End Sub
Here, we have created some sheets with the disorder arrangement listed alphabetically. Now, in this part, we have shown sorting worksheets alphabetically using a simple VBA macro. So, for better understanding, you should also go through the above video.
Read More: Excel VBA to Sort Worksheets Numerically
Example 2: Applying VBA to Sort Worksheets in Descending/Ascending Order Based on User Input in Excel
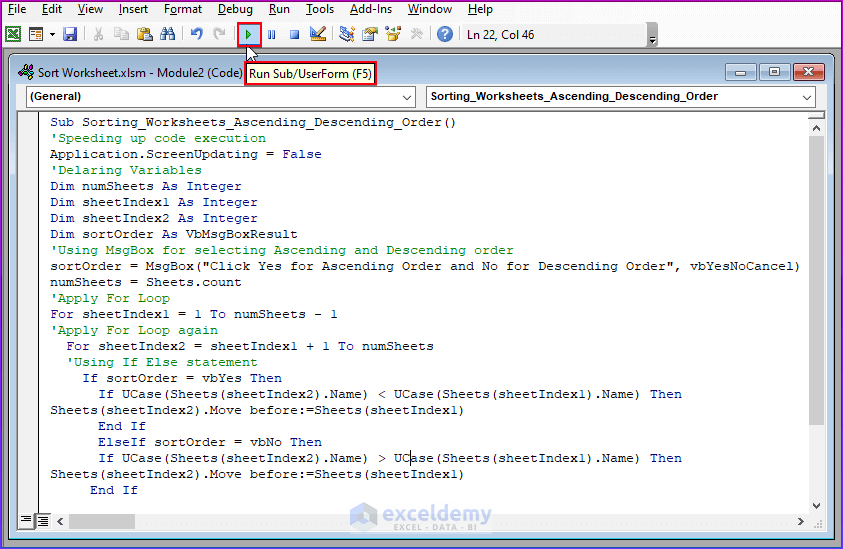
Copy the following code and paste it into the above Module. After that, click on Run to see the output.
Sub Sorting_Worksheets_Ascending_Descending_Order()
'Speeding up code execution
Application.ScreenUpdating = False
'Delaring Variables
Dim numSheets As Integer
Dim sheetIndex1 As Integer
Dim sheetIndex2 As Integer
Dim SortingOrder As VbMsgBoxResult
'Using MsgBox for selecting Ascending and Descending order
SortingOrder = MsgBox("Click Yes for Ascending Order and No for Descending Order", vbYesNoCancel)
numSheets = Sheets.count
'Apply For Loop
For sheetIndex1 = 1 To numSheets - 1
'Apply For Loop again
For sheetIndex2 = sheetIndex1 + 1 To numSheets
'Using If Else statement
If SortingOrder = vbYes Then
If UCase(Sheets(sheetIndex2).Name) < UCase(Sheets(sheetIndex1).Name) Then
Sheets(sheetIndex2).Move before:=Sheets(sheetIndex1)
End If
ElseIf SortingOrder = vbNo Then
If UCase(Sheets(sheetIndex2).Name) > UCase(Sheets(sheetIndex1).Name) Then
Sheets(sheetIndex2).Move before:=Sheets(sheetIndex1)
End If
End If
Next sheetIndex2
Next sheetIndex1
Application.ScreenUpdating = True
End Sub
VBA Code Breakdown
- Firstly, this code starts with the Sub statement and the name of the subroutine, “Sorting_Worksheets_Ascending_Descending_Order()”.
Sub Sorting_Worksheets_Ascending_Descending_Order()- Secondly, it turns off the application’s screen updating and it helps to increase the speed of the code. Then it declares and initializes four variables. Then, shows a message box asking the user to choose either ascending or descending order and after that, counts the number of sheets in the workbook. Here, the numSheets variable stores the number of worksheets in the workbook.
Application.ScreenUpdating = False
Dim numSheets As Integer
Dim sheetIndex1 As Integer
Dim sheetIndex2 As Integer
Dim SortingOrder As VbMsgBoxResult
SortingOrder = MsgBox("Click Yes for Ascending Order and No for Descending Order", vbYesNoCancel)
numSheets = Sheets.count- Now, create a loop to repeatedly iterate through the worksheets.
For sheetIndex1 = 1 To numSheets - 1- And, we generate a nested loop to compare the worksheet names.
For sheetIndex2 = sheetIndex1 + 1 To numSheets- The user’s request to have the sheets sorted in ascending order has been verified. Verifies whether the user has chosen to have the sheets sorted by descending value. Then, compares the names of each sheet and verifies if the name of the sheet at position sheetIndex2 is greater than the name of the sheet at position i. The sheet at position sheetIndex2 is moved in front of the sheet at the position sheetIndex1 by this line if the preceding comparison is accurate. moves to position sheetIndex2 of the following sheet. moves to position sheetIndex1 of the following sheet. enables the user to view the sorted sheets by turning on the application’s screen-updating the setting to true.
If SortingOrder = vbYes Then
If UCase(Sheets(sheetIndex2).Name) < UCase(Sheets(sheetIndex1).Name) Then
Sheets(sheetIndex2).Move before:=Sheets(sheetIndex1)
End If
ElseIf SortingOrder = vbNo Then
If UCase(Sheets(sheetIndex2).Name) > UCase(Sheets(sheetIndex1).Name) Then
Sheets(sheetIndex2).Move before:=Sheets(sheetIndex1)
End If
End If
Next sheetIndex2
Next sheetIndex1
Application.ScreenUpdating = True- Finally, this VBA macro ends with an End statement.
End Sub
Here, we have created some sheets with the disorder arrangement. Now, we would like to ascend or descend all the sheets in order. That is why, in this example, we have shown sorting worksheets in ascending or descending order using a simple VBA macro. So, for better understanding, you should also go through the above video.
Read More: Excel VBA to Calculate Active Sheet
Example 3: Using VBA to Sort Worksheet by Tab Color in Excel
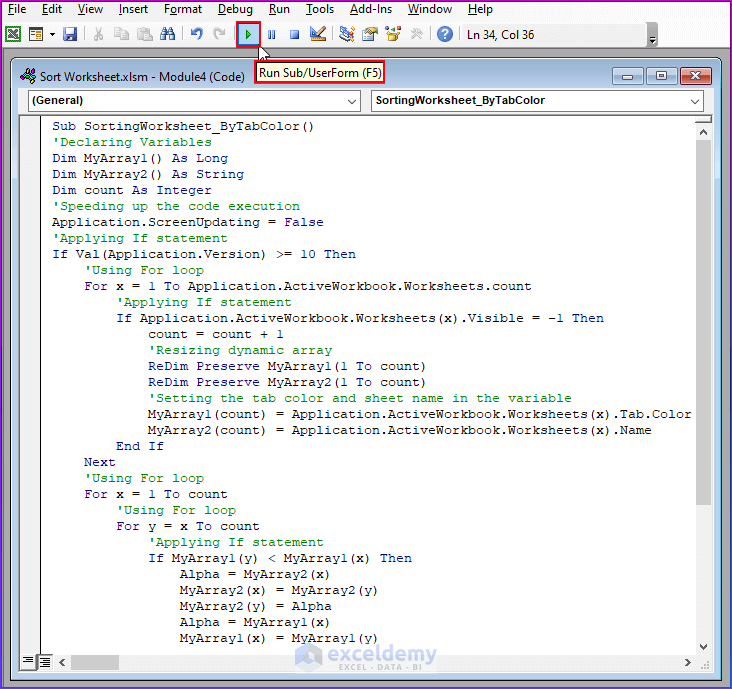
Copy the following code and paste it into the above Module. After that, click on Run to see the output.
Sub SortingWorksheet_ByTabColor()
'Declaring Variables
Dim MyArray1() As Long
Dim MyArray2() As String
Dim count As Integer
'Speeding up the code execution
Application.ScreenUpdating = False
'Applying If statement
If Val(Application.Version) >= 10 Then
'Using For loop
For x = 1 To Application.ActiveWorkbook.Worksheets.count
'Applying If statement
If Application.ActiveWorkbook.Worksheets(x).Visible = -1 Then
count = count + 1
'Resizing dynamic array
ReDim Preserve MyArray1(1 To count)
ReDim Preserve MyArray2(1 To count)
'Setting the tab color and sheet name in the variable
MyArray1(count) = Application.ActiveWorkbook.Worksheets(x).Tab.Color
MyArray2(count) = Application.ActiveWorkbook.Worksheets(x).Name
End If
Next
'Using For loop
For x = 1 To count
'Using For loop
For y = x To count
'Applying If statement
If MyArray1(y) < MyArray1(x) Then
Alpha = MyArray2(x)
MyArray2(x) = MyArray2(y)
MyArray2(y) = Alpha
Alpha = MyArray1(x)
MyArray1(x) = MyArray1(y)
MyArray1(y) = Alpha
End If
Next
Next
'Using For loop
For x = count To 1 Step -1
Application.ActiveWorkbook.Worksheets(CStr(MyArray2(x))).Move after:=Application.ActiveWorkbook.Worksheets(Application.ActiveWorkbook.Worksheets.count)
Next
End If
Application.ScreenUpdating = True
End Sub
VBA Code Breakdown
- Firstly, this code starts with the Sub statement and the name of the subroutine, “SortingWorksheet_ByTabColor()”.
Sub SortingWorksheet_ByTabColor()- Secondly, it turns off the application’s screen updating and it helps to increase the speed of the code. Then it declares and initializes two arrays and a “count” variable.
Sub SortingWorksheet_ByTabColor()
Dim MyArray1() As Long
Dim MyArray2() As String
Dim count As Integer
Application.ScreenUpdating = False- It then applies an If statement to verify if the version of Excel is 10 or higher. The worksheets are then looped through and checked to see if they are viewable using a For loop. Then, if they are visible, it increases the counter by 1 and changes the array sizes. The tab color and name in the second array are then changed in accordance with the comparison of the tab colors in the first array using yet another For loop.
If Val(Application.Version) >= 10 Then
    For x = 1 To Application.ActiveWorkbook.Worksheets.count
        If Application.ActiveWorkbook.Worksheets(x).Visible = -1 Then
            count = count + 1
            'Resizing dynamic array
            ReDim Preserve MyArray1(1 To count)
            ReDim Preserve MyArray2(1 To count)
            MyArray1(count) = Application.ActiveWorkbook.Worksheets(x).Tab.Color
            MyArray2(count) = Application.ActiveWorkbook.Worksheets(x).Name
        End If
    Next
    For x = 1 To count
        'Using For loop
        For y = x To count
            If MyArray1(y) < MyArray1(x) Then
                Alpha = MyArray2(x)
                MyArray2(x) = MyArray2(y)
                MyArray2(y) = Alpha
                Alpha = MyArray1(x)
                MyArray1(x) = MyArray1(y)
                MyArray1(y) = Alpha
            End If
        Next
Next- Finally, the worksheets are then moved to the book’s end using a third For loop in accordance with the second array’s order. The Screen-Updating attribute is subsequently changed to True, and the subroutine is finished.
For x = count To 1 Step -1
        Application.ActiveWorkbook.Worksheets(CStr(MyArray2(x))).Move after:=Application.ActiveWorkbook.Worksheets(Application.ActiveWorkbook.Worksheets.count)
    Next
End If
Application.ScreenUpdating = True- Finally, this VBA macro ends with an End statement.
End Sub
Now, we want to sort worksheets by using the sheet’s tab color in the proper order with the help of a macro. You can find it very convenient to use this example in your own sheet. Here, we have colored each sheet according to our wishes. That is why, in this example, we have shown sorting worksheets using a simple VBA macro. So, for better understanding, you should also go through the above video.
How to Sort Single-Column Data in Excel VBA
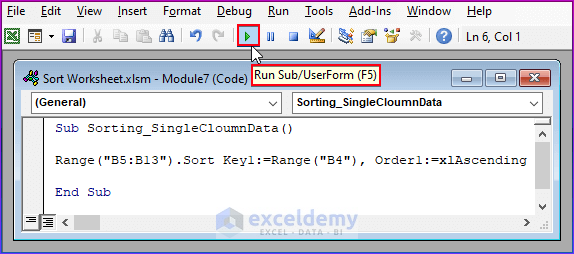
Now, in this section, we will generate the following VBA code in the Module by opening the new Module, which we have discussed in the above section on how to launch the VBA Macro Editor. Then, copy the following code and paste it into the above Module. After that, click on Run to see the output.
Sub Sorting_SingleCloumnData()
Range("B5:B13").Sort Key1:=Range("B4"), Order1:=xlAscending
End SubMoreover, you will learn how to sort single-column data in an Excel sheet by using a VBA macro. So, you can follow the above steps to do this easily.
How to Sort Multiple Column Data in Excel VBA
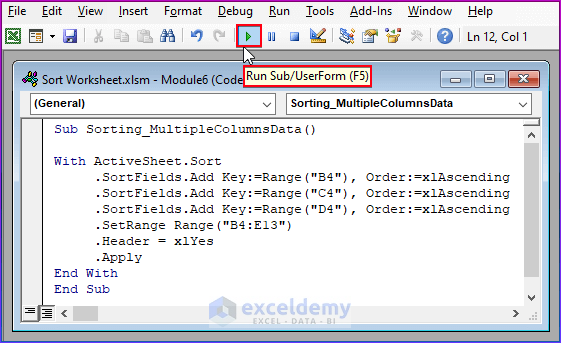
Copy the following code and paste it into the above Module. After that, click on Run to see the output.
Sub Sorting_MultipleColumnsData()
With ActiveSheet.Sort
.SortFields.Add Key:=Range("B4"), Order:=xlAscending
.SortFields.Add Key:=Range("C4"), Order:=xlAscending
.SortFields.Add Key:=Range("D4"), Order:=xlAscending
.SetRange Range("B4:E13")
.Header = xlYes
.Apply
End With
End Sub
VBA Code Breakdown
- Firstly, this code starts with the Sub statement and the name of the subroutine,
" Sorting_MultipleColumnsData()".
Sub Sorting_MultipleColumnsData()- This function will sort the data in the current worksheet’s columns B, C, and D in ascending order, starting at row 4 and continuing until row 13. When sorting the data, it will also take the header row into account.
With ActiveSheet.Sort
     .SortFields.Add Key:=Range("B4"), Order:=xlAscending
     .SortFields.Add Key:=Range("C4"), Order:=xlAscending
     .SortFields.Add Key:=Range("D4"), Order:=xlAscending
     .SetRange Range("B4:E13")
     .Header = xlYes
     .Apply
End With- Finally, this VBA macro ends with an End statement.
End Sub
For sorting multiple-column data, we have demonstrated an example of how to sort it by using a small macro. So, for a better understanding, you can follow the above video.
How to Sort Data by Cell Color in Excel VBA
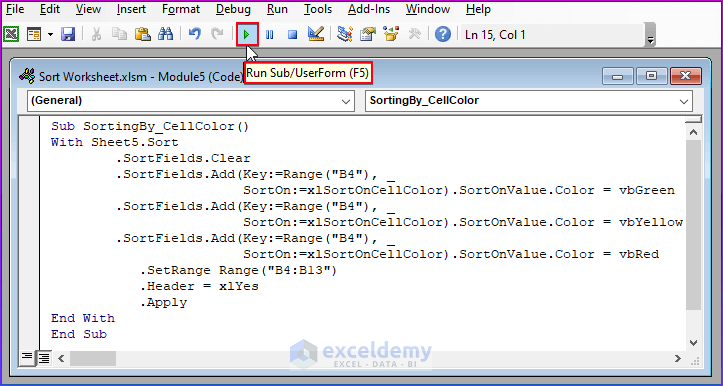
Copy the following code and paste it into the above Module. After that, click on Run to see the output.
Sub SortingBy_CellColor()
With Sheet5.Sort
.SortFields.Clear
.SortFields.Add(Key:=Range("B4"), _
SortOn:=xlSortOnCellColor).SortOnValue.Color = vbGreen
.SortFields.Add(Key:=Range("B4"), _
SortOn:=xlSortOnCellColor).SortOnValue.Color = vbYellow
.SortFields.Add(Key:=Range("B4"), _
SortOn:=xlSortOnCellColor).SortOnValue.Color = vbRed
.SetRange Range("B4:B13")
.Header = xlYes
.Apply
End With
End Sub
VBA Code Breakdown
- Firstly, this code starts with the Sub statement and the name of the subroutine, “SortingBy_CellColor()”.
Sub SortingBy_CellColor()- So, based on the color of the cells, this VBA code will sort the range B4:B13 in “Sheet5” of an Excel spreadsheet. Then, we will clear the existing sort fields from the sheet.
With Sheet5.Sort
.SortFields.Clear- After that, we will choose the sort order by adding SortFiels.Add Function for the range of cells B4:E13 in“Sheet5”. Here, we set our header argument and use the apply statement to sort the specified range of cells.
   .SortFields.Add(Key:=Range("B4"), _
                        SortOn:=xlSortOnCellColor).SortOnValue.Color = vbGreen
        .SortFields.Add(Key:=Range("B4"), _
                        SortOn:=xlSortOnCellColor).SortOnValue.Color = vbYellow
        .SortFields.Add(Key:=Range("B4"), _
                        SortOn:=xlSortOnCellColor).SortOnValue.Color = vbRed
           .SetRange Range("B4:B13")
           .Header = xlYes
.Apply- Finally, this VBA macro ends with an End statement.
End Sub
In this example, we have shown how to sort sheets using cell color within a specified range. This approach to sorting sheets is very convenient to understand. So, you can go through the above video, where we have demonstrated how to make it easy.
How to Sort Data by Font Color in Excel VBA

Now, in this section, we will generate the following VBA code in the Module by opening the new Module which we have discussed in the above section on how to launch the VBA Macro Editor. Then, copy the following code and paste it into the above Module. After that, click on Run to see the output.
Sub SortingBy_FontColor()
With Sheet6.Sort
.SortFields.Clear
.SortFields.Add(Key:=Range("B4"), _
SortOn:=xlSortOnFontColor).SortOnValue.Color = vbGreen
.SortFields.Add(Key:=Range("B4"), _
SortOn:=xlSortOnFontColor).SortOnValue.Color = vbBlue
.SortFields.Add(Key:=Range("B4"), _
SortOn:=xlSortOnFontColor).SortOnValue.Color = vbRed
.SetRange Range("B4:B13")
.Header = xlYes
.Apply
End With
End SubIn this final example, we have shown how to sort sheets using font color for a specified range. This method of sorting sheets is very simple to comprehend. Thus, you can go through the above video, where we have demonstrated how to make it easier.
Download Practice Workbook
You may download the following Excel workbook for better understanding and practice it yourself.
Conclusion
In this article, we’ve covered 3 examples of how to sort worksheets in Excel VBA. We sincerely hope you enjoyed and learned a lot from this article. If you have any questions, comments, or recommendations, kindly leave them in the comment section below.
Get FREE Advanced Excel Exercises with Solutions!
