In our everyday Excel usage, it is very common to perform different operations on different rows in a dataset or a part of a dataset. Of course, you can perform each action manually. But in order to automate these tasks, there is no better way than using VBA. In this tutorial, we are going to focus on how to perform different operations for different rows in a range with variable row number in Excel. And doing so, you will learn to select, insert numbers, perform mathematical operations, and format cells based on varying row number in Excel.
How to Use Range with Variable Row Number in Excel: 4 Suitable Examples
As mentioned earlier, we are going to perform different operations for different rows for a range of cells with the help of VBA. The Visual Basic for Application (VBA) is an event-driven programming language from Microsoft. This helps automate different otherwise daunting processes in Microsoft Office, especially Excel. To use VBA in Excel, or any other Office software, you first need to enable the Developer tab. If you don’t see it on the ribbon, then you have to use Excel Options to display the Developer tab on the ribbon.
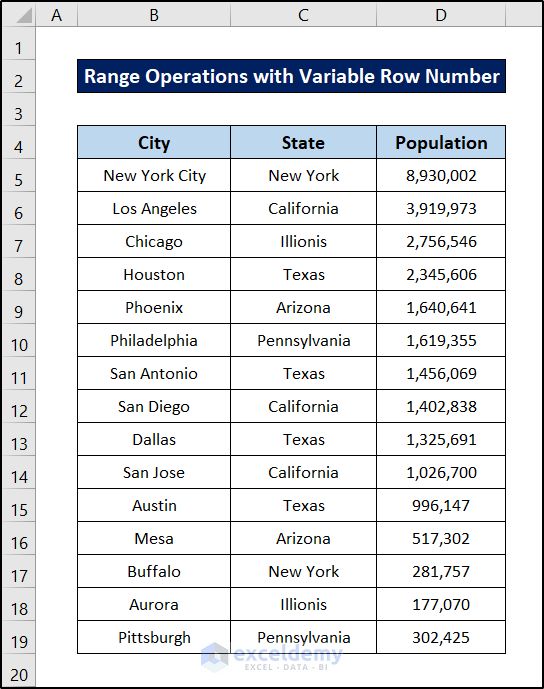
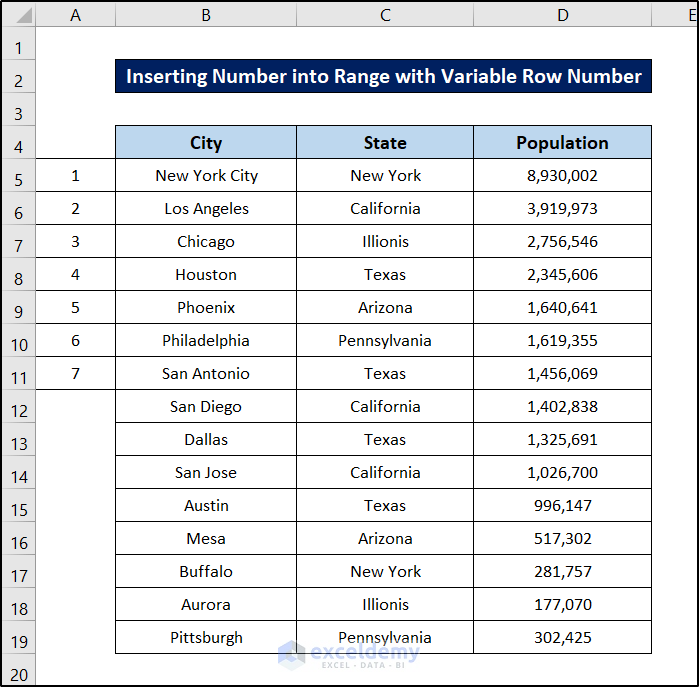
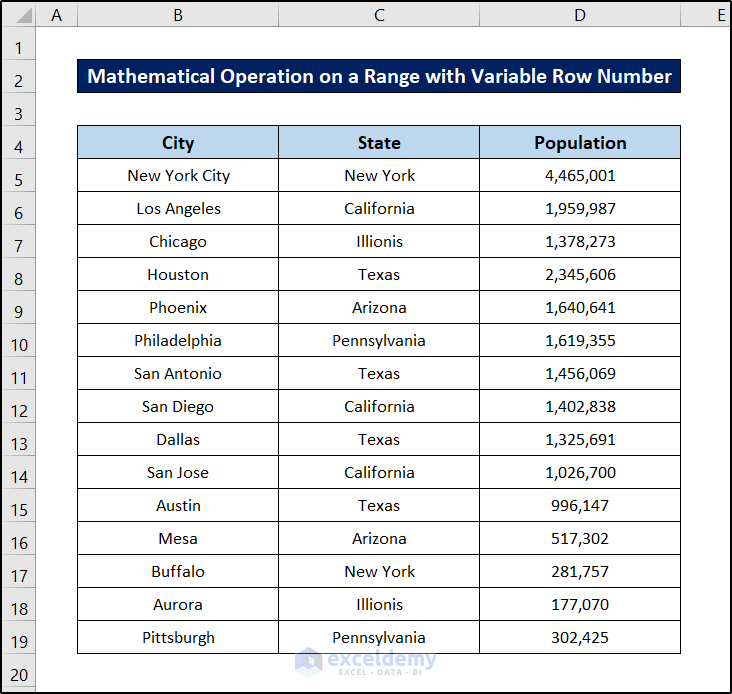
We are going to perform every operation in the following dataset.
Each operation is divided into its own sub-section. Keep reading to see how each of them works or find the one you need from the table above.
1. Selecting a Range with Variable Row Number
In this first section, we are going to select a range. This selection of range is the very basic portion of the code after which different operations can be done depending on variable row number in Excel. This code simply takes in different parameters such as where to start and end the range in the spreadsheet and selects them. Follow these steps to see how you can use this.
Steps:
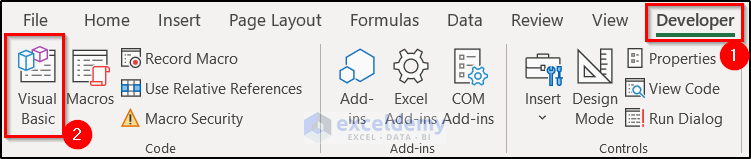
- First of all, go to the spreadsheet where you want to perform the operation and select the Developer tab on your ribbon.
- Then select Visual Basic from the Code section.
- As a result, the VBA window will open up. First, click on the Insert tab on it.

- Then select Module from the drop-down menu.
- Thus a new module will be created on the window. Select the module by double-clicking on it.
- Next, write down the following code.
Sub Select_Range()
First_Cell = InputBox("Enter the First Cell to Select: ")
Row_Number = Str(Range(First_Cell).Row)
Number_of_Rows = InputBox("Enter the Number of Rows to Select: ")
Rng = First_Cell & ":" & Mid(First_Cell, 1, Len(First_Cell) - Len(Row_Number) + 1) & Mid(Str(Int(Number_of_Rows) + Int(Row_Number) - 1), 2, 10)
Range(Rng).Select
End Sub
🔎 Breakdown of the Code
First_Cell = InputBox("Enter the First Cell to Select: ")This line creates an input box to where it will start the selection.
Row_Number = Str(Range(First_Cell).Row)The line converts the row number of the previous input to a string.
Number_of_Rows = InputBox("Enter the Number of Rows to Select: ")The line creates an input box that it will use to select the number of cells in the range.
Rng = First_Cell & ":" & Mid(First_Cell, 1, Len(First_Cell) - Len(Row_Number) + 1) & Mid(Str(Int(Number_of_Rows) + Int(Row_Number) - 1), 2, 10)

Range(Rng).Select
This portion of the code creates the range starting from First_Cell to Number_of_Rows and selects the range.
- Once you have done that, press F5 on your keyboard to run the code.
- Consequently, an input box will pop up. In this box, type in the cell reference from where you want to start the range.
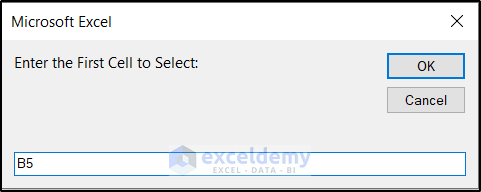
- Then press Enter and click on OK.
- In the next input box, put in the number of entries of the range you want to wish.

- Now press Enter and click on OK.
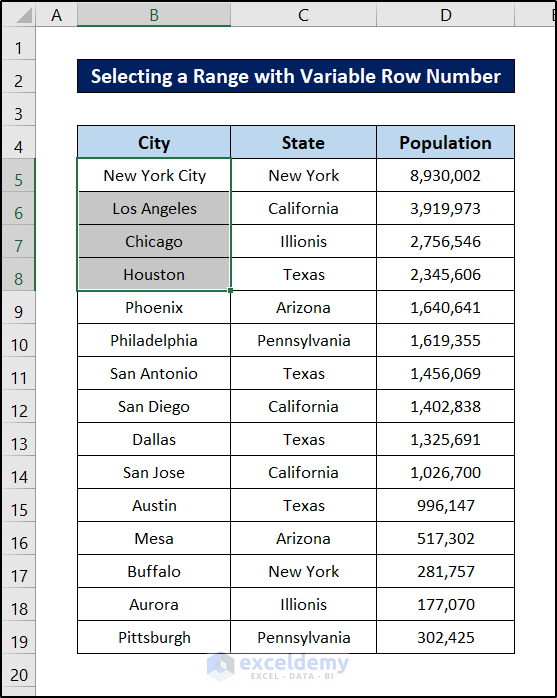
The range in the Excel spreadsheet will now be selected with the variable row number you had put in.
Read More: How to Get Row Number of Current Cell in Excel
2. Inserting Number into Range with Variable Row Number
We can follow this process to insert a number before (or after) each entry of a range. These numbers would be different for variable row number of the range in the Excel spreadsheet. The main idea is to select a range with the previously mentioned VBA code and add some extra bit of code to insert the number in the range however we want it.
Follow these steps for more details.
Steps:
- First of all, go to the spreadsheet you want to perform the operation and go to the Developer tab of the ribbon.
- Then select Visual Basic from the Code section.
- As a result, the VBA window will open up. Now select Insert from the window.
- And then select Module from the drop-down list.
- This will create a new module in the window. Now select the module if it is not already selected by double-clicking on it.
- Next, insert the following code in the module.
Sub Insert_Numbers()
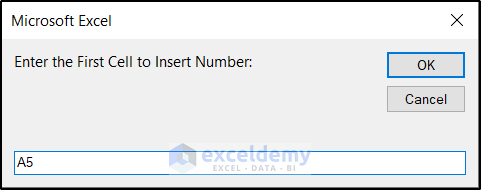
First_Cell = InputBox("Enter the First Cell to Insert Number: ")
Row_Number = Str(Range(First_Cell).Row)
Number_of_Rows = InputBox("Enter the Total Number of Rows to Insert Numbers: ")
Set Rng = Range(First_Cell & ":" & Mid(First_Cell, 1, Len(First_Cell) - Len(Row_Number) + 1) & Mid(Str(Int(Number_of_Rows) + Int(Row_Number) - 1), 2, 10))
Series_or_Fixed = Int(InputBox("Enter 1 to Enter a Series of Numbers: " + vbNewLine + vbNewLine + "OR" + vbNewLine + vbNewLine + "Enter 2 to Enter a Fixed Number: "))
If Series_or_Fixed = 1 Then
First_Number = Int(InputBox("Enter the First Number: "))
Increment = Int(InputBox("Enter the Increment: "))
For i = 1 To Rng.Rows.Count
Rng.Cells(i, 1) = First_Number + (i - 1) * Increment
Next i
ElseIf Series_or_Fixed = 2 Then
Number = Int(InputBox("Enter the Fixed Number: "))
For i = 1 To Rng.Rows.Count
Rng.Cells(i, 1) = Number
Next i
End If
End Sub
🔎 Breakdown of the Code
First_Cell = InputBox("Enter the First Cell to Insert Number: ")
Row_Number = Str(Range(First_Cell).Row)
Number_of_Rows = InputBox("Enter the Total Number of Rows to Insert Numbers: ")
Set Rng = Range(First_Cell & ":" & Mid(First_Cell, 1, Len(First_Cell) - Len(Row_Number) + 1) & Mid(Str(Int(Number_of_Rows) + Int(Row_Number) - 1), 2, 10))
This portion of the code takes a starting point and the number of entries in a range and makes a range for further operations just like the code of the previous section.
Series_or_Fixed = Int(InputBox("Enter 1 to Enter a Series of Numbers: " + vbNewLine + vbNewLine + "OR" + vbNewLine + vbNewLine + "Enter 2 to Enter a Fixed Number: "))This line creates an input box that takes in the series type.
If Series_or_Fixed = 1 Then
    First_Number = Int(InputBox("Enter the First Number: "))
    Increment = Int(InputBox("Enter the Increment: "))
    For i = 1 To Rng.Rows.Count
        Rng.Cells(i, 1) = First_Number + (i - 1) * Increment
    Next i
This loop is activated if we select an increment type series in the previous box. The if loop continues until the range is over and adds an increment each time the value in printed in an iteration.
ElseIf Series_or_Fixed = 2 Then
    Number = Int(InputBox("Enter the Fixed Number: "))
    For i = 1 To Rng.Rows.Count
        Rng.Cells(i, 1) = Number
    Next i
Meanwhile, this loop comes into play when the series will only contain one number. The loop will repeat with the number of entries the range has and each time print a single value.
- Once you have done that, press F5 on your keyboard.
- An input box will open up first. Now enter the cell where you want the numbered range to start.
- Then press Enter/ click on OK.
- In the next input box, select the number of components you want your range to be.

- Once you are done, click on OK.
- Now another input box will appear. At this instant, enter 1 for a series or 2 if you want a fixed value to be situated with each cell.

- Next, enter the first number of your entry and click on OK.

- Finally, enter the increment you want in the next box and click on OK.

As a result of the previous steps, the spreadsheet will now look like this.
This is how you can insert numbers in an Excel range with variable row number.
3. Mathematical Operation on a Range with Variable Row Number
Next up, we are going to perform a mathematical operation in a range with variable row number on a particular Excel spreadsheet. We need to modify the code a bit so that it can perform all of the arithmetic operations.
Follow these steps for a detailed guide.
Steps:
- First, go to the spreadsheet you want to perform the operation and go to the Developer tab on your ribbon.
- Then select Visual Basic from the Code
- As a result, the VBA window will open up. Now select Insert in the window.
- Then from the drop-down menu, select Module.
- Consequently, a new module will be inserted into the window. If the module is not already selected, select it by double clicking on it.
- Then insert the following code in the module.
Sub Mathematical_Operation()
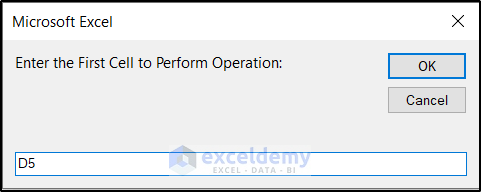
First_Cell = InputBox("Enter the First Cell to Perform Operation: ")
Row_Number = Str(Range(First_Cell).Row)
Number_of_Rows = InputBox("Enter the Total Number of Rows to Perform Operation: ")
Set Rng = Range(First_Cell & ":" & Mid(First_Cell, 1, Len(First_Cell) - Len(Row_Number) + 1) & Mid(Str(Int(Number_of_Rows) + Int(Row_Number) - 1), 2, 10))
Operation = Int(InputBox("Enter the Operation to Perform: " + vbNewLine + "Enter 1 for Addition: " + vbNewLine + "Enter 2 for Subtraction: " + vbNewLine + "Enter 3 for Multiplication: " + vbNewLine + "Enter 4 for Division: "))
Operations = Array("Add", "Subtract", "Multiply", "Divide")
Number = Int(InputBox("Enter the Number to " + Operations(Operation - 1) + ": "))
For i = 1 To Rng.Rows.Count
If Operation = 1 Then
Rng.Cells(i, 1) = Rng.Cells(i, 1).Value + Number
End If
If Operation = 2 Then
Rng.Cells(i, 1) = Rng.Cells(i, 1).Value - Number
End If
If Operation = 3 Then
Rng.Cells(i, 1) = Rng.Cells(i, 1).Value * Number
End If
If Operation = 4 Then
Rng.Cells(i, 1) = Rng.Cells(i, 1).Value / Number
End If
Next i
End Sub🔎 Breakdown of the Code
First_Cell = InputBox("Enter the First Cell to Perform Operation: ")
Row_Number = Str(Range(First_Cell).Row)
Number_of_Rows = InputBox("Enter the Total Number of Rows to Perform Operation: ")
Set Rng = Range(First_Cell & ":" & Mid(First_Cell, 1, Len(First_Cell) - Len(Row_Number) + 1) & Mid(Str(Int(Number_of_Rows) + Int(Row_Number) - 1), 2, 10))
This segment creates a range by taking in the first and the number of entries in a range.
Operation = Int(InputBox("Enter the Operation to Perform: " + vbNewLine + "Enter 1 for Addition: " + vbNewLine + "Enter 2 for Subtraction: " + vbNewLine + "Enter 3 for Multiplication: " + vbNewLine + "Enter 4 for Division: "))This creates an input box to determine which mathematical operation to perform next.
Number = Int(InputBox("Enter the Number to " + Operations(Operation - 1) + ": "))The line creates an input box to take in a number to add/subtract/multiply/divide.
For i = 1 To Rng.Rows.Count
    If Operation = 1 Then
        Rng.Cells(i, 1) = Rng.Cells(i, 1).Value + Number
    End If
    If Operation = 2 Then
        Rng.Cells(i, 1) = Rng.Cells(i, 1).Value - Number
    End If
    If Operation = 3 Then
        Rng.Cells(i, 1) = Rng.Cells(i, 1).Value * Number
    End If
    If Operation = 4 Then
        Rng.Cells(i, 1) = Rng.Cells(i, 1).Value / Number
    End If
Next i
This for loop adds/subtracts/multiplies/divides the previous number to the range and continues for the number of entries in a range.
- After that, press F5 on your keyboard.
- Next, an input box will open up. Here, select the first cell of the range where you want to start the operation. Numeric values of our dataset start from cell D5.
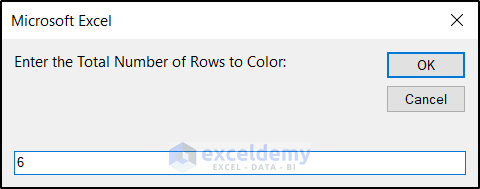
- After clicking on OK a new input box will appear. Here, enter the number of cells in the range you want to operate on.

- Then click on OK.
- Next, enter the suitable number based on the type of operation you want to perform. For example, we have entered 4 for division.

- Then click on OK.
- Finally, select the number you want to divide or any other operation you want to perform, and then click on OK.
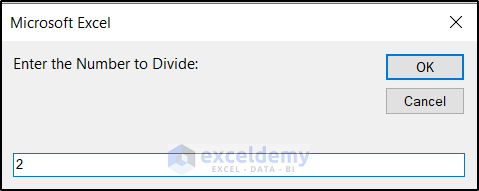
As a result, the dataset will now look like this with the first 3 entries divided by 2.
This is how you can perform different mathematical operations in an Excel range with variable row number.
4. Changing Cell Colors of Range with Variable Row Number
Finally, in this section, we are going to change the cell color of an Excel range based on the variable row number. You can also modify this code to change the cells into different formats.
Follow these steps to see how you can use the code to change the cell color.
Steps:
- First, go to the spreadsheet you want to perform the operation and go to the Developer tab on your ribbon.
- Then select Visual Basic from the Code
- As a result, the VBA window will open up. Now select Insert in the window.
- Then from the drop-down menu, select Module.
- Consequently, a new module will be inserted into the window. If the module is not already selected, select it by double clicking on it.
- Then insert the following code in the module.
Sub Color_Range()
First_Cell = InputBox("Enter the First Cell to Color: ")
Row_Number = Str(Range(First_Cell).Row)
Number_of_Rows = InputBox("Enter the Total Number of Rows to Color: ")
Set Rng = Range(First_Cell & ":" & Mid(First_Cell, 1, Len(First_Cell) - Len(Row_Number) + 1) & Mid(Str(Int(Number_of_Rows) + Int(Row_Number) - 1), 2, 10))
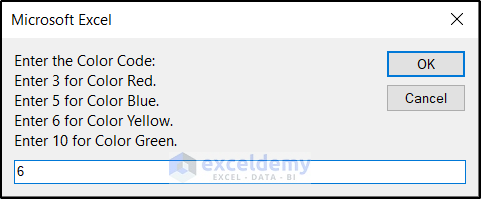
Color_Code = Int(InputBox("Enter the Color Code: " + vbNewLine + "Enter 3 for Color Red." + vbNewLine + "Enter 5 for Color Blue." + vbNewLine + "Enter 6 for Color Yellow." + vbNewLine + "Enter 10 for Color Green."))
Background_or_Text = Int(InputBox("Enter 1 to Color the Whole Background of the Cells: " + vbNewLine + vbNewLine + "Or" + vbNewLine + vbNewLine + "Enter 2 to Color Only the Texts: "))
For i = 1 To Rng.Rows.Count
If Background_or_Text = 1 Then
Rng(i, 1).Interior.ColorIndex = Color_Code
ElseIf Background_or_Text = 2 Then
Rng.Cells(i, 1).Characters(1, Len(Rng.Cells(i, 1))).Font.ColorIndex = Color_Code
End If
Next i
End Sub🔎 Breakdown of the Code
First_Cell = InputBox("Enter the First Cell to Color: ")
Row_Number = Str(Range(First_Cell).Row)
Number_of_Rows = InputBox("Enter the Total Number of Rows to Color: ")
Set Rng = Range(First_Cell & ":" & Mid(First_Cell, 1, Len(First_Cell) - Len(Row_Number) + 1) & Mid(Str(Int(Number_of_Rows) + Int(Row_Number) - 1), 2, 10))
This portion of the cell creates a range with the starting cell and the number of entries inserted into the input box.
Color_Code = Int(InputBox("Enter the Color Code: " + vbNewLine + "Enter 3 for Color Red." + vbNewLine + "Enter 5 for Color Blue." + vbNewLine + "Enter 6 for Color Yellow." + vbNewLine + "Enter 10 for Color Green."))The line creates an input box that works as the command for the color type you want to select.
Background_or_Text = Int(InputBox("Enter 1 to Color the Whole Background of the Cells: " + vbNewLine + vbNewLine + "Or" + vbNewLine + vbNewLine + "Enter 2 to Color Only the Texts: "))Meanwhile, this line creates another input box which will determine later whether the color will be used in the cell background or just the text color.
For i = 1 To Rng.Rows.Count
    If Background_or_Text = 1 Then
        Rng(i, 1).Interior.ColorIndex = Color_Code
    ElseIf Background_or_Text = 2 Then
        Rng.Cells(i, 1).Characters(1, Len(Rng.Cells(i, 1))).Font.ColorIndex = Color_Code
    End If
Next i
This combination of for and if loop changes the text color/background color of each entry of the range.
- Once you have done that, press F5 on your keyboard.
- At this instant, an input box will appear on the spreadsheet, enter the cell where you want your colored range to start and click on OK.

- In the next box, select the number of cells you want in the range and click on OK.
- Next, select the suitable number for the color you want the range to be filled with. Then click on OK.
- Finally, enter 1 to change the fill color or 2 to change the text color of the cells and click on OK.

The dataset on the spreadsheet will now look like this.
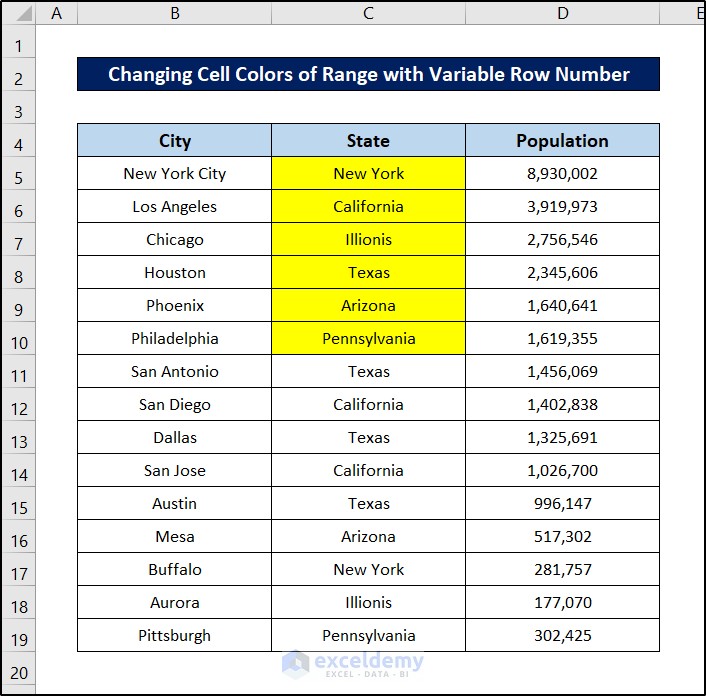
This is how you can format an Excel range with variable row number with the help of VBA.
Things to Remember
- While entering cell values, do not use absolute references.
- You can also run these codes afterward from the Macros under the Code group of the Developer Just select the name of the code properly before running it.
- Watch out for the correct sub names while working with multiple codes in a single workbook.
- Always back up your dataset before working with VBA codes, as many of the actions are irreversible.
Download Practice Workbook
You can download the workbook used for the demonstration from the link below.
Conclusion
These were some of the operations you can perform in an Excel range with variable row number in a dataset or a range. Hopefully, you can work with these with ease. I hope you found this guide helpful and informative. If you have any questions or suggestions, let us know below.
Related Article
<< Go Back to Row Number | Rows in Excel | Learn Excel
Get FREE Advanced Excel Exercises with Solutions!
