Here is a step-by-step guide on how to transpose rows to columns using the Power Query in Excel.
Step 1 – Inserting Data into Power Query
Suppose we have the following data table which we want to transpose using the Power Query tool.
![]()
First, we’ll insert the data to transpose into the Power Query Editor.
- Go to Data ➤ From Table/Range.
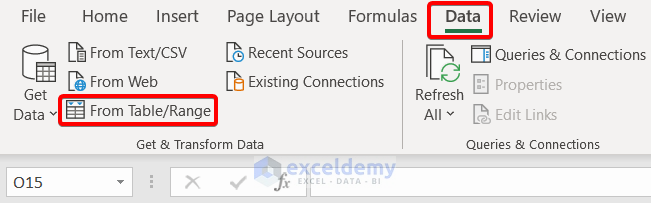
The Create Table dialog box will open.
- Insert the table range and click OK.
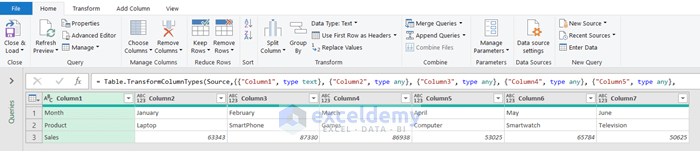
![]() The Power Query Editor will automatically pull the data table into it, like in this image:
The Power Query Editor will automatically pull the data table into it, like in this image:
Read More: How to Transpose Rows to Columns Using Excel VBA
Step 2 – Applying the Transpose Command
We’re ready to apply the Transpose command.
- Go to Transform ➤ Transpose.
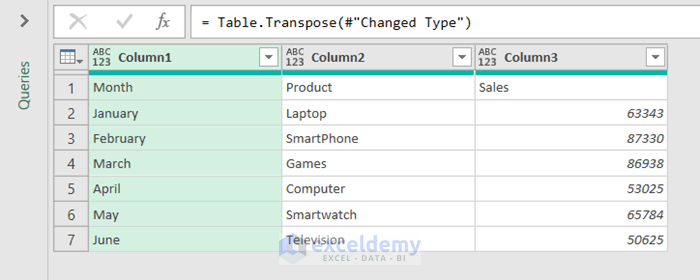
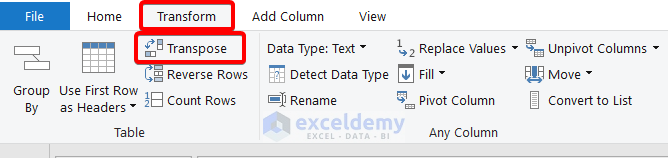 After hitting the Transpose command, the rows will be instantly transformed into columns like in the image below:
Step 3 – Closing & Loading
To conclude, we’ll close the Power Query Editor and place the transformed data in the spreadsheet.
- Go to the Home tab.
- Click on the Close & Load drop-down.
- Click on Close & Load.
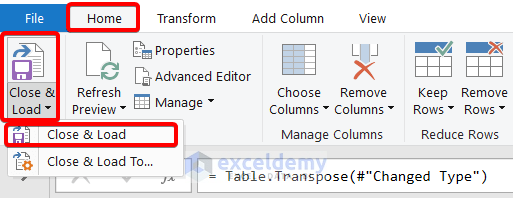 The Power Query Editor will close.
The transformed data will appear in a new worksheet like this:
![]()
Download Practice Workbook
Related Articles
- Convert Columns to Rows in Excel Using Power Query
- How to Convert Columns to Rows in Excel Based On Cell Value
- VBA to Transpose Multiple Columns into Rows in Excel
- How to Convert Column to Comma Separated List With Single Quotes
- Excel Paste Transpose Shortcut
- Excel Transpose Formulas Without Changing References
- How to Transpose in Excel VBA


Extremely helpful! Thank you!