Method 1 – Use VBA Macro to Send Email Automatically Based on a Cell Value
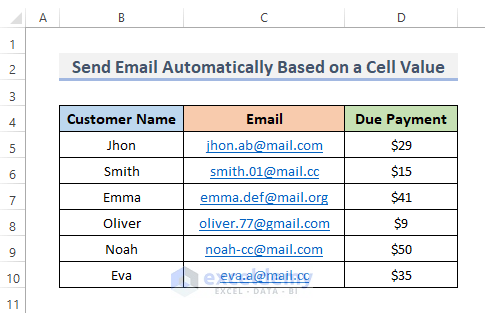
We have the following dataset of some customer details of a super shop. The dataset contains some customers’ names in column B, their email addresses in column C, and some dues for their purchasing products in column D. We want to send emails to them to request for paying the due bills, but here we have a condition which we follow: if the customer’s bill is greater than 10, only then we will send them emails.
Steps:
- Go to the Developer tab from the ribbon.
- From the Code category, click on Visual Basic to open the Visual Basic Editor. Alternatively, press Alt + F11 to open the Visual Basic Editor.

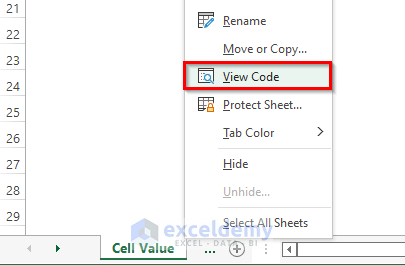
- You can also right-click on your worksheet name and go to View Code. This will also take you to Visual Basic Editor.
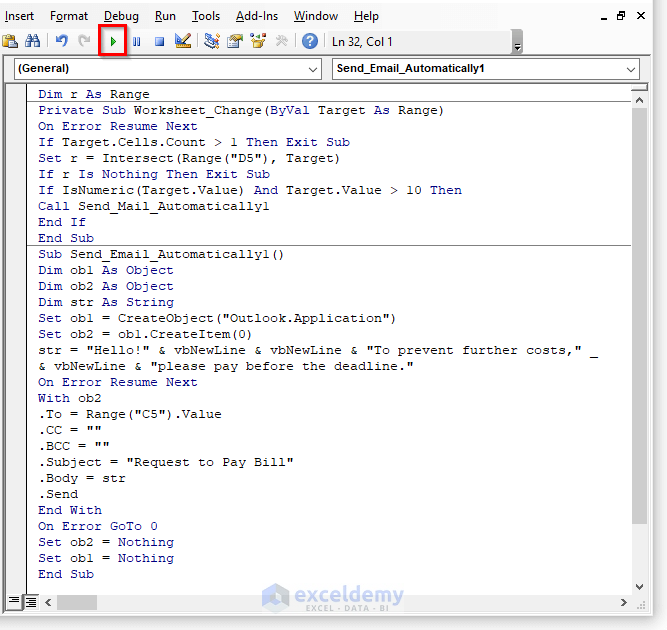
- You’ll get a Visual Basic Editor to insert code.
- Copy and paste the VBA code shown below.
VBA Code:
Dim r As Range
Private Sub Worksheet_Change(ByVal Target As Range)
On Error Resume Next
If Target.Cells.Count > 1 Then Exit Sub
Set r = Intersect(Range("D5"), Target)
If r Is Nothing Then Exit Sub
If IsNumeric(Target.Value) And Target.Value > 10 Then
Call Send_Mail_Automatically1
End If
End Sub
Sub Send_Mail_Automatically1()
Dim ob1 As Object
Dim ob2 As Object
Dim str As String
Set ob1 = CreateObject("Outlook.Application")
Set ob2 = ob1.CreateItem(0)
str = "Hello!" & vbNewLine & vbNewLine & "To prevent further costs," _
& vbNewLine & "please pay before the deadline."
On Error Resume Next
With ob2
.To = Range("C5").Value
.cc = ""
.BCC = ""
.Subject = "Request to Pay Bill"
.Body = str
.Send
End With
On Error GoTo 0
Set ob2 = Nothing
Set ob1 = Nothing
End Sub- Run the code by clicking on the RubSub button or pressing the keyboard shortcut F5.
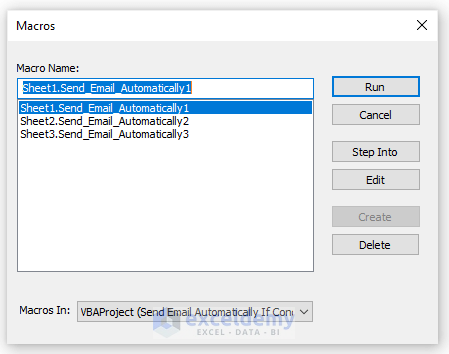
- A Macros dialog will show up. Click on the Macro with the same name as the VBA function above then hit the Run button.
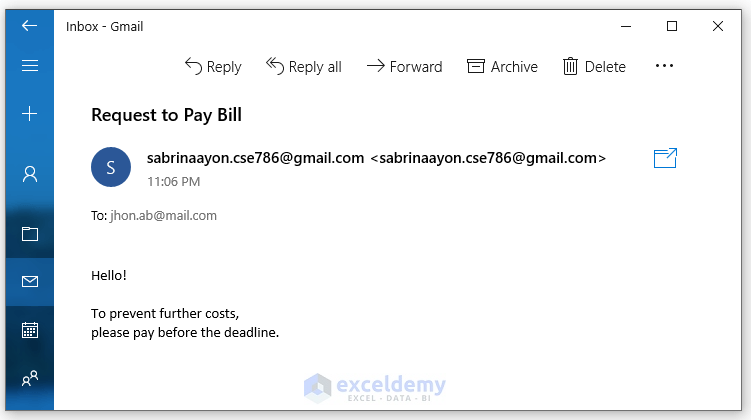
- If you go to your Outlook application and check the outbox, you will find the mail that you just sent via VBA Macro from Excel.
VBA Code Explanation
Private Sub Worksheet_Change(ByVal Target As Range)
On Error Resume Next
If Target.Cells.Count > 1 Then Exit Su
Set r = Intersect(Range("D5"), Target)
If r Is Nothing Then Exit Sub
If IsNumeric(Target.Value) And Target.Value > 10 Then
Call Send_Mail_Automatically1
End If
End Sub
We will be using a Private Sub for this. When the value of a cell change, this code will execute automatically. We use Private Sub with the Worksheet Change event. Then, reduce the number of cells to one, which is D5. After that, see if it’s more than 10. Finally, if the condition is fulfilled, the Send_Email_Automatically1 Sub Procedure will run.
Sub Send_Mail_Automatically1()
Dim ob1 As Object
Dim ob2 As Object
Dim str As String
Set ob1 = CreateObject("Outlook.Application")
Set ob2 = ob1.CreateItem(0)
str = "Hello!" & vbNewLine & vbNewLine & "To prevent further costs," & vbNewLine & "please pay before the deadline."
On Error Resume Next
With ob2
.To = Range("C5").Value
.cc = ""
.BCC = ""
.Subject = "Request to Pay Bill"
.Body = str
.Send
We use the Send_Email_Automatically1 Sub Procedure. Then, we declare the variable types. We use Outlook as our email client. Then, we enter the email content into our code; str is showing the email body, and then we want to send the email to the cell value C5, where our customers’ emails are stored, we put the subject on ‘.Subject’. Following that, ‘.Send’ is utilized to send our email.
Read More: How to Send Excel File to Email Automatically
Method 2 – Send Email Automatically Based on a Due Date Using VBA Code
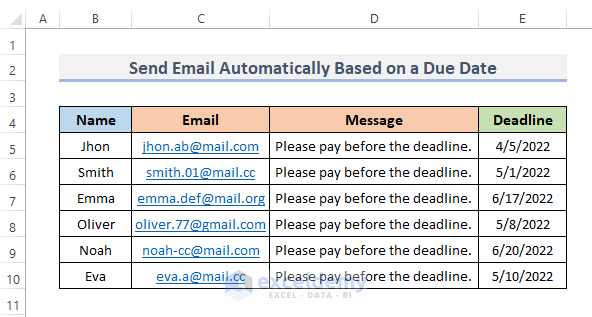
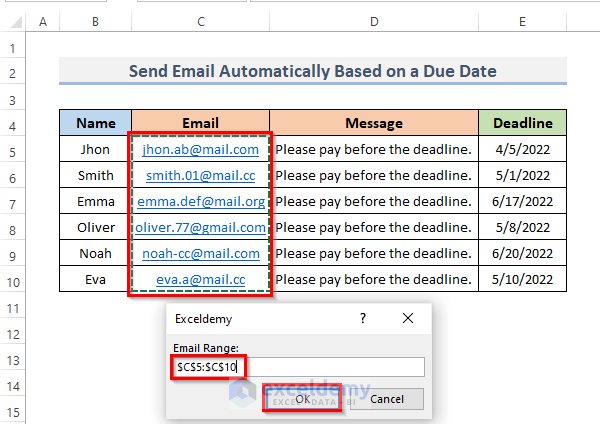
The dataset contains some customer names in column B, their email addresses in column C, the message we want to send in column D, and the deadlines of the due payment in column E.
Steps:
- Go to the Developer tab from the ribbon.
- Click on Visual Basic to open the Visual Basic Editor. Another way to open the Visual Basic Editor is simply to press Alt + F11. Or, right-click on the sheet, then select View Code.
- This will open the visual basic window.
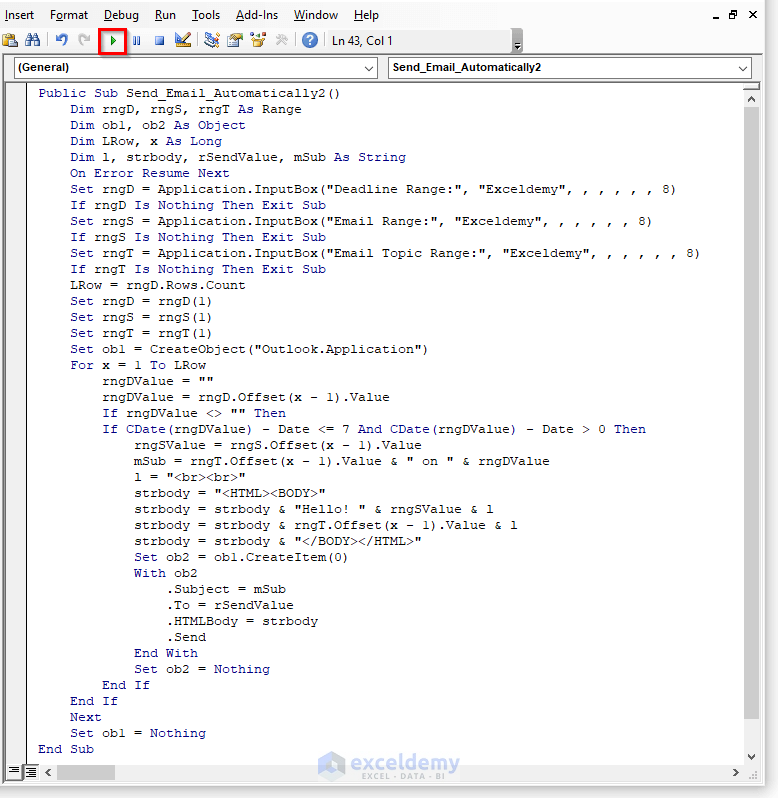
- Copy and paste the VBA code below into the window.
VBA Code:
Public Sub Send_Email_Automatically2()
Dim rngD, rngS, rngT As Range
Dim ob1, ob2 As Object
Dim LRow, x As Long
Dim l, strbody, rSendValue, mSub As String
On Error Resume Next
Set rngD = Application.InputBox("Deadline Range:", "Exceldemy", , , , , , 8)
If rngD Is Nothing Then Exit Sub
Set rngS = Application.InputBox("Email Range:", "Exceldemy", , , , , , 8)
If rngS Is Nothing Then Exit Sub
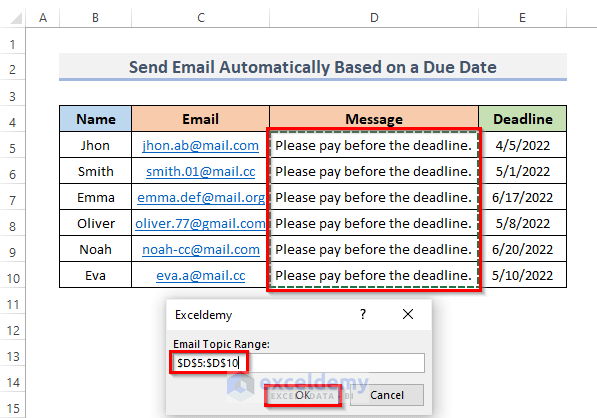
Set rngT = Application.InputBox("Email Topic Range:", "Exceldemy", , , , , , 8)
If rngT Is Nothing Then Exit Sub
LRow = rngD.Rows.Count
Set rngD = rngD(1)
Set rngS = rngS(1)
Set rngT = rngT(1)
Set ob1 = CreateObject("Outlook.Application")
For x = 1 To LRow
rngDValue = ""
rngDValue = rngD.Offset(x - 1).Value
If rngDValue <> "" Then
If CDate(rngDValue) - Date <= 7 And CDate(rngDValue) - Date > 0 Then
rngSValue = rngS.Offset(x - 1).Value
mSub = rngT.Offset(x - 1).Value & " on " & rngDValue
l = "<br><br>"
strbody = "<HTML><BODY>"
strbody = strbody & "Hello! " & rngSValue & l
strbody = strbody & rngT.Offset(x - 1).Value & l
strbody = strbody & "</BODY></HTML>"
Set ob2 = ob1.CreateItem(0)
With ob2
.Subject = mSub
.To = rSendValue
.HTMLBody = strbody
.Send
End With
Set ob2 = Nothing
End If
End If
Next
Set ob1 = Nothing
End Sub- Press the F5 key or click on the Run Sub button to run the code.
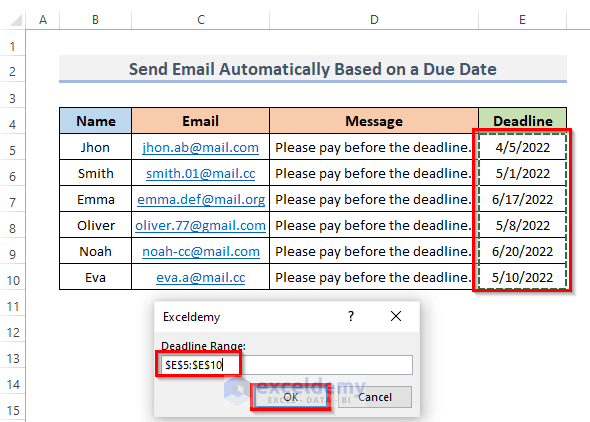
- Select the deadline column range and click OK.
- Select the email column range and hit OK to continue.
- Choose the message column range and click OK.
- The messages are now sent to the email addresses. You can check your Outlook inbox to ensure that.
VBA Code Explanation
Public Sub Send_Email_Automatically2()
    Dim rngD, rngS, rngT As Range
    Dim ob1, ob2 As Object
    Dim LRow, x As Long
    Dim l, strbody, rSendValue, mSub As String
    On Error Resume Next
    Set rngD = Application.InputBox("Deadline Range:", "Exceldemy", , , , , , 8)
    If rngD Is Nothing Then Exit Sub
    Set rngS = Application.InputBox("Email Range:", "Exceldemy", , , , , , 8)
    If rngS Is Nothing Then Exit Sub
    Set rngT = Application.InputBox("Email Topic Range:", "Exceldemy", , , , , , 8)
    If rngT Is Nothing Then Exit Sub
    LRow = rngD.Rows.Count
    Set rngD = rngD(1)
    Set rngS = rngS(1)
    Set rngT = rngT(1)
    Set ob1 = CreateObject("Outlook.Application")
Here, we again use a Private Sub, Send_Email_Automatically2 is the name of our Sub. Procedure. We declare the variable kinds. Then, we use InputBox to provide the value range. After that, we choose Outlook as our mail client.
 For x = 1 To LRow
        rngDValue = ""
        rngDValue = rngD.Offset(x - 1).Value
        If rngDValue <> "" Then
        If CDate(rngDValue) - Date <= 7 And CDate(rngDValue) - Date > 0 Then
            rngSValue = rngS.Offset(x - 1).Value
            mSub = rngT.Offset(x - 1).Value & " on " & rngDValue
            l = "<br><br>"
            strbody = "<HTML><BODY>"
            strbody = strbody & "Hello! " & rngSValue & l
            strbody = strbody & rngT.Offset(x - 1).Value & l
            strbody = strbody & "</BODY></HTML>"
            Set ob2 = ob1.CreateItem(0)
            With ob2
                .Subject = mSub
                .To = rSendValue
                .HTMLBody = strbody
                .Send
Then we use the VBA CDate function to see if a date is within seven days of the current date. Then, in our code, set the email content. Finally, we use ‘.Send’ to send our email.
Read More: How to Automatically Send Email from Excel Based on Date
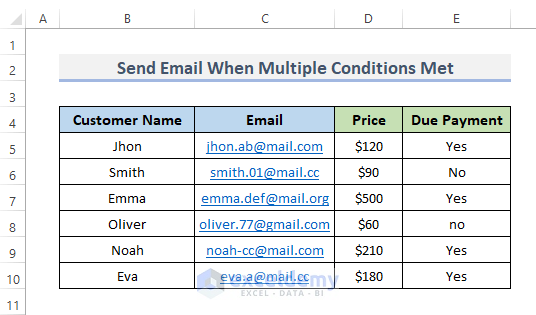
Method 3 – Automatically Send Email with Excel VBA When Multiple Conditions Are Met
We are going to use a VBA Macro to send an email, but with multiple conditions.
Steps:
- Click the Developer tab on the ribbon.
- Launch the Visual Basic Editor by clicking on Visual Basic.
- Alternatively, you may access the Visual Basic Editor by pressing Alt + F11. Or, right-click on the sheet name and choose View Code from the menu.
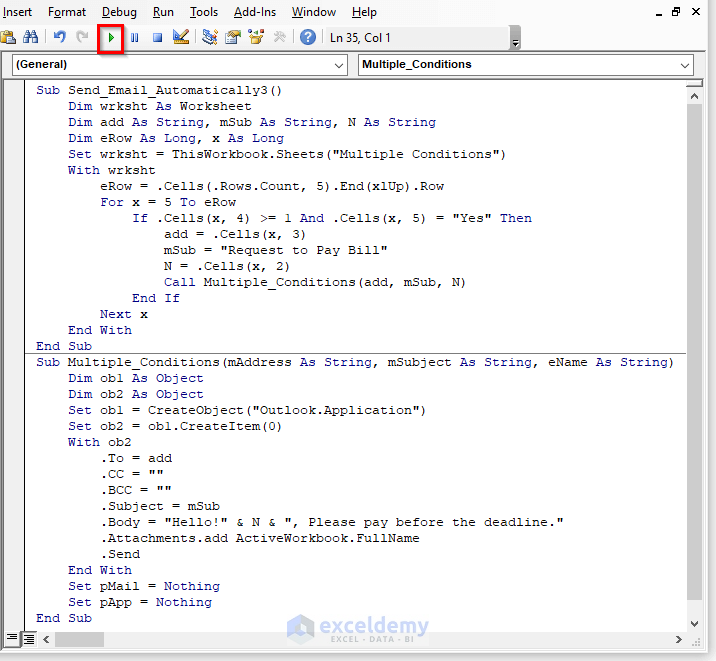
- The visual basic window will appear. Insert this code:
VBA Code:
Sub Send_Email_Automatically3()
    Dim wrksht As Worksheet
    Dim add As String, mSub As String, N As String
    Dim eRow As Long, x As Long
    Set wrksht = ThisWorkbook.Sheets("Multiple Conditions")
    With wrksht
        eRow = .Cells(.Rows.Count, 5).End(xlUp).Row
        For x = 5 To eRow
            If .Cells(x, 4) >= 1 And .Cells(x, 5) = "Yes" Then
                add = .Cells(x, 3)
                mSub = "Request to Pay Bill"
                N = .Cells(x, 2)
                Call Multiple_Conditions(add, mSub, N)
            End If
        Next x
    End With
End Sub
Sub Multiple_Conditions(mAddress As String, mSubject As String, eName As String)
    Dim ob1 As Object
    Dim ob2 As Object
    Set ob1 = CreateObject("Outlook.Application")
    Set ob2 = ob1.CreateItem(0)
    With ob2
        .To = add
        .CC = ""
        .BCC = ""
        .Subject = mSub
        .Body = "Hello!" & N & ", To prevent further costs, please pay before the deadline."
        .Attachments.add ActiveWorkbook.FullName
        .Send
    End With
    Set pMail = Nothing
    Set pApp = Nothing
End Sub- Press the F5 key to run the code.
- A Macros dialog will appear. Choose the appropriate Macros and press the Run button.
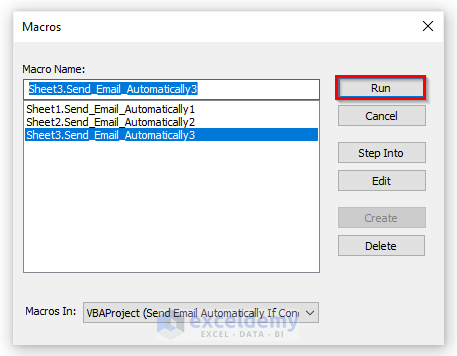
- If you open Outlook and look in your mailbox, you will see the emails that you just sent through VBA Macro from Excel.
VBA Code Explanation
Sub Send_Email_Automatically3()
    Dim wrksht As Worksheet
    Dim add As String, mSub As String, N As String
    Dim eRow As Long, x As Long
    Set wrksht = ThisWorkbook.Sheets("Multiple Conditions")
    With wrksht
        eRow = .Cells(.Rows.Count, 5).End(xlUp).Row
        For x = 5 To eRow
            If .Cells(x, 4) >= 1 And .Cells(x, 5) = "Yes" Then
                add = .Cells(x, 3)
                mSub = "Request to Pay Bill"
                N = .Cells(x, 2)
                Call Multiple_Conditions(add, mSub, N)
Here, we use two different procedures. Send_Email_Automatically3 is the name of our first Sub Procedure. We set ‘Multiple Conditions’ as our sheet and declare the Variable kinds. Then, we discover the last row number. Furthermore, because our value begins on row 5, we have moved row 5 to the end of our code.
Sub Multiple_Conditions(mAddress As String, mSubject As String, eName As String)
    Dim ob1 As Object
    Dim ob2 As Object
    Set ob1 = CreateObject("Outlook.Application")
    Set ob2 = ob1.CreateItem(0)
    With ob2
        .To = add
        .CC = ""
        .BCC = ""
        .Subject = mSub
        .Body = "Hello!" & N & ", To prevent further costs, please pay before the deadline."
        .Attachments.add ActiveWorkbook.FullName
        .Send
Then, we call Multiple_Conditions, our second Sub Procedure. We choose Outlook as our mail client. Then, in our code, set the email content. Using the Attachment technique, we are adding the Excel file to the email. Following that, we utilize our email to send with ‘.Send’.
Read More: Automatically Send Emails from Excel Based on Cell Content
Download the Practice Workbook
Related Articles
- How to Send an Editable Excel Spreadsheet by Email
- How to Send Bulk Email from Outlook Using Excel
- How to Send Automatic Email from Excel to Outlook
- How to Send Email If Conditions Met in Excel
- How to Send Multiple Emails from Excel Spreadsheet
<< Go Back To Send Email from Excel | Learn Excel
Get FREE Advanced Excel Exercises with Solutions!

The email isnt being sent. ???
Hello, TREY!
Try to do it in a new worksheet and go to the Visual Basic Application using the Developer tab instead of the View Code option.
If it does not work!
Please mail me the dataset.
[email protected]