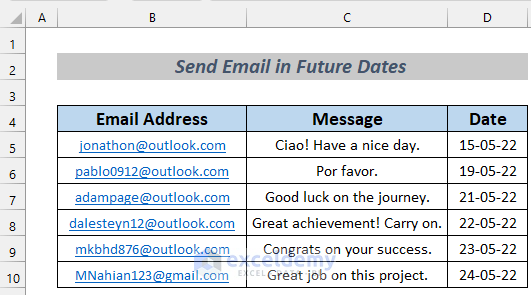
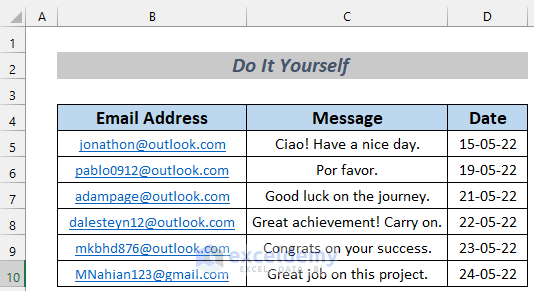
In the dataset, we have some email addresses (all of them are dummy addresses except one). We’re using a real address to demonstrate how the methods work.
How to Automatically Send Email from Excel Based on Date: 3 Ways
Method 1 – Using Excel VBA to Automatically Send an Email Based on a Fixed Date
This VBA macro emails if the date in a selected range matches today’s date. It prompts the user to select a range of cells and checks each cell. If a cell’s value matches the current date, it asks the user for the email subject, sender, recipient, CC, BCC, and message body. It then uses Outlook to send the email with the provided details.
Steps:
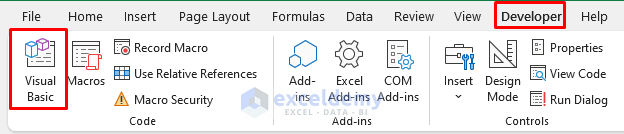
- Go to the Developer tab and select Visual Basic. The VBA window will open.
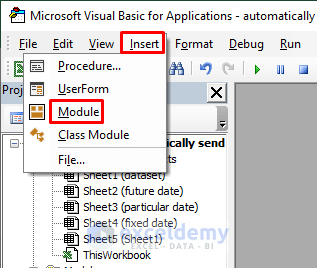
- Select Insert and pick Module.
 Copy the following code in the VBA Module.
Sub SendEmail01()
Dim Range_Select As Range
Dim Date_Range As Range
Dim Cell_Address As String
Dim Subject, Email_From, Email_To, Cc, Bcc, Email_Text As String
Dim Email_Obj, Single_Mail As Object
On Error Resume Next
Cell_Address = ActiveWindow.RangeSelection.Address
Set Range_Select = Application.InputBox("Select a range:", _
"Message Box", Cell_Address, , , , , 8)
If Range_Select Is Nothing Then Exit Sub
For Each Date_Range In Range_Select
If Date_Range.Value = Date Then
Subject = Application.InputBox("Subject: ", "Message", , , , , , 2)
Email_From = Application.InputBox("Send from: ", "Message Box", , , , , , 2)
Email_To = Application.InputBox("Send to: ", "Message Box", , , , , , 2)
If Email_To = "" Then Exit Sub
Cc = Application.InputBox("CC: ", "Message Box", , , , , , 2)
Bcc = Application.InputBox("BCC: ", "Message Box", , , , , , 2)
Email_Text = Application.InputBox("Message Body: ", "Message Box", , , , , , 2)
Set Email_Obj = CreateObject("Outlook.Application")
Set Single_Mail = Email_Obj.CreateItem(0)
With Single_Mail
.Subject = Subject
.To = Email_To
.Cc = Cc
.Bcc = Bcc
.Body = Email_Text
.send
End With
End If
Next
End Sub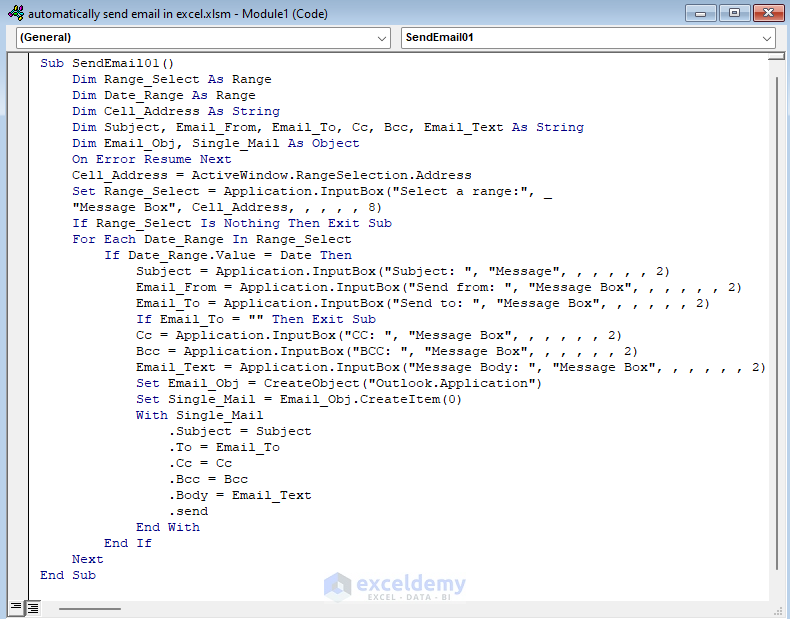
Code Explanation
- We declared some necessary variables: Range_Select and Date_Range as Range; Cell_Address, Subject, Email_From, Email_To, Cc, Bcc, Email_Text as String; Email_Obj and Single_Mail as Object.
- We set Range_Select to an InputBox where it can select a range of cells via a Message Box.
- We use Value in a VBA IF Statement and also set Subject, Email_From and Email_To to an InputBox.
- If there is no Email address (Email_To= “”), the Sub Procedure will exit. Otherwise, we put some more variables in a new IF Statement. Cc and Bcc refer to Carbon Copy and Blind Carbon Copy of the Email that we wish to send to different people.
- The Outlook Application Object is defined by Email_Obj. We use Single_Mail to create an item for the Email_Obj.
- We define Subject, Email_To, Cc, Bcc, Email_Text as the necessary parts of an Email through a With Statement. We also put the .Send command in this statement.
- Go back to your sheet and run the Macro named SendEmail01.
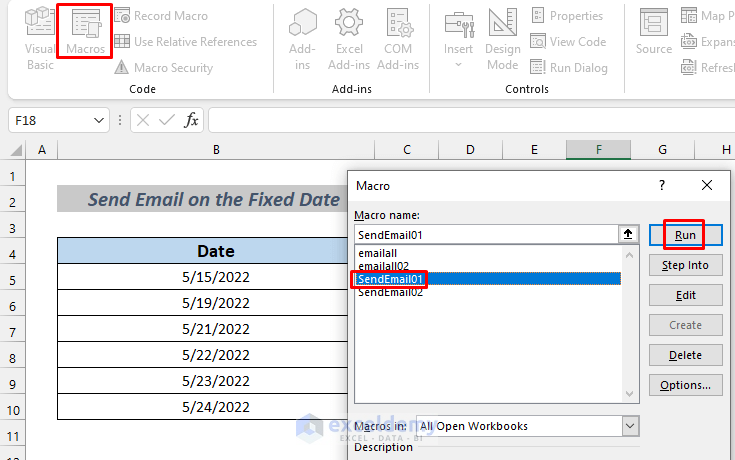
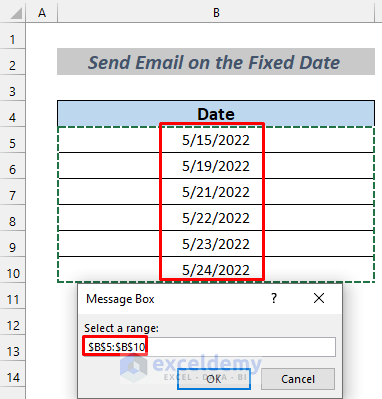
- You will see a Message Box pop up telling you to select the date range.
- Select the range from the table and click OK.
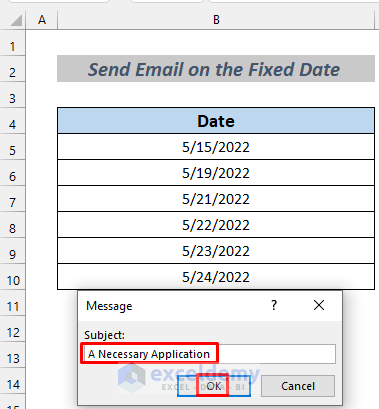
- Another Message Box will pop up. Type the subject and click OK.
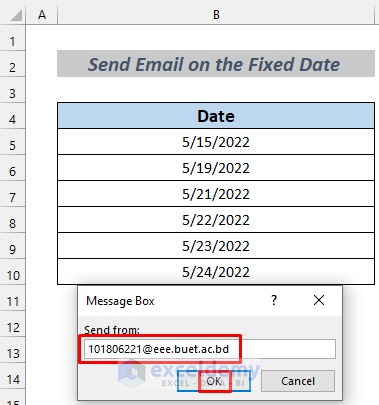
- You will be seeing a chain of Message Boxes telling you to put the necessary information to send the Email. Follow the instructions below.
- Put your sender Email address.
- Type in the Email address for the recipient.

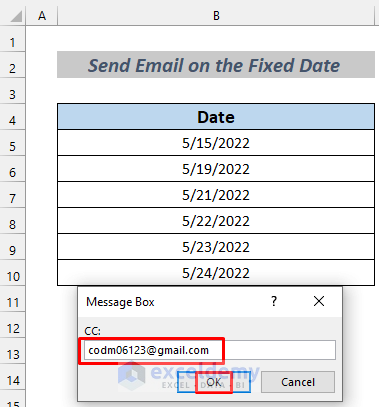
- Insert the CC address.
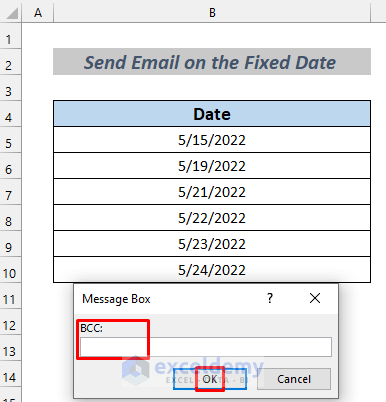
- Put the BCC recipient in the Message Box if you want.
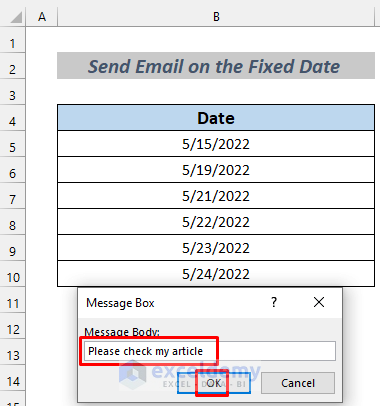
- Type your message.
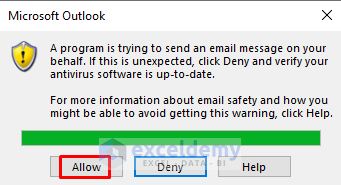
- After the final Message Box, you may see a warning box from Microsoft Outlook. Click Allow.
- This operation will send the Email to the addresses that you put in the corresponding message boxes.
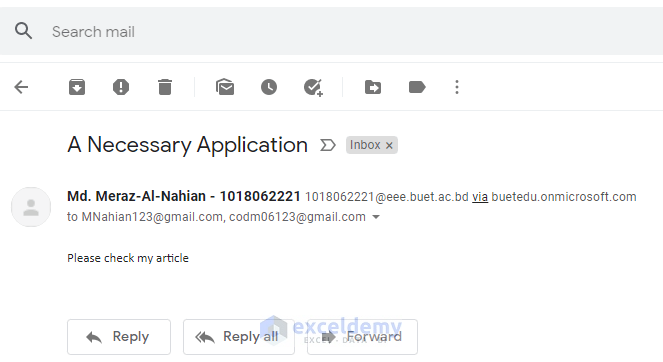
- This is the main Email.
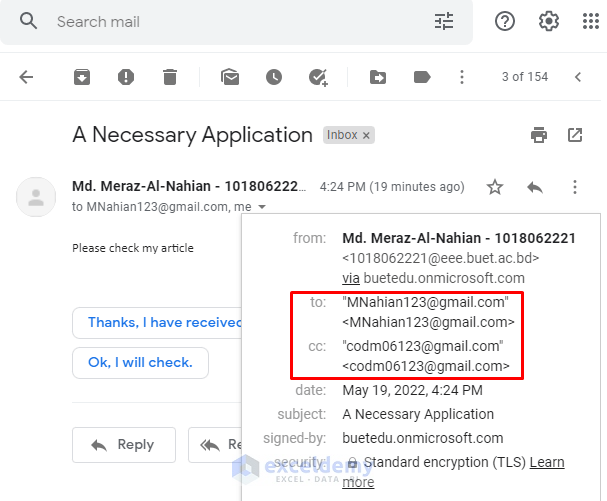
- Here is the Carbon Copy of the Email.
Thus you can automatically send an Email from Excel based on the date.
Read More: How to Send Excel File to Email Automatically
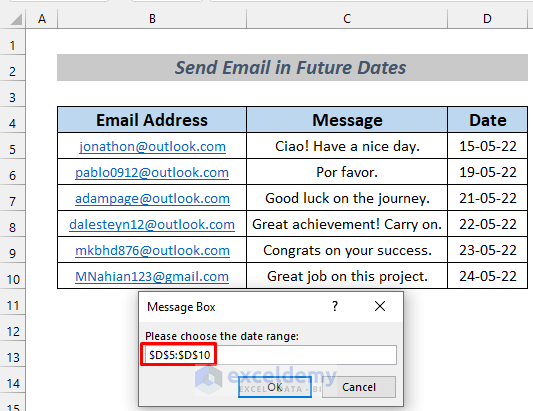
Method 2 – Sending Emails Automatically from Excel Based on Future Dates
In this section, we will send Emails based on future dates. Suppose you want to send someone an Email prior to 3 days or 7 days.
Steps:
- Open a VBA Module (see Method 1 if necessary).
- Copy the following code in the VBA Module.
Public Sub SendEmail02()
Dim Date_Range As Range
Dim Mail_Recipient As Range
Dim Email_Text As Range
Dim Outlook_App_Create As Object
Dim Mail_Item As Object
Dim Last_Row As Long
Dim VB_CR_LF, Email_Body, Date_Range_Value, Send_Value, Subject As String
Dim i As Long
On Error Resume Next
Set Date_Range = Application.InputBox("Please choose the date range:", "Message Box", , , , , , 8)
If Date_Range Is Nothing Then Exit Sub
Set Mail_Recipient = Application.InputBox("Please select the Email addresses:", "Message Box", , , , , , 8)
If Mail_Recipient Is Nothing Then Exit Sub
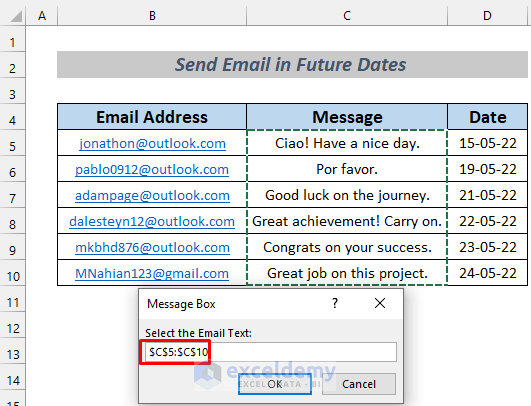
Set Email_Text = Application.InputBox("Select the Email Text:", "Message Box", , , , , , 8)
If Email_Text Is Nothing Then Exit Sub
Last_Row = Date_Range.Rows.Count
Set Date_Range = Date_Range(1)
Set Mail_Recipient = Mail_Recipient(1)
Set Email_Text = Email_Text(1)
Set Outlook_App_Create = CreateObject("Outlook.Application")
For i = 1 To Last_Row
Date_Range_Value = ""
Date_Range_Value = Date_Range.Offset(i - 1).Value
If Date_Range_Value <> "" Then
If CDate(Date_Range_Value) - Date <= 7 And CDate(Date_Range_Value) - Date > 0 Then
Send_Value = Mail_Recipient.Offset(i - 1).Value
Subject = Email_Text.Offset(i - 1).Value & " on " & Date_Range_Value
VB_CR_LF = "<br><br>"
Email_Body = "<HTML><BODY>"
Email_Body = Email_Body & "Dear " & Send_Value & VB_CR_LF
Email_Body = Email_Body & "Text : " & Email_Text.Offset(i - 1).Value & VB_CR_LF
Email_Body = Email_Body & "</BODY></HTML>"
Set Mail_Item = Outlook_App_Create.CreateItem(0)
With Mail_Item
.Subject = Subject
.To = Send_Value
.HTMLBody = Email_Body
.Display
End With
Set Mail_Item = Nothing
End If
End If
Next
Set Outlook_App_Create = Nothing
End Sub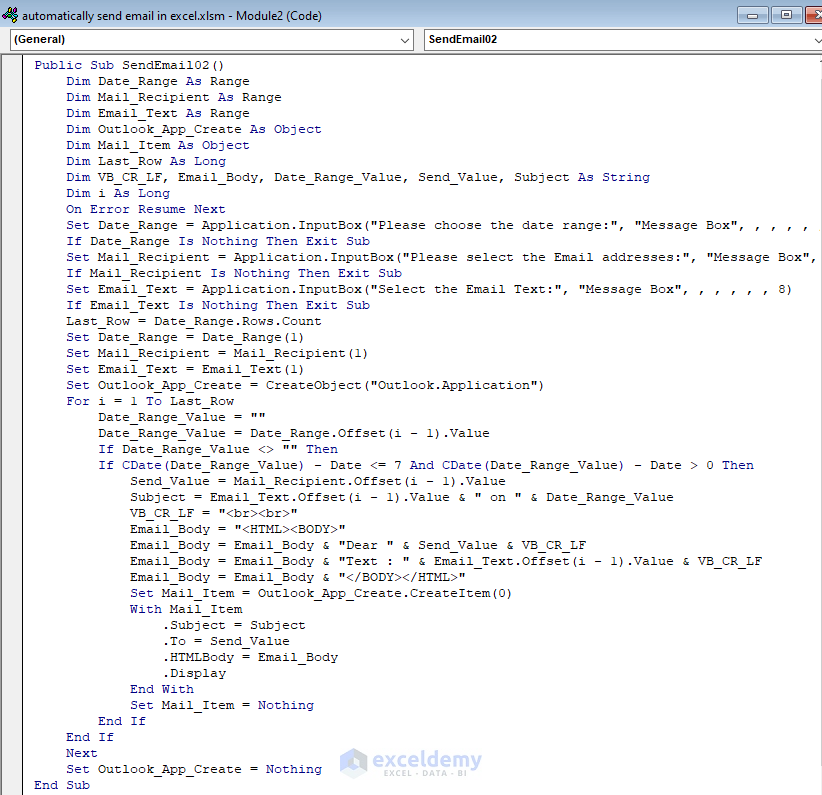
Code Explanation
- First, we declared some necessary variables: Date_Range, Mail_Recipient and Email_Text as Range; Outlook_App_Create and Mail_Item as Object; Last_Row and i as Long; VB_CR_LF (Visual Basic Carriage Return Line Feed), Email_Body, Date_Range_Value, Send_Value, Subject as String.
- Then we set Date_Range to an InputBox where it can select a range of dates via a Message Box. An If Statement is used to terminate Sub Procedure if the Date_Range is Nothing.
- We also set Mail_Recipient and Email_Text to InputBox
- After that, we create an Outlook Application Object which we define by Outlook_App_Create.
- A date interval is introduced. In this code, the duration is 7. Suppose you want someone to be reminded about an event or greetings 7 days after today which is 19th May. If the Emails you want to send are within the dates between 20th to 26th May, the recipient will receive the Email. Otherwise, it will ignore the command.
- Then we put some commands to format the Email_Body. And also define the necessary parts of the Email by the With Statement.
- We used the .Display command here so that Outlook will open these Email drafts and we can check if any other messages need to be sent. You can use the .Send command if you don’t want to see the message drafts. But do not use these two commands simultaneously.
- Go back to your sheet and run the Macro named SendEmail02.
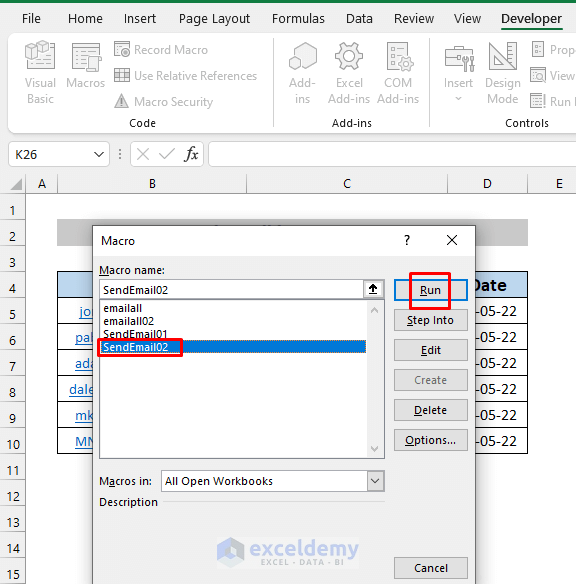
- You will see a message box pop up telling you to select the date range.
- Select the range and click OK.
- Another message box will pop up to select the Email address range.
- Select the range and click OK.

- Select the range of text messages in the message box and click OK.
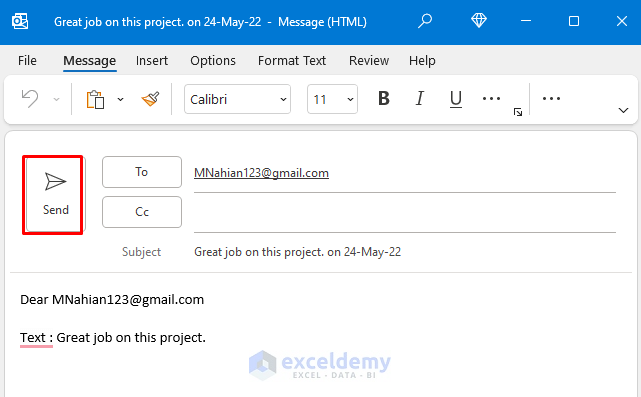
- You will see the email drafts for May 21 to May 24. We sent the corresponding email to the real address to show you the example. You can put a CC recipient if you want.
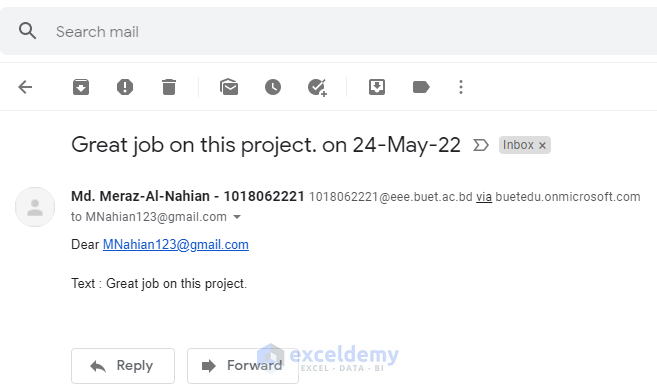
- Let’s check the Email inbox. These can be sent to Spam box, too, so check everywhere.
Read More: Automatically Send Emails from Excel Based on Cell Content
Method 3 – Automatically Sending Emails to a Single Address on a Date
Steps:
- Open a VBA Module.
- Copy the following code in the VBA Module.
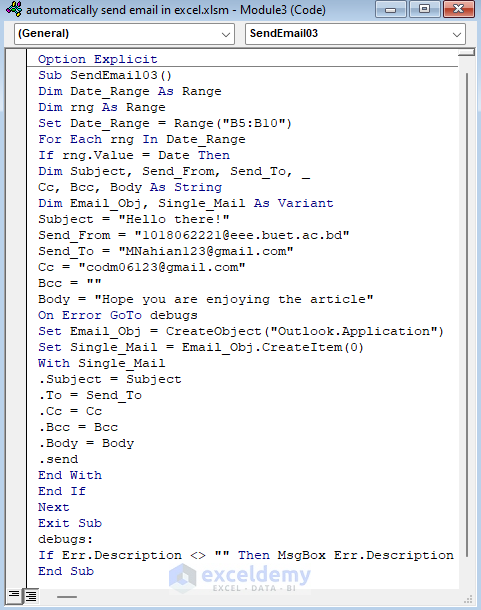
Option Explicit
Sub SendEmail03()
Dim Date_Range As Range
Dim rng As Range
Set Date_Range = Range("B5:B10")
For Each rng In Date_Range
If rng.Value = Date Then
Dim Subject, Send_From, Send_To, _
Cc, Bcc, Body As String
Dim Email_Obj, Single_Mail As Variant
Subject = "Hello there!"
Send_From = "[email protected]"
Send_To = "[email protected]"
Cc = "[email protected]"
Bcc = ""
Body = "Hope you are enjoying the article"
On Error GoTo debugs
Set Email_Obj = CreateObject("Outlook.Application")
Set Single_Mail = Email_Obj.CreateItem(0)
With Single_Mail
.Subject = Subject
.To = Send_To
.Cc = Cc
.Bcc = Bcc
.Body = Body
.send
End With
End If
Next
Exit Sub
debugs:
If Err.Description <> "" Then MsgBox Err.Description
End Sub
Code Explanation
- We declared some necessary variables: rng and Date_Range as Range.
- We defined the range for Date_Range.
- We used Value in a VBA IF Statement and also set Subject, Send_From, Send_To, Cc, Bcc and Body to String. Also, we set Email_Obj and Single_Mail as Variant.
- We set the text value for Subject, Send_From, Send_To, Cc and Bcc.
- We created an Outlook Application Object which we defined by Email_Obj. We’ll use Single_Mail to create an item for Email_Obj.
- We define Subject, Send_To, Cc, Bcc, Body as the necessary parts of an Email by a With Statement. We also put the .Send command in this statement.
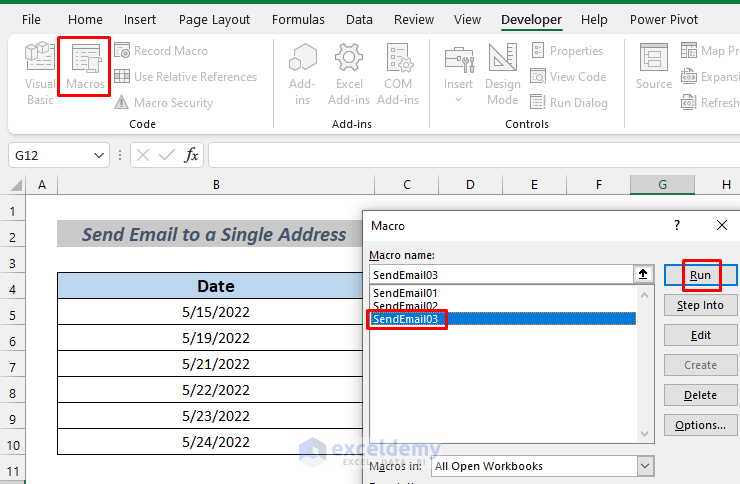
- Go back to your sheet and run the Macro named SendEmail03.
- Follow the on-screen instructions.
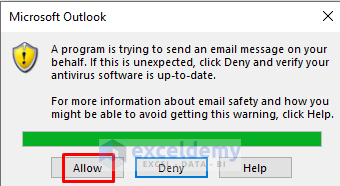
- You may see a warning box from Microsoft Outlook. Click Allow.
- This operation will send the Email to the addresses that you put in the corresponding message boxes.
- This is the main Email.
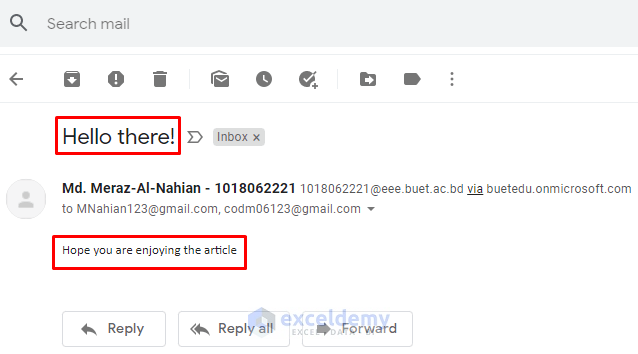
- Here is the Carbon Copy of the Email.

Read More: How to Send an Editable Excel Spreadsheet by Email
Practice Section
In this section, I’m giving you the dataset that we used in this article so that you can practice on your own.
Things to Remember
You need to open and log into your Outlook account to run the VBA codes in this article.
Download Practice Workbook
Related Articles
- How to Send Bulk Email from Outlook Using Excel
- How to Send Automatic Email from Excel to Outlook
- How to Send Email Automatically When Condition Met in Excel
- How to Send Email If Conditions Met in Excel
- How to Send Multiple Emails from Excel Spreadsheet
<< Go Back To Send Email from Excel | Learn Excel
Get FREE Advanced Excel Exercises with Solutions!

hi for the 3rd code, where an email will automatically be sent via the date, is it required to keep rerunning the macro? because i realise that when i manually change the date on my laptop, i do not receive an auto email.
hello there, thanks for asking. I understand your problem. Although I haven’t found the exact solution to your problem yet, I can help you on sending email at a certain time in a day. The 3rd code sends email in the current date when you run it. You can add a scheduler in the code. The email will be sent at the time you set in the code. I added the code below. You can see that the time here is 16:18:00. So if you run the code before 16:18, and keep the corresponding Excel file open, the email will be sent at 16:18. You don’t need to rerun this code during this time. Hope this helps you a bit. I’ll be working on your problem too. If I get a solution, I’ll immediately add that in your reply.
Option Explicit

Private Sub Workbook_Open()

     Application.OnTime TimeValue("16:18:00"), "SendEmail03"

End Sub

Sub SendEmail03()

Dim Date_Range As Range

Dim rng As Range

Set Date_Range = Range("B5:B10")

For Each rng In Date_Range

If rng.Value = Date Then

Dim Subject, Send_From, Send_To, _

Cc, Bcc, Body As String

Dim Email_Obj, Single_Mail As Variant

Subject = "Hello there!"

Send_From = "[email protected]"

Send_To = "[email protected]"

Cc = "[email protected]"

Bcc = ""

Body = "Hope you are enjoying the article"

On Error GoTo debugs

Set Email_Obj = CreateObject("Outlook.Application")

Set Single_Mail = Email_Obj.CreateItem(0)

With Single_Mail

.Subject = Subject

.to = Send_To

.Cc = Cc

.Bcc = Bcc

.Body = Body

.Send

End With

End If

Next

Exit Sub

debugs:

If Err.Description <> "" Then MsgBox Err.Description

End Sub
I have the same issue. Is it possible to send emails without running the code
Hi Tanya, thanks for reaching out. I understand your problem. It may not be possible to send the Email just by running the code and wait for the day to come. But I can help you on sending email at a certain time in a day. The 3rd code sends email in the current date when you run it. You can add a scheduler in the code. The email will be sent at the time you set in the code. I added the code below. You can see that the time here is 16:18:00. So if you run the code before 16:18, and keep the corresponding Excel file open, the email will be sent at 16:18. You don’t need to rerun this code during this time. Hope this helps you a bit. I’ll be working on your problem too. If I get a solution, I’ll immediately add that in your reply.
Option Explicit
Private Sub Workbook_Open()
Application.OnTime TimeValue(“16:18:00”), “SendEmail03”
End Sub
Sub SendEmail03()
Dim Date_Range As Range
Dim rng As Range
Set Date_Range = Range(“B5:B10”)
For Each rng In Date_Range
If rng.Value = Date Then
Dim Subject, Send_From, Send_To, _
Cc, Bcc, Body As String
Dim Email_Obj, Single_Mail As Variant
Subject = “Hello there!”
Send_From = “[email protected]”
Send_To = “[email protected]”
Cc = “[email protected]”
Bcc = “”
Body = “Hope you are enjoying the article”
On Error GoTo debugs
Set Email_Obj = CreateObject(“Outlook.Application”)
Set Single_Mail = Email_Obj.CreateItem(0)
With Single_Mail
.Subject = Subject
.to = Send_To
.Cc = Cc
.Bcc = Bcc
.Body = Body
.Send
End With
End If
Next
Exit Sub
debugs:
If Err.Description <> “” Then MsgBox Err.Description
End Sub
hello i was wondering how i could use this for email reminders when products are due to expire – i’d like to use one or two email addresses to alert certain staff members when it is time to re-order something. Which code would be best to use? Would these automatically send the emails on each date or would i have to run the macros on each date to get the emails sent out – many thanks in advance
hi, thanks for asking Liss. It will be better for you to use the code of the second method. You may not be able to set a reminder using VBA, but you can set a date interval using it. If you go through the explanation, you will see that I created a 7 days interval in the code (you can change it according to your convenience). If you want to remind your employee that he should finish his job within a week, you can use the dataset and VBA code of the second method. You cannot send emails on a particular date. Suppose you run this code on 15th July. You have a date range of 15th July to 25th July. The employees who have to finish their task within 16th to 22nd July will get your mail. Those who have to finish within 23rd to 25th won’t get your mail. However, you can make a schedule to send your mail in a particular time of the day. Just put the following statement at the beginning of the code of the second method. Hope this helps
Option ExplicitPrivate Sub Workbook_Open()
Application.OnTime TimeValue("hh:mm:ss"), "SendEmail02" 'put the time when you want to send the email
End Sub 'you must keep open your excel file until then after you run the code
Hello,
I have the same email address “[email protected]” in the multiple cells of the ‘Email Address’ Column. I want one single mail for “[email protected]” containing all the tasks , instead of individual mails for individual task for the same Email Address.
How do I achieve this in the above Macro?
Hi Pranav, thanks for the query. You can simply use the code of the second method of the article in this regard. Just follow the procedure after you run the code. Hope that helps you.
Hello Nahian.
I’ve just discovered your code samples for automating the sending of emails within Excel. I would just like to say thank you for providing these procedures. I am still a novice with VBA but with snippets from 03 version I have adapted version 02 to send event reminders from a ‘calendar’ list in an Excel worksheet. I have an icon on the ‘calendar’ worksheet to click-on to trigger the sending of the emails.
Eventually I hope to adapt it further as I have a gardening calendar with (currently) over 600 events across the full year. What would be ideal is to automatically open the workbook and run the email-sender as a single operation. Not sure how as yet but I understand it can be done. Anyway I am rambling on rather but thank you again.
Hey Barry, thank you for reaching out. If you provide your workbook, that would be easy for me to understand your problem.
I use Sendemail02 to sending email automatically from excel based on following dates, but the mail body i would like to mail merge with different letter, what should i do ?
The message text in the second is actually the mail body. If you want to change the Subject of the email, you can simply change it in the code. Please follow the code in the picture below. This subject will be the same for all the mails.
Dear NAHIAN,
i have started recently working with macros and got a task to send auto. mail,
I want to trigger auto mail from excel if the date is due and mail shall seek “To” “CC” and “Subject” from the excel list as below
To” Email ID CC” Email ID Subject Date
[email protected] [email protected] Only 5 Day to Go 28/03/23
[email protected] [email protected] Only 2 Day to Go 25/03/23
will pls provide the macro coding
Thank you –
Jignesh
Thank you JIGNESH for reaching out. Here is a VBA Macro code that will take “To Email Address”, “Email ID CC”, “Subject”, and “Date” ranges from the user and if the code finds any Date which is greater than the Current Date, an email will be sent to the corresponding mail address and CC address with corresponding Subject line. If you have any further queries, feel free to post on our ExcelDemy Forum.
Regards
Aniruddah
I was wondering if you could help me with the code for below scenario.
I have excel data where I need to send emails on a specific date within the excel (dates available in Column C) to the corresponding email address in Column G with Mail body details in Column A (tasks that are due).
However, if there are multiple tasks due on the same day for the same email address, only one email should be sent with consolidated details of all tasks due under Column A.
Further the email should go only if the status of the task is ‘In progress’ or ‘Outstanding’ not for ‘Completed status’. Status available in column E.
Also, like the others I was wondering if there is a way to send automated emails on the due date without running the code.
Dear VSP
Thank you very much for your question. I appreciate your interest in our article. I will show you the step-by-step process to create a macro according to your preferences. Also, you will be able to send automated emails on the due date without running the code.
● First, create the workbook. I am creating a sample workbook that has Message, Date, Status of work, and Email addresses in specific positions that you have mentioned.
● Select your entire dataset.
● Go to the Insert tab >> Table.
● Check the My table has headers option.
● Press OK.
● Sort your data according to your Email address.
● Now go to the Developer tab >> Visual Basic.
● Go to ThisWorkbook and paste the following code into the VBA Macro Editor.
● Save the file as Excel Macro-Enabled Workbook (.xlsm) file.
● Now, to automatically send emails, type Run in your Start Menu and open the Run dialog box.
● Paste the following path there and press OK.
%AppData%\Microsoft\Windows\Start Menu\Programs\Startup
● Place your Excel file in the Startup folder.
Now whenever you open your PC, the VBA code of your Excel file will be automatically executed. Emails will be sent to the given email addresses according to the criteria you mentioned.
Notes:
● Stay logged in to your outlook application. We are using the OUTLOOK Microsoft 365 Office application.
● The provided code sends an email for the current date. You can customize it for any date.
● Make sure that your active worksheet contains the sorted table and save the file accordingly.
You can download the sample Excel file from here.
Send Emails.xlsm
If you have any more questions, please let us know in the comment sections.
Regards,
Md. Abu Sina Ibne Albaruni
Team ExcelDemy
Hi , your sharing is helpful for me! appreciate it!
May I know how can I select more than 1 column in the email body ?
Hi, Tan Li Wen, thanks for reaching out. Here, I developed a solution to your problem. I made a second column for email body in column B as shown in the picture.
Here is the modified code. Use it following the steps described in the previous comment.
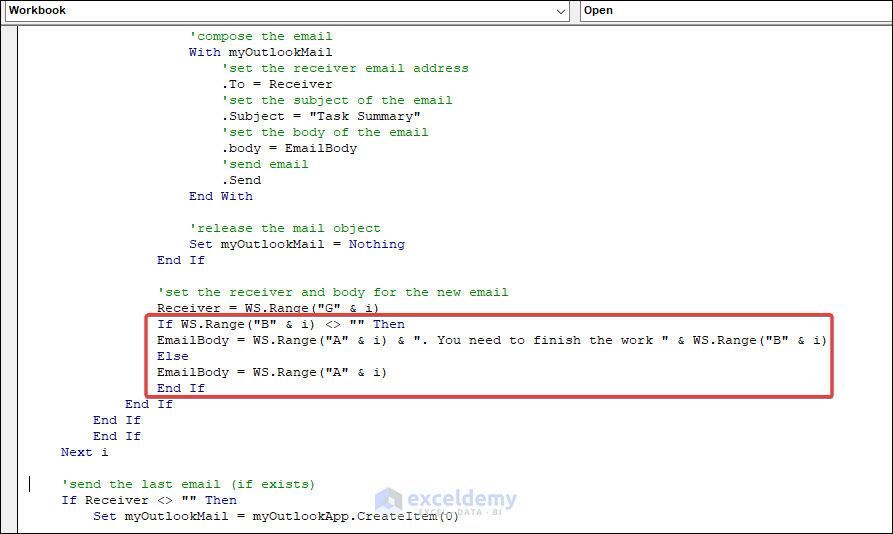
Here, I made changes in the marked portion of the following image. If there is a second message in the column B, it will be added to the main Email body as You need finish the work within ‘x’ days. If there’s no such thing in column B, only the part of the Email body in column A will be sent.
Hope this helps. If you have any more questions, please let us know in the comment sections.
Regards,
Md. Meraz Al Nahian
Team ExcelDemy
Hi, is there a way to add attachments to the email?
Hi, thanks for reaching out. Yes, there is a way to send emails with attachments using VBA. Here is the code for you.
You just have to change the file location according to your perception and use some valid email addresses. Also, keep logged into your outlook account.
I tried using the VBA for 3. However, it never actually opens an e-mail for me to send. I am unsure what I am doing wrong. I am most definitely an amateur, I am just trying to get an e-mail to send to one specific e-mail address when the deadline date is past by four days. I would also like to be able to CC another individual on this e-mail. Both e-mails are outlook e-mails. Any ideas?
Hi Mr. Brown, thanks for reaching out. Regarding the solution of your problem, you just have to modify the code a bit. You can use the code of the 3rd method, but I don’t know why it takes 15 minutes to send the email to the receiver.
So, I used the code of the first method. I’m giving it here again with modification. See the image below to see where the modification is made.
You wanted to send the Email if the deadline is past 4 days by the current date. So I subtracted 4 in the code.
Remember, your desired date has to be present in the date list. I’m going to give you an example here. In the date list, the date 10/22/2023 is present. It is past 4 days by today’s date which is 10/26/2023.
If the date is not present in the list, the code will work but it won’t send any email. If you have any confusion, follow method 1 to operate the macro. You can insert necessary Email addresses and the message easily. Hope this helps you. Thank you.
Good day, I hope this message finds you well. I want to send an email notification from excel to outlook when the deadline is seven days out, in addition to this, I have tried several codes, but it seems it is not possible to complete this task automatically through VBA. how can I make this task automatic through VBA. I do not have access to automate.
Dear Isaac Chavez
Thanks for visiting our blog. As requested, I have developed an Excel VBA Sub-procedure that will send an Email notification if the Deadline is 7 days ahead.
SOLUTION Overview:
Note: If the Microsoft Outlook dialog box appears, click Allow to send an email.
Excel VBA Sub-procedure:
I hope the sub-procedure will fulfil your requirements. I have attached the solution workbook as well; good luck.
DOWNLOAD SOLUTION WORKBOOK
Regards
Lutfor Rahman Shimanto
Excel & VBA Developer
ExcelDemy
Hi,
I was trying to follow 1 option to create sending automatic emailing. I create worksheet, open VB and copy your programme, gone back to spreadsheet and open macro entered the date range but after that dosent open another pop-up for entering other datas.
Please explain WHY is doesn’t run.
Tks
ALVIN
Hello Alvin,
This VBA macro sends an email if the date in a selected range matches Today’s date. It prompts the user to select a range of cells and checks each cell in the range. If a cell’s value matches the current date, it asks the user for the email subject, sender, recipient, CC, BCC, and message body. It then uses Outlook to send the email with the provided details.
In your date range you must include the date which will match Today’s date.
To understand the logic I added a debugging option here:
If you need further customization or have a specific dataset, please provide more details about how you want the VBA code to work.
Regards
ExcelDemy
Hi There,
Thank you for your help with excel! It has greatly aided in my use of macros.
I have a list of email addresses (column A) and a list of dates (column B). I need one email to be sent to each email address all on different dates. The dates can vary quite largely (e.g. some may be in 2 months and some in 10 months).
What is the best VBA code to use for this? I find your option 1 only sends emails run on that day. Option 2 is sending emails now for future dates and option 3 only allows one addressee.
Hello Liliana,
You are most welcome. You can adapt Method 1 from this article on sending emails based on dates. Here’s an updated VBA code snippet that checks if the date in column B matches today’s date before sending the email.
This code will check the date in column B and send the email if the date matches today’s date.
Regards
ExcelDemy
Hi there,
Your articles have helped me greatly in my everyday use of excel. Thank you for this 🙂
I have a scenario that I am in need of some help with please. I have a list of email addresses (column A) and a list of dates (column B). I need one email to be sent to each email address specified in column A on the dates specified in column B.
Each date varies quite significantly. The email for one person may need to be sent on 1/1/25, where as another on 12/5/25 and another on 1/12/25 etc.
To clarify there is only one email body that I need each individual email to receive. each on a different specified date.
Thank you for your help.
Hello Lili,
You are most welcome. You can adapt Method 1 from this article on sending emails based on dates. Here’s an updated VBA code snippet that checks if the date in column B matches today’s date before sending the email.
This code will check the date in column B and send the email if the date matches today’s date.
Regards
ExcelDemy
Hello Meraz,
I copied the 1st example code and set to run, but outlook did not completely open the first time and will not open now. Suggestions?
Thank you for any suggestions you may have.
Hello Donna,
It seems like Outlook may not have fully initialized when the macro was first run. Here are a few steps to troubleshoot:
Restart Your System: This clears any lingering background processes.
Check Task Manager: Ensure no Outlook process is running. End any that are and retry.
Verify Macro Settings: Make sure macros are enabled under Trust Center >> Macro Settings.
Run Excel as Administrator: Sometimes permissions can block full integration with Outlook.
Let me know if these steps resolve your issue!
Regards
ExcelDemy