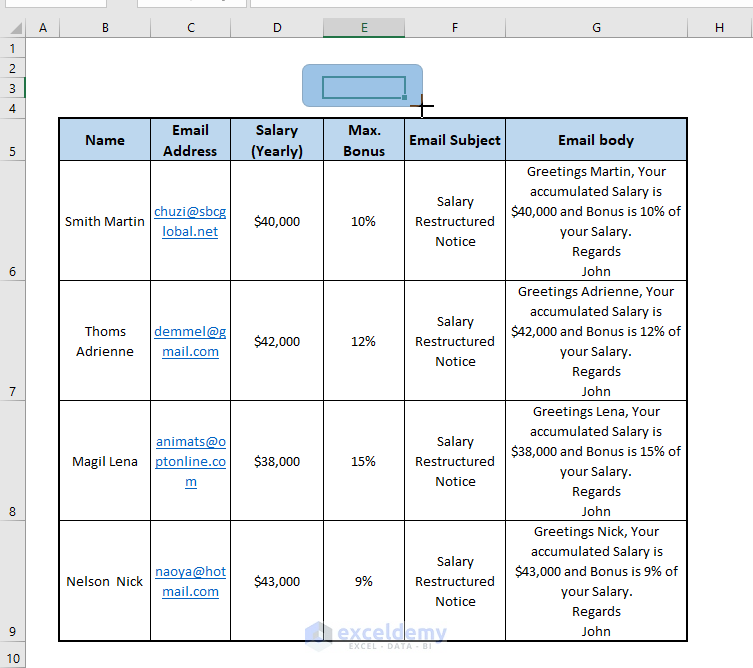
We have Employee Restructured Salary data in Excel, and we want to send automatic emails using Outlook.

Opening Microsoft Visual Basic and Inserting Code in Module
Opening the VBA Window:
- Using Keyboard Shortcuts: Press Alt + F11.
- Using the Developer Tab: In an Excel worksheet, go to the Developer Tab and select Visual Basic.

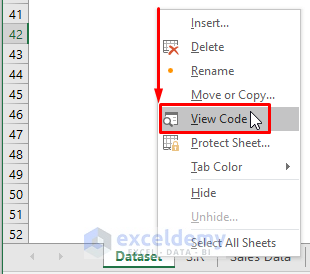
- Using the Worksheet Tab: Go to any worksheet, right-click on its name and choose View Code from the Context Menu.
Inserting a Module in Microsoft Visual Basic:
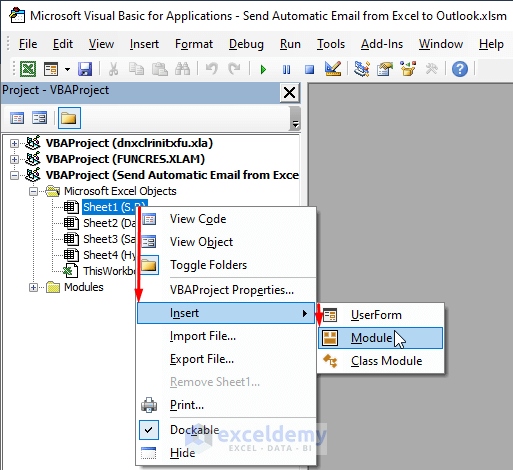
- Using Sheet Options: Select a Worksheet, then right-click on it, select Insert from the Context Menu, then choose Module.
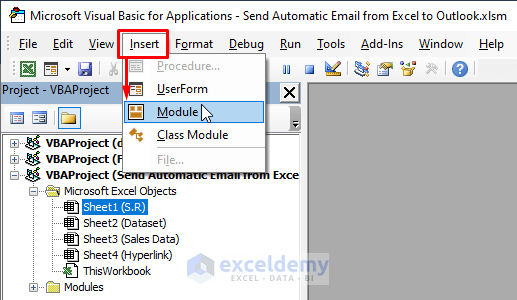
- Using the Toolbar: Select Insert from the Toolbar and choose Module.
Method 1 – Using Excel VBA Macro to Automatically Send Email from Outlook to the Selected Recipients
Steps:
- Go to the Insert tab.
- Select Shapes.
- Select any of the offered shapes (i.e., Rectangular: Rounded Corners).
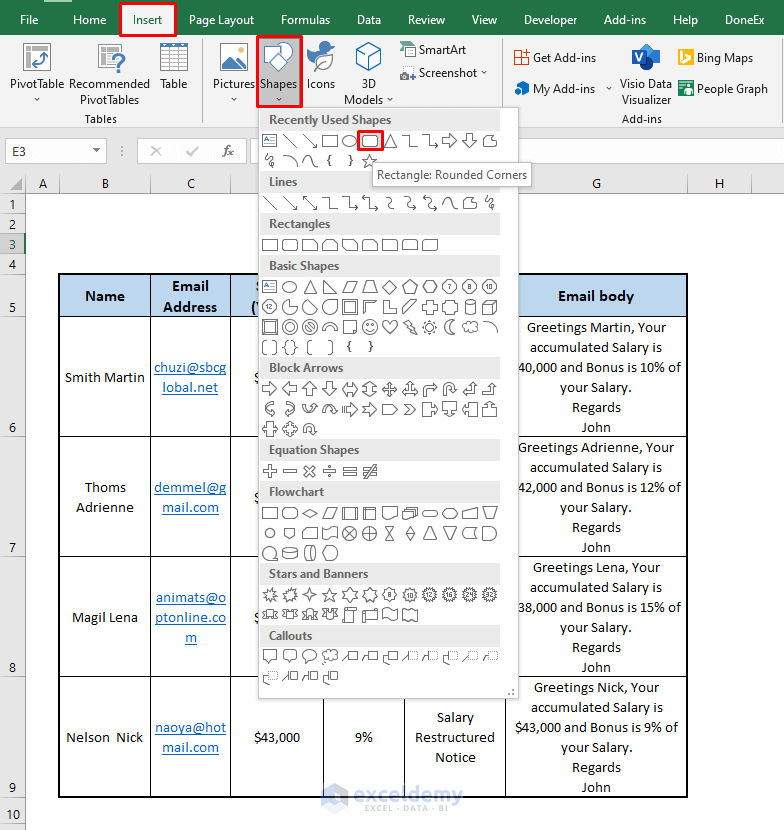
- Drag the Plus Icon wherever you want to insert the Shape as shown in the image below.
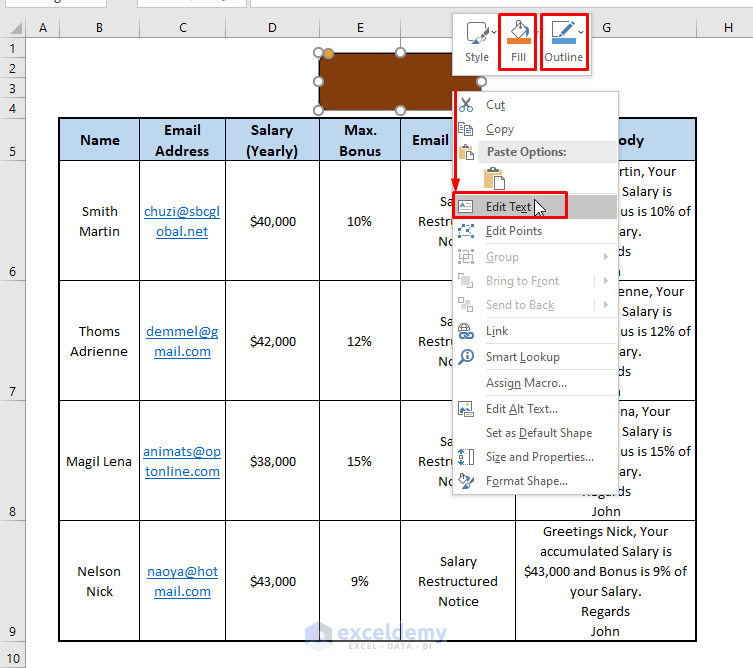
- Choose a preferred Shape Fill and Outline Color, then right-click on the shape.
- Click on Edit Text to insert text.
- Open Microsoft Visual Basic and insert a Module.
- Paste the following Macro in the Module.
Sub ExcelToOutlookSR()
Dim mApp As Object
Dim mMail As Object
Dim SendToMail As String
Dim MailSubject As String
Dim mMailBody As String
For Each r In Selection
    SendToMail = Range("C" & r.Row)
    MailSubject = Range("F" & r.Row)
    mMailBody = Range("G" & r.Row)
Set mApp = CreateObject("Outlook.Application")
Set mMail = mApp.CreateItem(0)
With mMail
    .To = SendToMail
    .Subject = MailSubject
    .Body = mMailBody
    .Display ' You can use .Send
    End With
Next r
End Sub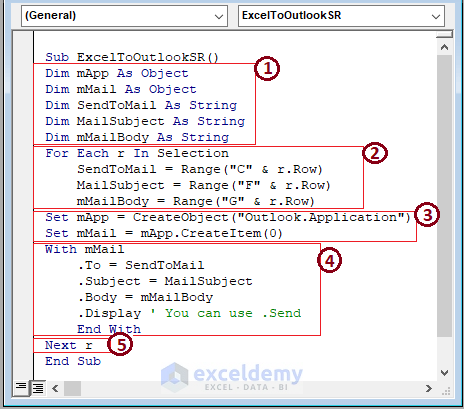
1 – starts the macro procedure by declaring the variables as Object and String.
2 – runs a VBA FOR loop for each row in the selection to assign Email’s Send To, Subject, and Body using row entries.
3 – assigns variables.
4 – performs the VBA With statement to populate Outlook items such as Send To, Mail Subject, etc. Here the macro only executes the Display command to bring out Outlook with an email draft. However, if Send command is used in place or after Display, Outlook will send the created email to the selected recipients.
5 – finishes the VBA FOR loop.
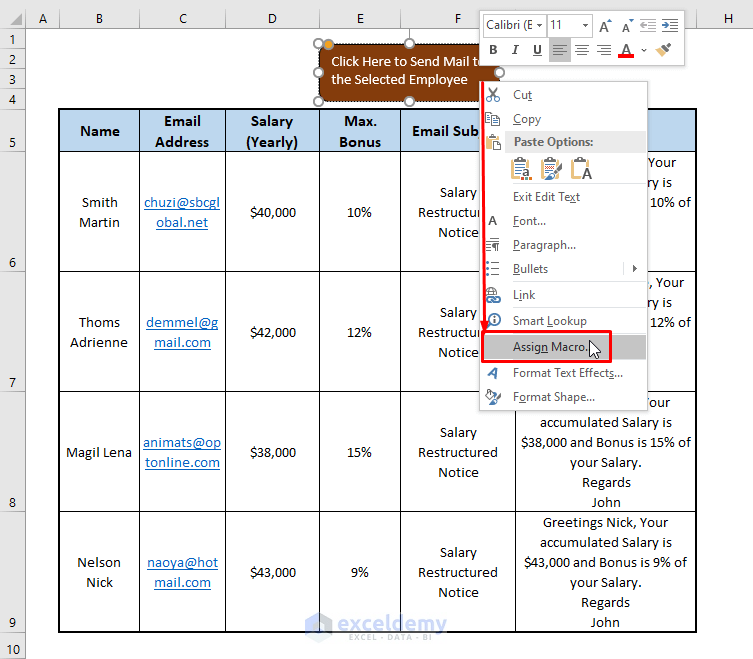
- Return to the worksheet.
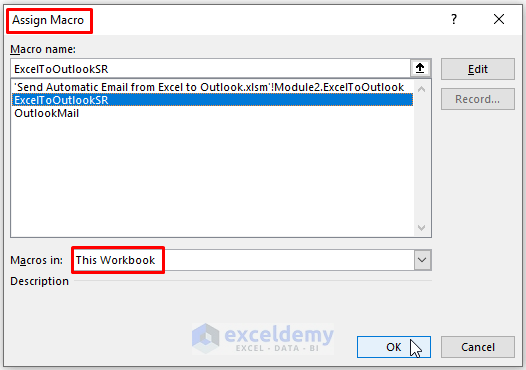
- Right-click on the Shape and select Assign Macro from the Context Menu options.
- Select the Macro ExcelToOutlookSR under the Macro name and choose the Macro in option as This Workbook.
- Click on OK.
- In the worksheet, select one or multiple employees, then click on the Shape.
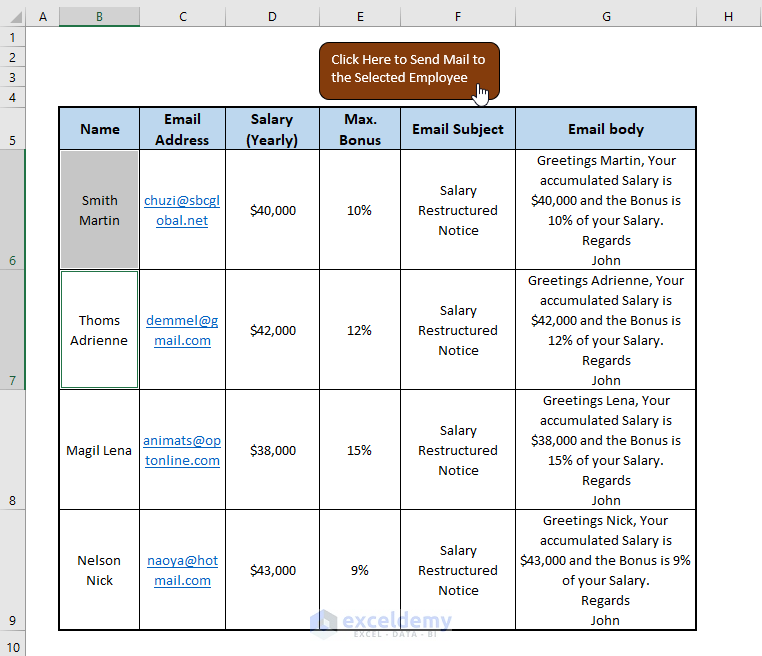
- Excel prompts Outlook to launch and creates or sends emails to the selected employees. Since we selected two employees, Outlook generated two different email drafts ready to be sent.

- Use the Send command to automatically send emails from Excel to Outlook using cell entries.
Read More: How to Send Excel File to Email Automatically
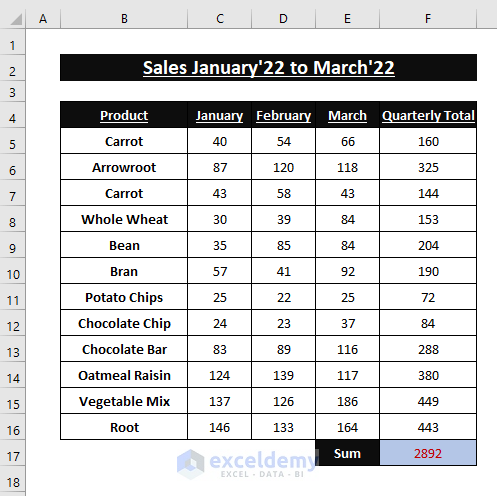
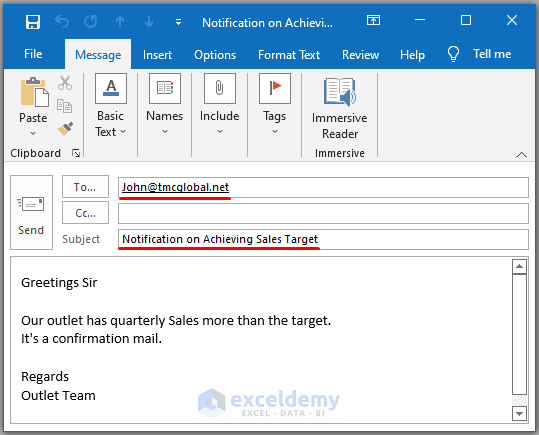
Method 2 – Sending Email Automatically from Excel to Outlook Depending on Specific Cell Value
We have Quarterly Sales Data as depicted below. After achieving a target (i.e., Sales > 2,000), we will automatically prompt Outlook to send an email from Excel to an assigned email.
- Use the following macro code in a VBA Module.
Option Explicit
Dim Rng As Range
Sub Worksheet_Change(ByVal mRng As Range)
On Error Resume Next
If mRng.Cells.Count > 1 Then Exit Sub
Set Rng = Intersect(Range("F17"), mRng)
If Rng Is Nothing Then Exit Sub
If IsNumeric(mRng.Value) And Target.Value > 2000 Then
Call ExcelToOutlook
End If
End Sub
Sub ExcelToOutlook()
Dim mApp As Object
Dim mMail As Object
Dim mMailBody As String
Set mApp = CreateObject("Outlook.Application")
Set mMail = mApp.CreateItem(0)
mMailBody = "Greetings Sir" & vbNewLine & vbNewLine & _
"Our outlet has quarterly Sales more than the target." & vbNewLine & _
"It's a confirmation mail." & vbNewLine & vbNewLine & _
"Regards" & vbNewLine & _
"Outlet Team"
On Error Resume Next
With mMail
        .To = "[email protected]"
        .CC = ""
        .BCC = ""
        .Subject = "Notification on Achieving Sales Target"
        .Body = mMailBody
        .Display 'or you can use .Send
End With
On Error GoTo 0
Set mMail = Nothing
Set mApp = Nothing
End Sub
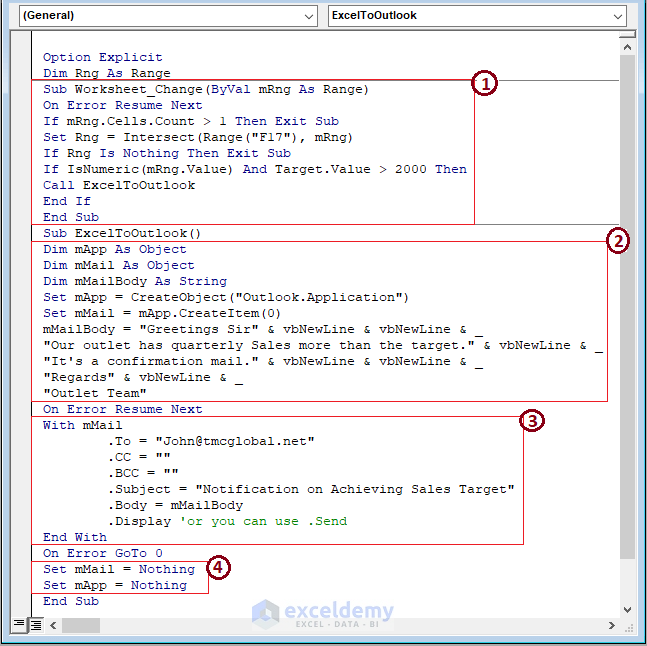
1 – assigns a cell (i.e., F17) within a range to execute the VBA IF statement. If the statement results in True, the macro calls another macro for execution.
2 – declares variable types and assign them to populate Outlook’s entries.
3 – performs VBA With statement to assign variables to email entries. Use the Send command instead of Display in case you directly want to send emails without reviewing them. The recipient email is inserted within the macro. Use alternative methods in case you want an automatic insertion of the recipient’s email id.
4 – clears certain variables.
- Use the F5 key to run the macro.
- Excel fetches Outlook with a draft email created automatically as shown.
- You can click on Send or auto-send using the Send command in the macro.
Read More: Automatically Send Emails from Excel Based on Cell Content
Method 3 – Creating VBA Macro to Send Email with the Active Worksheet from Excel by Outlook
- Insert the following macro in a Module.
Function ExcelOutlook(mTo, mSub As String, Optional mCC As String, Optional mBd As String) As Boolean
On Error Resume Next
Dim mApp As Object
Dim rItem As Object
Set mApp = CreateObject("Outlook.Application")
Set rItem = mApp.CreateItem(0)
With rItem
     .To = mTo
     .CC = ""
     .Subject = mSub
     .Body = mBd
     .Attachments.Add ActiveWorkbook.FullName
     .Display 'or you can use .Send
End With
Set rItem = Nothing
Set mApp = Nothing
End Function
Sub OutlookMail()
Dim mTo As String
Dim mSub As String
Dim mBd As String
mTo = "[email protected]"
mSub = "Quarterly Sales Data"
mBd = "Greetings Sir" & vbNewLine & vbNewLine & _
"Kindly find Outlet's Quarterly Sales data attached with this mail." & vbNewLine & _
"It's a notification mail." & vbNewLine & vbNewLine & _
"Regards" & vbNewLine & _
"Outlet Team"
If ExcelOutlook(mTo, mSub, , mBd) = True Then
    MsgBox "Successfully created the Mail draft or Sent"
End If
End Sub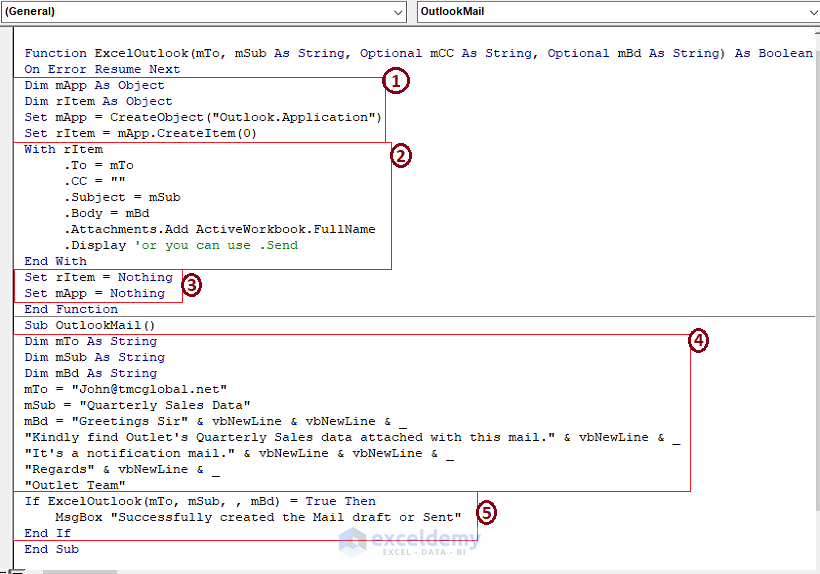
1 – declares and set the variables.
2 – assigns the commands using the VBA With statement. Use the Display or Send command for reviewing or direct sending emails respectively.
3 – clears the previously set variables.
4 – assigns the VBA With commands with texts.
5 – executes the VBA Custom Function.
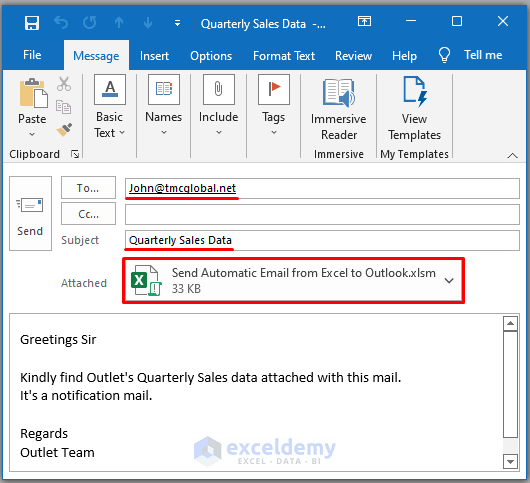
- Press F5, and you’ll get a draft email to review similar to the below image.
Read More: How to Send Multiple Emails from Excel Spreadsheet
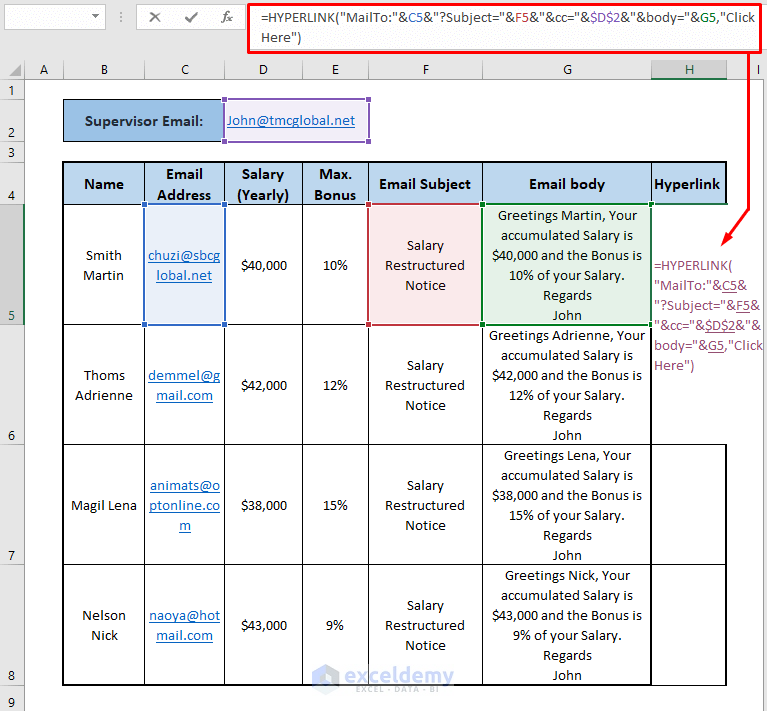
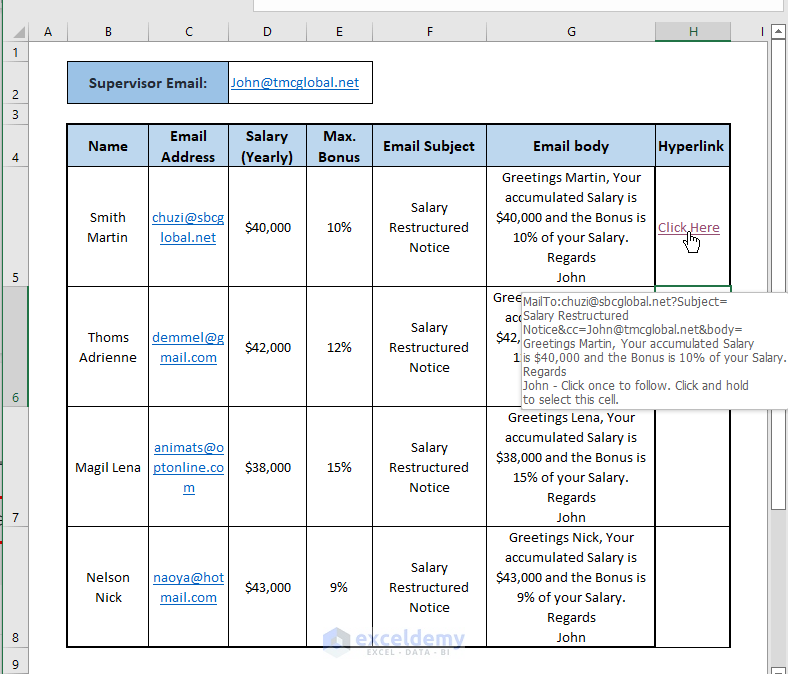
Method 4 – Sending an Automatic Email from Excel to Outlook Using the HYPERLINK Function
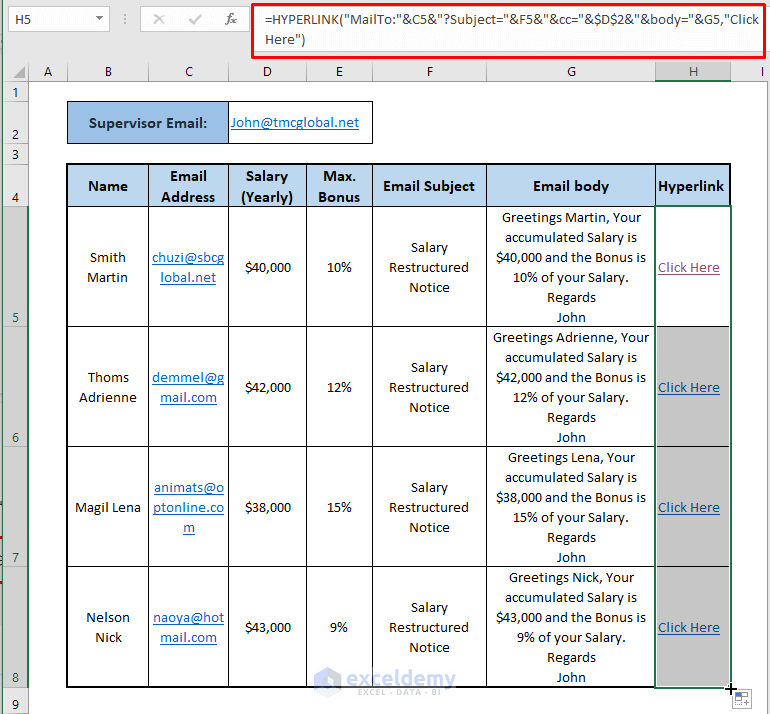
- Use the following formula in cell H5.
=HYPERLINK("MailTo:"&C5&"?Subject="&F5&"&cc="&$D$2&"&body="&G5,"Click Here")The HYPERLINK function takes “MailTo:”&C5&”?Subject=”&F5&”&cc=”&$D$2&”&body=”&G5 as link_location, and “Click Here” as friendly_name.
- Hit Enter to paste the link.
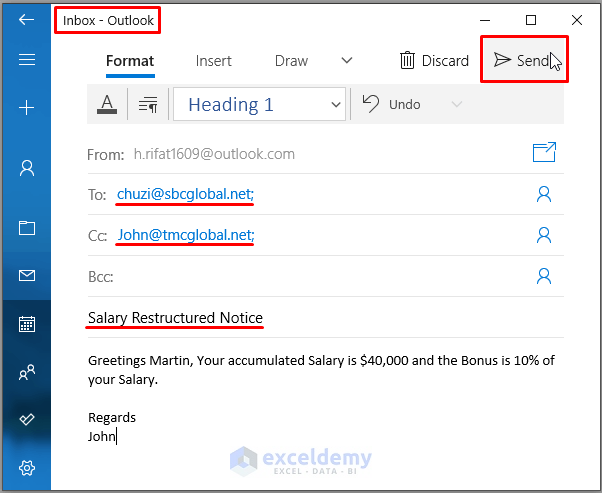
- Click on the link.
- Excel takes you to Outlook. You’ll see all the Outlook entries are filled with assigned data from Excel.
- Click on Send.
- Drag the Fill Handle to apply the formula to other cells and repeat sending.
Read More: How to Send an Editable Excel Spreadsheet by Email
Download the Excel Workbook
Related Articles
- How to Send Bulk Email from Outlook Using Excel
- How to Send Email Automatically When Condition Met in Excel
- How to Send Email If Conditions Met in Excel
- How to Automatically Send Email from Excel Based on Date
<< Go Back To Send Email from Excel | Learn Excel
Get FREE Advanced Excel Exercises with Solutions!

Is it a way to include attached files using the hyperlink function?
Greetings Julian Chen,
Sadly, the HYPERLINK function doesn’t support any attachment links in its arguments. You have to use Other Means to attach files. You can use Method 3 of this article to include an attachment.
Regards,
Md. Maruf Islam (Exceldemy Team)
Hello Maruf,
I hope your doing well
Firstly, thanks for the explicit explanation.
Secondly, I would like to ask how can we include more than one row in the body.
As I want to send a table within the body mail A1:L2 for example.
Thanks in advance again.
Hello Rash,
Thank you for your comment. If you want to send a table within the email body for any range, then you have to create a table in any worksheet. For this, you will follow our Method No.3 where we have used a VBA code to send an active sheet within the email body. Firstly, you can create a table in this active sheet and send this sheet with your table within the email body. Can you please share your Excel file with us? We will customize the file according to your requirements. Email address [email protected].
Regards,
Bishawajit Chakraborty (Exceldemy Team)
Hi
I am trying to create a hyperlink to outlook which can be clicked to send an email with various cell entries. So the cells before the link will have name, number, dates etc, with a first line in the email “Please see below booking” etc and a line at the end “any problems please let me know” etc. When i use the hyperlink function there aren’t enough characters for everything I need in the email, and it puts all the info on one line with no spaces. Is there a way around this? This is the hyperlink formula I have used =HYPERLINK(“Mailto:”&AD5&”?Subject=”&AE5&”&cc=”&AF5&AG5&”&Bcc=”&I4&”&Body=”&AI5&T4&G4&H4&Q4&S4,”EMAIL”)
The VBA method 2 you have shown looks similar to what I need but without the “IF >2000” addition.
I have also never attempted VBA before, so I was going to try and copy and paste your VBA and edit it to what I need but I am not that talented just yet!
Thanks for your help
Hello Danielle D, Thank you for your question. For the first question, you can add a line break using the CHAR function. CHAR(10) to be more specific. There are some feature limitations in the HYPERLINK method. You need to use the other methods to do more advanced stuff.
Then, for the second question, if you send your Excel file to [email protected], we will try to modify the VBA code according to your needs.
Is it possible to send images from excel via e-mail at a specific time every day automatically not manually?
Hello Ahmed, thank you for reaching out. You can send email in a certain time of a day automatically, but you have to keep the Excel file open. One more thing, you cannot send email automatically by Excel everyday. You have to set up the time and then run the Macro. The code is given below.
In the picture, I’m providing you some direction regarding where you may need to change the code element.
Note: If the code doesn’t work, make sure you have an Outlook account and open the Microsoft Office App.
Great post!
Thanks a lot for your appreciation.
I would like to know the VBA or Macro to use on a spreadsheet where I want to email my client but want the email to be one of my Outlook Templates already created. So, if I click on the client’s email address from the spreadsheet or click on a Macro button in the clients contact information row, it launches my Outlook Template filling in the client’s email address and inserts their name at the beginning of the body message.
Is this possible? I’m struggling to find a video or web pages to show how this is done.
Thanks a lot for posting your query in Exceldemy
Below I am giving you a VBA code using which you can open the outlook template saved on your pc and then replace them with desired text from the Excel sheet.
the sample template file that we are using is given below.
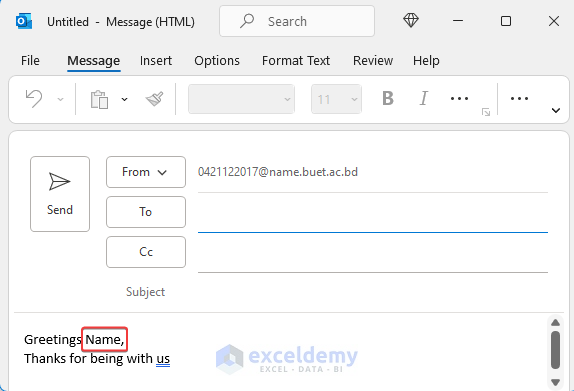
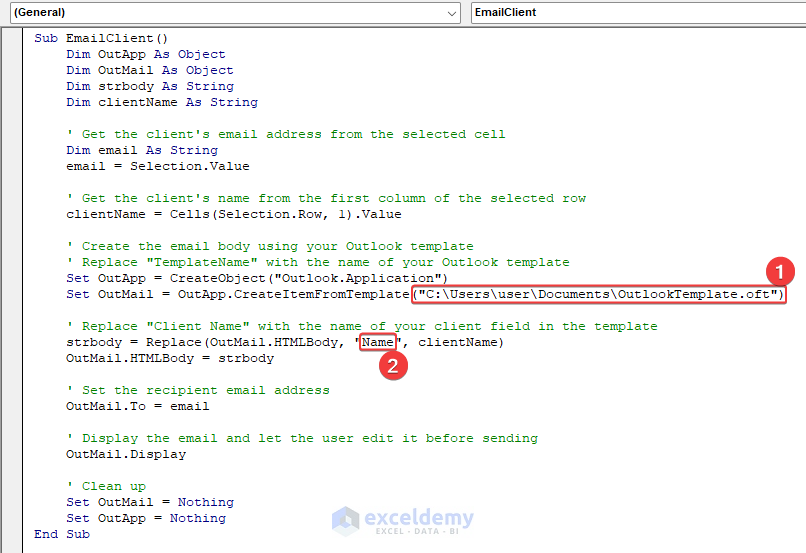


The Name, in the beginning, is going to be replaced by the desired name and the recipient will be the selected mail address.
In the code, two separate things must be taken seriously, firstly the location of the template file. The location of the template mail has to be specified correctly in the code(Marked as 1), as shown in the image. So please rewrite the location of the file correctly.
secondly, f you need to specify which term to replace with names inside the code(Marked as 2).
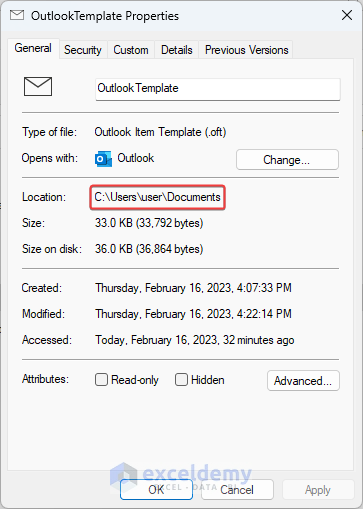
the location of the template file in your pc can be found in the properties tab as shown below.
finally, you are ready to execute the code.For this, you have to first select the email address to which you want to send the email. Then Run the Macro by pressing the Macro button placed just right side of the information.
Then you can see that the a new email has been composed with the name placed in the beginning with the selected mail address as the recipient.
You can download the sample macro file from the links below
Sample Macro File: https://www.exceldemy.com/wp-content/uploads/2023/02/Send-Automatic-Email-outlook-template.xlsm\
In case you need to template file, please contact us through email.
Regards,
Rubayed Razib
How to add Attachement in Method 1
Hello SANJAY DANGI,
Thank you for reaching out. You can add attachment to the email in the first method easily. Follow these steps to do it.
Sub ExcelToOutlookSR() Dim mApp As Object Dim mMail As Object Dim SendToMail As String Dim MailSubject As String Dim MailBody As String Dim FileName As String Dim Path As String 'Declare variable for file path Path = "D:\Exceldemy\" 'Set file path For Each r In Selection SendToMail = Range("C" & r.Row) MailSubject = Range("F" & r.Row) MailBody = Range("G" & r.Row) FileName = Range("H" & r.Row) 'Get file name from H column Set mApp = CreateObject("Outlook.Application") Set mMail = mApp.CreateItem(0) With mMail .To = SendToMail .Subject = MailSubject .Body = MailBody .Display .Attachments.Add (Path & FileName) 'Add attachment End With Next r Set mMail = Nothing Set mApp = Nothing End Subhow to include a mail body bigger than 255 characters
Hello SAPTARSHI,
I have personally sent a mail with a mail body of more than 255 characters via the “Using VBA Macro to Automatically Send Email Using Outlook to Selected Recipients” method. The receiver got the mail with the full mail body. I have used Microsoft 365 and found no character restriction in this process.
Regards,
Naimul Hasan Arif
Hi, thank you for this super helpful document! I’m wondering whether it is possible to send the email from another account I have from Outlook. It automatically sends it from my personal account but I would like it to send from my second account. Thank you!
Hi, Jessica!
Yes, it is possible. In short, Outlook assigns every email of yours to a number. You can call a specific mail using the Accounts.Item(x) method, x is the number assigned to the mail. Mention this account in the MailItem.SendUsingAccount property and the code will send the mail from that specific account. Keep in mind, the process works for Excel 2007 and later versions.
Here is the details of the process:
(This is to enable the Outlook library in your Excel workbook)
This code will give you the list containing your outlook mails and their numbers on your spreadsheet.
Hope this helped. If you still have inquiries, let us know.
Hi! I was able to find the number of the account I want to use (2), but when I use the second part of the code, I get the following error message: Runtime error ‘450’ Wrong number of arguments or invalid property assignment. When I click debug, it highlights the “.SendUsingAccount = mApp.Session.Accounts(2)” line of the code. Do you have any idea what went wrong?
Hi there, thanks for the clear explanation. I was wondering whether it is possible to send the emails from my second Outlook account instead of my primary one. Thanks in advance!
Hello again, Jessica! In the previous reply, I have mentioned exactly how you can do this. If you go through the second step, you will find the item number of your second Outlook mail (generally is 2. can also be 1 depending on how you had logged in to your accounts).
If it isn’t, take note of the number. Replace the 2 in .SendUsingAccount = mApp.Session.Accounts(2) with the number Excel shows. You will find this line in the With statement at the end.
In case if you are having trouble understanding any of the part, let us know about that.
Hi, how can i add signature with below code?
Sub ExcelToOutlookSR()
Dim mApp As Object
Dim mMail As Object
Dim SendToMail As String
Dim MailSubject As String
Dim mMailBody As String
For Each r In Selection
SendToMail = Range(“C” & r.Row)
MailSubject = Range(“F” & r.Row)
mMailBody = Range(“G” & r.Row)
Set mApp = CreateObject(“Outlook.Application”)
Set mMail = mApp.CreateItem(0)
With mMail
.To = SendToMail
.Subject = MailSubject
.Body = mMailBody
.Display ‘ You can use .Send
End With
Next r
End Sub
Dear Mary,
You can use the following code that also includes signature.
Feel free to customize the Signature accordingly.
Regards
Aniruddah
Team Exceldemy
hi, Please advice how to capture the data from pivot in the body of the mail as per the data range in a table format
Hello KARTHIK!
Thanks for reaching out and sharing your problem with us.
I think the article will help you capture the data from pivot in the body of the mail as per the data range in a table format. Please read the article again.
If you are still facing issues, please mail us at the address below.
[email protected]
Again, thank you for being with us.
Regards
Md. Abdur Rahim Rasel
Exceldemy Team
Hi there,
Is there any way to set the From field on an email? I want to hide my own email and send from a generic one. When I try and add .From to the Email set up, I get a 438 error – is there a way around this?
Hello Nick Throp,
The reason of the getting 438 error is you don’t have the on behalf permission. To set the “From” field in an email using VBA in Outlook, you must need to have “Send As” or “Send on Behalf” permissions for the generic email you want to use. Without these permissions, .From property will result in a 438 error.
To use .From property you should contact to IT admin to obtain the required permissions for the generic email address. Once permissions are granted, the VBA code should work without throwing an error.
Here’s an example of setting the “From” field:
MailItem.SentOnBehalfOfName = “[email protected]”
This approach will allow you to send emails on behalf of another account if you get the permission.
Regards
ExcelDemy
Hi i am looking to be able to send an automated email when a range of cells are filled in red, and show the information in the email for cells contained in that row, so if a date is past due and cell goes red, any info in the row where the cell turned red is to be contained in the email, i have a basic email going out at the moment
Thank you
Hello Paul,
You are most welcome. To automate email notifications when a cell turns red, you can update your existing VBA code to check the cell color. You can use the Interior.Color property to identify red cells. Once a red cell is found, compile the data from that row and include it in the email body.
Sample VBA Code:
1. This code checks the specified range (A1) in Sheet1 for red cells. If a red cell is found, it compiles information from that row and sends an email.
2. Remember to update the Range, Sheet name, and recipient email address as needed.
3. Make sure to enable macros and allow programmatic access to Outlook.
Regards
ExcelDemy
Hi Can’t seem to get it to work,
My work sheet range is A2:O48, to send email once a cell in F turns red.
Email body info from A and E
Sub SendEmailOnRedCell()
Dim rng As Range
Dim cell As Range
Dim OutApp As Object
Dim OutMail As Object
Dim emailBody As String
Dim ws As Worksheet
Set ws = ThisWorkbook.Sheets(“2024 service”) ‘ Change to your sheet name
Set rng = ws.Range(“A2:O48”) ‘ Change to your specific range
‘ Create Outlook application
Set OutApp = CreateObject(“Outlook.Application”)
‘ Loop through each cell in the range
For Each cell In rng
If cell.Interior.Color = RGB(255, 0, 0) Then ‘ Check if the cell is red
emailBody = “Information from row ” & cell.Row & “: ” & vbCrLf
emailBody = emailBody & “A: ” & ws.Cells(cell.Row, 2).Value & vbCrLf
emailBody = emailBody & “E: ” & ws.Cells(cell.Row, 2).Value & vbCrLf
‘ Create and send the email
Set OutMail = OutApp.CreateItem(0)
With OutMail
.To = “[email protected]” ‘ Change to recipient’s email
.Subject = “Alert: Red Cell Detected”
.Body = emailBody
.Send
End With
Set OutMail = Nothing
End If
Next cell
‘ Clean up
Set OutApp = Nothing
End Sub
Many thanks for all your help very much appreciated
Hello Paul,
You are most welcome. It looks like there are a couple of issues in your VBA code that need fixing:
1. The range check should specifically look at column F only.
2. You need to correct the index for the columns A and E in the email body.
The code now checks only column F (F2) for red cells.
Corrected the indices for columns A and E (1 for A, 5 for E).
Regards
ExcelDemy
Hello, can you please help, i’m really new to this and cant get a email to send when a cell in col f is >=0, email to contain info from col A and col F
Option Explicit
Dim Rng As Range
Sub Worksheet_Change(ByVal mRng As Range)
On Error Resume Next
If mRng.Cells.Count > 1 Then Exit Sub
Set Rng = Intersect(Range(“a2:o48”), mRng)
If Rng Is Nothing Then Exit Sub
If IsNumeric(mRng.Value) And Target.Value >= 0 Then
Call ExcelToOutlook
End If
End Sub
Sub ExcelToOutlook()
Dim mApp As Object
Dim mMail As Object
Dim mMailBody As String
Set mApp = CreateObject(“Outlook.Application”)
Set mMail = mApp.CreateItem(0)
mMailBody = “Hello” & vbNewLine & vbNewLine & _
“Please note 1 or more items require a service.” & vbNewLine & _
Range(“a2:f48”) & vbNewLine & vbNewLine & _
“Regards” & vbNewLine & _
“Outlet Team”
On Error Resume Next
With mMail
.To = “[email protected]”
.CC = “”
.BCC = “”
.Subject = “”
.Body = mMailBody
.Display ‘or you can use .Send
End With
On Error GoTo 0
Set mMail = Nothing
Set mApp = Nothing
End Sub
Hello Paul,
You can use this updated VBA code that will send an email when a cell in column F is >= 0 and include information from columns A and F in the email body.
Option Explicit
Dim Rng As Range

Sub Worksheet_Change(ByVal Target As Range)
    On Error Resume Next
    ' Check if more than one cell is changed
    If Target.Cells.Count > 1 Then Exit Sub

    ' Limit the range to A2:O48
    Set Rng = Intersect(Me.Range("A2:O48"), Target)
    If Rng Is Nothing Then Exit Sub

    ' Check if the cell in column F is >= 0
    If Not IsNumeric(Target.Value) Then Exit Sub
    If Target.Column = 6 And Target.Value >= 0 Then
        Call SendEmail(Target.Row)
    End If
End Sub

Sub SendEmail(rowNum As Long)
    Dim mApp As Object
    Dim mMail As Object
    Dim mMailBody As String
    Dim ws As Worksheet

    Set ws = ThisWorkbook.Sheets("2024 service") ' Change to your sheet name
    Set mApp = CreateObject("Outlook.Application")
    Set mMail = mApp.CreateItem(0)

    ' Prepare email body with info from column A and F
    mMailBody = "Hello," & vbNewLine & vbNewLine & _
                "Please note that item in row " & rowNum & " requires attention." & vbNewLine & _
                "A: " & ws.Cells(rowNum, 1).Value & vbNewLine & _
                "F: " & ws.Cells(rowNum, 6).Value & vbNewLine & _
                vbNewLine & "Regards," & vbNewLine & "Outlet Team"

    ' Send email
    On Error Resume Next
    With mMail
        .To = "[email protected]" ' Change to recipient’s email
        .Subject = "Alert: Cell in Column F >= 0"
        .Body = mMailBody
        .Display ' or you can use .Send to send the email directly
    End With
    On Error GoTo 0
    ' Clean up
    Set mMail = Nothing
    Set mApp = Nothing
End Sub
Worksheet_Change Event triggers when any cell in the range A2 changes. Sends an email when a cell in column F is greater than or equal to 0. Includes the information from columns A and F for the corresponding row in the email body.
Regards
ExcelDemy
Hi really sorry, I cant work out the individual lines of text where 1 starts and ends?
Hello Paul,
Each line of the email body starts and ends with vbNewLine for formatting. The _ at the end of each line allows you to split longer lines across multiple lines for readability. You can follow this breakdown to understand how each line flows.
Regards
ExcelDemy