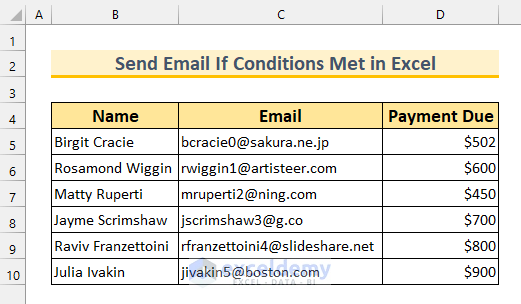
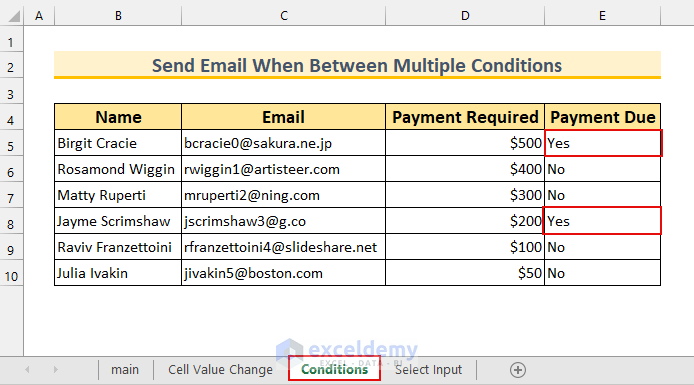
This article provides 3 methods to send an email if conditions are met in Excel. To demonstrate our methods, we’ve selected a dataset with 3 columns: “Name”, “Email”, and “Payment Due”.
Method 1 – Using VBA to Send Email If a Cell Value Changes in Excel
Steps:
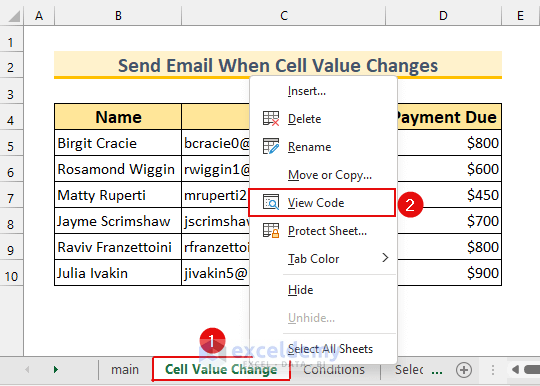
- Right-Click on the “Cell Value Change” Sheet.
- Select View Code.
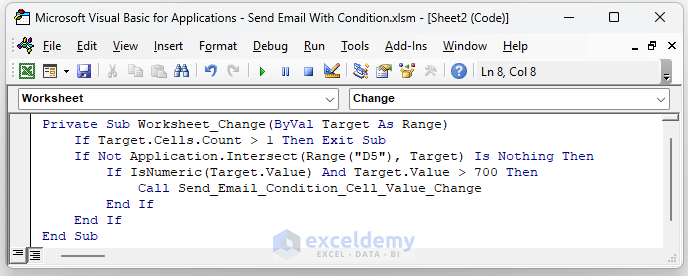
- Enter this code:
Private Sub Worksheet_Change(ByVal Target As Range)
    If Target.Cells.Count > 1 Then Exit Sub
    If Not Application.Intersect(Range("D5"), Target) Is Nothing Then
        If IsNumeric(Target.Value) And Target.Value > 700 Then
            Call Send_Email_Condition_Cell_Value_Change
        End If
    End If
End Sub
VBA Code Breakdown
Here, we’ll be using a Private Sub, because we don’t execute this code via the Macro window. This code will run itself when there is a cell value change.
- We define a Private Sub where the event is Worksheet_Change.
- We limit the number of cells to 1, namely cell D5.
- We check if its value is more than 700.
- If the condition is met then the Sub Procedure Send_Email_Condition_Cell_Value_Change will execute.
- Save and close this window.
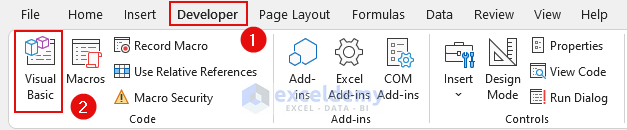
Now we enter code into the Module window. To bring up the VBA Module:
- From the Developer tab, select Visual Basic.
- Alternatively, press ALT + F11.
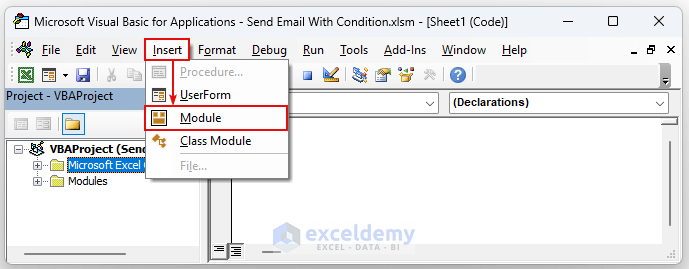
- From the Insert tab, select Module.
- Enter the following code:
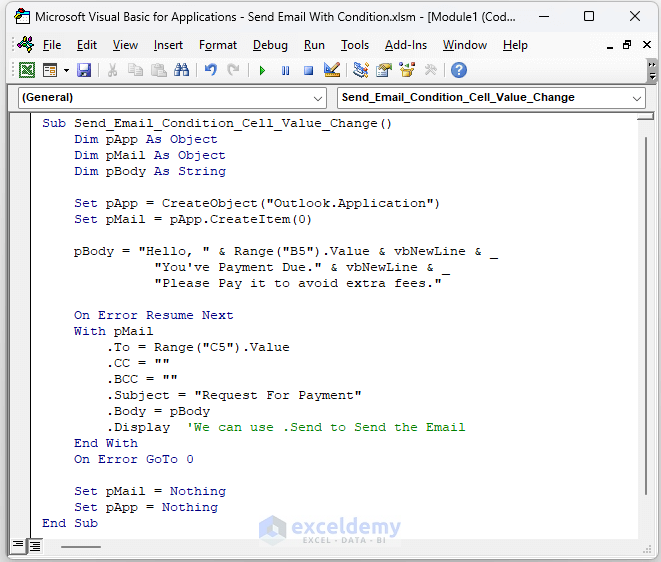
Sub Send_Email_Condition_Cell_Value_Change()
Dim pApp As Object
Dim pMail As Object
Dim pBody As String
Set pApp = CreateObject("Outlook.Application")
Set pMail = pApp.CreateItem(0)
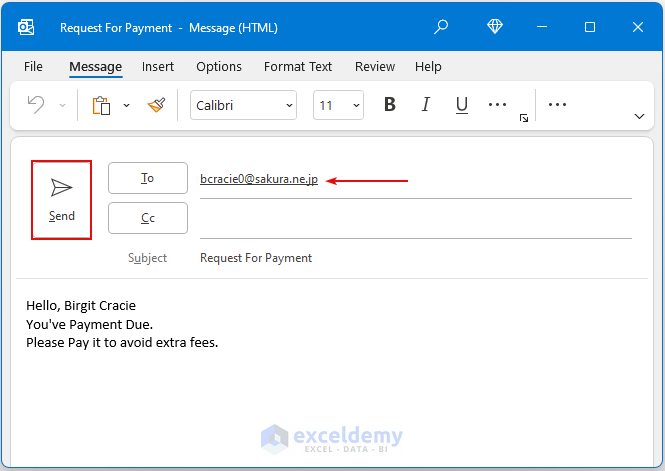
pBody = "Hello, " & Range("B5").Value & vbNewLine & _
"You've Payment Due." & vbNewLine & _
"Please Pay it to avoid extra fees."
On Error Resume Next
With pMail
.To = Range("C5").Value
.CC = ""
.BCC = ""
.Subject = "Request For Payment"
.Body = pBody
.Display 'We can use .Send to Send the Email
End With
On Error GoTo 0
Set pMail = Nothing
Set pApp = Nothing
End SubVBA Code Breakdown
- We call our Sub Procedure Send_Email_Condition_Cell_Value_Change.
- We declare the Variable types.
- We select Outlook as our Mail Application.
- The email content is set.
- “.Display” is used to display our email, meaning we’ll need to press Send manually to send the emails. Alternatively, we could use “.Send” here to send email automatically without displaying it first.
- Save and close the Module.
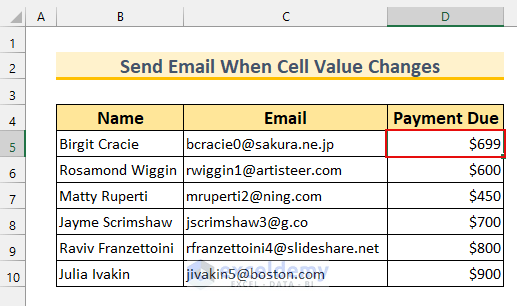
Now, in our dataset, we can type 699 and nothing will happen.
However if we type 801 (or any value greater than 700), then our code will execute.
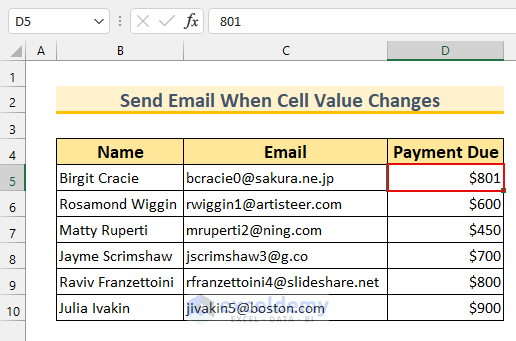
The Outlook email sending option will be shown. Press Send to send the email address.
Read More: How to Send Excel File to Email Automatically
Method 2. Using VBA to Send Email If Multiple Conditions are Met
For the second method, we’ve changed our dataset. Moreover, we’ll be using 2 Sub Procedures in a single Module. If our code works as intended, we’ll send emails to 2 people, and attach the file to our email.
Steps:
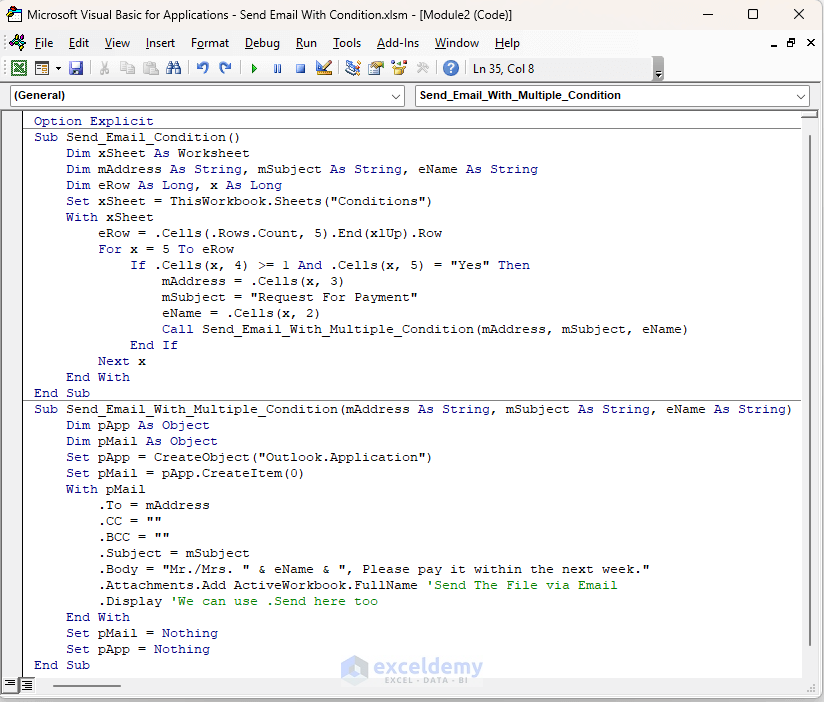
- As shown in the first method, bring up the Module window and enter this code:
Option Explicit
Sub Send_Email_Condition()
    Dim xSheet As Worksheet
    Dim mAddress As String, mSubject As String, eName As String
    Dim eRow As Long, x As Long
    Set xSheet = ThisWorkbook.Sheets("Conditions")
    With xSheet
        eRow = .Cells(.Rows.Count, 5).End(xlUp).Row
        For x = 5 To eRow
            If .Cells(x, 4) >= 1 And .Cells(x, 5) = "Yes" Then
                mAddress = .Cells(x, 3)
                mSubject = "Request For Payment"
                eName = .Cells(x, 2)
                Call Send_Email_With_Multiple_Condition(mAddress, mSubject, eName)
            End If
        Next x
    End With
End Sub
Sub Send_Email_With_Multiple_Condition(mAddress As String, mSubject As String, eName As String)
    Dim pApp As Object
    Dim pMail As Object
    Set pApp = CreateObject("Outlook.Application")
    Set pMail = pApp.CreateItem(0)
    With pMail
        .To = mAddress
        .CC = ""
        .BCC = ""
        .Subject = mSubject
        .Body = "Mr./Mrs. " & eName & ", Please pay it within the next week."
        .Attachments.Add ActiveWorkbook.FullName 'Send The File via Email
        .Display 'We can use .Send here too
    End With
    Set pMail = Nothing
    Set pApp = Nothing
End Sub
VBA Code Breakdown
- We call our first Sub Procedure Send_Email_Condition.
- We declare the Variable types and setting “Conditions” as our Sheet.
- The last row number is found. Our values starts from row 5, so we assign row 5 as the last row in our code.
- We call our second Sub Procedure Send_Email_With_Multiple_Condition.
- We select Outlook as our Mail Application.
- We set the email content in our code.
- We attach the Excel file to the email using the Attachment method.
- “.Display” is used to display our email, meaning we’ll need to press Send manually to send the emails. We could use “.Send” to send email automatically without displaying.
- Save and close the Module.
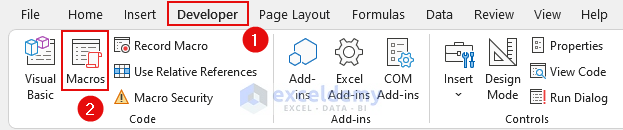
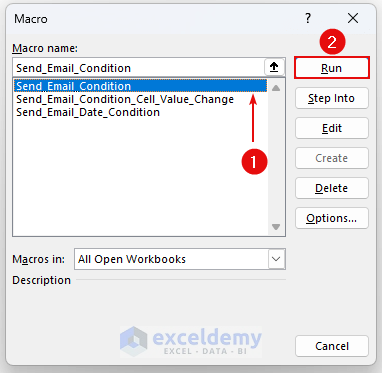
Bring up the Macro window to execute our code.
- From the Developer tab, select Macros.
The Macro window will pop up.
- Select “Send_Email_Condition”.
- Click Run.
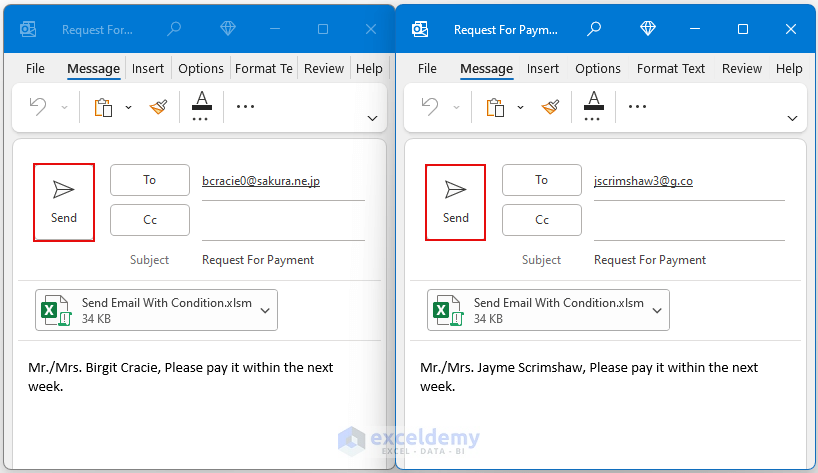
This will execute our code. Two people met our condition, hence we’ll see two email windows.
Read More: Automatically Send Emails from Excel Based on Cell Content
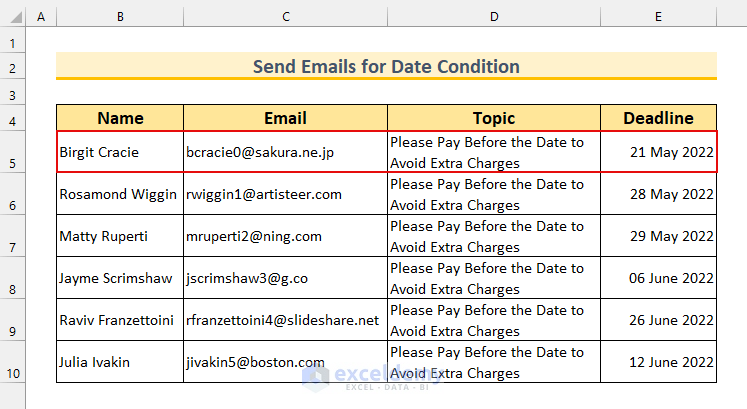
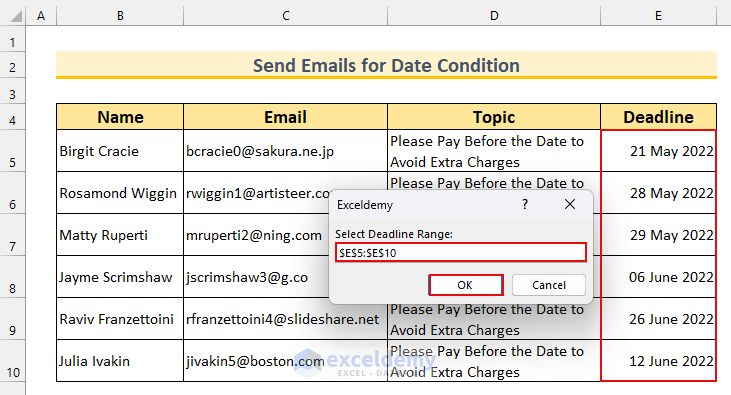
Method 3 – Send Email Based on Date Conditions
For the last method, we’ll send emails if the deadline is within one week of the current date. Assuming 19 May 2022 is the current date, there is only one row that falls within seven days of it, row 5. We’ll send an email to that person using the VBA code.
Steps:
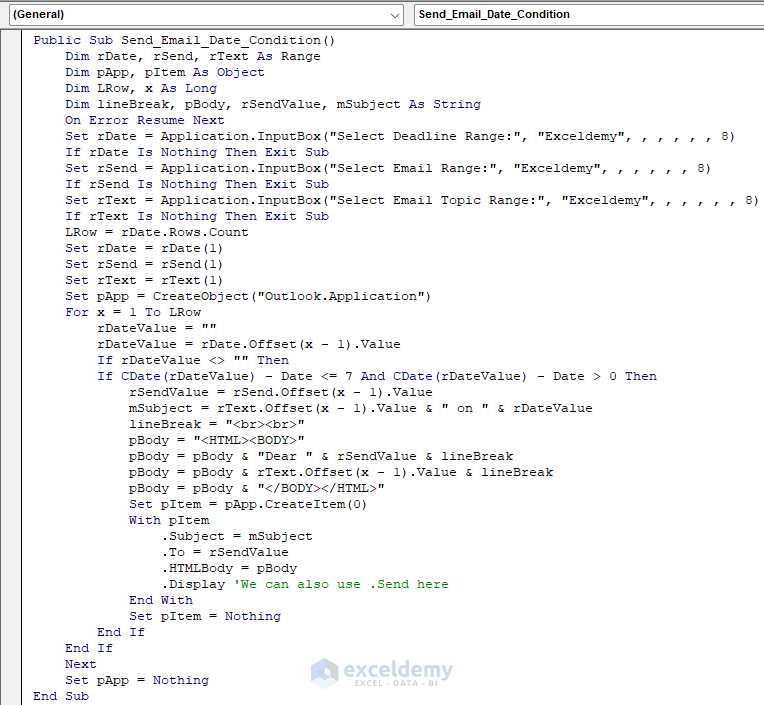
- As shown in the first method, bring up the Module window and enter this code:
Public Sub Send_Email_Date_Condition()
    Dim rDate, rSend, rText As Range
    Dim pApp, pItem As Object
    Dim LRow, x As Long
    Dim lineBreak, pBody, rSendValue, mSubject As String
    On Error Resume Next
    Set rDate = Application.InputBox("Select Deadline Range:", "Exceldemy", , , , , , 8)
    If rDate Is Nothing Then Exit Sub
    Set rSend = Application.InputBox("Select Email Range:", "Exceldemy", , , , , , 8)
    If rSend Is Nothing Then Exit Sub
    Set rText = Application.InputBox("Select Email Topic Range:", "Exceldemy", , , , , , 8)
    If rText Is Nothing Then Exit Sub
    LRow = rDate.Rows.Count
    Set rDate = rDate(1)
    Set rSend = rSend(1)
    Set rText = rText(1)
    Set pApp = CreateObject("Outlook.Application")
    For x = 1 To LRow
        rDateValue = ""
        rDateValue = rDate.Offset(x - 1).Value
        If rDateValue <> "" Then
        If CDate(rDateValue) - Date <= 7 And CDate(rDateValue) - Date > 0 Then
            rSendValue = rSend.Offset(x - 1).Value
            mSubject = rText.Offset(x - 1).Value & " on " & rDateValue
            lineBreak = "<br><br>"
            pBody = "<HTML><BODY>"
            pBody = pBody & "Dear " & rSendValue & lineBreak
            pBody = pBody & rText.Offset(x - 1).Value & lineBreak
            pBody = pBody & "</BODY></HTML>"
            Set pItem = pApp.CreateItem(0)
            With pItem
                .Subject = mSubject
                .To = rSendValue
                .HTMLBody = pBody
                .Display 'We can also use .Send here
            End With
            Set pItem = Nothing
        End If
    End If
    Next
    Set pApp = Nothing
End Sub
VBA Code Breakdown
- We call our first Sub Procedure Send_Email_Date_Condition.
- We declare the Variable types and setting “Conditions” as our Sheet.
- We use InputBox to set the range of our values.
- We select Outlook as our Mail Application.
- We use the VBA CDate function to check if a date is within seven days from the current date.
- We set the email content in our code.
- We use “.Display” to show our email, meaning we’ll need to press Send manually to send the emails. We could use “.Send” to send email automatically without displaying.
- Save and close the Module.
- As shown in method 2, bring up the Macro window.
- Select “Send_Email_Date_Condition” and press Run.

The macro dialog box opens.
- Select the date column and click OK.
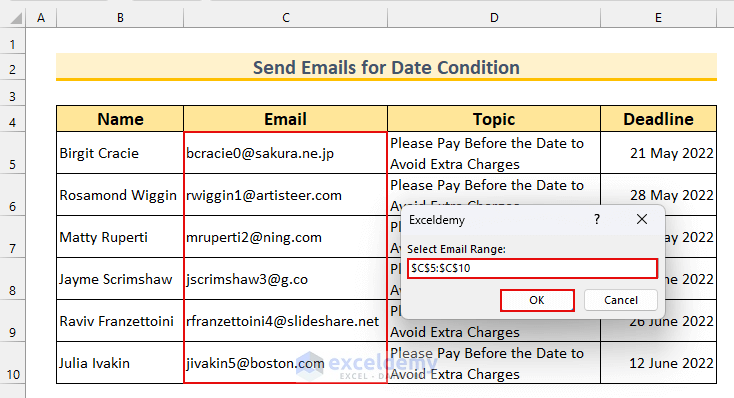
- Select the email column and press OK.
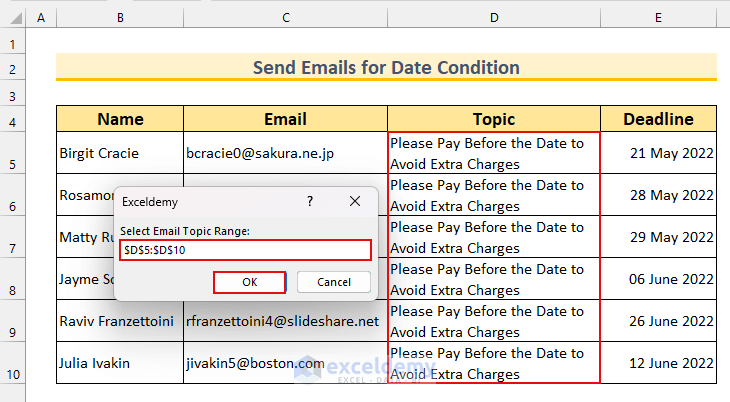
- Select the email content column and click OK.
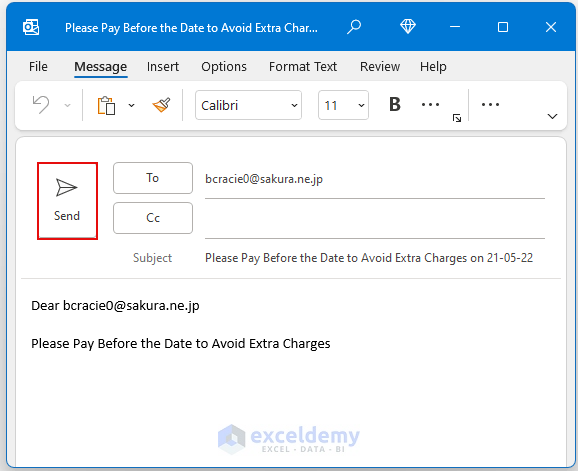
The email dialog box opens.
- Press Send to achieve our goal.
Read More: How to Send Email Automatically When Condition Met in Excel
Things to Remember
- In all our methods, Outlook was our default email Application. You will need to use different codes for separate Applications.
Download Practice Workbook
Related Articles
- How to Send an Editable Excel Spreadsheet by Email
- How to Send Bulk Email from Outlook Using Excel
- How to Send Automatic Email from Excel to Outlook
- How to Automatically Send Email from Excel Based on Date
- How to Send Multiple Emails from Excel Spreadsheet
<< Go Back To Send Email from Excel | Learn Excel
Get FREE Advanced Excel Exercises with Solutions!

Hello!
I am following step – 1. Using VBA to Send Email If a Cell Value Changes in Excel.
But how can I create this without limiting it to only one cell – D5. How to edit range lets say from D5 to D10?
Thank you Edijs for your wonderful question. To edit the cell range follow these steps:
Firstly, enable the Microsoft Forms 2.0.
Secondly, type this code on to sheet 2.
Thirdly, type change the code from Module 1.
This should solve your problem. You can see the output from the following animated image.
If you have any further question, please let us know.
Regards
Bishawajit, on behalf of ExcelDemy
Hi! Thank you for this. However, the email cannot be sent automatically even when i use .Send. Any Idea?
Hi OZZY,
Thanks for your comment.
If the given codes are not working for the .Send function,
• Use the following code in your worksheet by clicking on View Code.
• Then, use the following code in your Module.
We hope this will solve your problem. Please let us know if you face any further problems.
Regards,
Arin Islam,
ExcelDemy
Hey guys, how would I also add a condition in the code from step 1 to only send once a day? For instance, in the code below, I know the target value will go below 72 more than once a day, but I do not want it sending 100 emails a day.
Thanks!
Private Sub Worksheet_Change(ByVal Target As Range)
If Target.Cells.Count > 1 Then Exit Sub
If Not Application.Intersect(Range(“C15”), Target) Is Nothing Then
If IsNumeric(Target.Value) And Target.Value < 72 Then
Call Send_Email_Condition_Cell_Value_Change
End If
End If
End Sub
Hello, HUNTER!
Thanks for sharing your problem with us!
To add a condition in the code from step 1 to only send once a day, you can use a global variable to keep track of the last time an email was sent. Here’s an example of how you can modify the code:
In this modified code, the lastSentTime variable is used to keep track of the last time an email was sent. When a cell is changed and meets the criteria for sending an email, the code checks if at least one day has passed since the last email was sent before sending a new email. If less than a day has passed, the code skips sending the email. Once an email is sent, the lastSentTime variable is updated with the current time.
Hope this will help you.
Good Luck!
Regards,
Sabrina Ayon
Author, ExcelDemy.
Hello,
I need to compare two rows. one stays the same, the other changes. I need to send an email when a number in any cell in the changing row falls below the value from the corresponding cell that stays the same. i.e A2 is fewer than B2 —> send email. How to do this for multiple cells ? thank you very much.
Hello JAN ZÁKOSTELSKÝ
Thanks for reaching out and sharing your problem. You want to compare two Excel rows: one that remains constant and another that changes. You need to receive an email whenever a number in any cell of the changing row becomes lower than the value in the corresponding cell of the constant row.
I am delighted to inform you that I have developed an Excel VBA Sub-procedure and an Event Procedure. These will fulfil your requirements.
Follow these steps:
Hopefully, the idea will help you; good luck.
Regards
Lutfor Rahman Shimanto
Excel & VBA Developer
ExcelDemy
Hello, thank you very much for your answer it helped a lot. I have one more request. The information I am changing are in column H the static value is in column I and in column A there is an ID number. is it possible to write the ID number from column A when the value in column H falls below value of column I? thank you for your help
kind regards
zákostelský jan
Hello Zakostelsky Jan
You can use the Worksheet_Change event in Excel VBA to make the code run automatically whenever column H changes.
Here’s how you can modify the code:
I hope the idea will help you; good luck.
Regards
ExcelDemy
Hello, thank you this works well, however I´d like to keep it as a private sub that executes automatically when there is a change. this code is very good for checking the whole sheet for past changes but needs to be run to send the email. Can it run itself whenever there is a change in the columm H ? thank you very much.
Kindest regards
Zakostelsky Jan
Hello JAN ZAKOS TELSKY,
I hope you are doing well. Thank u so much for your query. Well, I can see you want to add the ID number (Column A) in the mail body when the changing row falls below the value from the corresponding cell. You also added that the changing values are in column H, and the static value is in column I.
Now, follow the below VBA code to write the ID number from column A in the email body when the value in column H falls below the value of column I.
Code:
Once you apply the code, you will get an email as below.
Hope this information will help you. Please let us know if there is any further query in the comment section.
Best Regards,
Afrina Nafisa
Exceldemy