
Image by Editor
Creating custom forms in Microsoft Access is an effective way to streamline data entry, enhance user experience, and maintain data integrity. With custom forms, you can create more user-friendly interfaces for database users, ensure that data is entered in the correct format, reduce errors, and improve workflow efficiency.
In this article, we will show how to design custom forms for enhanced data entry in Microsoft Access.
Create a Table in Access
Let’s assume we have a database with an Employee table that includes the following fields:
- EmployeeID (AutoNumber)
- FirstName (Short Text)
- LastName (Short Text)
- Position (Short Text)
- Department (Short Text)
- DateOfBirth (Date/Time)
- StartDate (Date/Time)
- Salary (Currency)
- IsActive (Yes/No)
You can use this Employee table to create a custom form.

Create a Basic Custom Form
- Open the Employee table in Datasheet view.
- Go to the Create tab >> select Form.
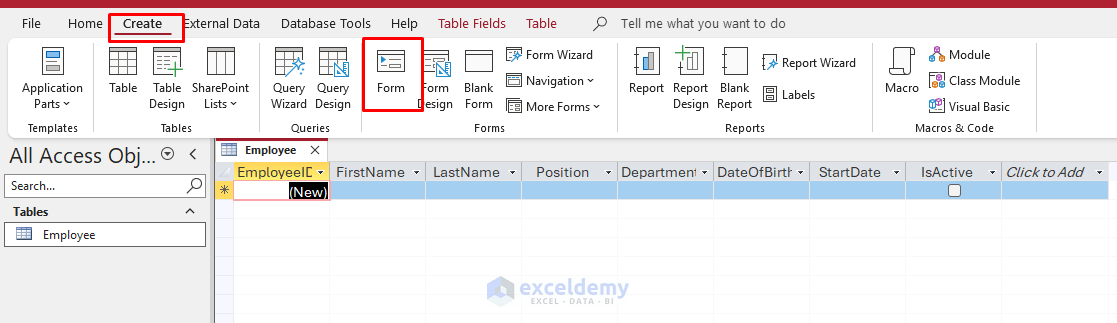
- This will automatically generate a form for the Employee table based on the current layout of the table.
- Organize the fields logically:
- Personal Information: First Name, Last Name, Date of Birth.
- Job Information: Position, Department, Start Date, Salary.
- Status Information: IsActive (checkbox).

Add Controls to the Form
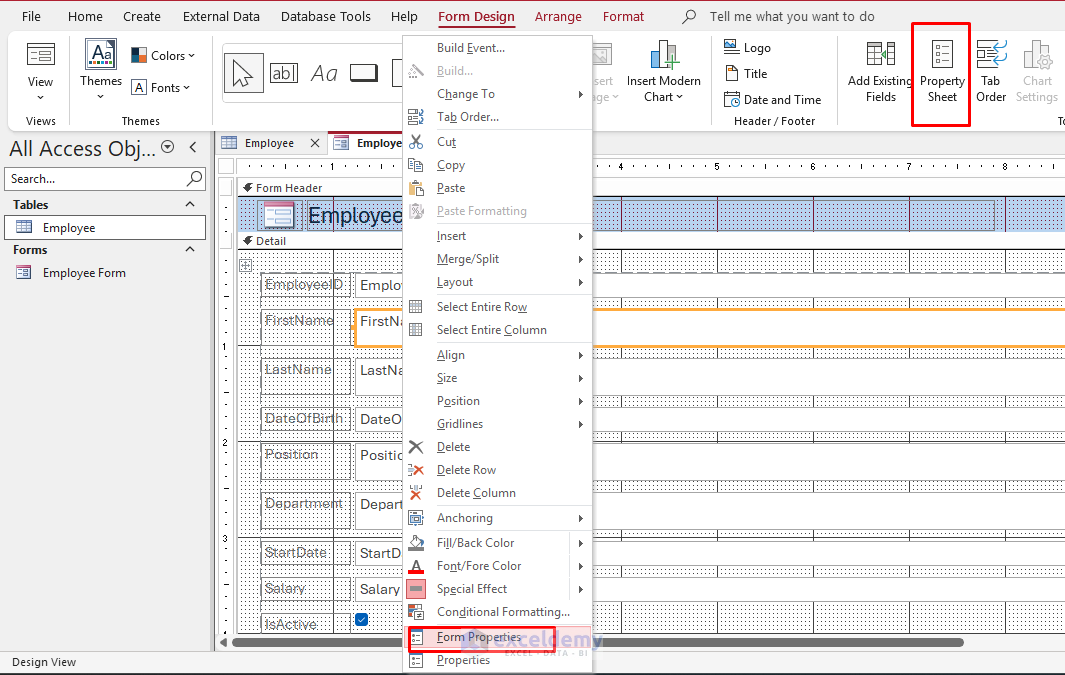
Once the form is created, you can switch to Design View to customize it further.
- Click on the View dropdown in the upper left corner (just below File).
- Select Design View from the dropdown.

You can add the necessary input fields (controls) to the form.
- Right-click on the Text Box >> select Field Properties.
- Or, go to the Form Design tab >> select Property Sheet.
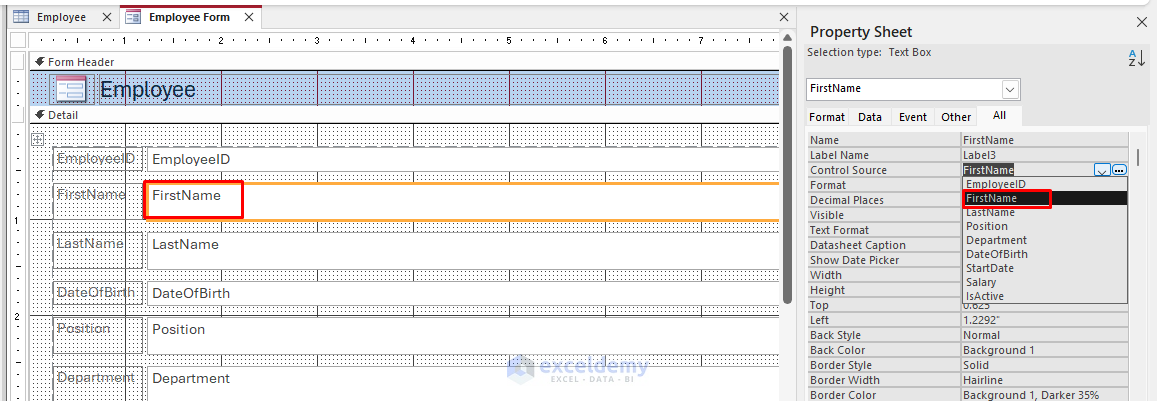
Check the field properties. Since we created the table from an existing one, the Control Source for all fields was automatically set to their corresponding properties.
Manually Add Text Boxes
First Name and Last Name:
- Click on the Text Box control in the Design tab.
- Place the text box on the form for the FirstName field and set the Control Source property to FirstName.
- Do the same for LastName.
Position and Department:
- Add text boxes for Position and Department.
- Set the Control Source for both text boxes to Position and Department, respectively.
Date of Birth:
- Click the Date/Time control from the Design tab and place it on the form.
- Set the Control Source to DateOfBirth.
- The calendar picker will automatically appear in Form View, allowing easy date selection.
Start Date:
- Similarly, add another Date/Time control for StartDate.
Salary (Currency Control)
- Add a Text Box for the Salary field.
- Set the Control Source to Salary.
- Under the Format property, choose Currency to format the salary appropriately.
IsActive (Checkbox)
- Add a Checkbox control for the IsActive field.
- Set the Control Source to IsActive.
Setting Form Properties
Now, let’s set some properties for the form to enhance its functionality.
Record Source:
- Set the Record Source property to the Employee table.
Allow Additions:
- Set Allow Additions to Yes to enable new data entry.

Default View:
- Set the Default View to Single Form for easier data entry, where one record is displayed simultaneously.

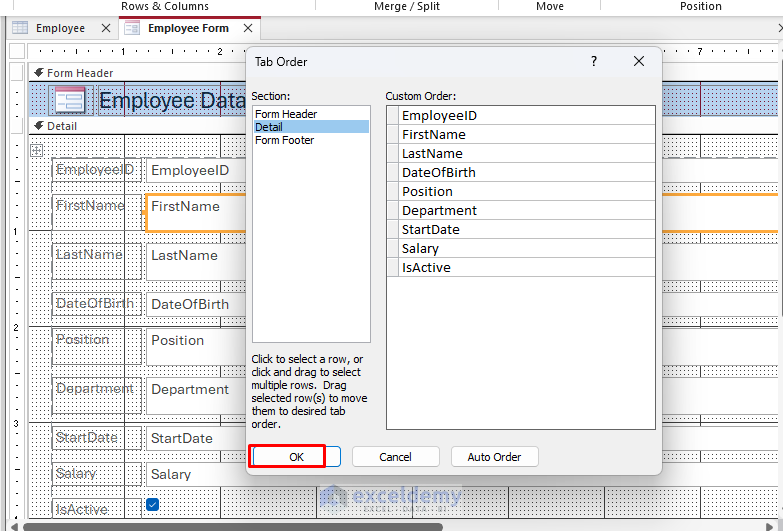
Tab Order:
- Make sure the tab order of the controls makes sense.
- Right-click on a control >> select Tab Order.
- Click OK.
Validate Data Entry
To ensure that users enter valid data, we can apply some basic validations.
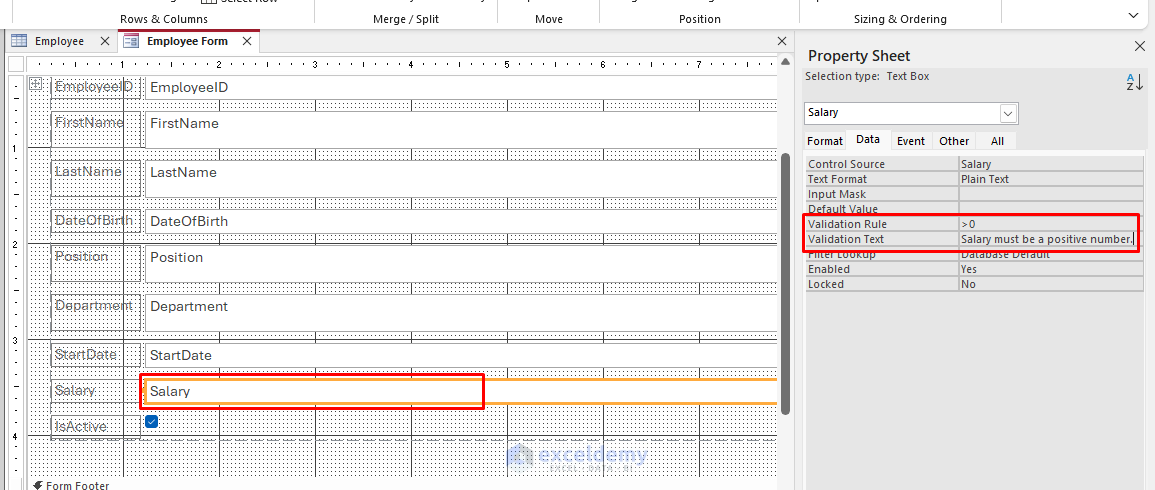
Validation Rule for Salary:
- Set a Validation Rule on the Salary field to ensure the salary is positive:
- Open the Property Sheet for the Salary text box.
- Set the Validation Rule property to: >0 (Salary must be greater than 0).
- Set the Validation Text property to: Salary must be a positive number.
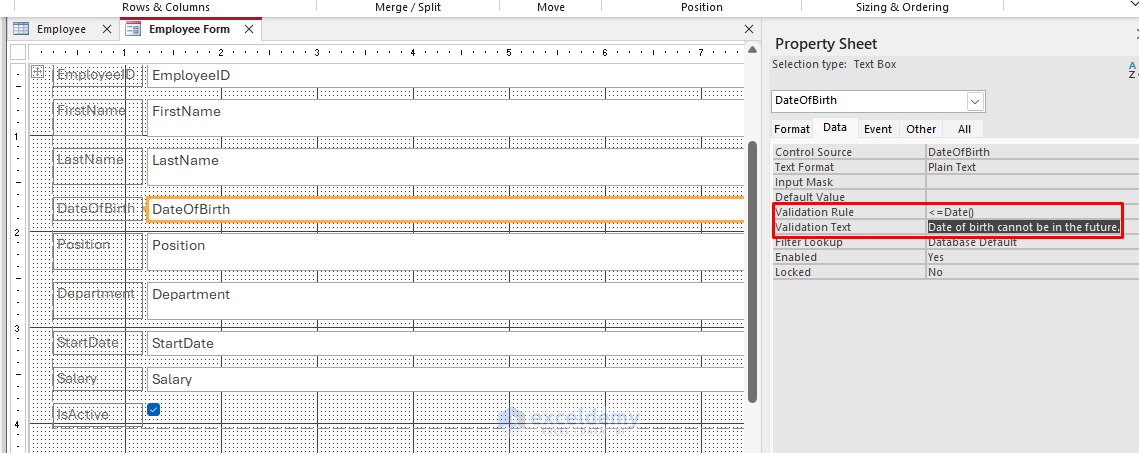
Date of Birth (Valid Date Range):
- Set a Validation Rule to ensure that the employee’s DateOfBirth is not in the future:
- Set the Validation Rule for DateOfBirth: <=Date()
- Set the Validation Text: Date of birth cannot be in the future.
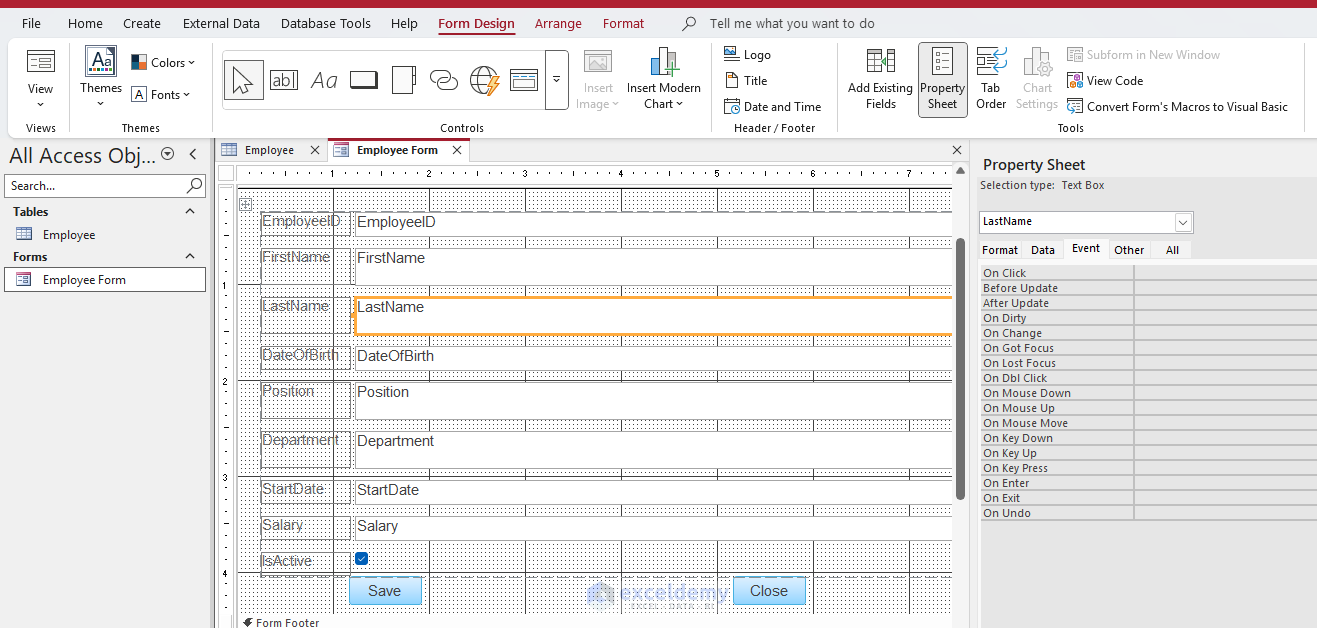
Add Buttons for Navigation and Actions
Buttons allow users to navigate records or perform specific actions like saving or closing the form.
Add a Save Record Button:
- Go to the From Design tab >> insert Buttons.
- Insert two buttons >> name them Save and Close.
- In the Property Sheet >> select Event >> select On Click >> select Event Procedure.

- Insert the following VBA code in the Save button.
Private Sub Save_Click()
DoCmd.Save
MsgBox "Save Button Clicked"
End Sub
- Insert the following VBA code in the Close button.
Private Sub Close_Click()
DoCmd.Close
End Sub

Employee Data Entry Form:
Test Data Entry Form
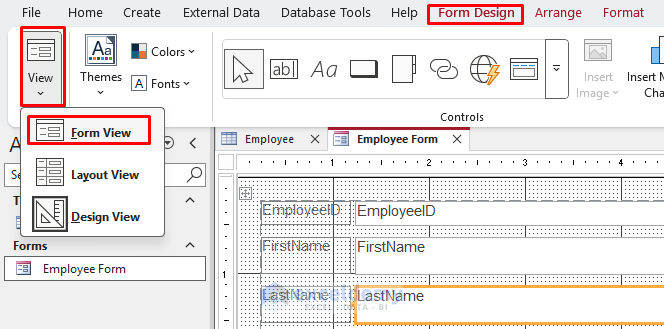
Once the form is designed, switch to Form View to test it.
- Go to the Form Design >> from View >> select Form View.
- Enter Data: Insert the following sample employee data.
- Click Save.
- Click OK.
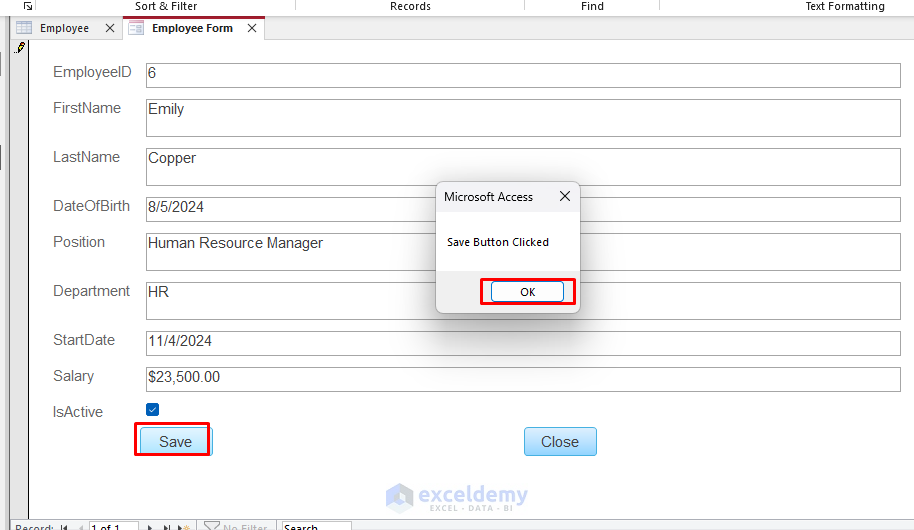
- Check for Errors: Make sure the validation rules work (e.g., entering a negative salary should prompt an error).
- Refine Layout: Adjust the size of text boxes and reposition controls to make the form look cleaner and more user-friendly.
Employee Table with Data:

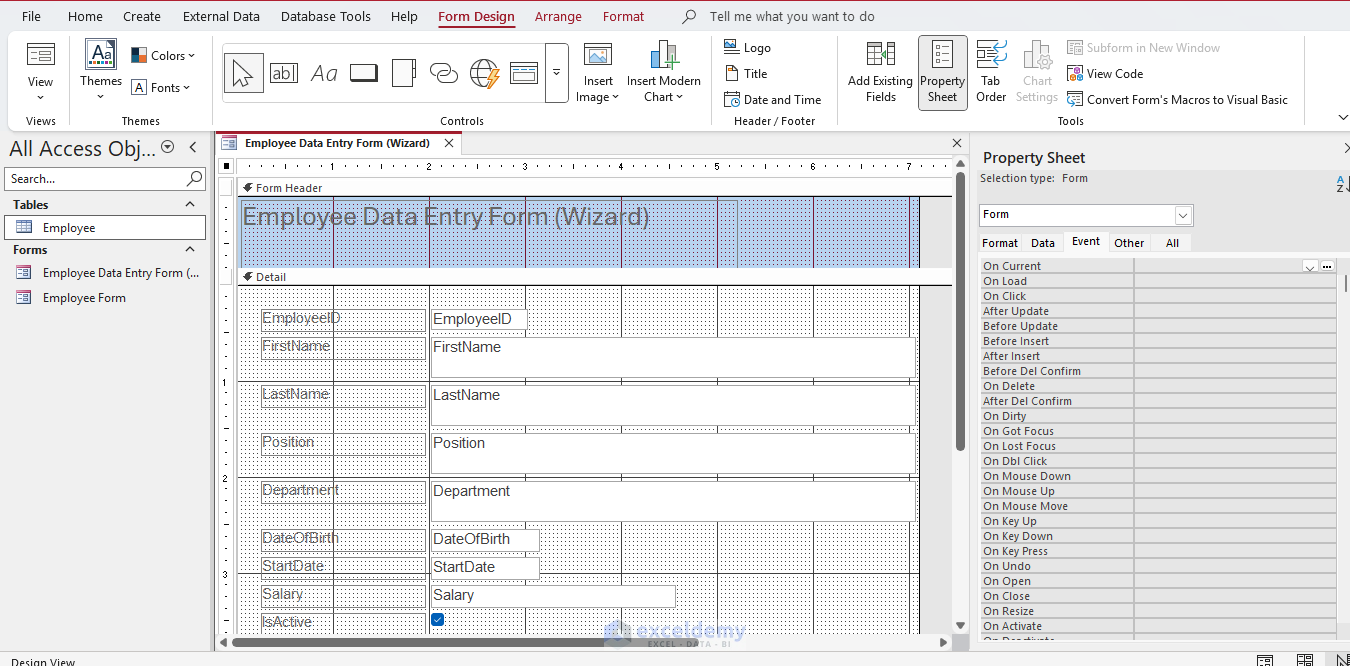
Alternative Method: Form Wizard
You can design a custom form using the Form Wizard option too.
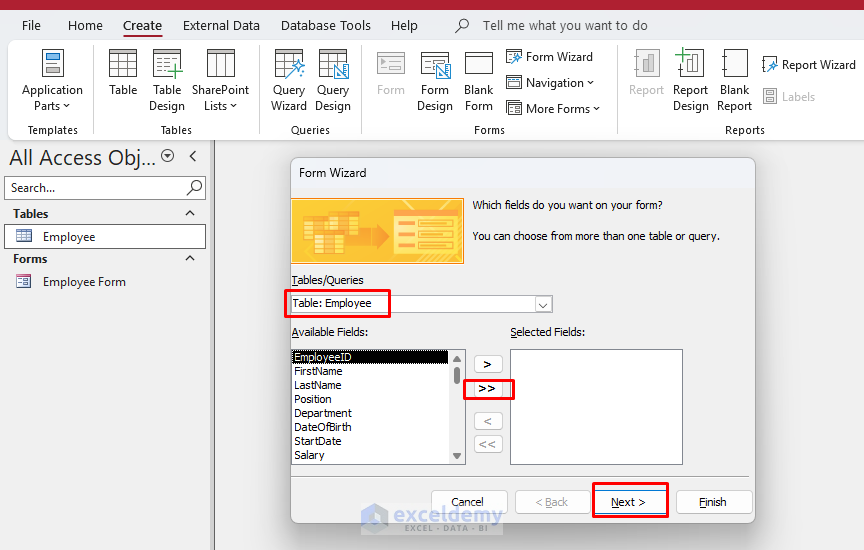
- Go to the Create tab >> select Form Wizard.
- In the first wizard screen, ensure Table: Employee is selected in the dropdown.
- In the Available Fields box >> click the button with double-right arrows (>>).
- This will move all fields to the Selected Fields box.
- Click Next to continue.
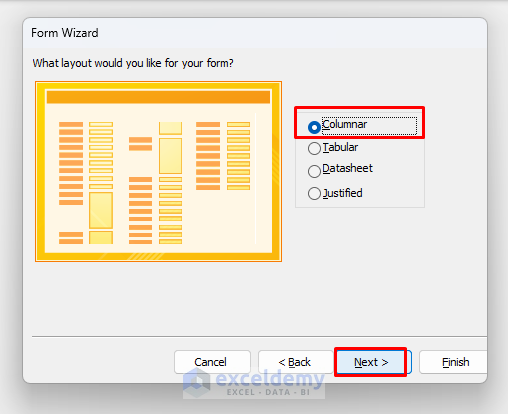
- Select Columnar layout (best for data entry – shows one record at a time with labels to the left of each field).
- Click Next.
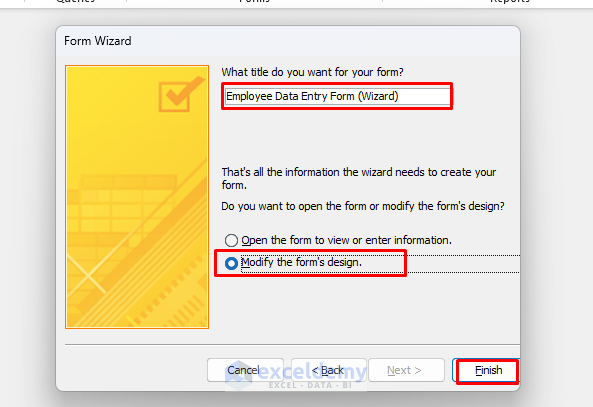
- Type a name for your form (e.g., “Employee Data Entry Form”)
- Select Modify the form’s design.
- Click Finish.
- The form will open, showing the first record on your Employee table.
- All fields will be displayed and ready for data entry or editing.
Conclusion
By following these steps, you can easily design custom forms tailored to your database needs, enhancing data entry and overall database management. Custom forms in Access allow you to efficiently manage data entry, improve user experience, and ensure data integrity. This tutorial shows the process of creating a custom form for entering employee data, adding necessary controls like buttons, text boxes, combo boxes, date pickers, and checkboxes, and applying validation rules to prevent errors. Explore all options to design your custom forms based on your data entry specification.
Get FREE Advanced Excel Exercises with Solutions!
