Method 1 – Use the Data Validation Option to Create a Range of Numbers in Excel
In this datasheet, we have used 3 columns and 7 rows to represent some employees’ Names, Genders, and Ages. We’ll create a range for the Age column so that no one can input an invalid number. Let’s assume that an employee’s age can’t be higher than 100 years.

Steps:
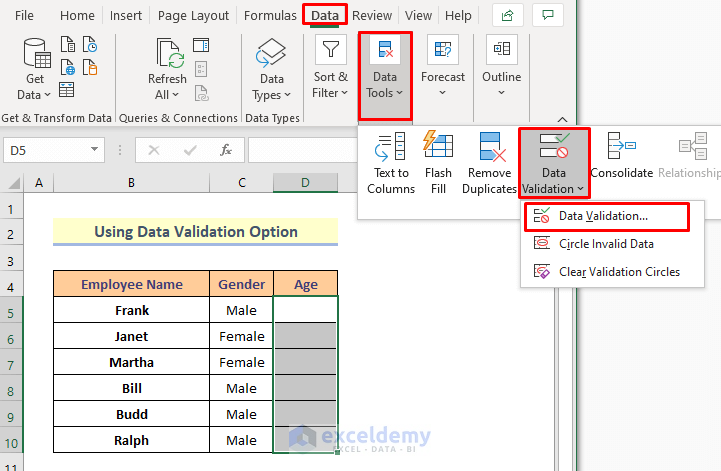
- Select the whole Age column.
- Go to Data, choose Data Tools, and select Data Validation
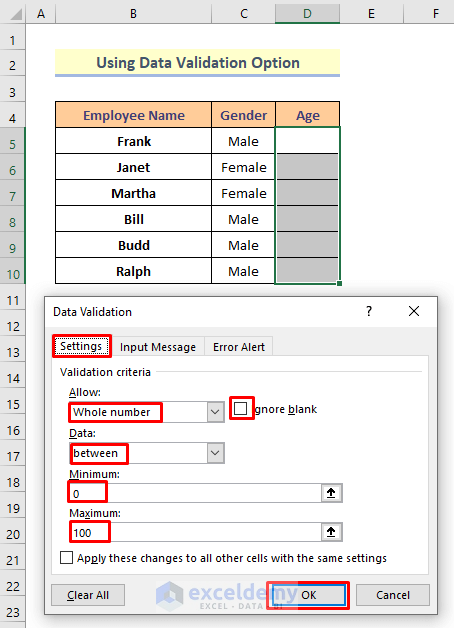
- A dialog box will open up.
- Go to Settings.
- Select Whole Number from Allow drop-down.
- Select Between from the Data drop-down tab.
- Unmark Ignore Blank option.
- Input the Minimum and Maximum numbers. We have put them as 0 and 100, respectively.
- Press OK.
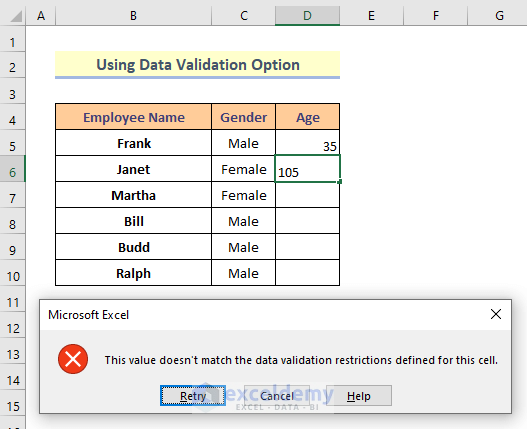
- Insert any number in the Age column. It will detect the validity. We put 35 in cell D5 and it has become valid. But when we put 105 in cell D6, an error box opened showing that the data doesn’t match with the validation.
Read More: Data Validation Drop Down List with Excel Table Dynamic Range
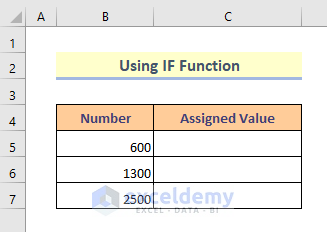
Method 2 – Insert a Function to Create a Range of Numbers to Assign a Value or Category in Excel
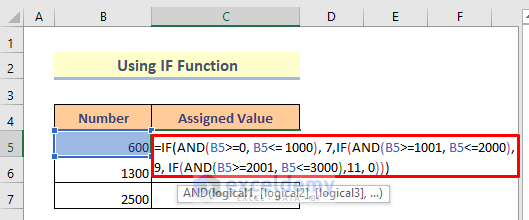
We will use a new dataset that has 2 columns. The columns are titled with Number and Assigned Value. It contains some random numbers in 3 successive rows. We want to assign a number (such as 7) for Cell C5 if the number in Cell B5 belongs between the range 0 to 1,000. We will assign 9 for the range 1,001 to 2,000 and 11 for the range 2,001 to 3,000.
Steps:
- Select Cell C5 and insert the following formula:
=IF(AND(B5>=0, B5<= 1000), 7,IF(AND(B5>=1001, B5<=2000), 9, IF(AND(B5>=2001, B5<=3000),11, 0)))How Does the Formula Work?
- The first combination of the IF and AND functions checks if the input value lies between 0 and 1000, if it does then the input value will be assigned in the cell.
- If the first condition is not matched, then the second combination of the IF and AND functions will check if the input value lies between 1001 and 2000. If so, the formula will allow you to input the value, otherwise, it won’t.
- Similarly, for the range of the numbers between 2001 and 3000, the third combo of the IF and AND functions will allow you to input a certain numeric value.
- If no condition matched then it will show “0”
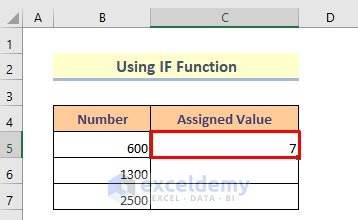
- Press Enter.
- Look at the image below that shows the assigned value.
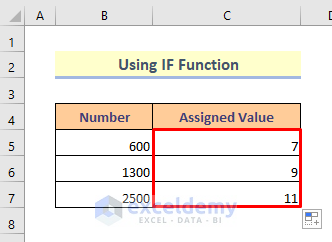
- Use the Fill Handle to copy the formula to the next two rows.
Note: You can also apply textual categories, such as with the formula below:
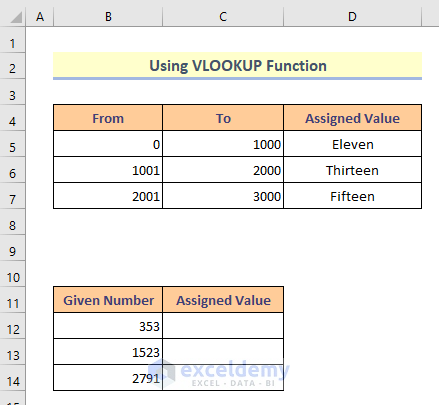
=IF(AND(B5>=0, B5<= 1000), “Seven”,IF(AND(B5>=1001, B5<=2000), “Nine”, IF(AND(B5>=2001, B5<=3000),”Eleven”, 0)))Method 3 – Use the VLOOKUP Function to Create a Range of Numbers in Excel
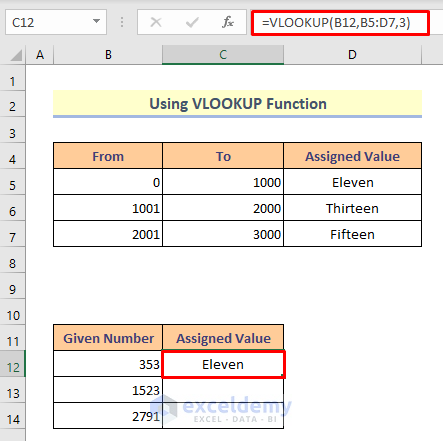
Let’s rearrange the dataset like the image below so we have clearly listed categories, then check where given numbers fall inside the categories.
 Steps:
- For Cell C12, use the formula provided below.
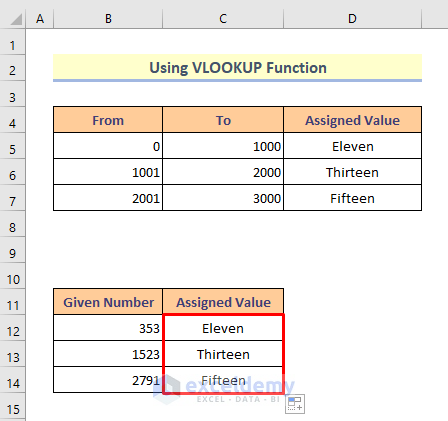
=VLOOKUP(B12,B5:D7,3)- Hit the Enter button. It will show the assigned value.
- Use the AutoFill Handle tool to copy the formula for the next two rows.
Download the Practice Book
Download the Excel workbook that we’ve used to prepare this article.
Related Articles
- Create Dynamic Sum Range Based on Cell Value in Excel
- How to Create Dynamic Range Using Excel INDEX Function
- Dynamic Named Range Based on Cell Value in Excel
- OFFSET Function to Create & Use Dynamic Range in Excel
- Dynamic Range for Multiple Columns with Excel OFFSET
<< Go Back to Dynamic Range | Named Range | Excel Formulas | Learn Excel
Get FREE Advanced Excel Exercises with Solutions!
