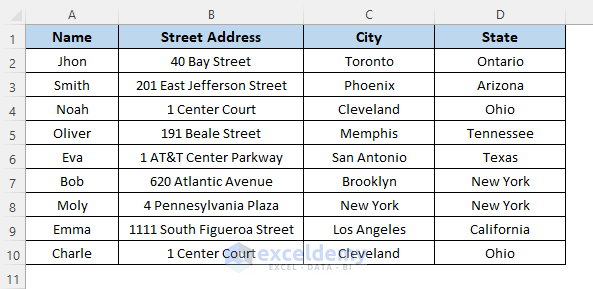
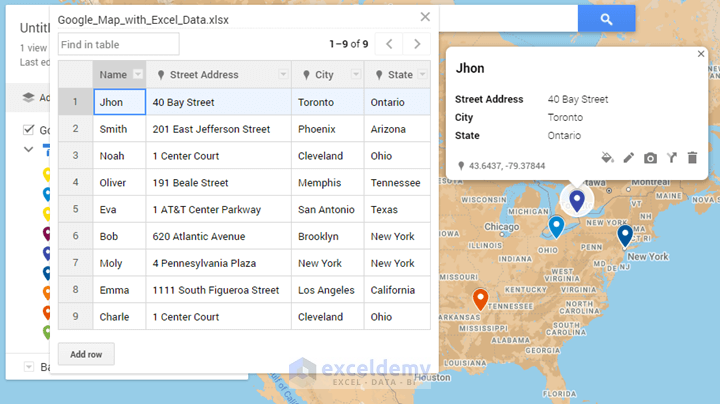
Step 1: Prepare the Worksheet
Suppose we need to collect some employees’ detailed addresses:
- Put their name in column A.
- Place the street address in column B.
- In columns C and column D, we insert the city and the state sequentially.
Read More: How to Create a Map in Excel
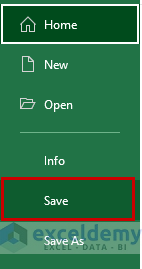
Step 2: Save or Export Spreadsheet with Excel Data
- Go to the File tab from the ribbon.

- Click on the Save option to keep the data for further processing.
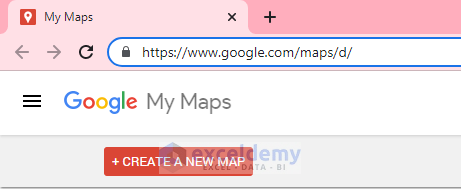
Step 3: Import Excel Data into ‘Google My Maps’
- Open a web browser. We’re using Google Chrome.
- In the Search Google or type a URL section, go to Google My Maps. This is a service from Google that allows us to create our custom Google Maps.
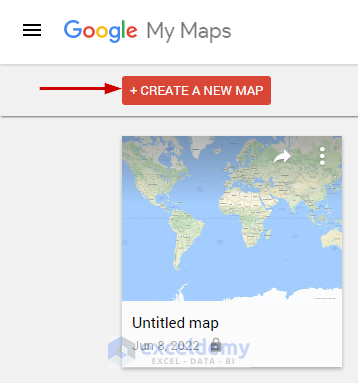
- Click on CREATE A NEW MAP.
- Click on the Import button in the popup.

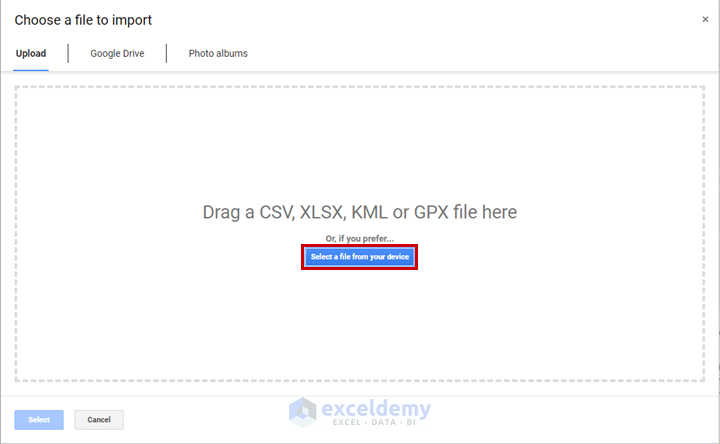
- This will display the Choose a file to import window.
- You will see several options for importing files. Choose Upload and click on Select a file from your device.
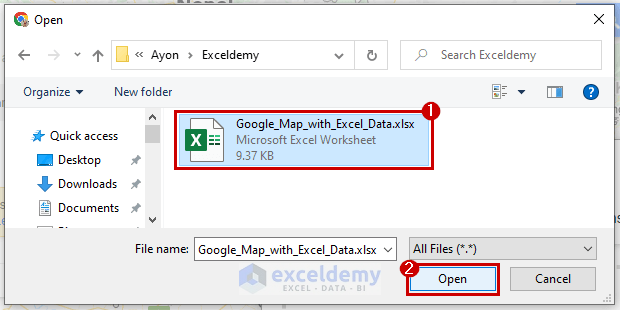
- Go to the folder where the spreadsheet is saved. Select the spreadsheet and click on Open or double-click the file.
Read More: How to Map Data in Excel
Step 4: Setting Positions of Placemark and Column Title for Map
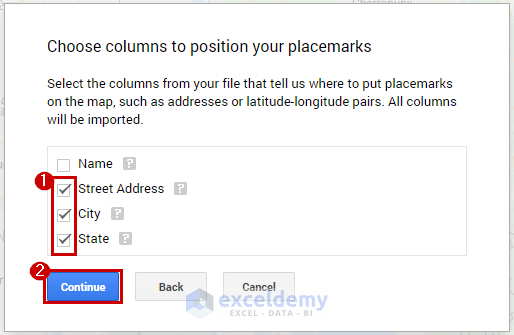
- Importing the Excel spreadsheet will display the dialog where all the columns will be imported.
- From Choose columns to position your placemarks, check the boxes for Street Address, City, and State.
- Click on Continue to proceed.
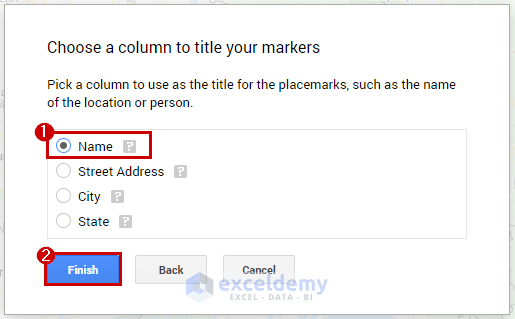
- We now need to decide how we want our placemarks to be titled when users see the map. So, choose Name.
- Click on Finish to complete the setup.
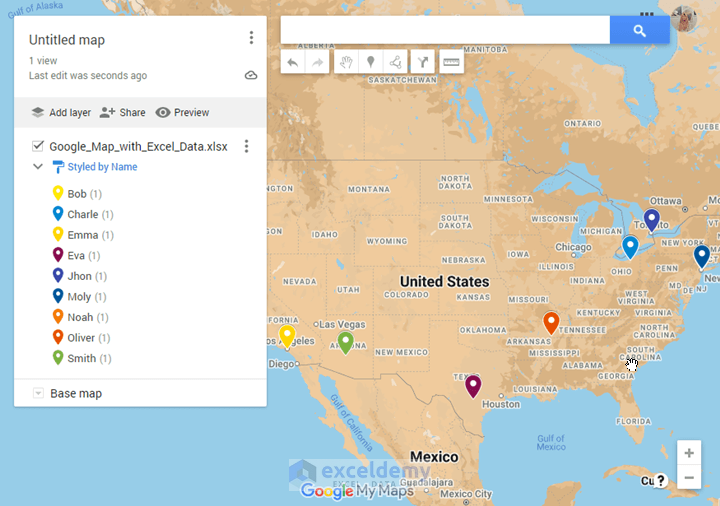
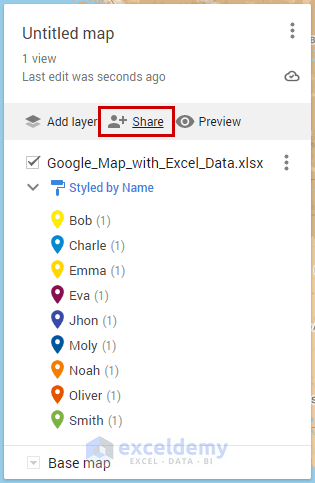
- The screenshot below shows the map we have just set up. You can see how they look on the map. The blue pins are the exact locations of the employee addresses.

Read More: How to Plot Points on a Map in Excel
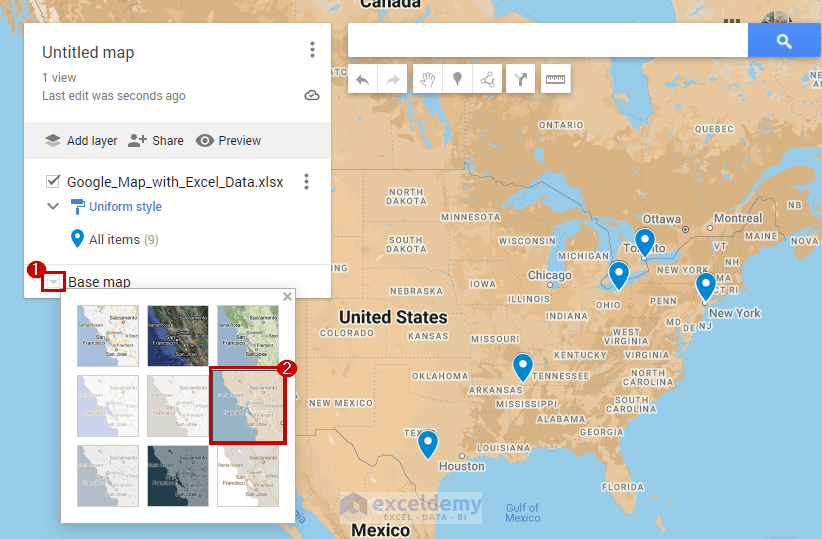
Step 5: Change Base Map
- Click on the tiny little triangle which is on the left side of the Base Map.
- Pick your base map, such as Simple Altas.
Step 6: Change Pin Style
- Click on the Format Painter icon shown below.
- Select Name.
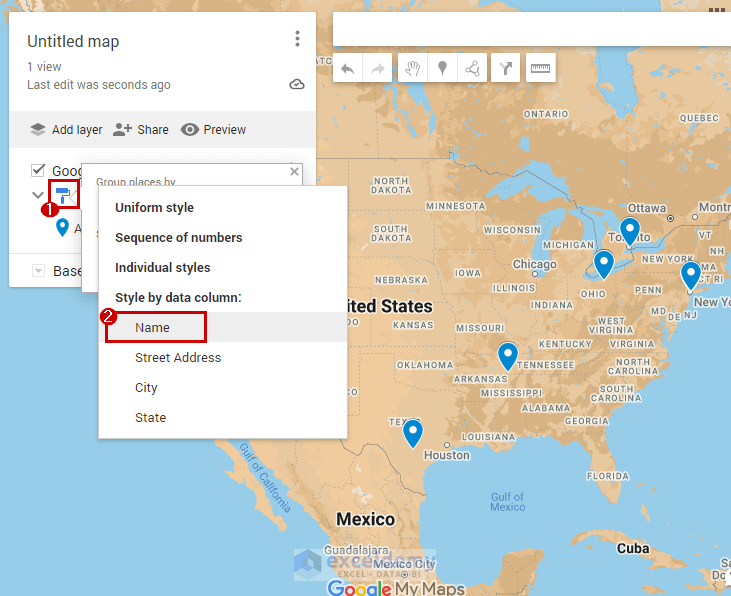
- This will change the placemark color to be Styled by Name. Almost every name has a different color for its placemark.
Read More: How to Make a Population Density Map in Excel
Step 7: Open Data Table to Edit Data
You can see the exact worksheet name from where the data was pulled.
- Click the three dots next to the name.
- Select Open data table.
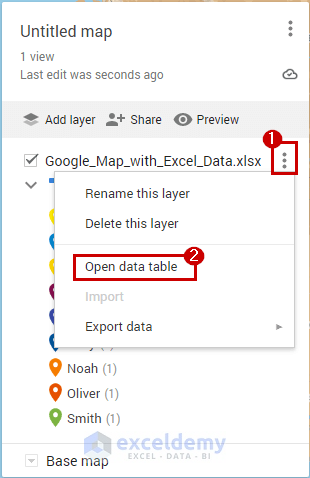
- This will display the data copied from the spreadsheet, which you can then edit. Note that this won’t affect the offline version you saved previously.
Step 8: Share Google Map and Name It with Description
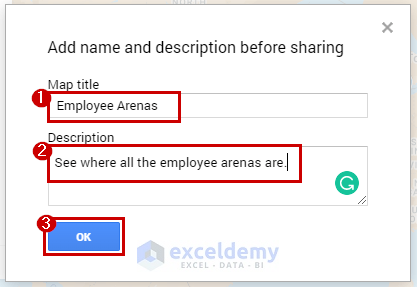
- Click on the Share button. This will open the Add name and description before sharing dialog box.
- Write the Map Title, such as Employee Arenas.
- Provide a description for that map.
- Click OK to finish.
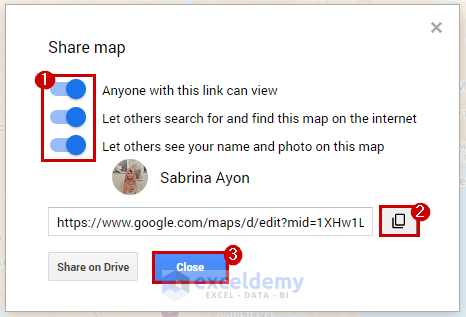
- Switch on the options for Anyone with this link can view and Let others search for and find this map on the internet.
- Click on the Copy option next to the link. The link will be in your clipboard and can be pasted elsewhere.
- Hit Close.
Note: Once you upload the sheet into Google Maps, changing the information in the local Excel file will not change any data on the maps. You can only change the spreadsheet data by following Step 7 or importing the sheet again.
Read More: How to Plot Addresses on Google Map from Excel
Download Practice Workbook
You can download the workbook and practice with them.
Related Articles
- How to Plot Cities on a Map in Excel
- How to Make Route Map in Excel
- [Fixed!] Excel Map Chart Not Working
<< Go Back to Excel Map Chart | Excel Charts | Learn Excel
Get FREE Advanced Excel Exercises with Solutions!

This is so helpful but I have 315 data lines out of 713 that were not included. They have little red warning triangles but I have no idea what wrong with them. They are in the same format as every other line but excluded from the map. Help
Hello Sarah Thornberry,
Glad you found it helpful! The red warning triangles usually indicate an issue with the data format or missing values.
Try checking for extra spaces, special characters, or inconsistent formatting in those rows.
You can also hover over the warning triangle to see the error message. If the issue persists, consider reformatting the data as plain text or checking if any column headers are mismatched. Let me know if you need more help!
Regards
ExcelDemy