
Image by Editor
Power Query is a powerful data connection technology in Microsoft Excel and Power BI that enables users to extract, transform, and load (ETL) data with ease. It enables users to connect to various data sources, transform data with a few clicks, and create automated, repeatable data processing workflows. In this tutorial, we’ll explore the steps involved in using Power Query to automate data transformation processes, which will help you streamline your workflow and save time.
What is Power Query?
Power Query is an ETL (Extract, Transform, Load) tool available in Microsoft Excel and Power BI that simplifies data connection and data transformation.
- Import data from multiple sources (Excel, databases, web, APIs, etc.).
- Clean, transform, and reshape data without complex formulas.
- Automate repetitive data tasks.
- Automate data refreshes to ensure up-to-date insights.
Enabling Power Query
Power Query is built into:
- Excel 2016 and later: Found under the Data tab as Get & Transform.
- Excel 2010/2013: Available as an add-in. After installation, use the Power Query tab.

- Power BI Desktop: Built-in under Transform Data tab.
- Go to the Home tab >> select Get Data.
- Or use the Transform Data button after loading the data.
Power Query can connect to various data sources, such as:

Import Data into Power Query
To import data:
- Go to the Data tab >> select Get Data >> select the data source (e.g., Excel workbook, SQL database, Web, etc.).
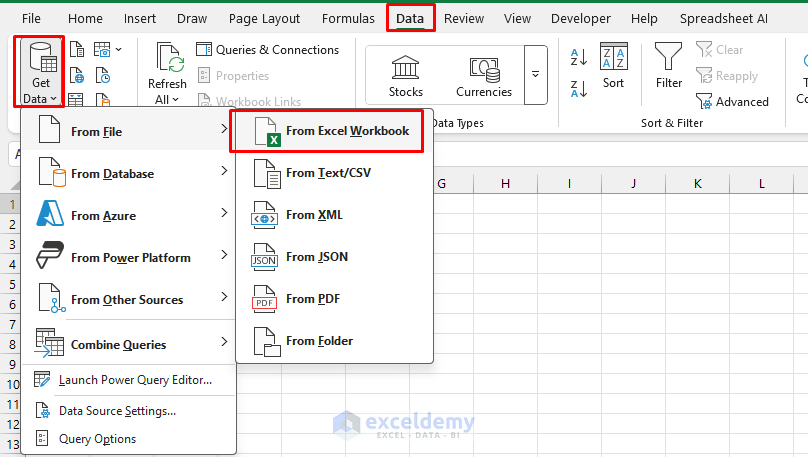
- Choose your file and select the sheet/table you want to import.
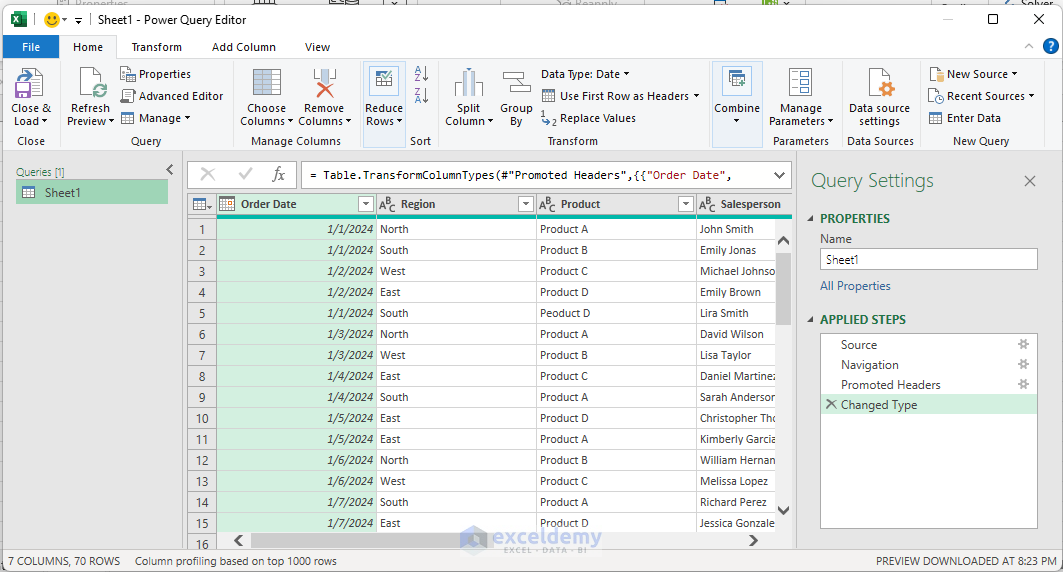
- Click Transform Data to open the Power Query Editor.

Power Query Editor:
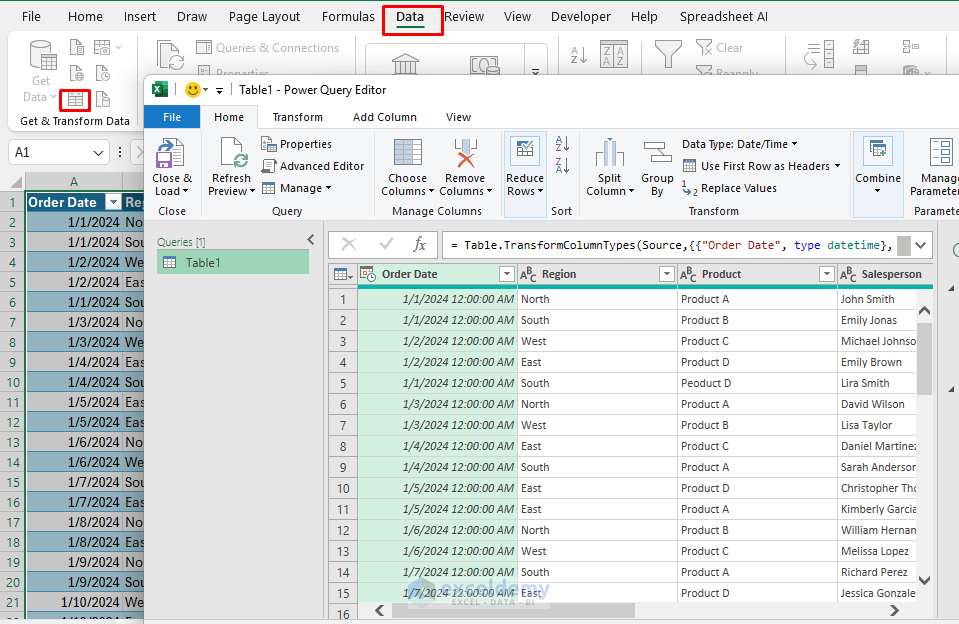
You can directly import Excel data in Power Query Editor;
- Go to the Data tab >> select From Table/Range.
- Click OK.
Data Transformation with Power Query
Clean and Format Data
- Remove Rows: Go to the Home tab >> click on Remove Rows >> select the following options as per your data transformation.

- Change Data Types: Click on a Column Header >> choose the correct data type (Text, Number, Date, etc.).

- Format Text: Go to the Transform tab >> select required options to remove extra spaces or clean non-printable characters.

- Date and Time Operations: Go to the Transform tab >> from Date & Time Column group >> select required options.
- Date extraction (year, month, day).
- Date arithmetic (adding/subtracting periods).
- Working with date ranges.

Split and Merge Columns
- Split Columns: Go to the Home tab >> click Split Column >> choose delimiter or fixed width.

- Merging Columns:
- Select multiple columns.
- Click Merge Columns >> specify a separator (e.g., space, comma).

Add Custom Columns
To create a new column with calculations:
- Go to the Add Column tab >> select Custom Column.
- Enter a formula (e.g., [Column1] + [Column2]).
- Click OK to apply the transformation.
- Available columns:
- Custom column
- Conditional column
- Index column
- Calculated columns
- Duplicate Column

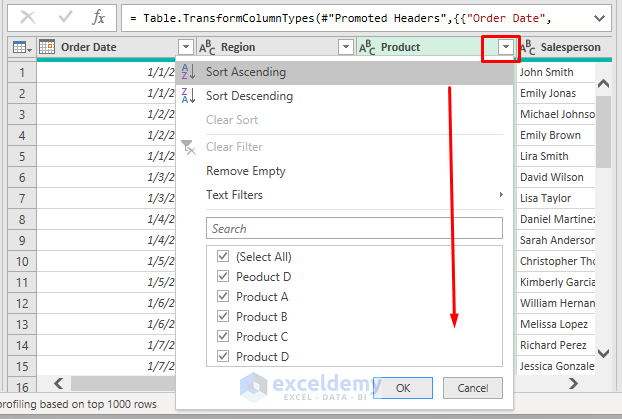
Filter and Sort Data
- Use the filter drop-down in column headers to select specific values.
- Sort data by clicking the sort icon next to a column.
Groupe and Aggregate Data
- Go to the Home tab >> select Group By to summarize data based on key fields.
- Choose an aggregation function (sum, average, count, etc.).
- Click OK.

Automate Data Refresh
After setting up transformations, Power Query allows for automatic updates:
- Click Close & Load to save the transformed data.

- In Excel, go to the Data tab >> select Refresh All to update data.

- In Power BI, click Refresh to update visuals with new data.
Advanced Power Query Features
Combine and Merge Data
Append Queries: Combine tables with identical columns. Combining data vertically (adding rows).
- Go to the Home tab >> select Append Queries.
- Select queries to append.
- Choose the append option (two tables or three or more tables).
Merge Queries: Join tables based on common keys (like SQL joins). Combining data horizontally (joining tables).
- Go to the Home tab >> select Merge Queries.
- Select the tables and join columns.
- Choose the join kind (Inner, Left Outer, Right Outer, Full Outer, etc.).

Mathematical Operations
- Go to the Transform tab >> from Number Column group >> select required functions.
- Basic arithmetic.
- Rounding functions.
- Statistical functions.

Use M Code for Custom Transformations
Power Query operates on an underlying language called M. To edit M code:
- Go to the Home tab >> select Advanced Editor to view or modify the script.
- Use M functions like:
- Table.TransformColumns
- Table.SelectRows for advanced transformations.

Create Parameterized Queries
- Click Manage Parameters to define input parameters for flexible data retrieval.
- Use parameters in queries to filter data dynamically.

Pivot and Unpivot
If you have data that’s in a wide format (multiple columns for categories), you can pivot the data to convert it into a more suitable format. Similarly, you can unpivot columns into rows for easier analysis.
- Go to the Home tab >> select Pivot Column or Unpivot Column.

Best Practices for Power Query
- Keep Queries Organized: Rename steps and queries.
- Reduce Steps Where Possible: Avoid unnecessary transformations to improve performance.
- Use Load Options Wisely: Choose Load to Data Model for large datasets instead of loading directly to worksheets.
Conclusion
Power Query is one of the most popular tools to automate data transformation. Power Query is a game-changer for reducing manual work, and improving efficiency. Whether you’re cleaning raw data, merging tables, or automating reports, Power Query provides a robust and user-friendly platform for all your ETL needs. This article shows most used various features for data transformation along with advanced options. Start experimenting with Power Query today to unlock the full potential of your data workflows!
Get FREE Advanced Excel Exercises with Solutions!
