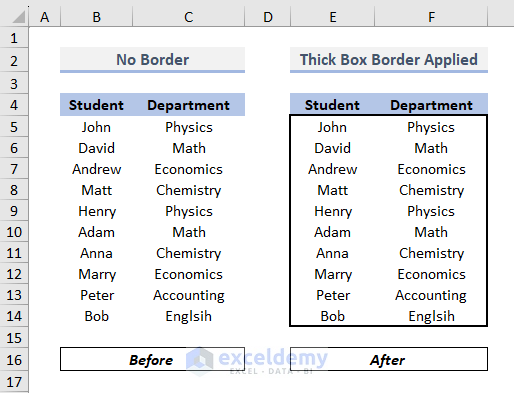
The following image shows data on the left without a border and on the right with a thick box border, including student names and departments.
3 Ways to Add Thick Box Border in Excel
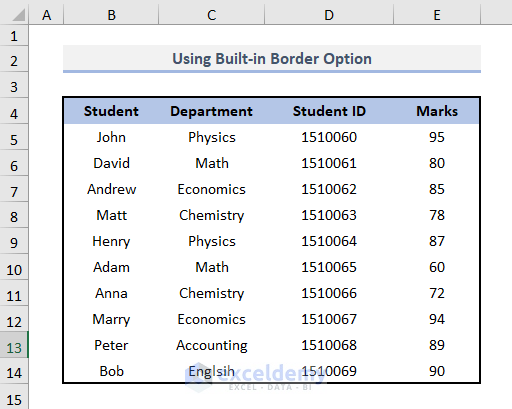
The following set of data contains the names of several students, their respective departments, student IDs, and the scores they achieved in an examination. We will use it in the whole article.

Method 1 – Using the Format Cells Dialog Box
- Select the data range.
- Go to the Home tab and the Font group.
- Select the Font Settings anchor. You can also press Ctrl + Shift + F to open Font Settings.
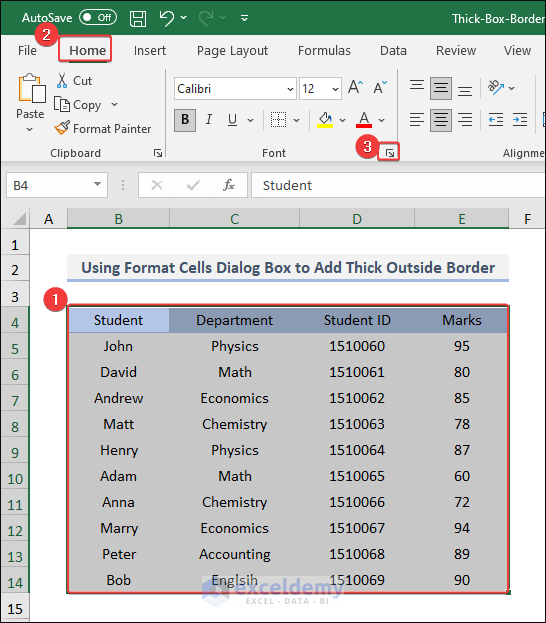
- The Format Cells dialog box will pop out.
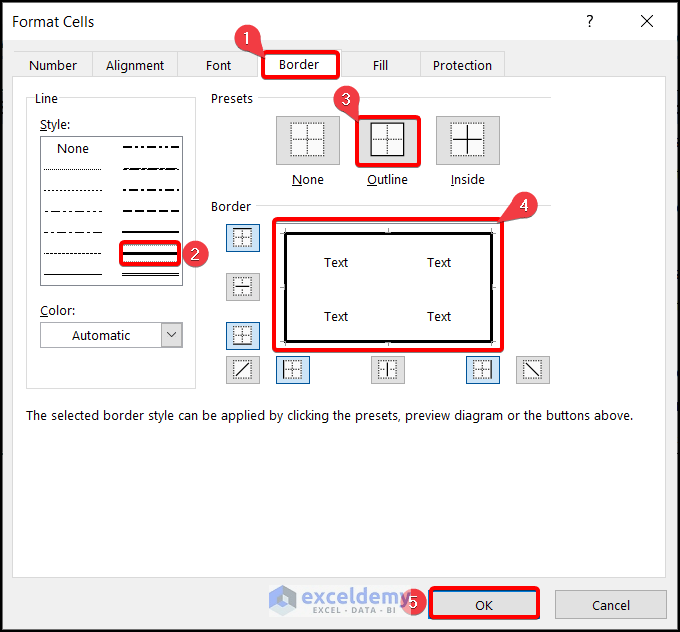
- In the Format Cells dialog box, select Border.
- In the Style section, select a thick line.
- Go to Presets section and click on Outside Border Outline.
- Hit OK.
- As a result, your outside cell borders will be created just like in the snapshot below.

Note: You can press Ctrl + 1 to open the Format Cells dialog box.
Read More: How to Insert Border in Excel
Method 2 – Using the Built-in Border Option
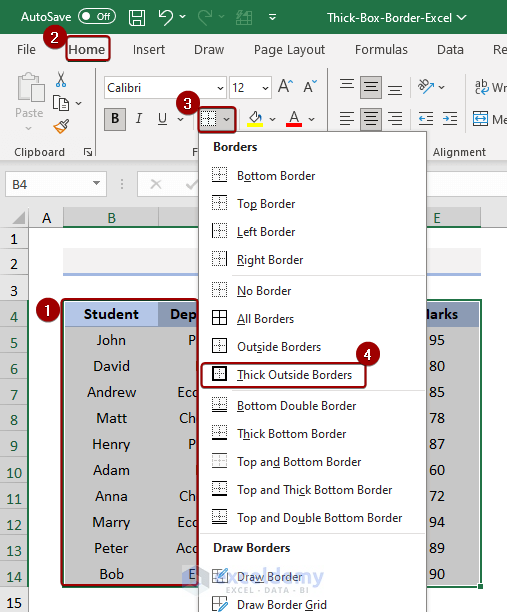
- Select the range of cells where you want to put the border.
- Go to the Home tab and the Font group, then select the Border drop-down.
- Choose Thick Outside Border.
- You will get the following output in your worksheet.
Note: You can use the keyboard shortcut to apply thick box border. Select the range and use the keys Alt + H + B + T one by one serially.
Read More: How to Apply All Borders in Excel
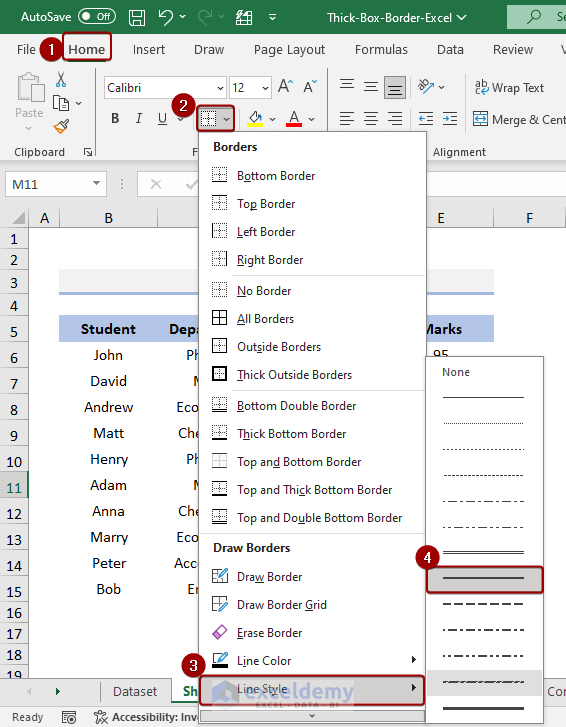
Method 3 – Using the Line Style from Draw Borders
- Go to the Home tab, click the Border drop-down and go to the Draw Borders group.
- Click on Line Style.
- Select the thick border style.
- Excel switches to the Draw Border mode automatically, and the cursor becomes a pen.
- Take the mouse pointer to the range of cells where you want to apply the border.
- Click on the mouse, hold it, and drag it to the range of cells.
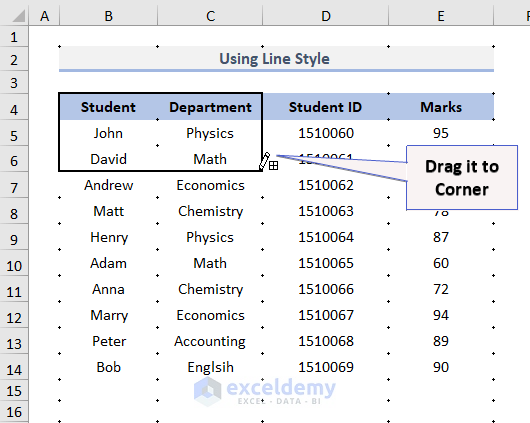
- You will get the output in your worksheet. Here’s a GIF overview of the process.

How to Create a Custom Thick Box Border Style in Excel
Step 1 – Format the New Style
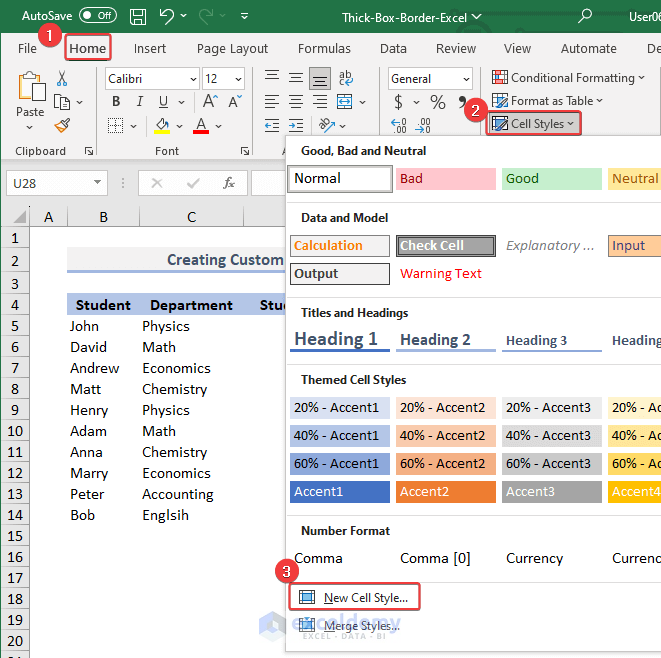
- Go to the Home tab and the Styles group.
- Click on Cell Styles and select New Cell Style.
- The Style dialog wizard will appear.
- Name the style and click Format.
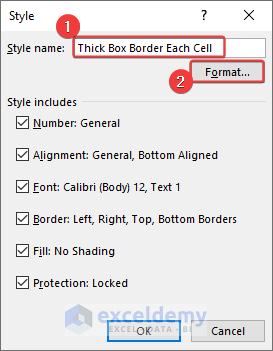
- The Format Cells dialog box will appear.
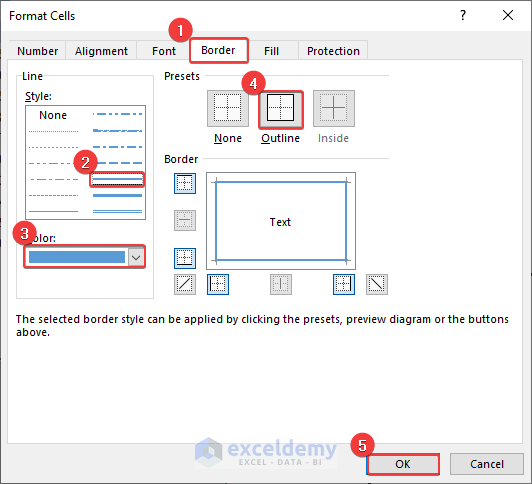
- In the Format Cells dialog box:
- Select Thick Border from Style group.
- Pick a color from Color group.
- Choose the Outline border.
- Press OK.
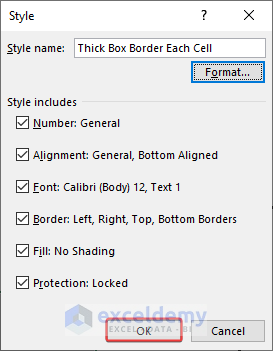
- The Style box will appear again.
- Click OK.
Step 2 – Apply the Newly Created Style
- Select the entire data range.
- Go to Home tab and the Styles group.
- Select Cell Styles and the Custom group.
- Click on the newly created style.
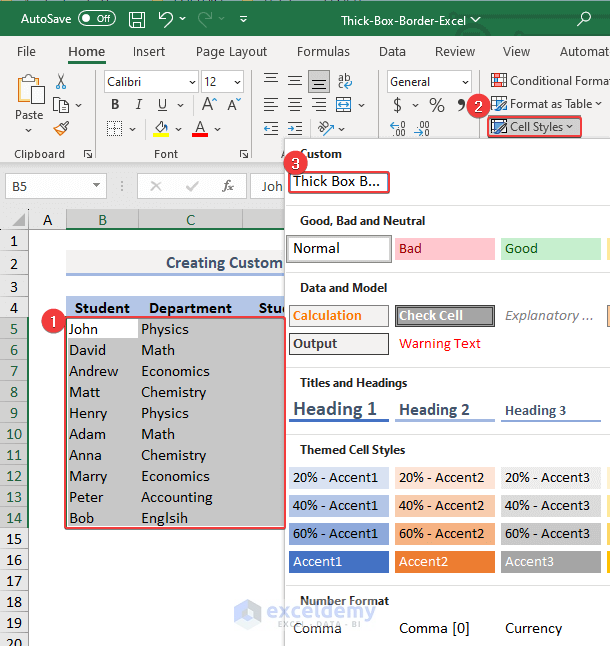
- You will get a thick box border applied to the cells like the image below.

Read More: How to Change Border Color in Excel
Download the Practice Workbook
Frequently Asked Questions
How to remove a thick box border from a range in Excel?
Select the range, go to Home tab, click on the Borders drop-down, and select the No Border option.
How to apply thick bottom border?
You can use the keyboard shortcut Alt + H + B + H to apply thick bottom border to a range of cells.
How to apply top and thick bottom border?
You can use the keyboard shortcut Alt + H + B + C to apply the Top and Thick Bottom Border to a range of cells.
Related Articles
- How to Apply Bottom Double Border in Excel
- How to Add or Remove Dotted Border in Excel
- How to Add Cell Borders Inside and Outside in Excel
- How to Remove Borders in Excel
- How to Apply Top and Bottom Border in Excel
- How to Change Border Color in Excel
<< Go Back to Cell Borders in Excel | Excel Cell Format | Learn Excel
Get FREE Advanced Excel Exercises with Solutions!
