If you are searching for the solution or some special tricks to stop autofill formula in Excel table then you have landed in the right place. There are several ways to stop the autofill formula in the Excel table. This article will show you each and every step with proper illustrations so you can easily apply them for your purpose. Let’s get into the central part of the article.
Download Practice Workbook
You can download the practice workbook from here:
What Is AutoFill Feature in Excel Table?
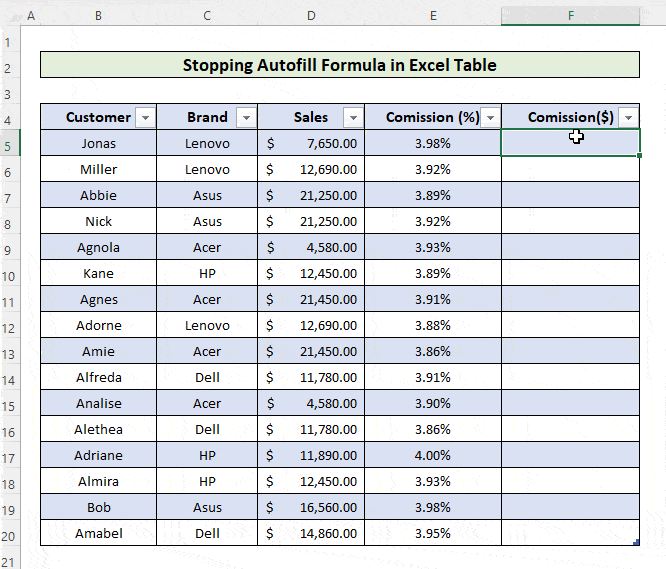
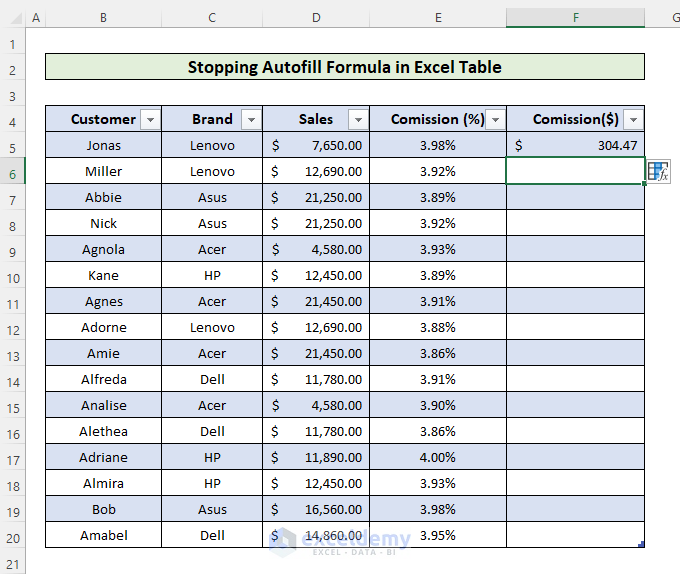
By default, when you insert a formula in one cell of an Excel table column then you will see the full column is auto-filled by just changing the cell reference. As shown in the gif below, when you insert a formula in the first cell of the Commission column, the formula will be applied in the entire column automatically. This is the Autofill Formula feature of Excel.
2 Ways to Stop AutoFill Formula in Excel Table
In this section, I will show you 3 quick and easy methods to stop the autofill formula in an Excel table on Windows operating system. You will find detailed explanations with clear illustrations of each thing in this article. I have used Microsoft 365 version here. But you can use any other versions as of your availability. If anything of this article doesn’t work in your version then leave us a comment.
1. Stop AutoFill Formula Temporarily with “Undo Calculated Column” Command
There is an option for you in Excel to stop the Autofill formula temporarily.
📌 Steps:
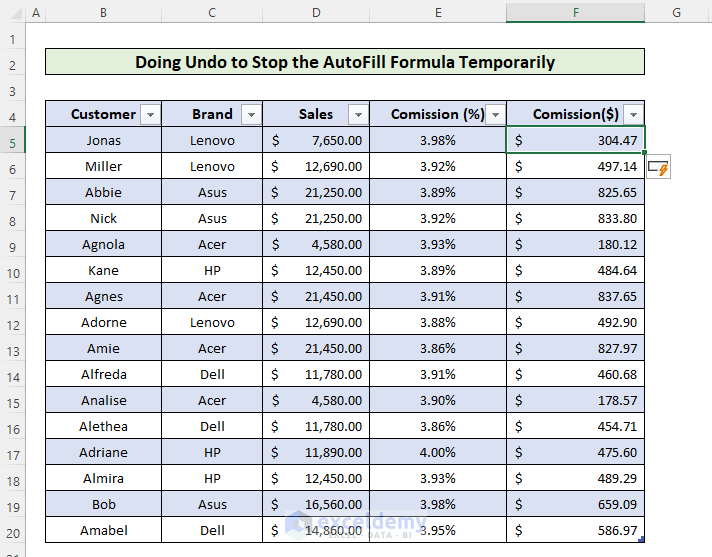
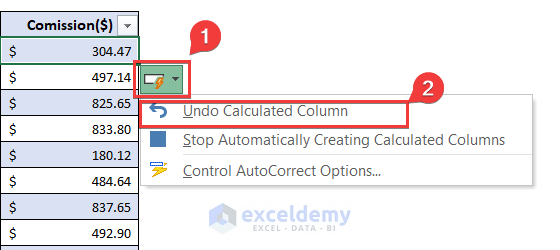
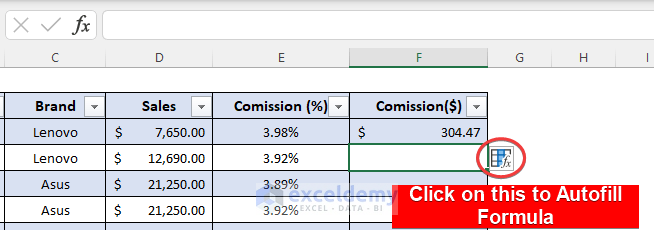
- When you insert a formula in the Excel column and the full column is auto-filled then you will find an autofill icon beside the column.
- Click on this and you will get some options to select.
- From the options, select that one saying “Undo Calculated Column”.
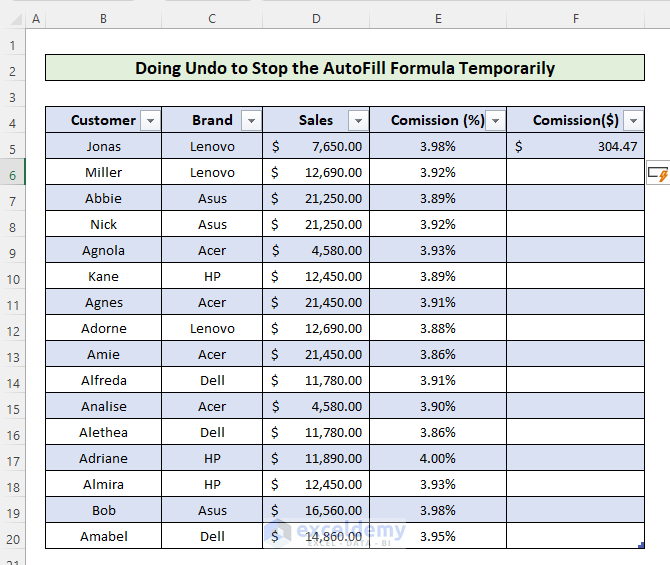
Thus, you have undone the autofill process and there is only one cell filled that is inserted by you.
- Now, you can insert other values or new formulas into the other cells of the column.
- You can also overwrite the cells with the same formula by clicking the Autofill icon again.
2. Stop Excel Table Autofill Permanently from Excel Options
You can permanently turn off the Excel autofill feature from the Excel options. There are 3 different ways to disable the autofill column feature in an Excel table. I am showing all three methods in steps and with clear illustrations.
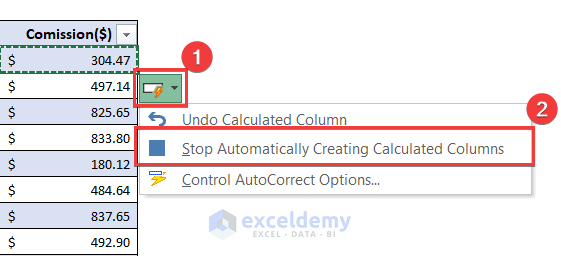
2.1 Selecting “Stop Automatically Creating Calculated Columns” Option
In the last method, during the process of stopping the autofill feature temporarily, you have landed on the autofill options.
📌 Steps:
- When you click on the autofill icon, there will appear 3 options.
- Of them, the 2nd one is saying “Stopping Excel Table Autofill Permanently”.
- And if you select this, it disables permanently the autofill formula feature in an Excel table.
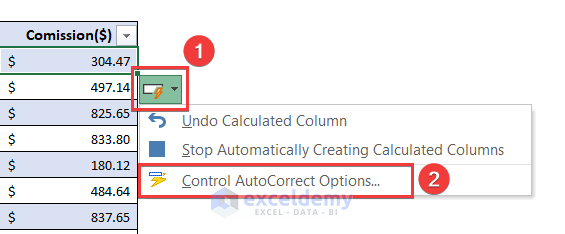
2.2 Selecting “Control AutoCorrect Options”
Also, you can select the 3rd option saying “Control AutoCorrect Options” and there will open a pop-up window.
- In the pop-up window named “AutoCorrect”, go to the tab “Autoformat As You Type” and here you find an option saying “Fill formulas in tables to create calculated columns”.
- You have to unmark this option and press OK to stop the autofill formula in the Excel table.

2.3 From Excel Options
You can also disable the Excel table autofill formula feature from the Excel options. Follow the steps below to do this-
📌 Steps:
- First, open an Excel file and go to the File >> Options.
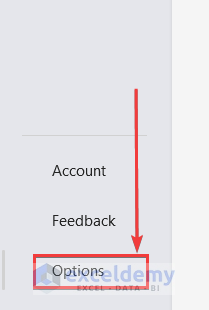
- In the Excel Options window, you will find a list of menus.
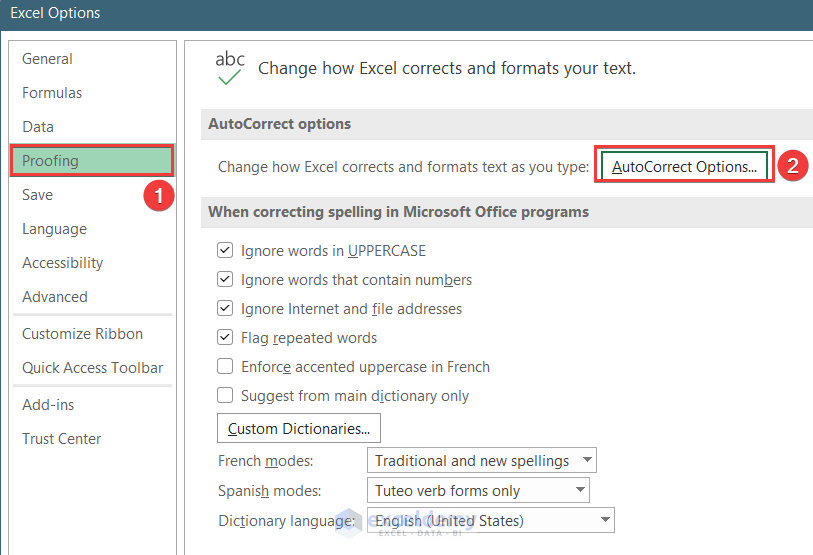
- Go to the Proofs menu.
- Here, you will find a button named “AutoCorrect Options”
- Now, a new pop-up window named “AutoCorrect” will appear.
- Here, go to the tab “Autoformat As You Type”.
- And, you find an option saying “Fill formulas in tables to create calculated columns”. You have to unmark this option.
- Finally, press OK to stop the autofill formula in the Excel table.
- Still, after disabling the Excel table autofill feature, you are allowed to use the Excel default Autofill feature.
- To use the Excel default Autofill feature, click on the autofill icon that will appear after inserting the formula in the cell.
Things to Remember
- You can still overwrite the Excel formula by undoing the autofill column calculations.
- To re-enable the Excel autofill formula feature, use the method using Excel options in section 2.3.
Conclusion
In this article, you have found how to stop the autofill formula in an Excel table. I hope you found this article helpful. You can visit our website ExcelDemy to learn more Excel-related content. Please, drop comments, suggestions, or queries if you have any in the comment section below.
Get FREE Advanced Excel Exercises with Solutions!
