Here’s an overview of splitting a large dataset so we can scroll independently across the panes.
Download the Practice Workbook
How to Split an Excel Sheet
Method 1 – Split an Excel Worksheet Horizontally
- Select any cell in column A to split horizontally. Here, cell A11 is selected.
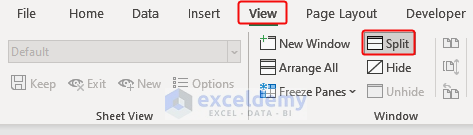
- From the View tab, click on Split in the Window option.
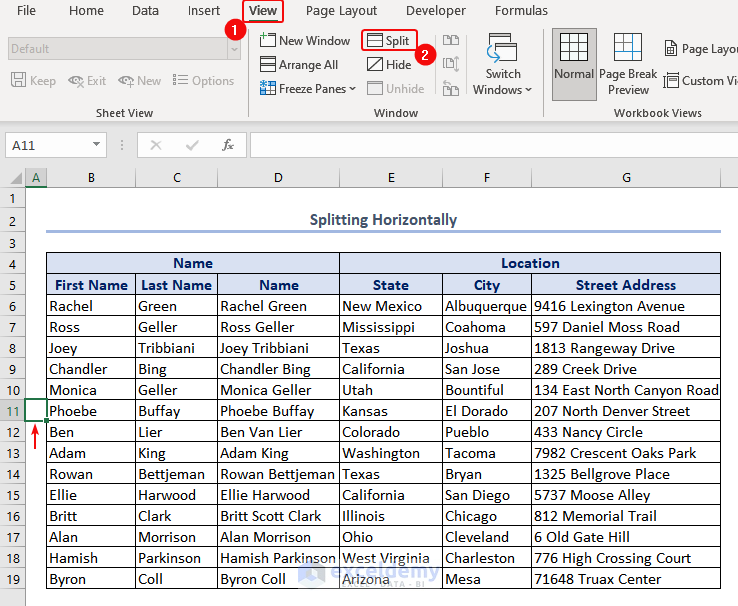
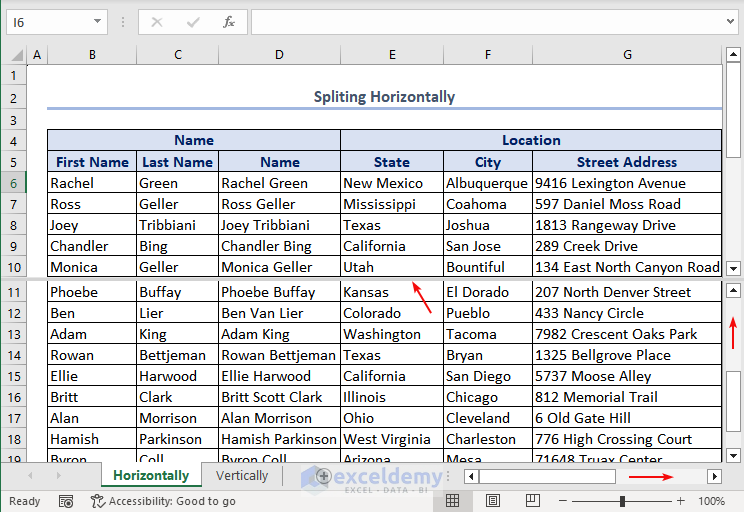
- The worksheet got split horizontally along the 11th row You can use the scroll bar to look for the data in the panes.
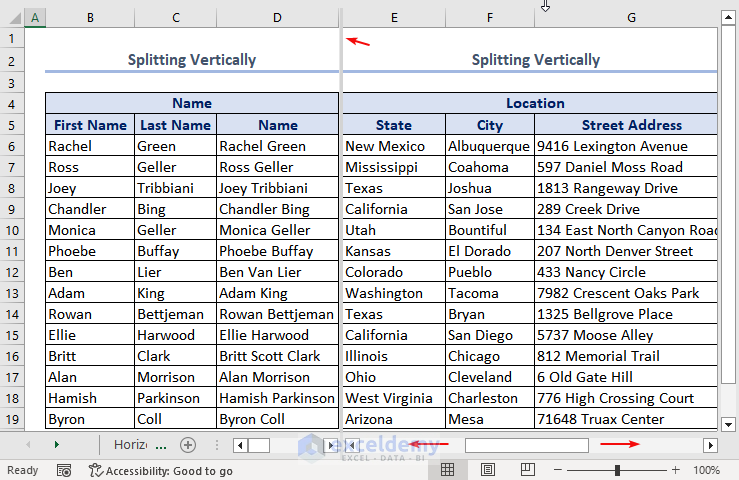
Method 2 – Split the Sheet Vertically
- Select cell E1 along the first row.
- Click on Split in the Window group from the View tab.
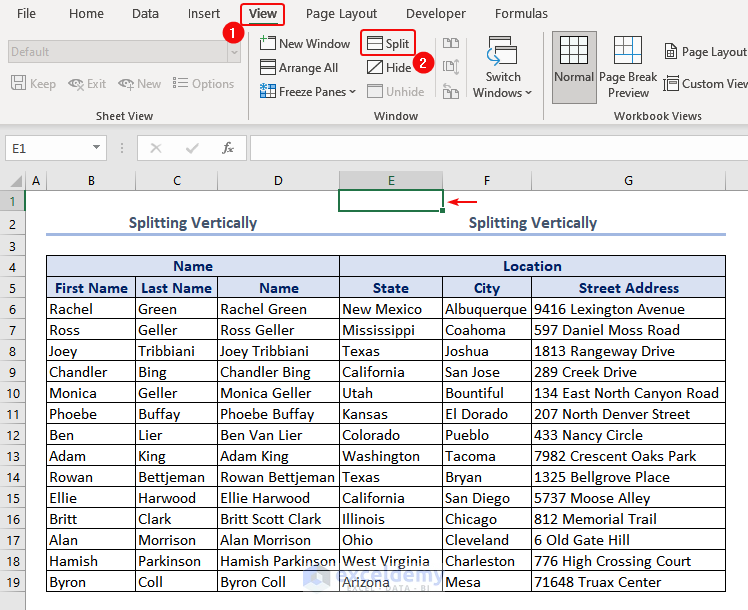
- The worksheet has been split vertically along Column E.
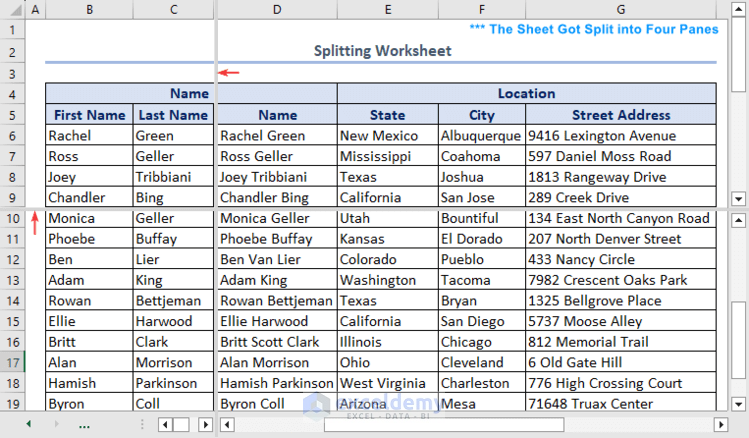
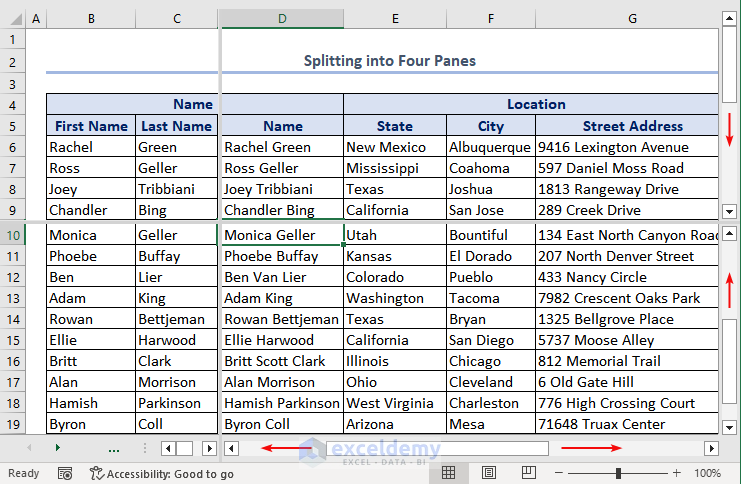
Method 3 – Split the Worksheet into Four Panes
- Select any cell other than the first row or column. We selected the cell D10.
- Click Split in the Window group from View.
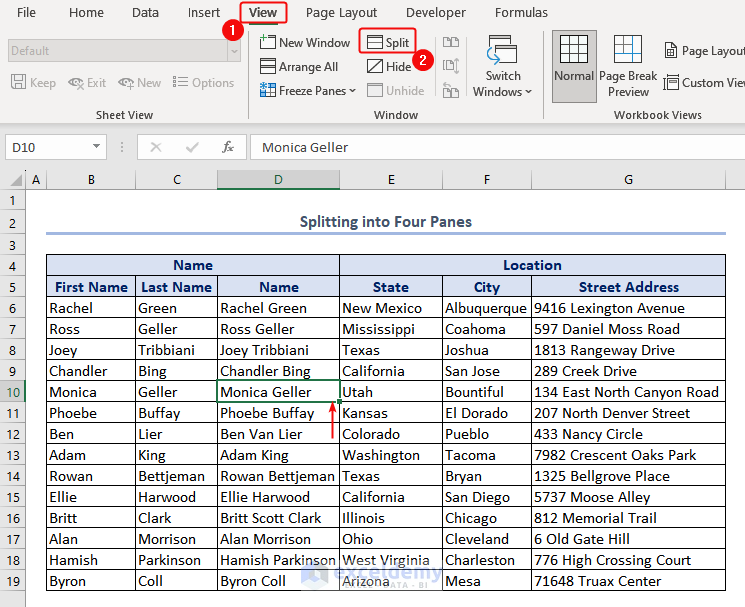
- Four panes in the worksheet will appear as follows. You can scroll down to look for cells or data in each pane.
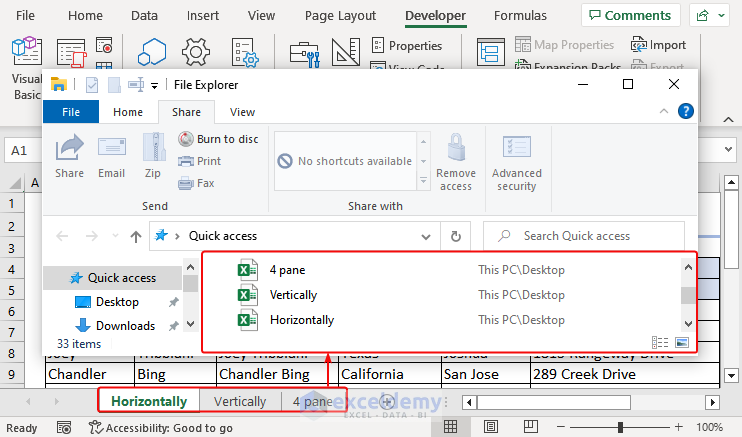
Method 4 – Split a Workbook to Separate Excel Files with VBA code
We have a workbook with three sheets named Horizontally, Vertically, and 4 Pane. We will split the workbook and create separate Excel files for each worksheet in it.
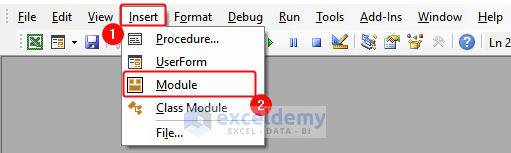
- From the Developer tab, click on Visual Basic.

- From Insert, click on Module.
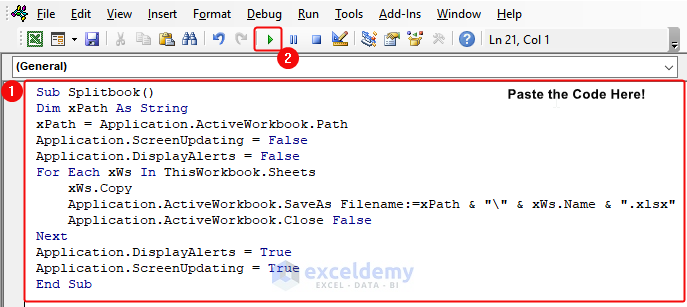
Sub Splitbook()
Dim xPath As String
xPath = Application.ActiveWorkbook.Path
Application.ScreenUpdating = False
Application.DisplayAlerts = False
For Each xWs In ThisWorkbook.Sheets
    xWs.Copy
    Application.ActiveWorkbook.SaveAs Filename:=xPath & "\" & xWs.Name & ".xlsx"
    Application.ActiveWorkbook.Close False
Next
Application.DisplayAlerts = True
Application.ScreenUpdating = True
End Sub
- Paste the above code into the Module and click on the Green icon to run it.
Note: This code will save the file into This PC in your C drive.
- This will automatically split the workbook into different Excel and save it as shown in the picture below.

How to Undo Split in an Excel Worksheet
- Click on the Split feature from the View tab.
Read More: How to Split Excel Sheet into Multiple Files
Things to Remember
- Select any cell in the first column (A) to split horizontally.
- Select any cell in the first row to split vertically.
- Select any cell inside the dataset to split into four panes.
- To activate a split screen in Excel, go to the View tab on the tab, and click on the Split button. Alternatively, you can use the shortcut Alt + W + S to split the window vertically or Alt + W + V to split the window horizontally.
- When you print from a split screen, only the active pane will be printed. To print both panes, you need to activate each pane and print separately.
- The split screen settings are saved with the workbook. So, when you close and reopen the workbook, the split screen configuration will be restored
Frequently Asked Questions (FAQ)
How do I split an Excel sheet?
- Position the cursor in the cell where you want to split the sheet vertically or horizontally.
- Go to the “View” tab in the Excel tab.
- In the “Window” group, click on “Split” to split the sheet.
- Excel will create a split bar at the selected cell, allowing you to adjust the split by dragging the bar horizontally or vertically.\
What is the shortcut key to split worksheets in Excel?
You can use the shortcut Alt + W + S to split the window vertically or Alt + W + V to split the window horizontally.
Split Excel Sheet: Knowledge Hub
<< Go Back to Excel Worksheets | Learn Excel
Get FREE Advanced Excel Exercises with Solutions!
