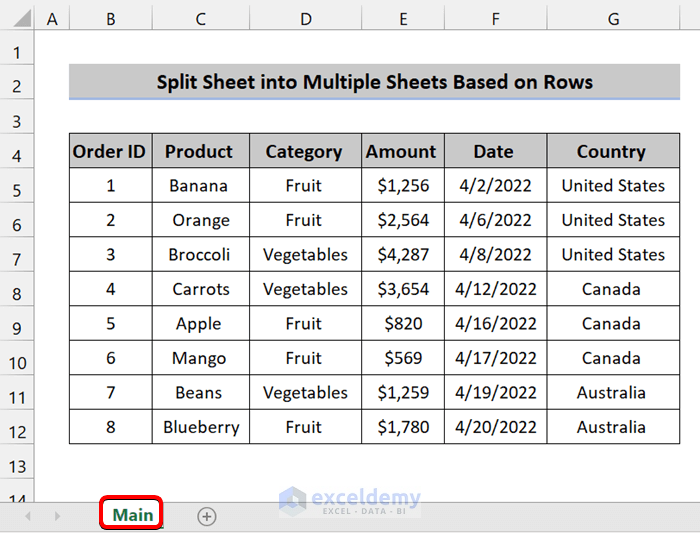
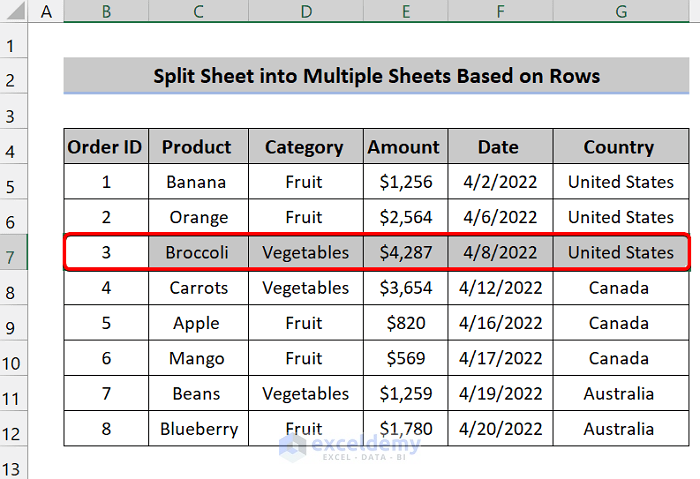
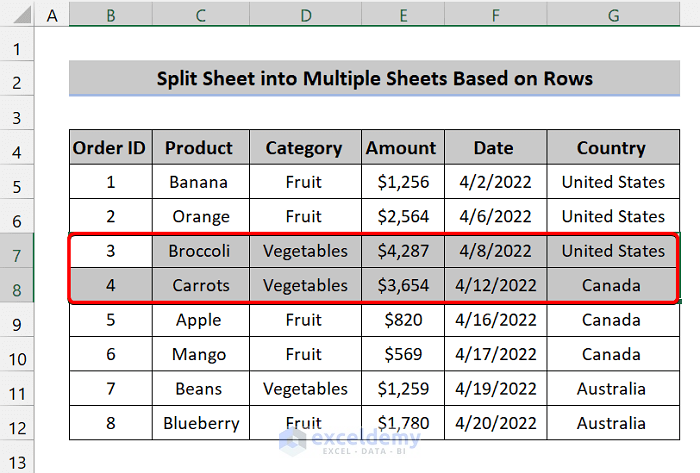
The sample dataset below will be used for demonstration.
Procedure 1 – Build the Code
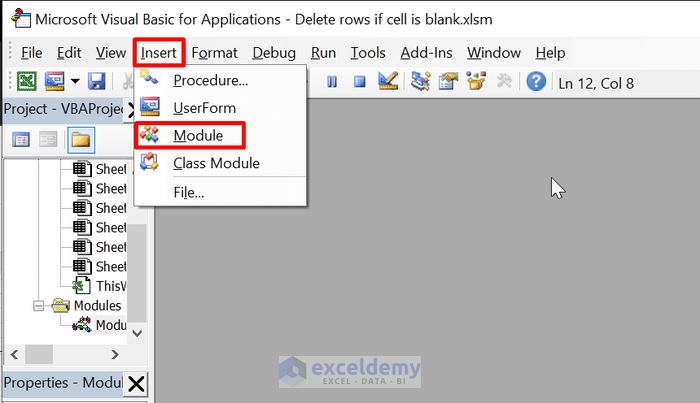
Press Alt+F11 on your keyboard to open the VBA editor. Select Insert > Module.
Step 1 – Create Sub-Procedure
Enter the following VBA code:
Sub Split_Sheet_based_on_rows()

End Sub
Step 2 – Declare Necessary Variables
Sub Split_Sheet_based_on_rows()

Dim data_range As Range
Dim start_row As Range
Dim split_row As Integer
Dim main_sheet As Worksheet

End Subdata_range: It will store the dataset range.
start_row: From which row we will start to split.
split_row: Number of rows that we want to split.
main_sheet: It will store the “Main” worksheet.
Step 3 – Taking User Inputs for Dataset and Number of Rows to Split
Sub Split_Sheet_based_on_rows()

Dim data_range As Range
Dim start_row As Range
Dim split_row As Integer
Dim main_sheet As Worksheet

xTitleId = "Multiple Sheets Based on Rows"
Set data_range = Application.Selection
Set data_range = Application.InputBox("Data Range", xTitleId, data_range.Address, Type:=8)
split_row = Application.InputBox("Row Number Split", xTitleId, 5, Type:=1)

End SubxTitleId: The title we will show in our input box.
Application.InputBox(“Data Range”, xTitleId, data_range.Address, Type:=8): By this line of code, we are taking the dataset range.
Application.InputBox(“Row Number Split”, xTitleId, 5, Type:=1): This line will take the number of rows from the user by which they want to split the sheet into multiple worksheets.
Step 4 – Set the Main Sheet and Staring Row to Split
Sub Split_Sheet_based_on_rows()

Dim data_range As Range
Dim start_row As Range
Dim split_row As Integer
Dim main_sheet As Worksheet

xTitleId = "Multiple Sheets Based on Rows"
Set data_range = Application.Selection
Set data_range = Application.InputBox("Data Range", xTitleId, data_range.Address, Type:=8)
split_row = Application.InputBox("Row Number Split", xTitleId, 5, Type:=1)

Set main_sheet = data_range.Parent
Set start_row = data_range.Rows(1)

End Sub
Set main_sheet = data_range.Parent: This code implies that you are storing the “Main” worksheet in the main_sheet variable. “The parent of a range is a worksheet object.”
Set start_row = data_range.Rows(1): It will store the first row from the dataset as it will start the split in the worksheet into multiple sheets from that row.
Step 5 – Create a Loop
Sub Split_Sheet_based_on_rows()

Dim data_range As Range
Dim start_row As Range
Dim split_row As Integer
Dim main_sheet As Worksheet

xTitleId = "Multiple Sheets Based on Rows"
Set data_range = Application.Selection
Set data_range = Application.InputBox("Data Range", xTitleId, data_range.Address, Type:=8)
split_row = Application.InputBox("Row Number Split", xTitleId, 5, Type:=1)

Set main_sheet = data_range.Parent
Set start_row = data_range.Rows(1)

Application.ScreenUpdating = False
For i = 1 To data_range.Rows.Count Step split_row

Next

End Sub
We have created a For-Next loop to loop through the whole dataset. You can see, we have also added an extra “Step”.
We employ the Step keyword to set a different increment for the counter variable of a loop in Excel VBA.
Suppose, you have a code like this:
Dim j As Integer

For j = 1 To 6 Step 2
    Cells(j, 1).Value = 100
Next j
For the first execution, the value of j will be 1. When it returns to the loop, the value of j will be 3, not 2. Step 2 increases the value of j by 2.
Step 6 – Check Whether Your Given Rows are Larger than the Dataset or Not
Sub Split_Sheet_based_on_rows()

Dim data_range As Range
Dim start_row As Range
Dim split_row As Integer
Dim main_sheet As Worksheet

xTitleId = "Multiple Sheets Based on Rows"
Set data_range = Application.Selection
Set data_range = Application.InputBox("Data Range", xTitleId, data_range.Address, Type:=8)
split_row = Application.InputBox("Row Number Split", xTitleId, 5, Type:=1)

Set main_sheet = data_range.Parent
Set start_row = data_range.Rows(1)

Application.ScreenUpdating = False
For i = 1 To data_range.Rows.Count Step split_row
resizeCount = split_row
If data_range.Rows.Count < split_row Then resizeCount = data_range.Rows.Count - 1
Next

End Sub
resizeCount = split_row: The number of rows to split in another variable are stored.
If data_range.Rows.Count < split_row: Checks whether your given rows are larger than your dataset. If you have a dataset of 5 rows but you want to split them based on 6 rows. It will cause an error.
Then resizeCount = data_range.Rows.Count – 1: If that’s the case, it will resize your number of rows. You have a dataset of 5 rows but you want to split them based on 6 rows. In this case, your new split rows will be 5. It will help you split the data into two sheets. The first sheet will have 5 rows and the second one will have 1 row.
Step 7 – Copy the Data
Sub Split_Sheet_based_on_rows()

Dim data_range As Range
Dim start_row As Range
Dim split_row As Integer
Dim main_sheet As Worksheet

xTitleId = "Multiple Sheets Based on Rows"
Set data_range = Application.Selection
Set data_range = Application.InputBox("Data Range", xTitleId, data_range.Address, Type:=8)
split_row = Application.InputBox("Row Number Split", xTitleId, 5, Type:=1)

Set main_sheet = data_range.Parent
Set start_row = data_range.Rows(1)

Application.ScreenUpdating = False
For i = 1 To data_range.Rows.Count Step split_row
resizeCount = split_row
If data_range.Rows.Count < split_row Then resizeCount = data_range.Rows.Count - 1

start_row.Resize(resizeCount).Copy

Next

End Sub
Copy the data from the sheet.
It will start from the first row of your given range. Then, it will expand based on your split rows. If you want to split the sheet based on 2 rows, and your dataset starts from the range B5:G5.
As you want to split the sheet based on 2 rows, it will expand and select 2 rows and copy them from your dataset.
Step 8 – Create Another Worksheet
Sub Split_Sheet_based_on_rows()

Dim data_range As Range
Dim start_row As Range
Dim split_row As Integer
Dim main_sheet As Worksheet

xTitleId = "Multiple Sheets Based on Rows"
Set data_range = Application.Selection
Set data_range = Application.InputBox("Data Range", xTitleId, data_range.Address, Type:=8)
split_row = Application.InputBox("Row Number Split", xTitleId, 5, Type:=1)

Set main_sheet = data_range.Parent
Set start_row = data_range.Rows(1)

Application.ScreenUpdating = False
For i = 1 To data_range.Rows.Count Step split_row
resizeCount = split_row
If data_range.Rows.Count < split_row Then resizeCount = data_range.Rows.Count - 1
start_row.Resize(resizeCount).Copy

Application.Worksheets.Add after:=Application.Worksheets(Application.Worksheets.Count)

Next

End Sub
Paste the data onto another sheet. Add a sheet to paste the data. As we are using the loop, it will create multiple sheets in later execution.
Step 9 – Paste the Data
In a newly created sheet, paste the following data:
Sub Split_Sheet_based_on_rows()

Dim data_range As Range
Dim start_row As Range
Dim split_row As Integer
Dim main_sheet As Worksheet

xTitleId = "Multiple Sheets Based on Rows"
Set data_range = Application.Selection
Set data_range = Application.InputBox("Data Range", xTitleId, data_range.Address, Type:=8)
split_row = Application.InputBox("Row Number Split", xTitleId, 5, Type:=1)

Set main_sheet = data_range.Parent
Set start_row = data_range.Rows(1)

Application.ScreenUpdating = False
For i = 1 To data_range.Rows.Count Step split_row
resizeCount = split_row
If data_range.Rows.Count < split_row Then resizeCount = data_range.Rows.Count - 1
start_row.Resize(resizeCount).Copy
Application.Worksheets.Add after:=Application.Worksheets(Application.Worksheets.Count)

Application.ActiveSheet.Range("A1").PasteSpecial

Next

End Sub
Step 10 – Select Next Number of Rows
Sub Split_Sheet_based_on_rows()

Dim data_range As Range
Dim start_row As Range
Dim split_row As Integer
Dim main_sheet As Worksheet

xTitleId = "Multiple Sheets Based on Rows"
Set data_range = Application.Selection
Set data_range = Application.InputBox("Data Range", xTitleId, data_range.Address, Type:=8)
split_row = Application.InputBox("Row Number Split", xTitleId, 5, Type:=1)

Set main_sheet = data_range.Parent
Set start_row = data_range.Rows(1)

Application.ScreenUpdating = False
For i = 1 To data_range.Rows.Count Step split_row
resizeCount = split_row
If data_range.Rows.Count < split_row Then resizeCount = data_range.Rows.Count - 1
start_row.Resize(resizeCount).Copy
Application.Worksheets.Add after:=Application.Worksheets(Application.Worksheets.Count)
Application.ActiveSheet.Range("A1").PasteSpecial

Set start_row = start_row.Offset(split_row)

Next

End Sub
After pasting the data into a new worksheet, set a new row to start this process again. If you want to split the sheet based on 2 rows, it will split the first 2 rows. After completing all the processes from above, it will start from the third row.
When it goes back to the loop, it will work with the next 2 rows.
Step 11 – Clear the Clipboard (Final Code)
Sub Split_Sheet_based_on_rows()

Dim data_range As Range
Dim start_row As Range
Dim split_row As Integer
Dim main_sheet As Worksheet

xTitleId = "Multiple Sheets Based on Rows"
Set data_range = Application.Selection
Set data_range = Application.InputBox("Data Range", xTitleId, data_range.Address, Type:=8)
split_row = Application.InputBox("Row Number Split", xTitleId, 5, Type:=1)

Set main_sheet = data_range.Parent
Set start_row = data_range.Rows(1)

Application.ScreenUpdating = False
For i = 1 To data_range.Rows.Count Step split_row
resizeCount = split_row
If data_range.Rows.Count < split_row Then resizeCount = data_range.Rows.Count - 1
start_row.Resize(resizeCount).Copy
Application.Worksheets.Add after:=Application.Worksheets(Application.Worksheets.Count)
Application.ActiveSheet.Range("A1").PasteSpecial
Set start_row = start_row.Offset(split_row)
Next

Application.CutCopyMode = False
Application.ScreenUpdating = True

End Sub
Application.CutCopyMode = False: When you cut or copy any text, it is stored to the clipboard which can be pasted anywhere. This property is set up to False to clear the clipboard.
Read More: How to Split Excel Sheet into Multiple Sheets Based on Column Value
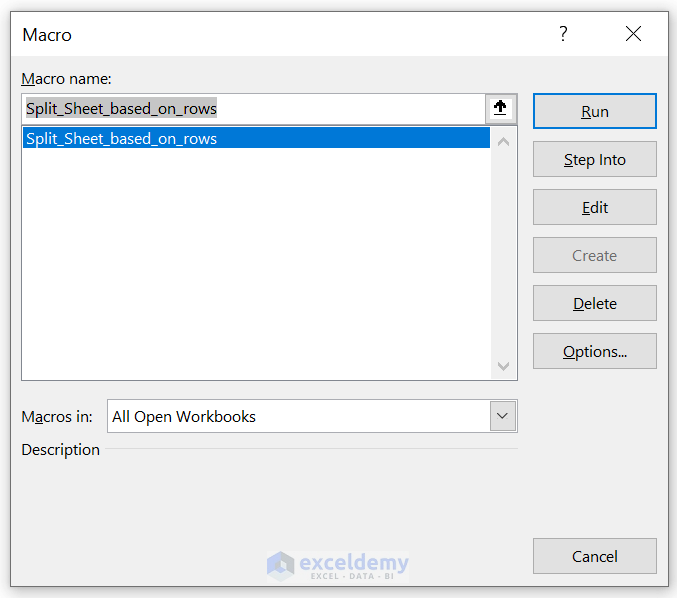
Procedure 2 – Run the Code
Steps
- Press Alt+F8 on your keyboard to open the Macro dialog box.
- Select Split_Sheet_based_on_rows and click on Run.
- Select your dataset range. Click on OK.
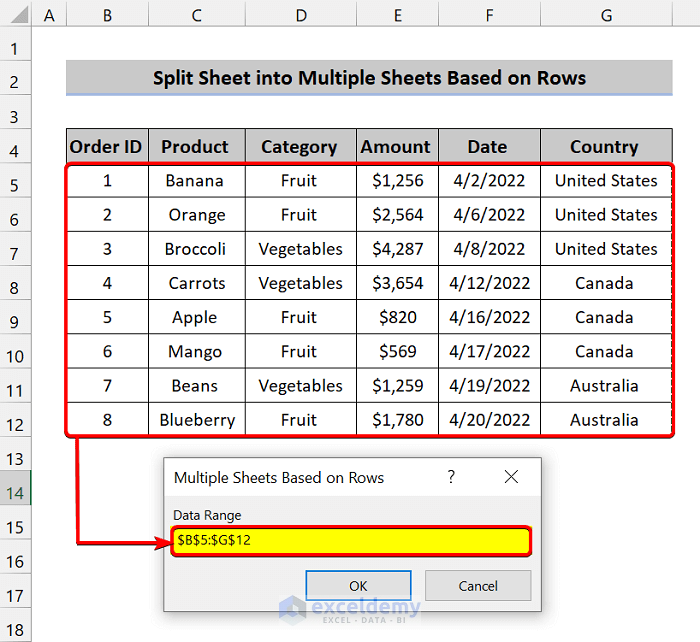
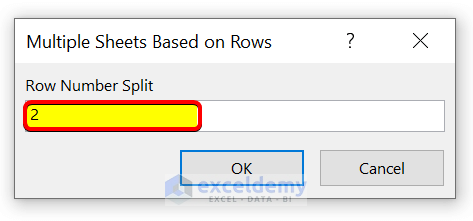
- Enter the number of rows you want to split your data into multiple Excel sheets.
- Click OK.
Read More: How to Split Excel Sheet into Multiple Worksheets
Download Practice Workbook
Related Articles
- How to Split Excel Sheet into Multiple Worksheets
- How to Split Sheet into Multiple Sheets Based on Rows in Excel
- How to Split Excel Sheet into Multiple Sheets Based on Column Value
- How to Split Excel Sheet into Multiple Files
- How to Enable Side-by-Side View with Vertical Alignments in Excel
- How to Split a Workbook to Separate Excel Files with VBA Code
<< Go Back to Split Excel Cell | Excel Worksheets | Learn Excel
Get FREE Advanced Excel Exercises with Solutions!
