In this article, we will present 5 different methods for selecting non-adjacent (or non-contiguous) cells in Excel, All the methods will work in Excel 2010, Excel 2013, Excel 2016, and Excel 2019.
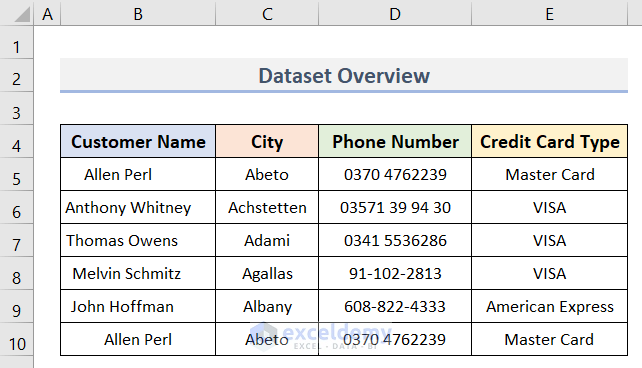
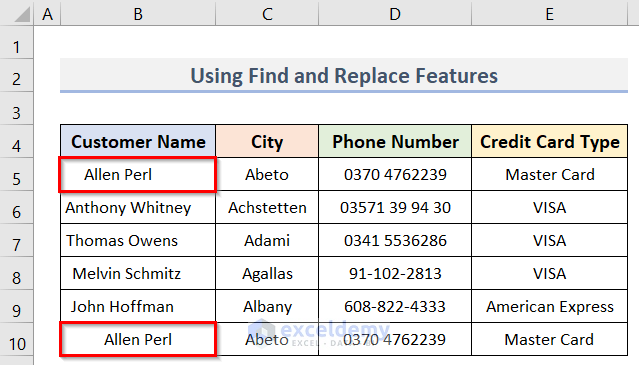
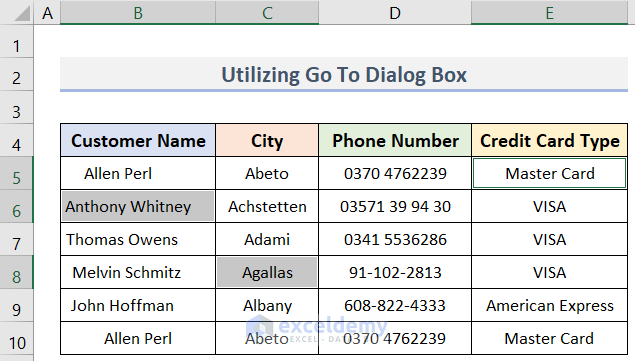
We’ll use the following dataset (B4:E10) as a base for our examples. There are a couple of duplicate values, there on purpose.
Method 1 – Using the Mouse and Keyboard to Select Non-Adjacent Cells in Excel
We can simply use our mouse to select non-adjacent cells in Excel (with a little help from the keyboard).
Steps:
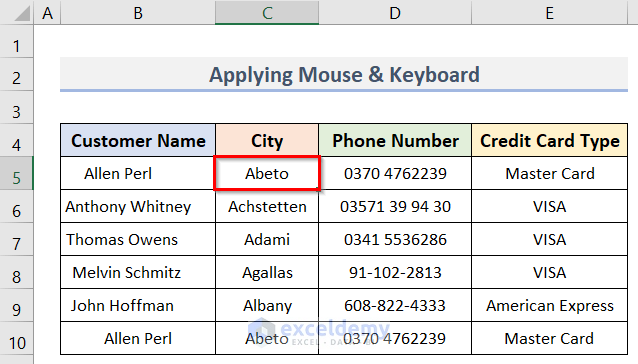
- Click on the first cell or cells you want to select. Here, we will first click on cell C5 in the Customer Name column.
- Hold the Ctrl key on the keyboard and bring the cursor to the next cell in your selection.
- Left-click on the mouse to select the cell.
- After selecting the cell, release the mouse button.
- Similarly, select the rest of the cells while holding down the Ctrl key.
- When done selecting cells, release the Ctrl key.
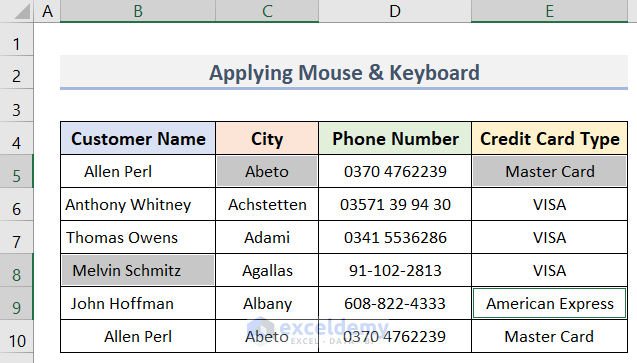
In this case, we selected cells B8, E5 & E9 respectively.
Read More: Select All Cells with Data in Excel
Method 2 – Selecting Non-Adjacent Cells in Excel Using Only the Keyboard
Who needs a mouse when you can use the keyboard only!
Steps:
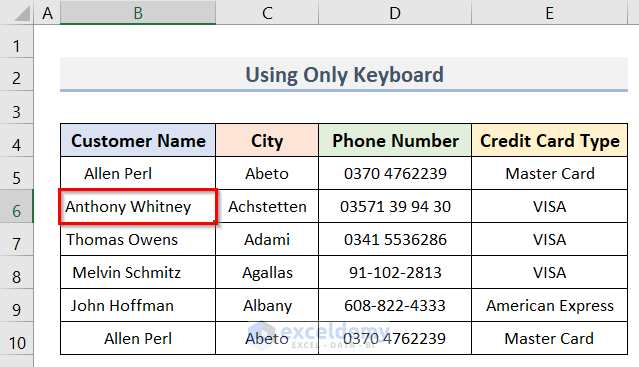
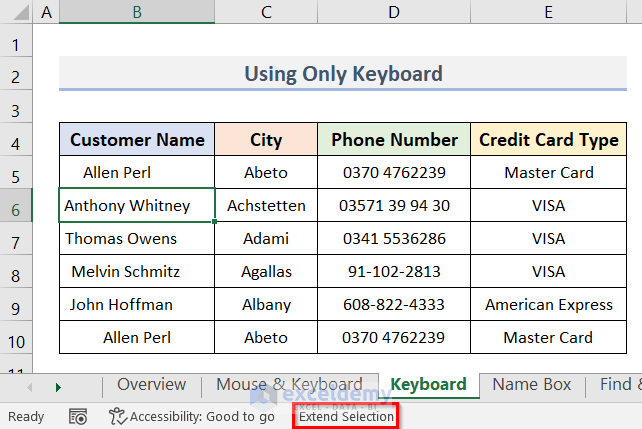
- Select the first cell. In our case, cell B6.
- Press the F8 key to lock the active cell B6, and put your system in Extend Selection mode.
See the status bar of the following image.
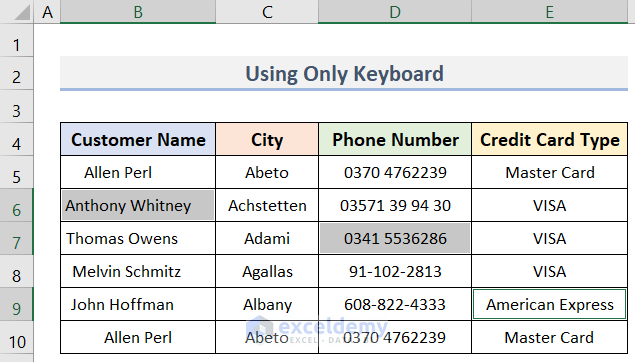
- Now press Shift + F8 on the keyboard.
- Go to any other cell and add that to your selection. For example, cell D7.
- Press the F8 key again.
- In the same way, select cell E9.
In the screenshot below, we can see that cells B6, D7, and E9 are selected.
- To leave this mode, press F8 twice.
Read More: Select All Cells with Data in a Column in Excel
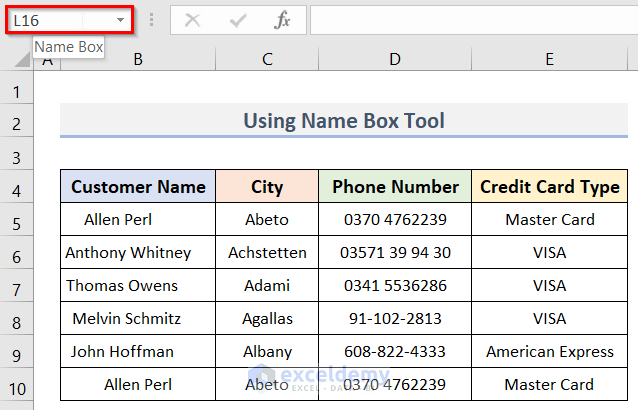
Method 3 – Using the Name Box Tool
In this approach, we will use the Name Box for selecting non-contiguous cells. The location of the Name Box in a worksheet is shown in the following image.
Steps:
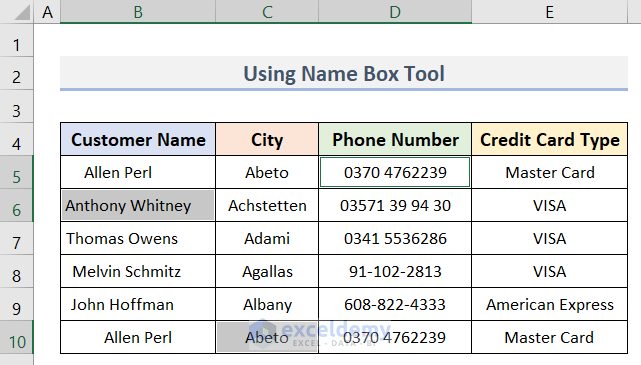
- Enter the cells (B6, C10 & D5) in the Name Box, separated by the comma (,).

- Press Enter.
- The cells (B6, C10, D5) that you inserted in the Name Box will be selected (see the screenshot).
You need not follow any order while entering the cell references in the Name Box.
Read More: How to Select Cells with Certain Value in Excel
Method 4 – Using the Find and Replace Feature
You can also select non-adjacent cells using the Find and Replace tool. Here, we will find the cells containing ‘Allen Perl’ using this tool.
Steps:
- Press Ctrl + F on the keyboard.
The Find and Replace dialog box will pop up.
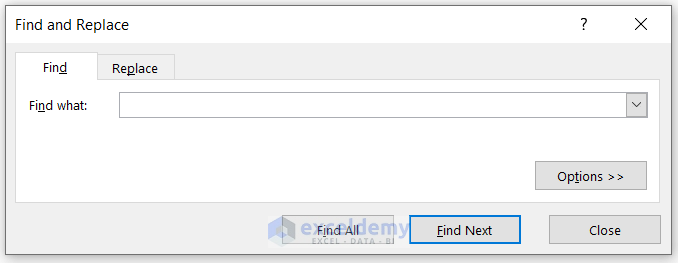
- Go to the Find tab in the dialog box.
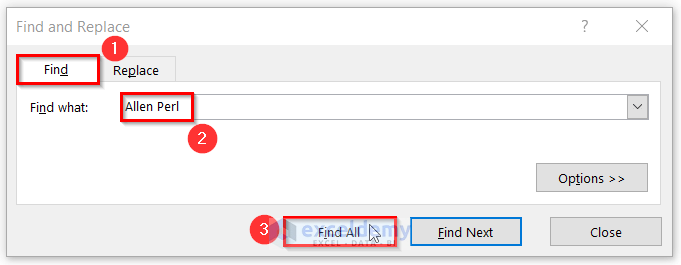
- In the Find what option, enter your desired word. Here, we enter Allen Perl.
- Click on Find All.
The box will show all the matches for the keyword (Allen Perl).
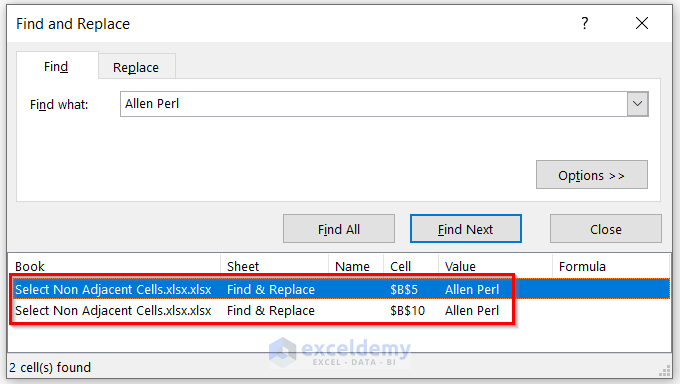
- Click Ctrl + A (to Select All).
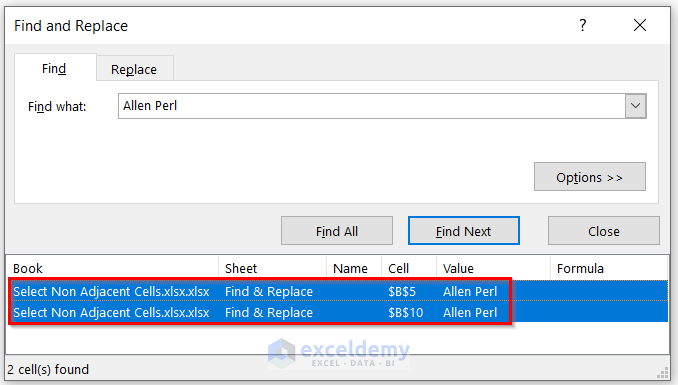
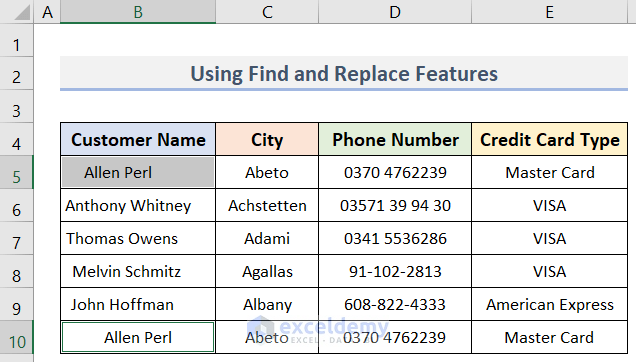
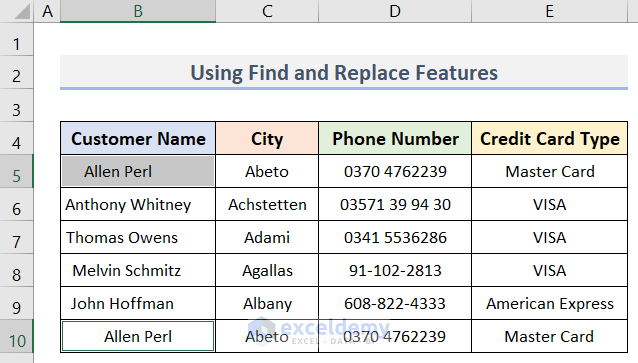
As a result, the cells (B5 & B10) containing the keyword (Allen Perl) will be selected.
- Close the Find and Replace box.
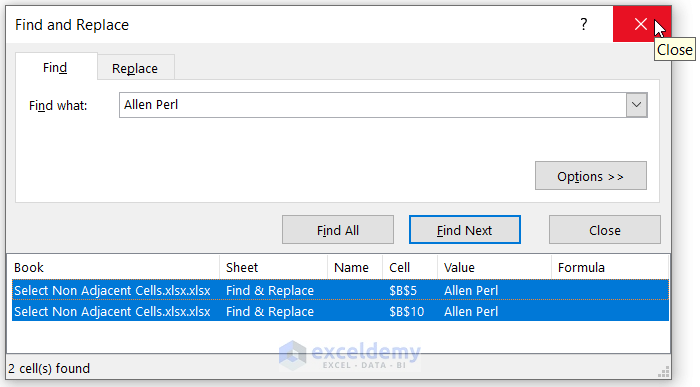
The cells will still be selected in the worksheet.
Read More: How to Select Random Cells in Excel
Method 5 – Using the Go To Dialog Box
In our last method, we’ll use an editing tool called Go To, located in the Editing group of the Home tab, for selecting non-contiguous cells.
Steps:
- Go to the Home tab.
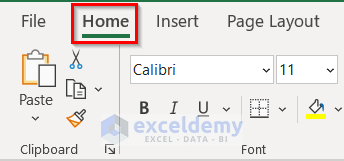
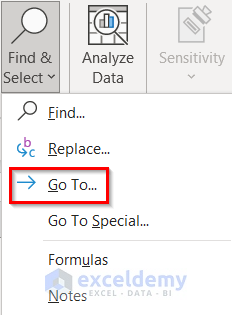
- Click on the Find & Select drop-down in the Editing group.

- Click on Go To.
A new dialog box (Go To) will open.
- Insert the cell references of the cells you want to select, separated by a comma.
- Click OK to close the dialog box, or just press Enter.
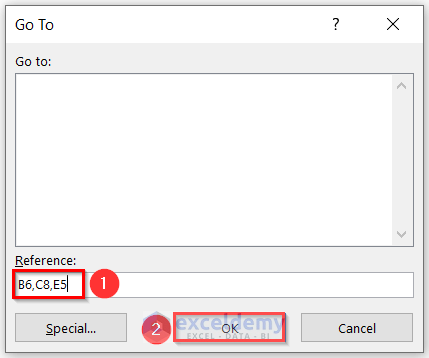
The cells specified in the dialog box will be selected. In our case, we selected cells B6, C8 & E5.
Similar to the Name Box method, you need not follow any order here. The last cell in the list will show as the active cell (E5 in our case).
Read More: How to Select Blank Cells in Excel and Delete
Download Practice Workbook
Related Articles
- How to Select Highlighted Cells in Excel
- How to Select Only Filtered Cells in Excel Formula
- [Fixed!] Selected Cells Not Highlighted in Excel
<< Go Back to Select Cells | Excel Cells | Learn Excel
Get FREE Advanced Excel Exercises with Solutions!
