Method 1 – Save the Excel File in the Binary Format
Steps:
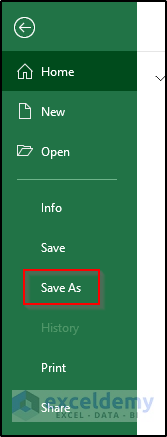
- Go to the File tab in the ribbon and select the Save As option.
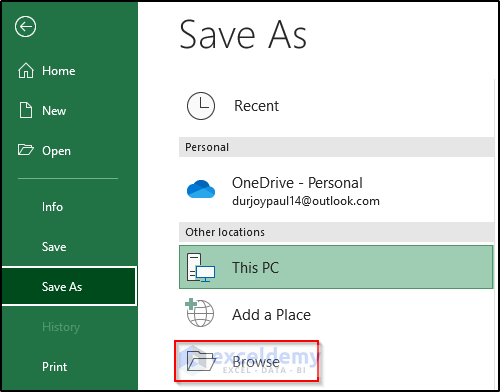
- Select the Browse option from the Save As section.
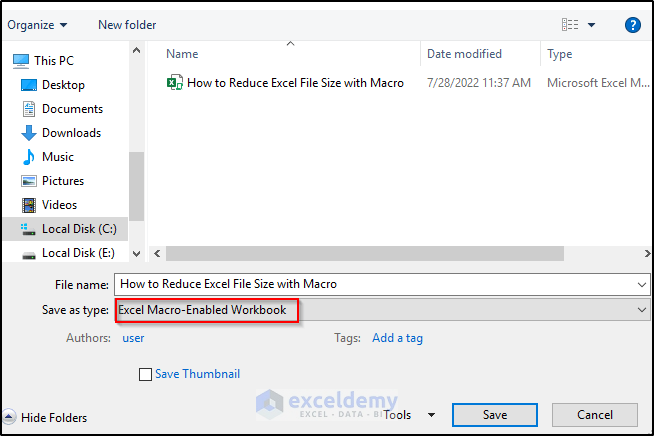
- Select the Save as type drop-down option.
- Select the Excel Binary Workbook option.
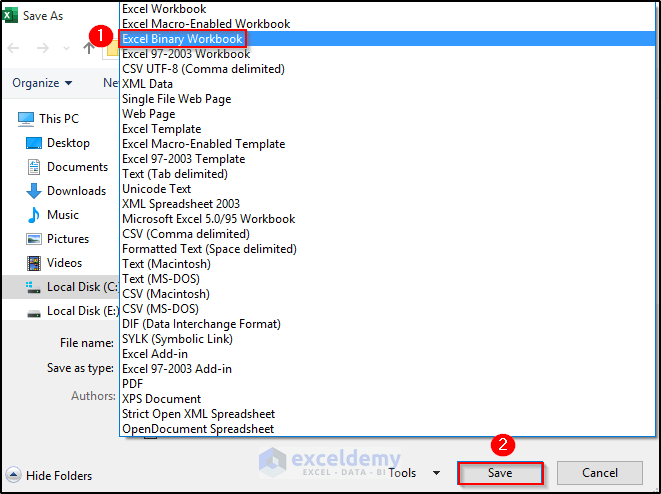
- Click on Save.
- We get a reduced file size compared to macro-enabled format.

Read More: How to Compress Excel File for Email
Method 2 – Remove Unused VBA Code
Using VBA code can increase the file size to some extent. Removing those unused VBA codes from the Excel file can be an effective solution to reducing Excel file size.
Method 3 – Remove Redundant Code
An optimized code can reduce Excel file size with macro. Suppose you need to bold a cell value by using the VBA code. In most cases, you first select the cell and then bold it in the VBA code.
Sub Bold_cells()
Range("B1").Select
Selection.Font.Bold = True
End Sub
Here we use two lines of code. First, we select the cell and then make the font bold. To remove this redundancy, we can write this code in one line.
Sub Bold_cells()
Range("B1").Font.Bold = True
End Sub
By doing this, we can reduce the code size, and at the same time, we can reduce the overall Excel file size.
Method 4 – Reduce Remark Statements (Comments)
Comments don’t get processed by the compiler, but they still take up space in the file size. Removing comments can reduce the file size slightly.
Method 5 – Exporting All VBA Modules and Importing Them Again
- Export all the VBA modules that you created in the past.
- Import them back into the VBA modules.
The main advantage of this method is that when you export the VBA modules, it reduces their size. When you import them all in the VBA modules, it also imports with the reduced size.
Method 6 – Disabling Macro
While using VBA code in Excel, we need to save the file in a Macro-Enabled Workbook. Save the workbook with macros disabled, then reopen the workbook. After that, enable the macro.
Method 7 – Optimize the Excel File Size by Removing Unused Areas
Steps
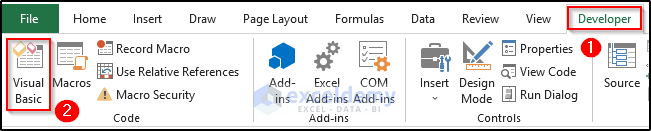
- Go to the Developer tab in the ribbon.
- Select Visual Basic from the Code group.
- It will open the Visual Basic window.
- Go to the Insert tab in the ribbon.
- Select Module.

- In the Module window, use the following code.
Sub RemoveUnused()
    Dim cell_last As Range
    Dim ans
    Dim row_last As Long, column_last As Long, position_of_last_dot As Long
    Dim file_name_full As String, name_of_file As String, target_name As String
    If WorksheetFunction.CountA(Cells) = 0 Then Exit Sub
    Application.ScreenUpdating = False
    ans = MsgBox("Do you need to generate a copy of this Workbook?", vbQuestion + vbYesNoCancel)
    If ans = vbCancel Then
        GoTo ExitSub
    End If
    If ans = vbYes Then
        file_name_full = ActiveWorkbook.FullName
        If file_name_full = "" Then
            MsgBox "Please run the macro after saving the file"
            GoTo ExitSub
        End If
        position_of_last_dot = InStrRev(file_name_full, ".")
        target_name = WorksheetFunction.Replace(file_name_full, position_of_last_dot, 0, "_" & Format(Now(), "yyyymmddhhmmss"))
        ActiveWorkbook.SaveCopyAs target_name
    End If
    row_last = Cells.Find(What:="*", After:=[A1], SearchOrder:=xlByRows, SearchDirection:=xlPrevious).Row
    column_last = Cells.Find(What:="*", After:=[A1], SearchOrder:=xlByColumns, SearchDirection:=xlPrevious).Column
    Application.ScreenUpdating = False
    Rows(row_last + 1 & ":" & Rows.Count).Clear
    Columns(Split(Cells(1, column_last + 1).Address, "$")(1) & ":" & Split(Cells(1, Columns.Count).Address, "$")(1)).Clear
    ActiveWorkbook.Save
ExitSub:
    Application.ScreenUpdating = True
End Sub- Go to the Developer tab in the ribbon.
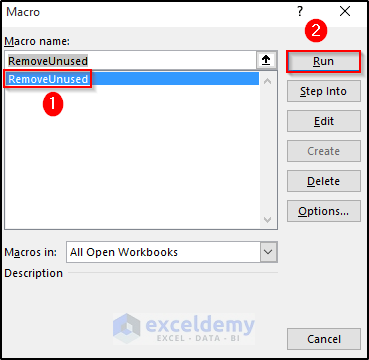
- Select Macros from the Code group.

- Select the RemoveUnused macro and click on Run.
Read More: How to Compress Excel File to Smaller Size
Method 8 – Remove Empty Rows and Columns
Blank rows and columns can make the dataset bigger and eventually increase the Excel file to some extent. To reduce Excel file size, we need to remove those empty rows and columns and then save the Excel file.
Read More: How to Reduce Excel File Size by Deleting Blank Rows
Method 9 – Remove Data Formatting
Steps
- Select the entire dataset or a part from where you want to remove the data formatting.
- Go to the Home tab in the ribbon.
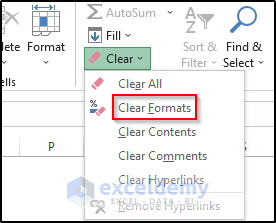
- Select the Clear option from the Editing group.

- Select Clear Formats. It will remove all the formatting from your dataset.
- Save the workbook.
Method 10 – Compress the File
Steps
- Right-click on the Excel file.
- Select the Send to option from the context menu.
- In the Send to section, select Compressed (zipped) folder.
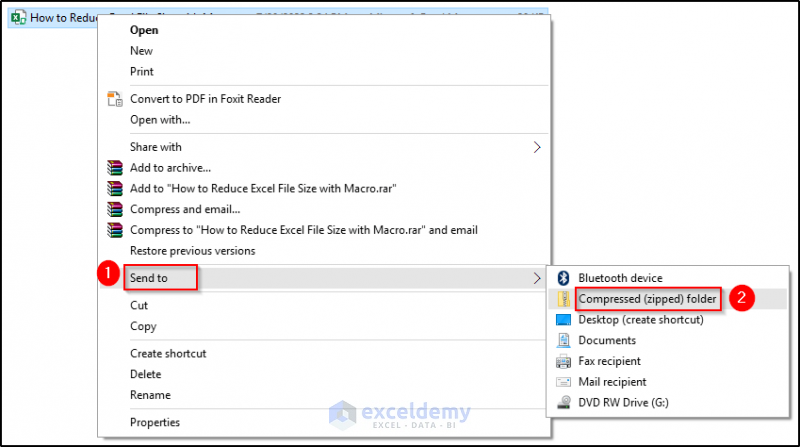
- It will convert the Excel file into a zip file, which reduces its size.

Read More: How to Reduce Excel File Size Without Opening
Method 11 – Compress Images
Steps
- Select the image you want to compress.
- Go to the Picture Format tab in the ribbon.
- Select the Compress Pictures option from the Adjust group.

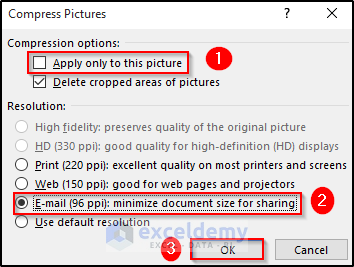
- This will open the Compress Pictures dialog box.
- From Compression Options, uncheck the Apply only to this picture option.
- Click on Email(96 ppi): minimize document size for sharing.
- Click on OK.
- Save the workbook.

Read More: How to Reduce Excel File Size with Pictures
Download the Practice Workbook
Related Articles
- How to Compress Excel File More than 100MB
- How to Reduce Excel File Size Without Deleting Data
- How to Determine What Is Causing Large Excel File Size
- [Fixed!] Excel File Too Large for No Reason
<< Go Back to Excel Reduce File Size | Excel Files | Learn Excel

