Method 1 – Compress an Excel File Larger than 100 MB to ZIP/RAR
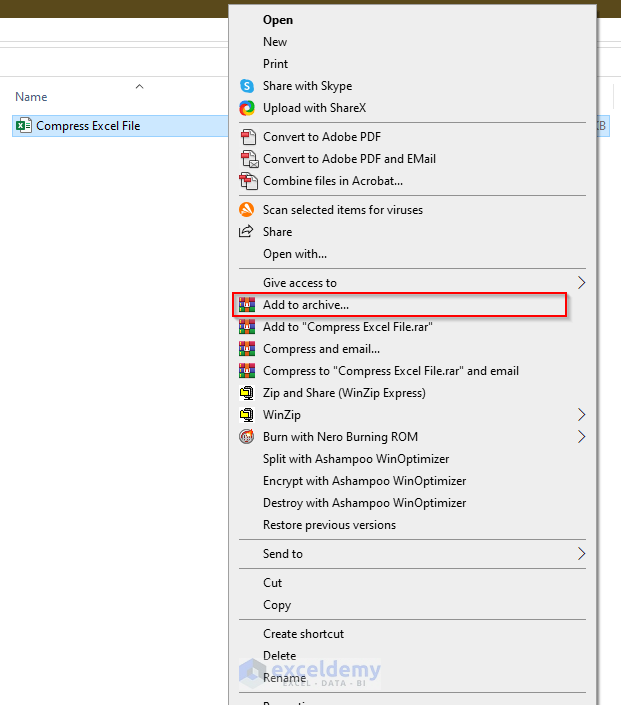
- Right-click on the Excel file.
- Choose Add to archive.
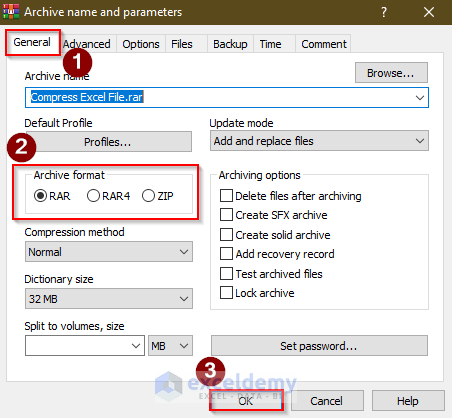
- An Archive name and parameters window will appear.
- Go to General and select RAR or ZIP in the Active format. We have selected RAR.
- Click OK.
Disclaimer: We used WinRAR software as an example.
Read More: How to Compress Excel File to Smaller Size
Method 2 – Using the Excel Binary Format for Saving to Compress an Excel File Larger than 100 MB
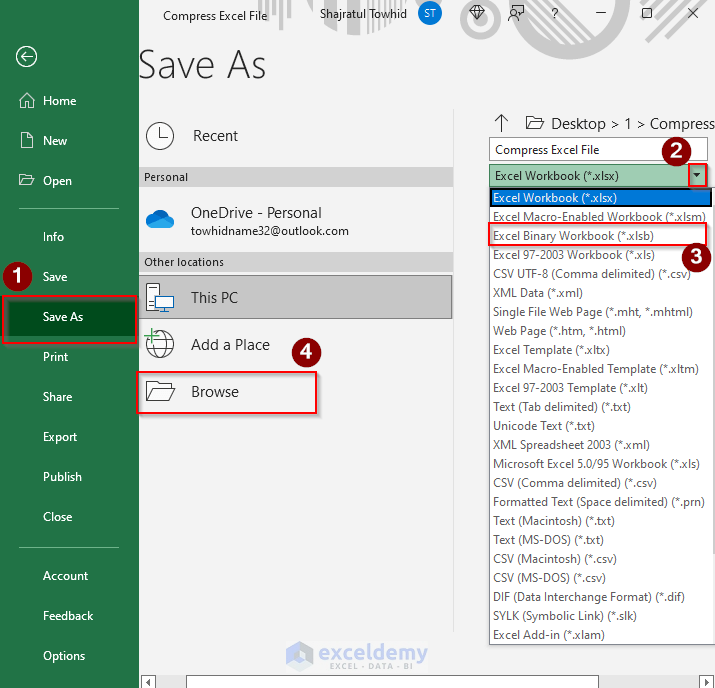
- Go to File.
- Select Save As.
- Choose file type as Excel Binary Workbook (*.xlsb).
- Click Browse and put the file in your local storage.
- An Excel Binary Workbook is created and the size is decreased from 24KB to 20KB.

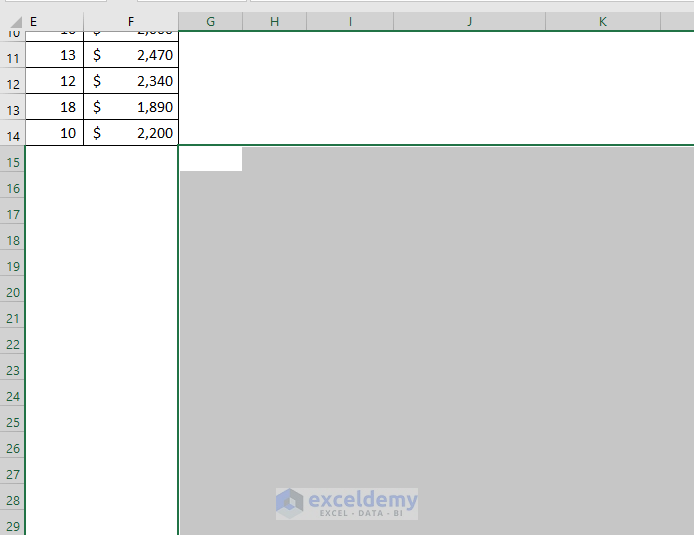
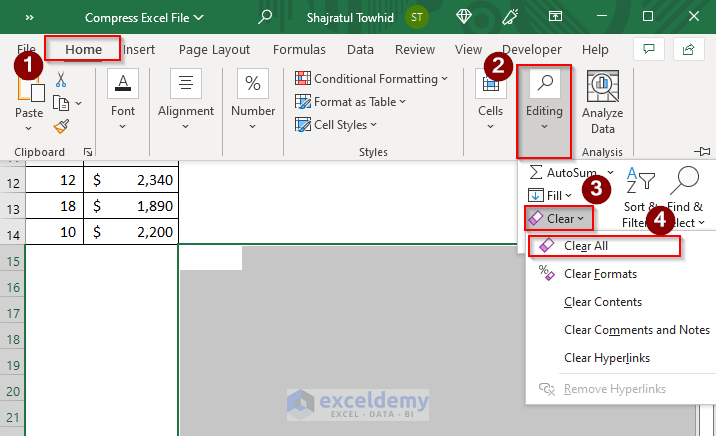
Method 3 – Clearing Blank Cells to Reduce Excel File Size
- To clear blank cells, click Ctrl + Shift + ↓ + →. The arrow signs indicate where we need to put our command.
- Go to Home and select Editing.
- Choose Clear and click Clear All.
- All the blank cells will be cleared.
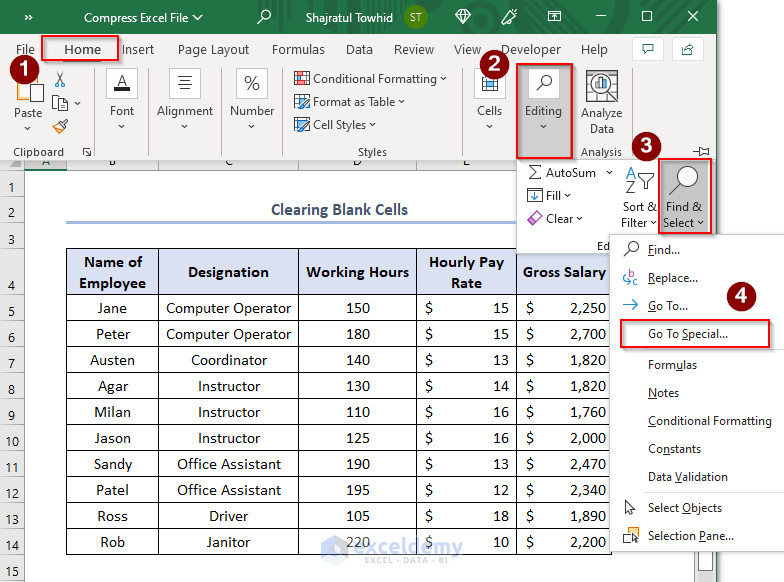
Additionally, we can do this by following another way.
- Go to Home and select Editing.
- Choose Find & Select and pick Go to Special.
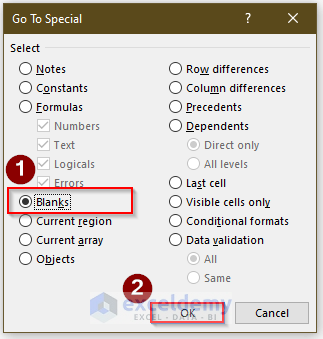
- The Go to Special window will appear.
- Select Blanks and click OK.
Read More: How to Reduce Excel File Size by Deleting Blank Rows
Method 4 – Reducing the Number of Worksheets to Compress an Excel File
If you have any worksheets with data that are not being used or any formula in those worksheets that are not useful, then just delete the worksheets. Additional worksheets just make the size of the Excel file bigger and deleting those unnecessary worksheets reduces the size a lot.
Read More: How to Compress Excel File for Email
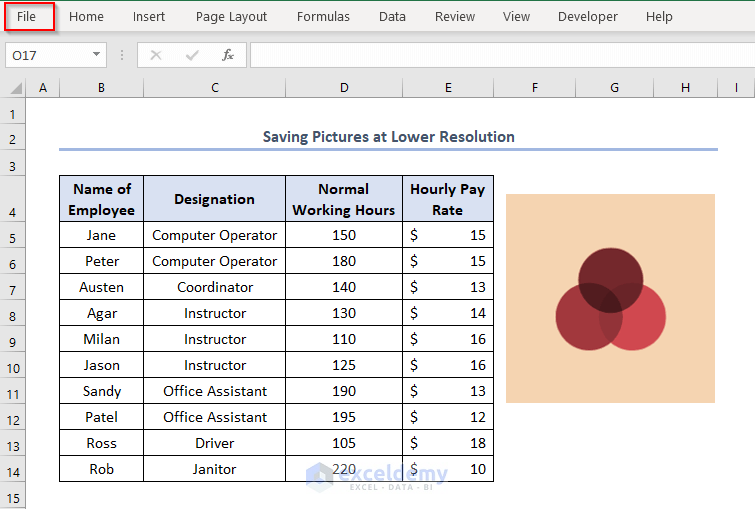
Method 5 – Saving Pictures at a Lower Resolution
- Go to File.
- Choose Options.
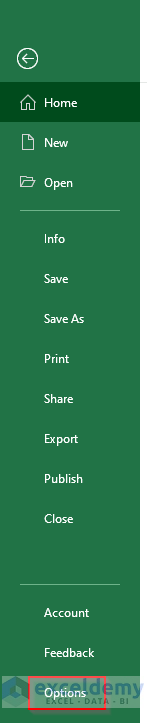
- An Excel Options window will appear.
- Go to Advanced.
- Check Discard Editing Data in the Image Size and Quality. Make sure that Do not Compress Images in file is unchecked.
- In the Default Resolution option, choose 150 ppi or lower. In most cases, we don’t need the resolution to be higher than that.

Read More: How to Reduce Excel File Size Without Deleting Data
Method 6 – Compressing Pictures
We can compress the pictures in an Excel file and it will also reduce the size of the file a lot.
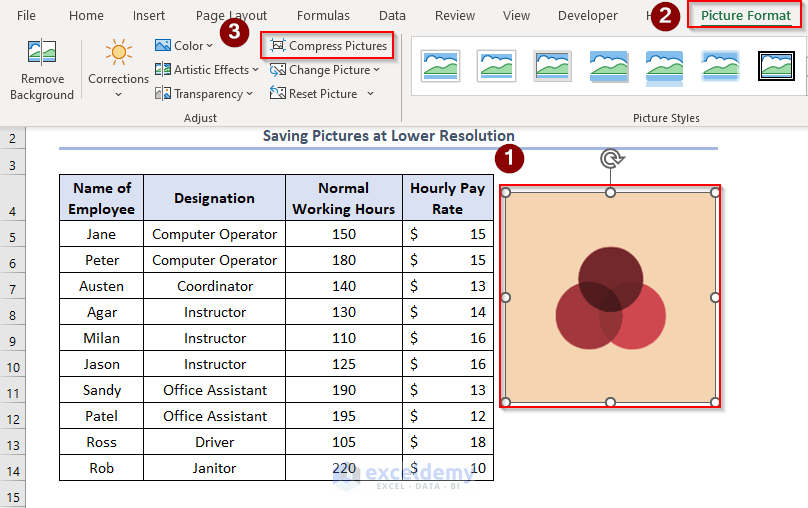
- Click on the picture and go to Picture Format.
- Select Compress Pictures.
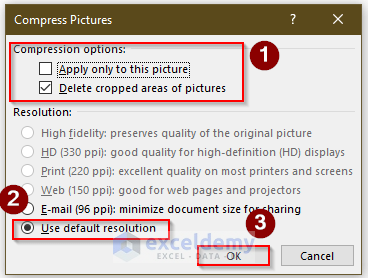
- The Compress Pictures window will appear.
- In the Compression options, mark Delete cropped areas of pictures. If you need to compress only the selected picture, select Apply only to this picture. But if you need to compress all the pictures in the file, deselect this option.
- In the Resolution box, select Use default resolution and click OK.
Read More: How to Reduce Excel File Size with Pictures
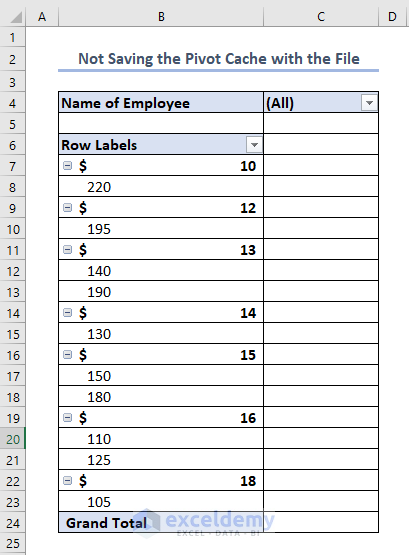
Method 7 – Not Saving the Pivot Cache with the File
Suppose we have the following PivotTable in our spreadsheet.
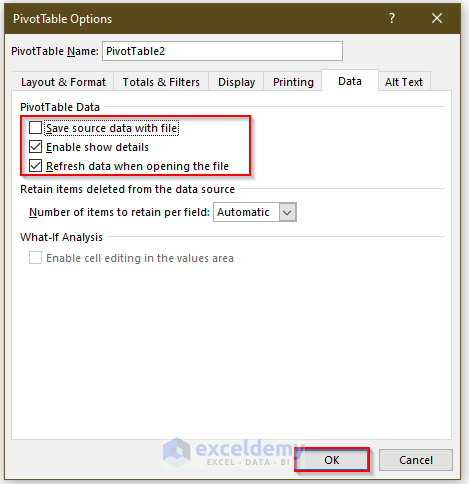
- Select any cell in the PivotTable.
- Go to PivotTable Analyze.
- Select PivotTable.
- Choose Options.

- The PivotTable Options window will appear.
- Select the following options shown in the picture below and click OK.
Download the Practice Workbook
Related Articles
- Reduce Excel File Size Without Opening
- How to Reduce Excel File Size with Macro
- [Fixed!] Excel File Too Large for No Reason
- How to Determine What Is Causing Large Excel File Size
<< Go Back to Excel Reduce File Size | Excel Files | Learn Excel
Get FREE Advanced Excel Exercises with Solutions!
