In Excel, radio buttons are also referred to as “Option” buttons. They are employed to log user input into Excel. They can be found under the “Insert” heading under the “Developer” tab. There may be more than one radio button for every given criterion. However, a single button rather than a number of options can be checked. A radio button can be added by clicking the insert command and then drawing it in any desired cell. In this article, we will show you how to use the option button in Excel.
Procedures to Insert an Option Button in Excel
In Excel, a radio button is sometimes referred to as an “Option” button. It is used to choose among a variety of possibilities. A small circular object adjacent to the text asks us to select an option, and we have seen this on hundreds of online pages. It receives a black dot when we choose it. Here, we will add the Developer tab to add Option button in Excel.
- Firstly, right-click anywhere on the Ribbon.
- Then, choose to Customize the Ribbon option.

- So, the Excel Options window will open.
- Then, click on the Customize Ribbon option.
- After that, select the check mark on the Developer tab on the right side.
- Besides, click OK.

- Here, you will see the Developer tab in the tab options.
- Firstly, go to the Developer tab.
- Secondly, click on the Insert command.
- Finally, you will notice the Option Button here in your worksheet.
Read More: How to Add Radio Buttons in Excel
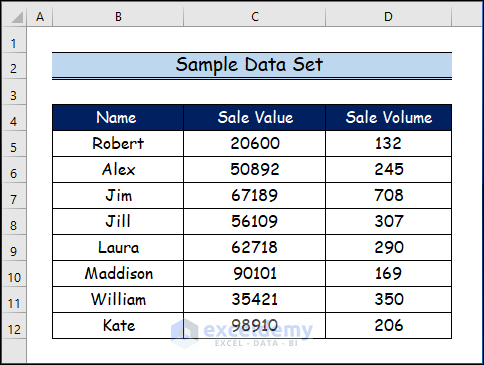
In this article, we will demonstrate to you how to insert Radio Button or Option Button utilizing the Developer tab. And, especially you will learn to use the option button in Excel for making a dynamic chart and in Excel VBA code. Let’s suppose we have a sample data set.
1. Using the Option Button to Make a Dynamic Chart in Excel
In this method, we will make a dynamic chart based on the sale value and the sale volume. Here are the following steps you can follow.
Step 1:
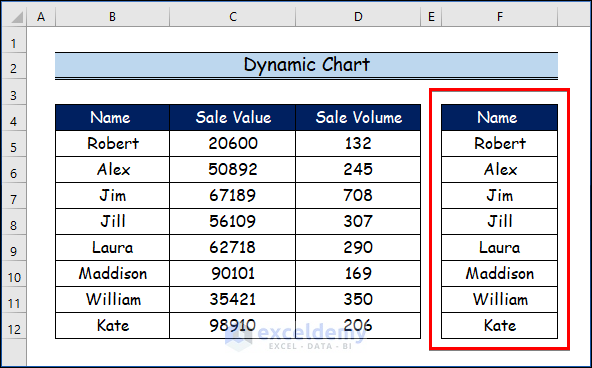
- Firstly, we will copy the first column and paste it onto the right side.
Step 2:
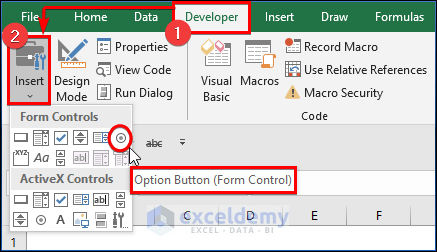
- Firstly, go to the Developer tab.
- Secondly, click on the Insert command.
- After that, choose the Option Button from the Form Control tools.
Step 3:
- Here, right-click on the Option Button tool from your worksheet.
- Then, select the Edit Text option.
- And, press CTRL+D to add more Option Button to your worksheet.

Step 4:
- After that, we will edit the name of our two option buttons as Sale Value and Sale Volume.

Step 5:
- Here, right-click on the options button to add the cell link.
- Then select the Format Control option.

Step 6:
- Therefore, we will link the option buttons in cell F13.
- And, click OK.

Step 7:
- Here, if you select the sale value, it will show 1 in the F13 cell.

Step 8:
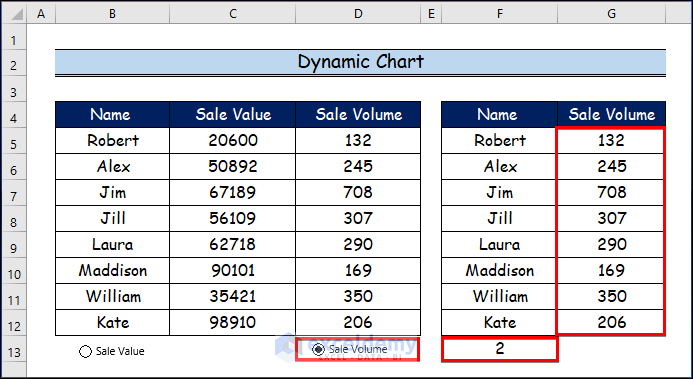
- Here, if you select the sale volume, it will show 2 in the F13 cell.

Step 9:
- Now, we’ll display the data in the second table and then create the dynamic chart using the values of the F13 field (1 for “Sale Value” and 2 for “Sale Volume”).
- So, we will apply the following formula here.
=INDEX($C$5:$D$12,ROWS($F$5:F5),$F$13)- Then, use the Fill Handle tool and drag it down from the G5 to the G12 cell.

Step 10:
- Here is our new data set for sale value on the right side you will see when you click on the Sale Value option button.

Step 11:
- While clicking the Sale Volume option button, you can see the sale volume data set on the right side.
Step 12:
- Here, go to the Insert tab first.
- Secondly, choose the Insert Column or Bar Chart from the charts group.
- Thirdly, select the Clustered Column chart from the 2-D Column option.

Step 13:
- As a result, the sale volume graph will be displayed when you click the Sale Volume option button below this.
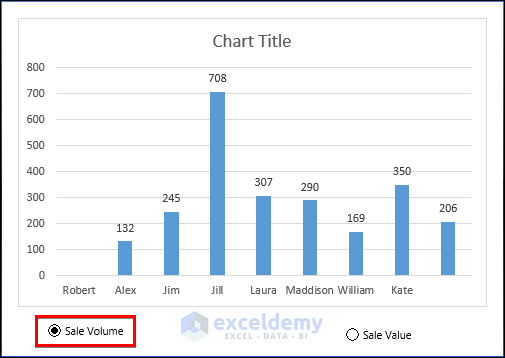
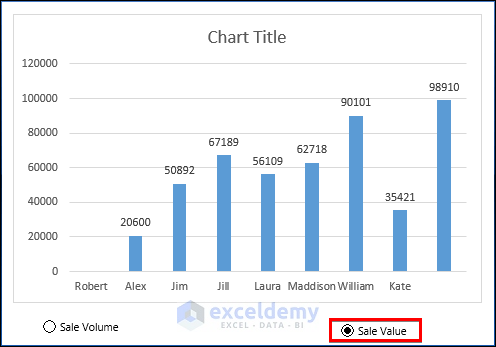
Step 14:
- Therefore, when you select the Sale Value option button down below here, it will show the sale value graph.
Read More: How to Set Option Button Value in Excel VBA
2. Utilizing the Option Button with Excel VBA
VBA is a programming language that may be used for a variety of tasks, and different types of users can use it for those tasks. Using the Alt + F11 keyboard shortcut, you can launch the VBA editor. In the last section, we will generate a VBA code that makes it very easy to use the option button in Excel.
Step 1:
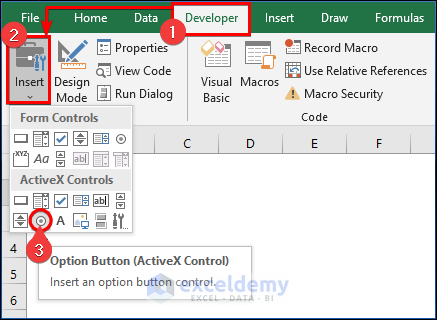
- Firstly, go to the Developer tab.
- Secondly, click on the Insert command.
- After that, choose the Option Button (ActiveX Control) from the Form Control tools.
Step 2:
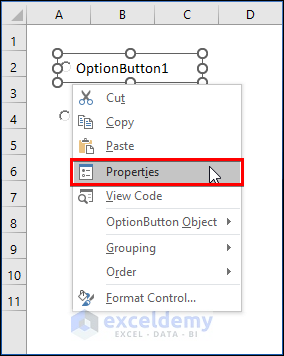
- Here, right-click on the options button to add the cell link.
- Then select the Properties option.
Step 3:
- After that, change the caption name to Male and Female.

Step 4:
- Then, right-click on the options button to add the cell link.
- Besides, select the View Code option.

Step 5:
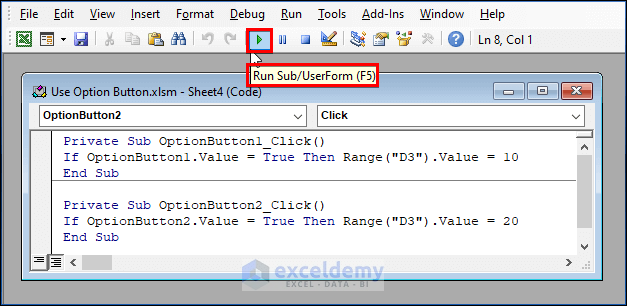
- Now, paste the following VBA code into the Module.
- Then, to run the program, click the “Run” button or press F5.
Private Sub OptionButton1_Click()
If OptionButton1.Value = True Then Range("D3").Value = 10
End Sub

Private Sub OptionButton2_Click()
If OptionButton2.Value = True Then Range("D3").Value = 20
End Sub
Step 6:
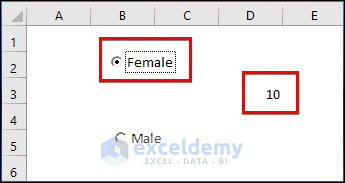
- Finally, if you select the Female option button, it will show you the number value 10.
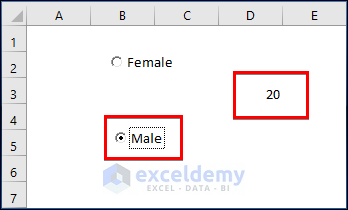
Step 7:
Finally, the number value 20 will appear if you choose the Male choice button.
Download Practice Workbook
You may download the following Excel workbook for better understanding and practice it by yourself.
Conclusion
In this article, we’ve covered 2 handy methods to use the option button in the Excel formula. We sincerely hope you enjoyed and learned a lot from this article. If you have any questions, comments, or recommendations, kindly leave them in the comment section below.
Related Articles
- How to Group Radio Buttons in Excel
- How to Insert Excel VBA Radio Button Input Box
- Radio Button in Excel Without Macro (Insert, Copy, Group & Delete)
- How to Create & Apply Option Button Click Event in Excel VBA

