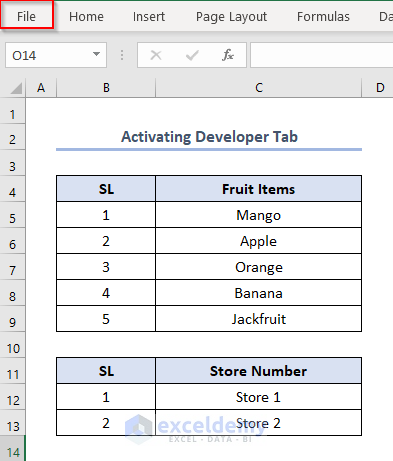
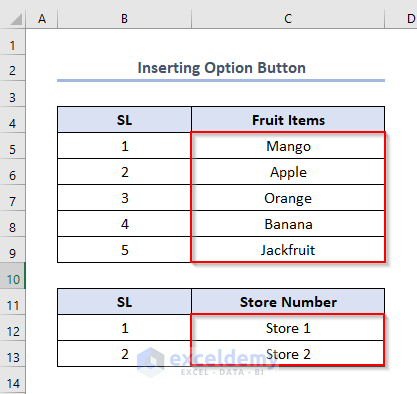
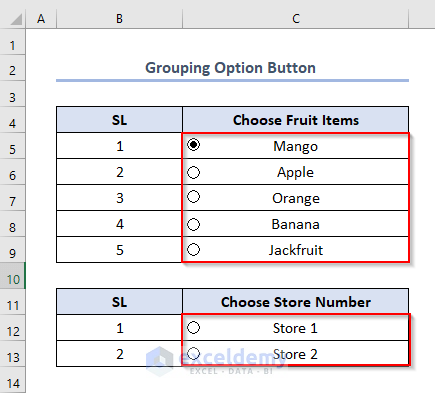
Consider the following dataset of fruit items and two stores. We’ll insert option buttons so we can use this dataset to input data in other sheets.

Step 1 – Activating the Developer Tab to Add Option Button in Excel
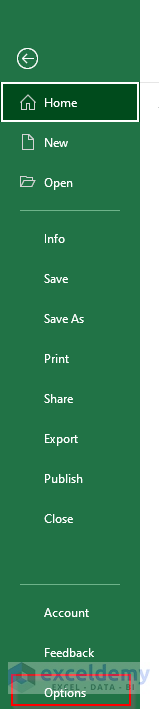
- Go to File.
- Go to Options.
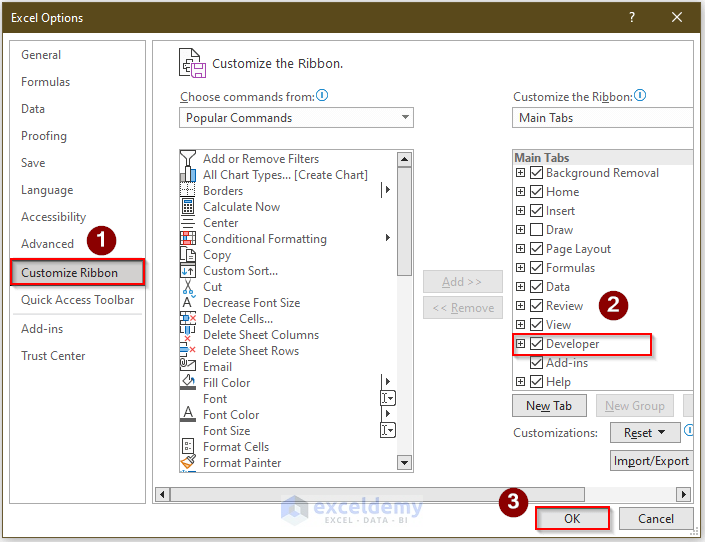
- The Excel Options window will appear.
- Select Customize Ribbon.
- Check the Developer item from the list on the right and click OK.
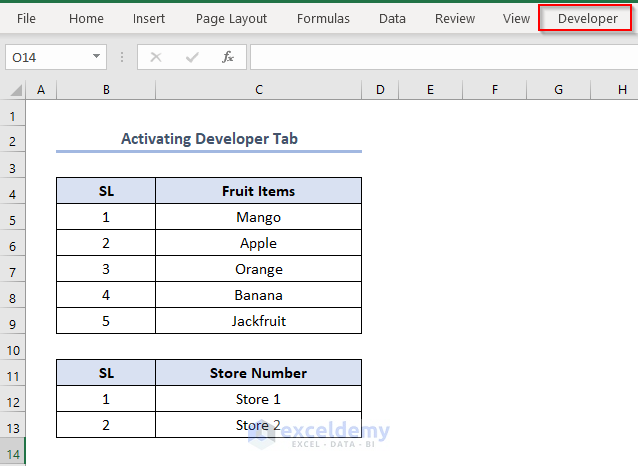
- The Developer tab is added to the Excel ribbon.
Step 2 – Inserting an Option Button
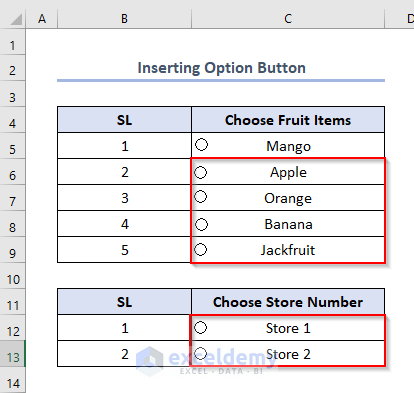
We need to add option buttons in cells C5:C9 and C12:C13.
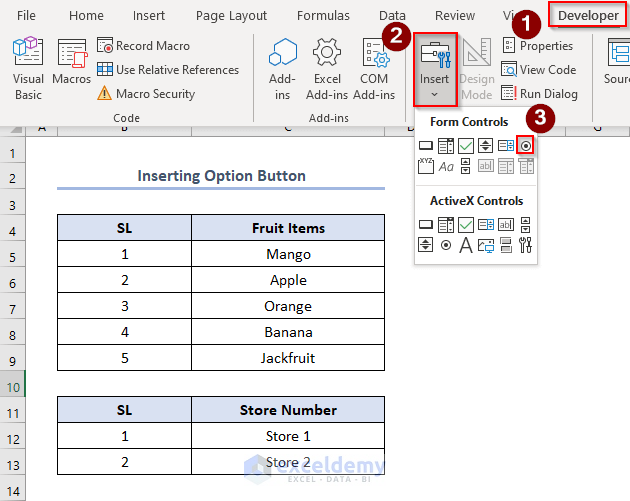
- Go to the Developer tab and click Insert.
- Select the Option Button Icon in the Form Controls section.
- The cursor changes to a plus.
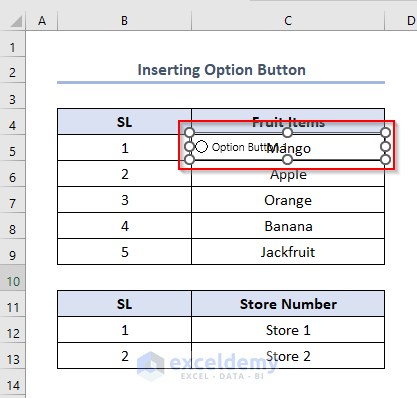
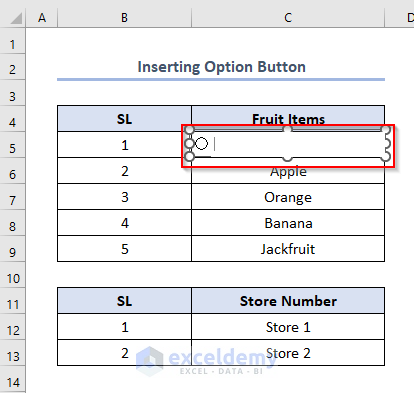
- Place the cursor in the desired location, create a box surrounding the first option, Mango, and stretch the box to cover the cell.
- Click anywhere on the sheet to finalize the button.
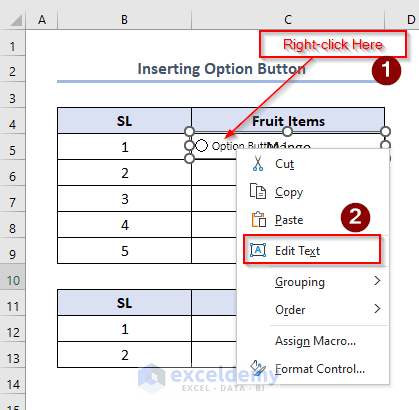
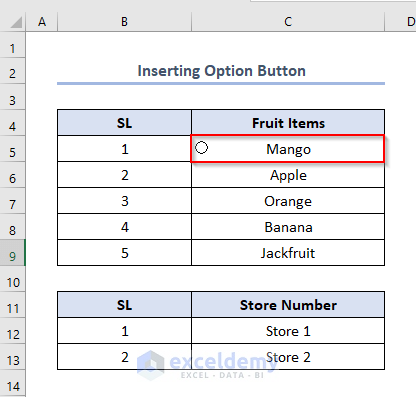
- Right-click on the option button and choose Edit Text.
- Delete the default name Option Button.
- Click anywhere on the sheet, and you’ll only see the initial cell value.
- Follow the same procedure to add option buttons to all of the options like this.
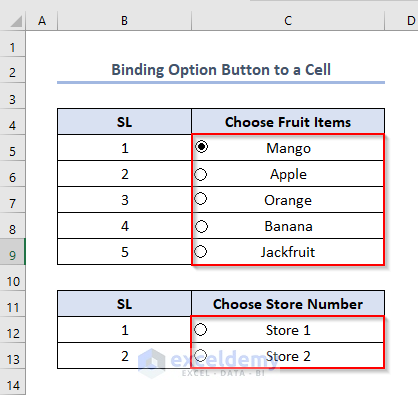
Step 3 – Binding or Linking the Option Button to a Cell
We need to bind the option buttons to another cell to display a value.
- Right-click on a button.
- Select Format Control.
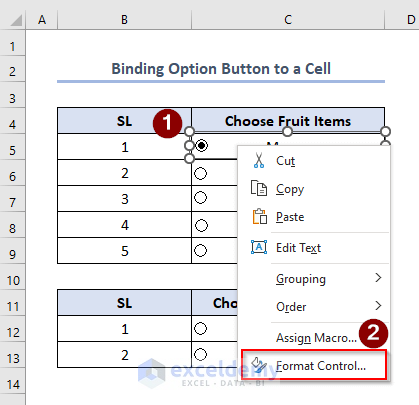
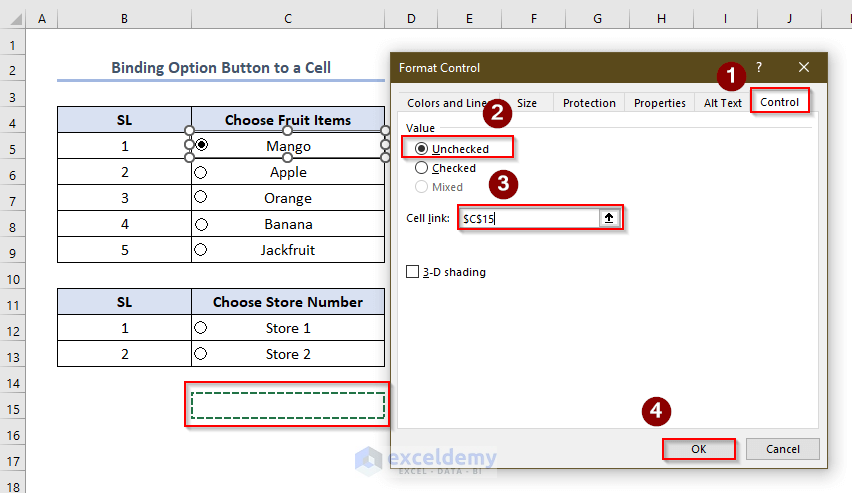
- A Format Control window will appear.
- Go to Control and select Unchecked, then place the bounded cell reference in the Cell link box. We chose C15.
- Click OK.
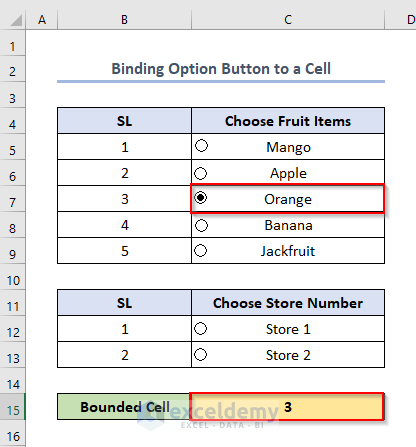
- Repeat for all buttons. This cell will represent the option button number.
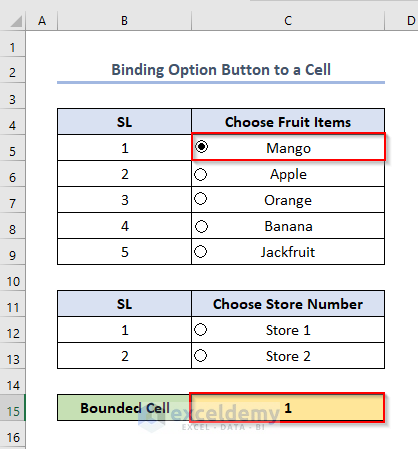
- We have selected the Option Button 3, so the C15 cell is showing 3.
Read More: How to Set Option Button Value in Excel VBA
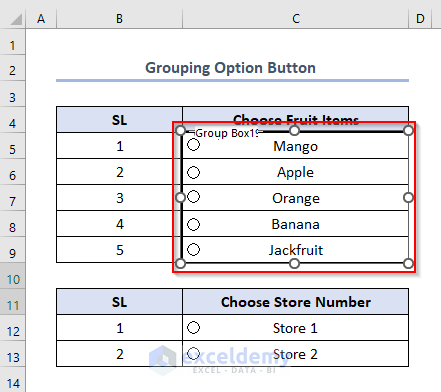
Step 4 – Grouping Option Button
We need to make two groups of the option buttons.
- Go to Developer and click Insert.
- Choose the Grouping Icon in the Form Controls section.

- Stretch the cursor to make a box around the option buttons you want to group. The first group for the sample is cells C5:C9.
- Click anywhere on the sheet and Excel will create Group box 1.
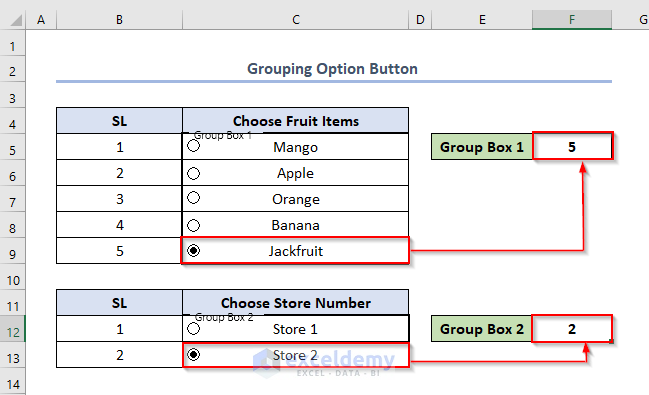
- Create the Group box 2 following the same procedure.

- Bind Group box 1 to Cell F5 and Group box 2 to Cell F12.
- The two Group boxes will show the different option button numbers for different Group Boxes.
Read More: How to Group Radio Buttons in Excel
Download the Practice Workbook
Related Articles
- Radio Button in Excel Without Macro
- How to Insert Excel VBA Radio Button Input Box
- How to Create & Apply Option Button Click Event in Excel VBA

