This article provides two easy examples of how to merge cells in Excel to a Word document. We will show the way to merge cells in an Excel file with a single page as well as multiple pages to a Word document. You also get some tips for using tables and cells in Word through this article.
While working in Excel, you might want to merge cells in an Excel file to a Word document in order to create a report or another document. Since these applications are part of Microsoft’s Office suite, you can simply synchronize between them.
I hope you find this article informative and useful. So, let’s get into the main discussion.
Download Practice Workbook
You can download the practice workbook from here:
Merge Cells in Excel to Word Document: 2 Examples
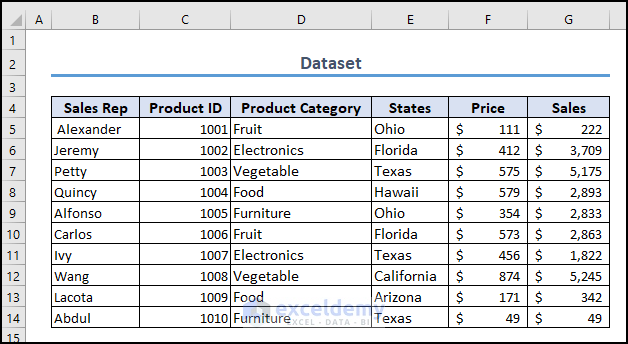
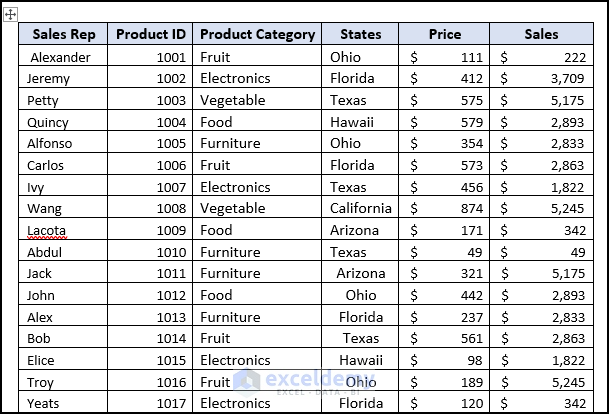
To demonstrate these 2 examples we have taken a dataset of 11 rows and 6 columns which are Sales Rep, Product ID, Product Category, States, Price and lastly Sales. The dataset belongs to the B4:G14 cell range as shown in the following screenshot.
1. Merge Cells in Excel File with Single Page into Word Document
1.1. Merge Excel Cells into Word Document Directly
First, we will show how to merge Excel cells into a Word document directly. Follow the below steps accordingly:
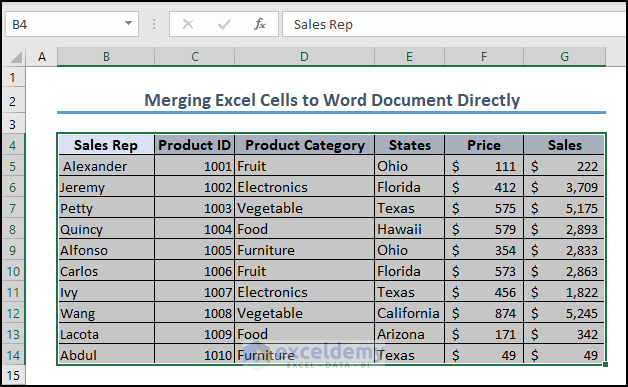
- Select the dataset and copy it by pressing CTRL + C.
- Then, open a Word document.
- Choose the Paste Special option (shortcut ALT + CTRL + V) from the drop-down list of the Paste option in the Home tab.
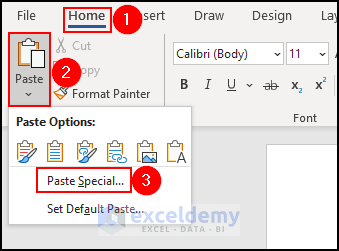
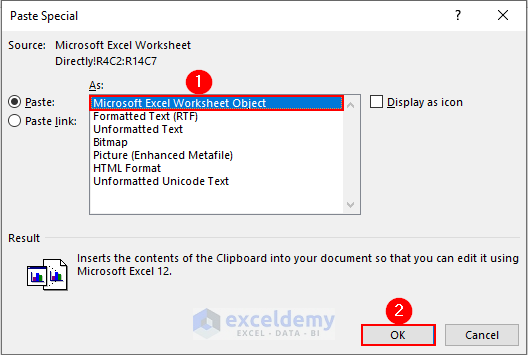
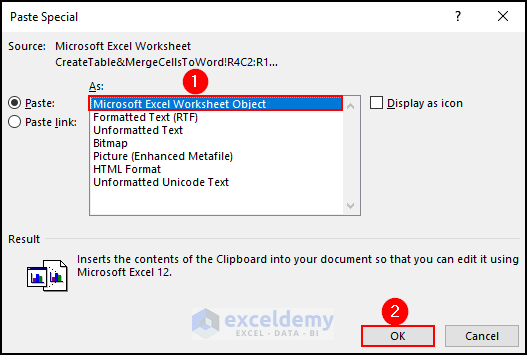
- A dialog box named “Paste Special” will pop up.
- Choose the Microsoft Excel Worksheet Object option from the list of As.
- Then click OK.
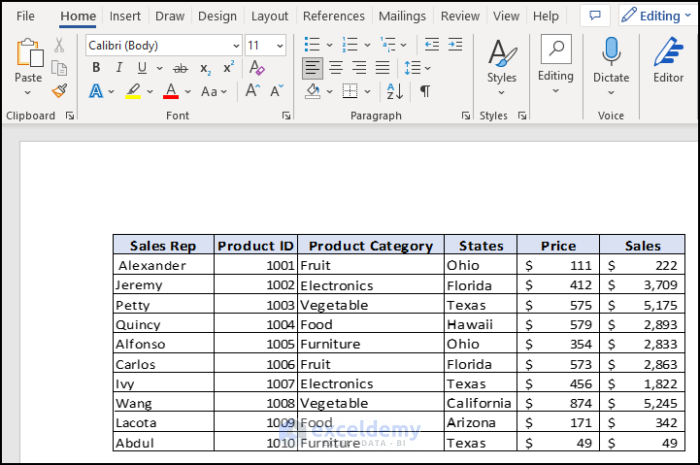
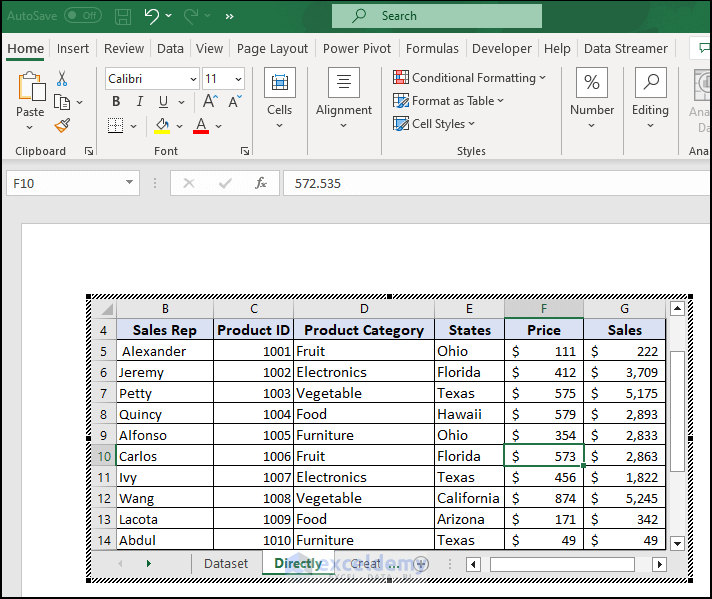
- After pressing OK, you’ll get the following dataset in the Word document.

- And if you double-click over any cell within the dataset, you’ll see the Excel Ribbon in your document just like the below image.
Thus you can merge Excel cells into a Word document directly.
1.2. Create Excel Table and Merge Cells into Word Document
In this part, we will create an Excel table from the dataset and then merge it into the document. To do that go through the below steps accordingly:
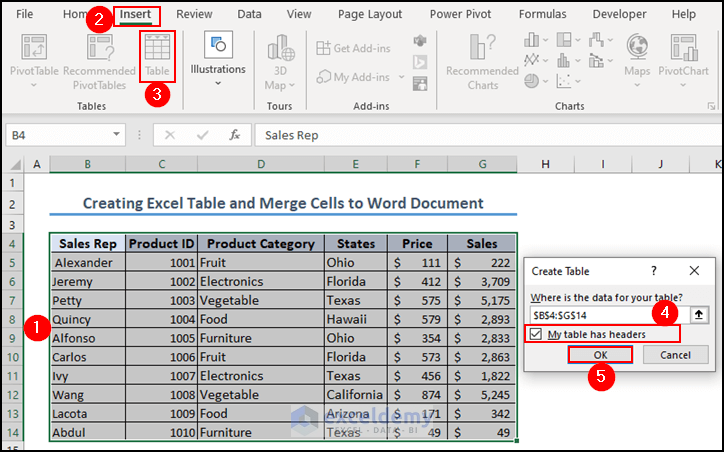
- To create a table, select the whole dataset.
- Go to Insert tab>> select Table.
- A dialog box named Create Table will appear where you need to check the box before My table has headers
- Click OK.
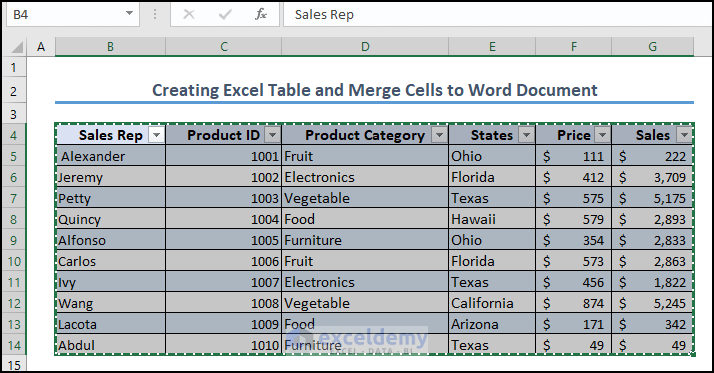
- As a result, a table will be created as shown in the following screenshot.
- Now, copy the entire table by pressing CTRL + C.
- Now, go to the Word document and choose the Microsoft Excel Worksheet Object option from the Paste Special dialog box like the previous method.
- Eventually, you’ll get the table in the document with the Filter Button just like the Excel worksheet.
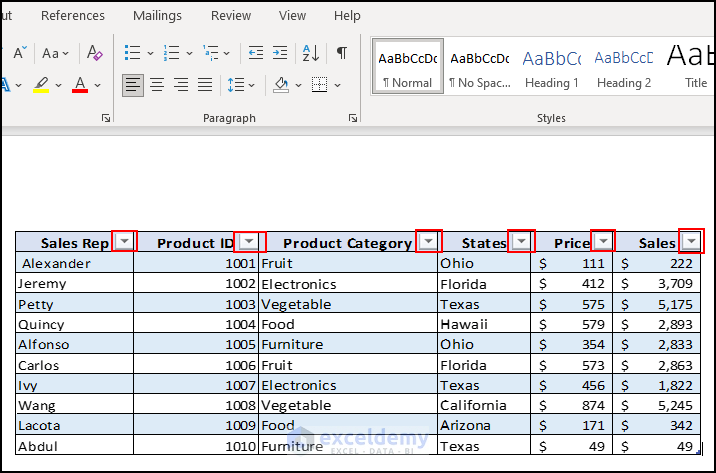
- Now, if you click on the Filter Button of the Product Category, you’ll see the options. And this will work the same as it does in Excel.

Thus you can create a table from dataset cells and merge them into a Word document.
2. Merge Cells in Excel File with Multiple Pages to Word Document
You can use this method if your dataset is large and the Word document covers multiple pages. In our dataset the cell range is B4:G30.

Now go through the below steps:
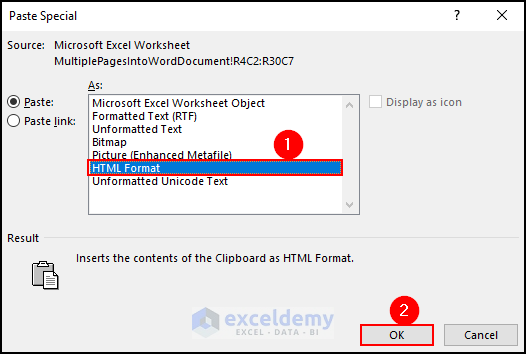
- First, you need to copy the entire dataset and paste it into the Word document using the Paste Special dialog box like previous methods.
- In the Paste Special dialog box, choose the HTML Format and click OK to proceed.
You’ll get the dataset within seconds. However, if you closely examine the copied dataset in the document, you’ll notice that it’s missing the header row except for the first page. You must add this header row.
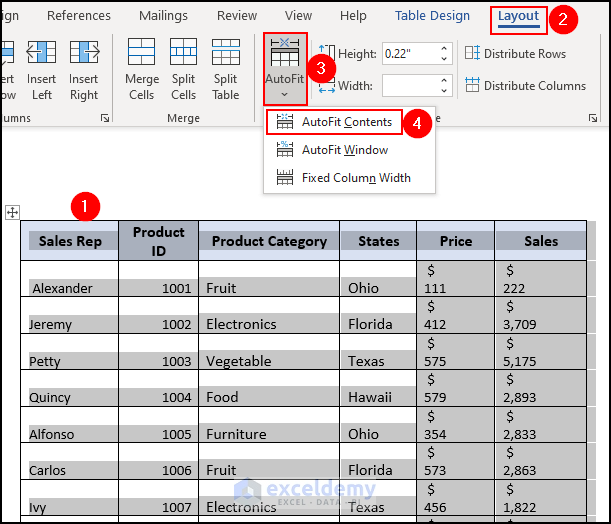
- To add the header, select a cell within the copied dataset and then go to the Layout tab.
- Select the Repeat Header Rows from the drop-down list of the Data option.
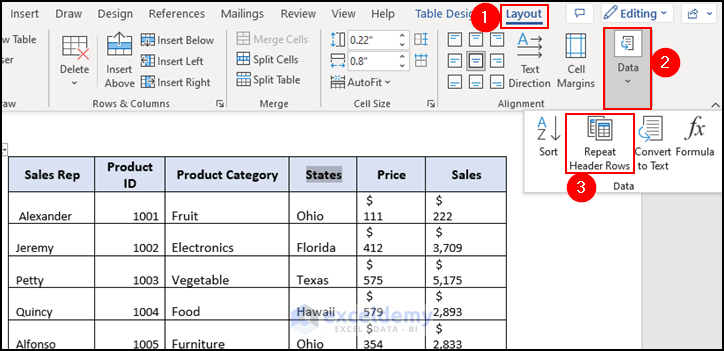
- The header row will immediately appear on every page.
- Moreover, you can apply the AutoFit Contents from the drop-down menu of the AutoFit option in the Layout tab to make the dataset readable.
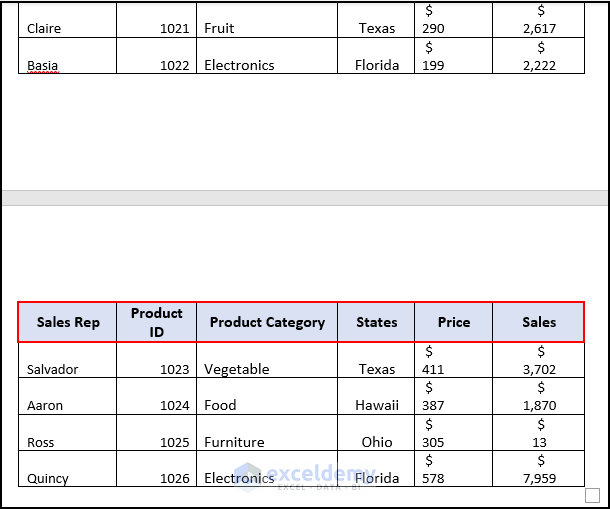
- As a result, you’ll get the following output.
Thus you can merge cells in an Excel file with multiple pages into a Word document.
Tips for Using Tables and Cells in Microsoft Word
- Use the shortcut “CTRL+Z” to undo your most recent actions. If you merge or split extra cells by mistake, you might want to use this shortcut.
- If your table does not have visible borders, use gridlines. This can be accomplished by selecting the “Layout” tab and choosing “View Gridlines”.
Frequently Asked Questions
1. Can I merge cells with data in Excel?
Yes, you can merge cells that contain data in Excel. However, please note that when you merge cells, only the content from the upper-left cell will remain, and the data from the other cells will be discarded.
2. Is it possible to merge cells in Excel and keep the merged format when pasted into a Word document?
When you copy merged cells from Excel and paste them into a Word document, the merged format is generally preserved. However, the exact formatting may depend on the version of Excel and Word you are using, as well as the settings of your clipboard and paste options. To ensure the best results, it’s recommended to paste the content as a picture or use the “Paste Special” option in Word to maintain formatting.
3. Can I merge cells in Excel with keyboard shortcuts?
Yes, you can merge cells in Excel using keyboard shortcuts. Here’s how:
- Select the cells you want to merge.
- Press and hold the Alt key.
- While holding the Alt key, press the following sequence of keys: H, M, and then press Enter.
Key Takeaways from the Article
- In this article, we have discussed 2 examples of how to merge cells to a Word document.
- We have shown how to merge cells with a single page and multiple pages to a Word document.
- Showed a step-by-step procedure of all methods.
- Discussed some tips for using tables and cells in Word.
- Provide solutions to frequently asked questions by readers.
Conclusion
In this article, we tried to provide a concise and thorough overview of how to merge cells in Excel to a Word document. Don’t forget to download the practice file. We hope this was helpful. Please let us know in the comment section if you have any queries or suggestions. To learn more, please visit ExcelDemy, a one-stop Excel solution provider.
Get FREE Advanced Excel Exercises with Solutions!
