Watch Video – Make an Hourly Schedule in Excel
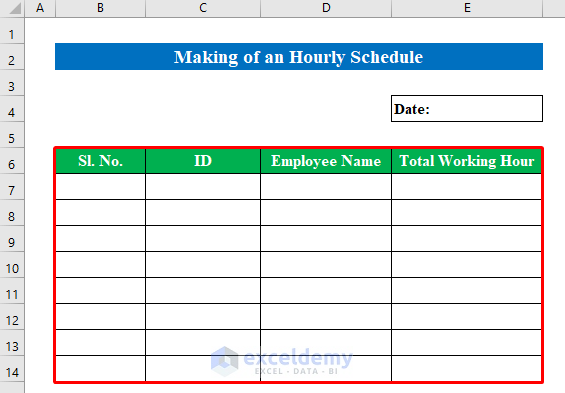
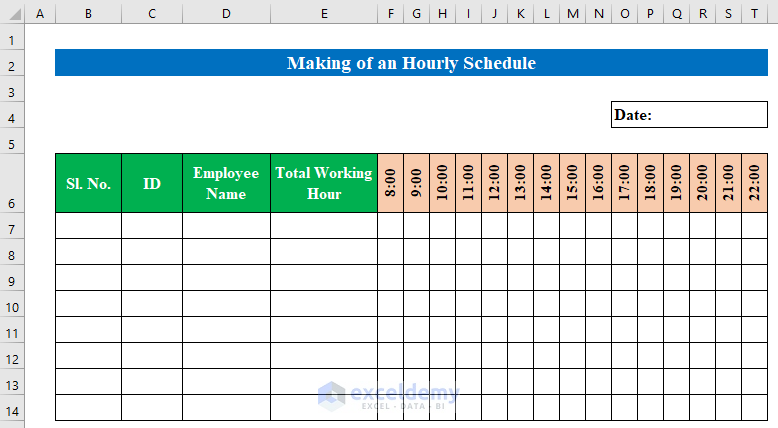
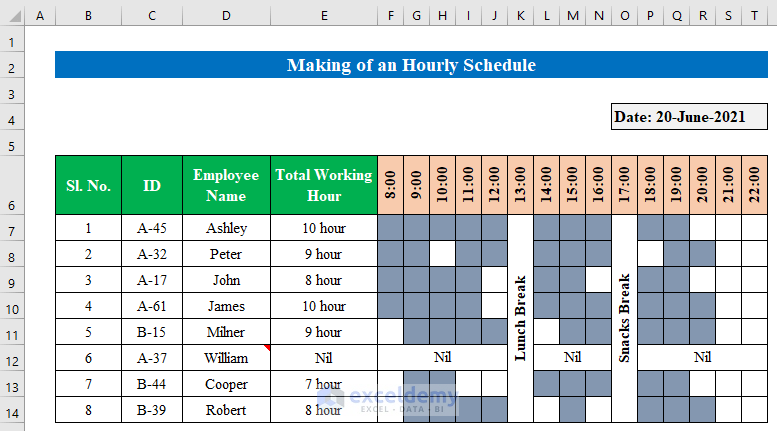
Step 1: Create the Dataset with Proper Information
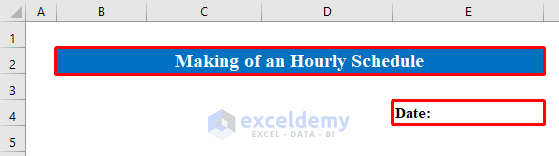
- Make a heading, and below that type “Date” to store the date in the cell.
- As we are creating an hourly schedule for a workstation thus we need “No”, “ID”, “Employee Name”, and “Total Working Hour” to complete the dataset.
Step 2: Insert Time in Total Working Hour Column
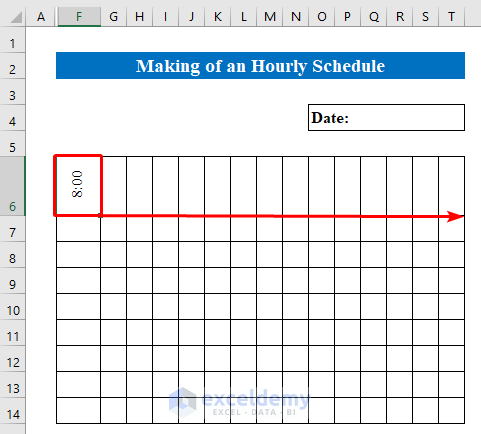
- We will make borders for some columns to store the time hour-wise.
- The workstation’s starting time is “8:00 AM,” so we put “8:00” in the cell (F6).
- Change the rotation of the text by selecting Rotate Text Up from the Home ribbon.

- Pull the Fill Handle row-wise to fill with the leading time with a gap of 1 hour.
- We will get the hours in cells (F6:T5).
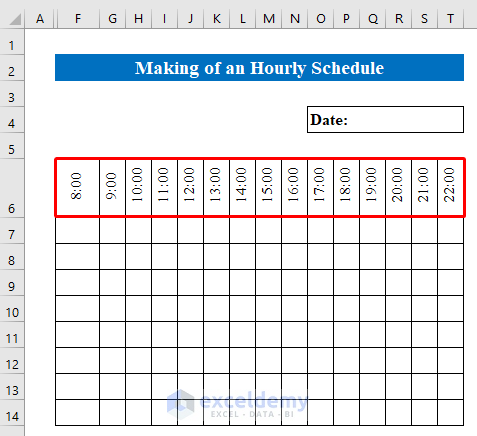
- Fill with color on the cells (F6:T6). Our final table will look exactly like the following.
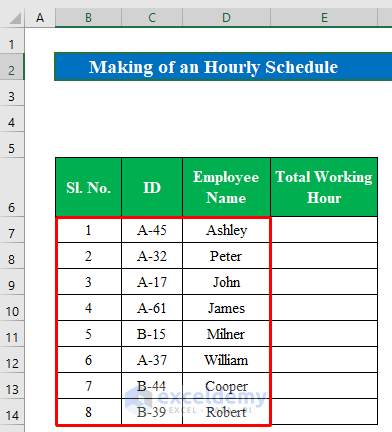
Step 3: Fill with Data to Calculate Total Hour
- Fill the cells with data to calculate the total hour. Let’s begin.
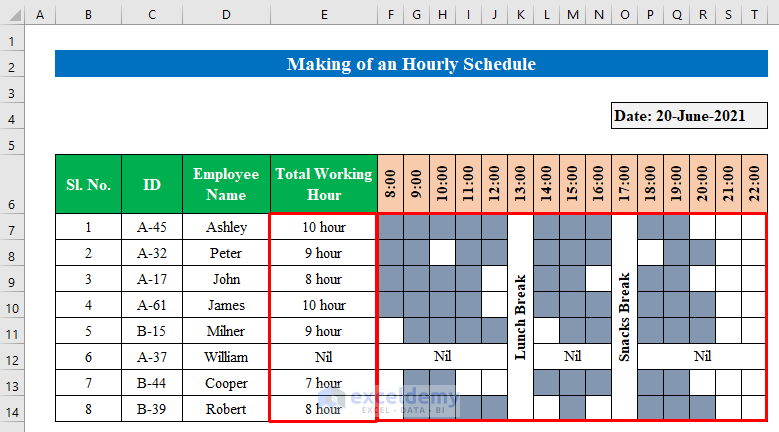
- Collecting data from the workstation we got the “Employee Name”, and “ID” for the employees appointed to the floor.
- We collected how much time “Ashley” worked and in which hours.
- We found a “10 Hours” in which he put effort into the workstation.
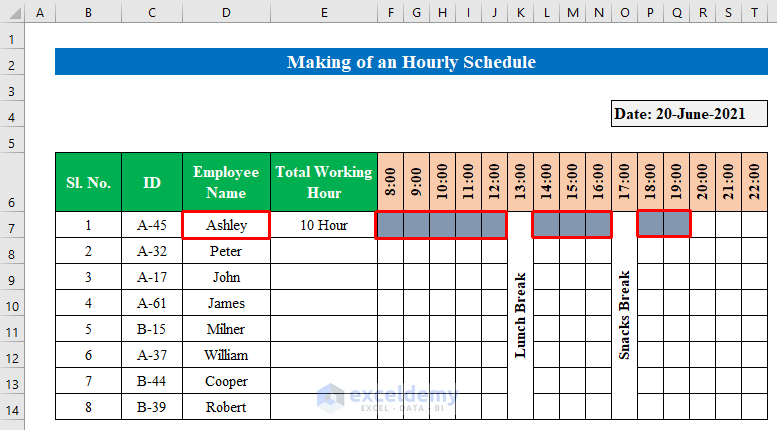
- We collected data, which represented employees’ efforts on an hourly schedule.
Read More: How to Create a Monthly Schedule in Excel
Step 4: Add Comments to the Table
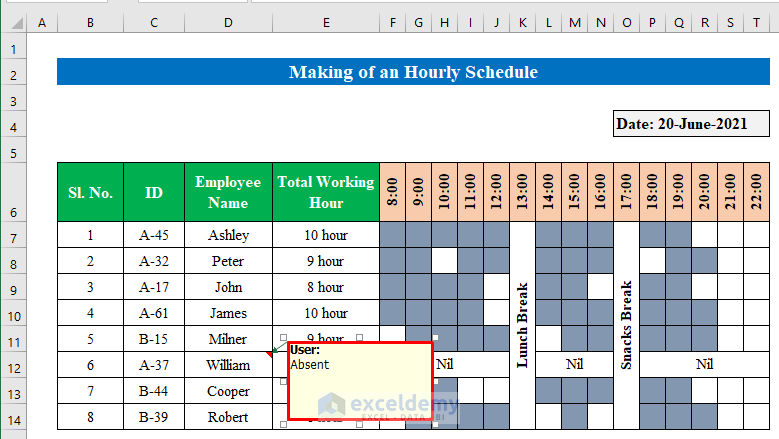
- We will add notes to specific cells to mark them easily. Select a cell (D6) and press the New Note from the Review option.
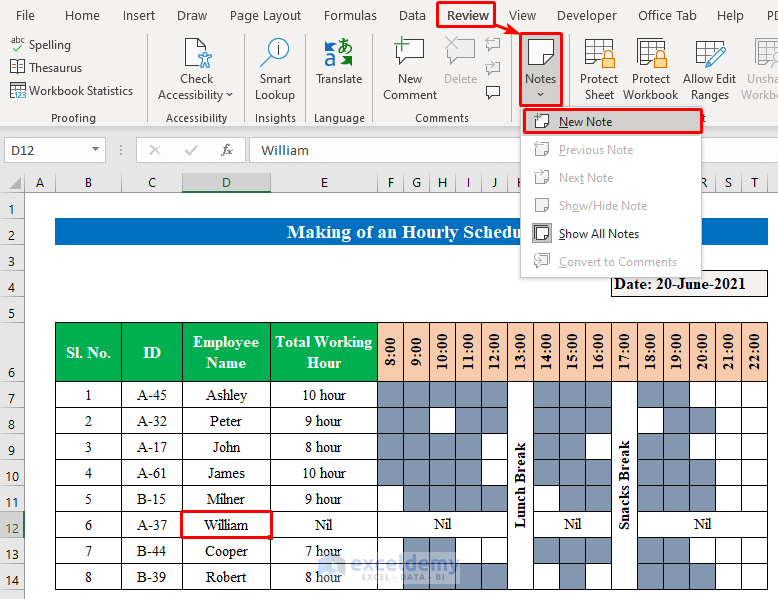
- Enter your note in the cell so that you can work more smoothly.
- We have successfully made an hourly schedule in Excel within a short moment.
Read More: How to Create a Weekly Schedule in Excel
Things to Remember
If you want you can also attach comments for specific cells where multiple users can reply with their opinion. To do so go to the Review option and click the New Comment to add comments.
Download the Practice Workbook
Download this workbook to practice.
Related Articles
- How to Make a Daily Schedule in Excel
- How to Create a Schedule in Excel That Updates Automatically
- How to Create a Recurring Monthly Schedule in Excel
<< Go Back to Excel for Business | Learn Excel
Get FREE Advanced Excel Exercises with Solutions!

Hi,
I need to build a monthly appointment schedule for clients. What do you recommend beginning with?
Thank you,
Nat
Hello Nat,
Thanks for reaching out! To build a monthly appointment schedule for your clients in Excel, a great starting point is this detailed guide:
How to Create a Monthly Schedule in Excel (3 Simple Ways)
This article walks you through three practical methods:
Using Excel Templates: Quickly set up a schedule by customizing built-in templates.
Manual Creation: Design a schedule from scratch with full control over layout and formatting.
Interactive Combo Box: Add dropdowns to switch between months dynamically.
Each method includes step-by-step instructions with visuals, making it easy to follow along. If you need a downloadable template or further assistance customizing it for your specific needs, feel free to ask!
Regards
ExcelDemy