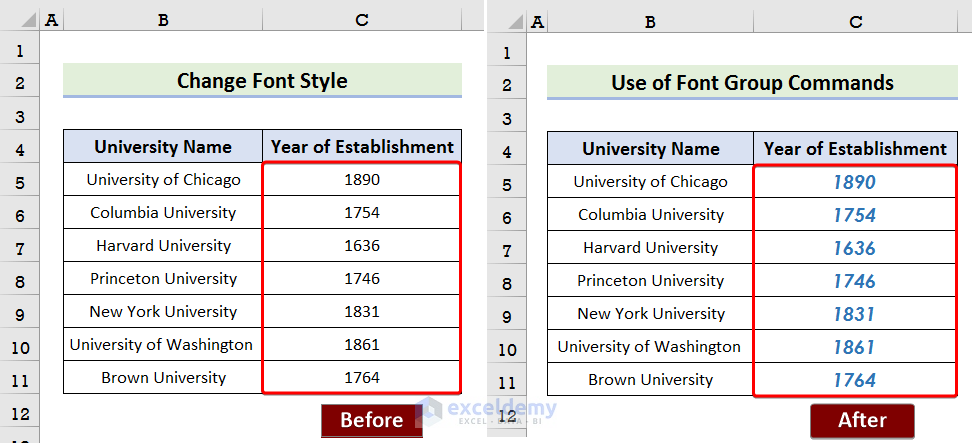
In this Excel tutorial, we will describe how to change font style. Changing font style in Excel is a process that enhances the visual appeal of the data, and includes changing the font name, size, and color, as well as making the font italic or bold.
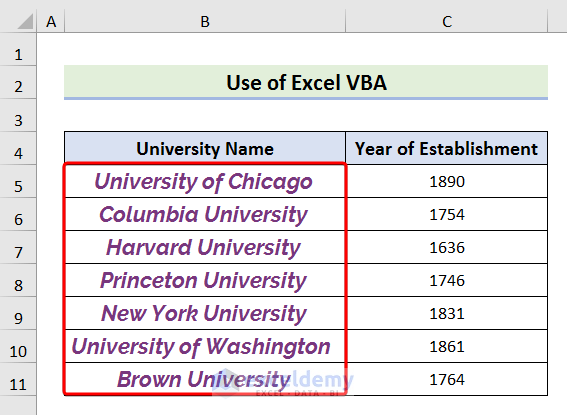
In the following dataset, we have different university names along with their establishment years. We will change the font styles based on the selection.
Here are 5 easy ways to change font styles in Excel:
Method 1 – Using the Font Option
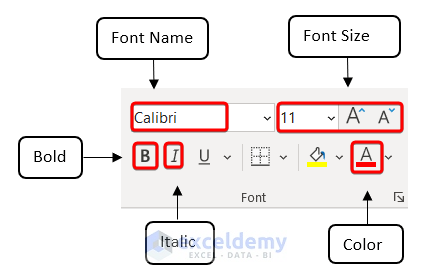
There are some helpful preset commands in the Font group to change the font style in Excel. The main benefit of the Font group commands is that they are ergonomic and easy to operate. We can change the font size, name, and color easily from here.
Steps:
- Select a cell or a range of cells.
- Go to the Home tab > Font group.
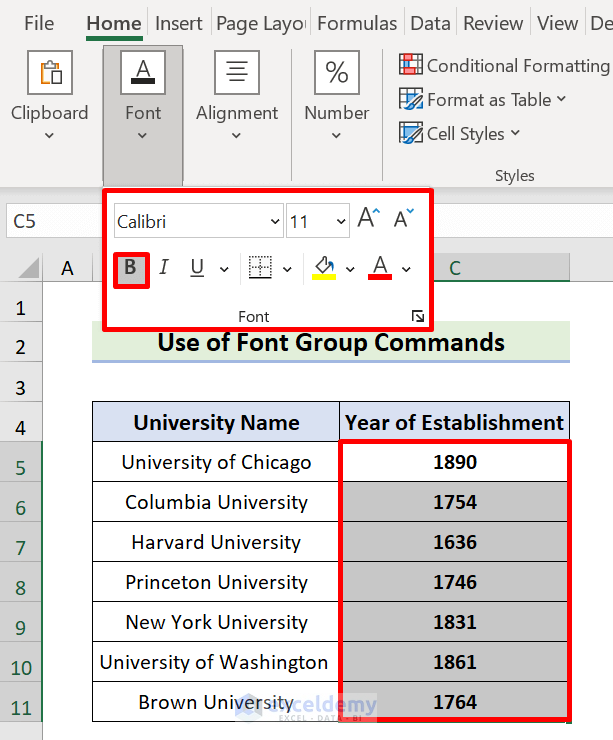
- Change the font name, size, and/or color.
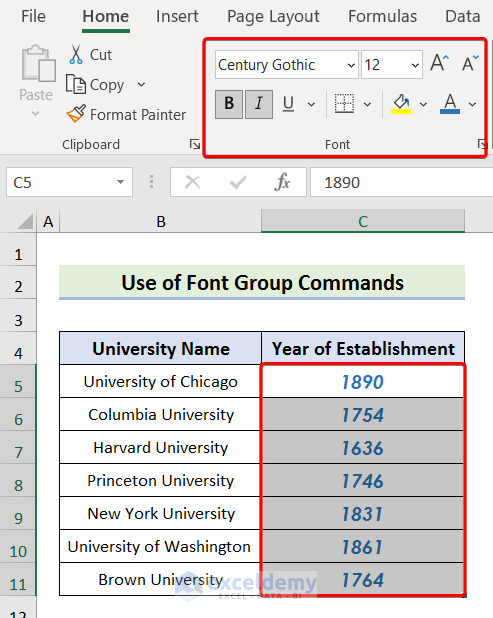
- Make the font bold and italic.
The font style for the selected cells is changed.
Read More: How to Increase Font Size Using Keyboard in Excel
Method 2 – Using the Format Cells Dialog Box
We can also use the Format Cells dialog box to change the font style for selected cells.
Steps:
- Select a range of cells.
- Go to the Home tab > Font group > Font Settings dialog box launcher. Or press Ctrl+Shift+F.
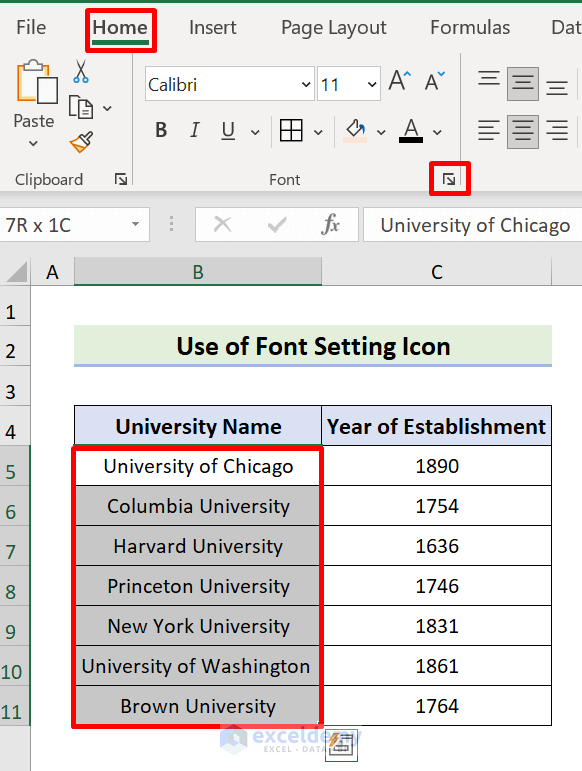
- In the Font tab of the Format Cells dialog box:
- Select a font from Font.
- Pick a style of text from Font Style.
- Click OK.
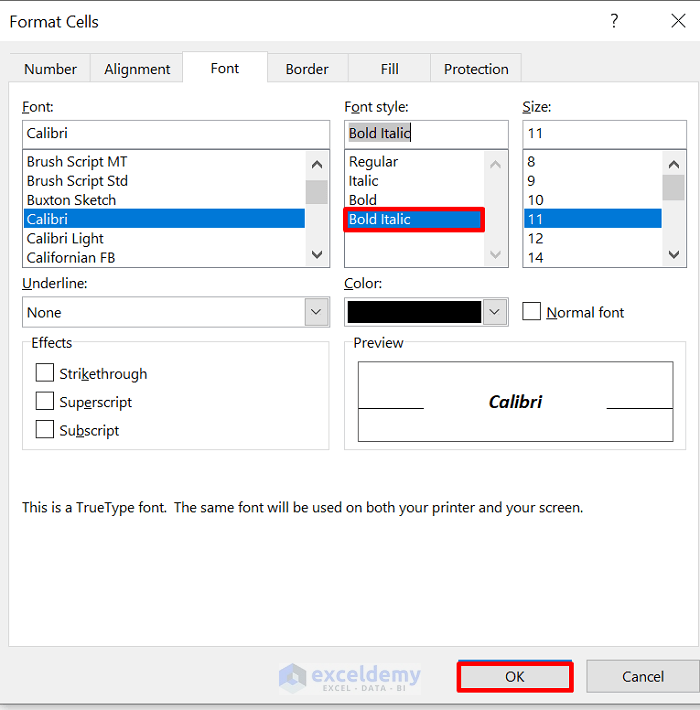
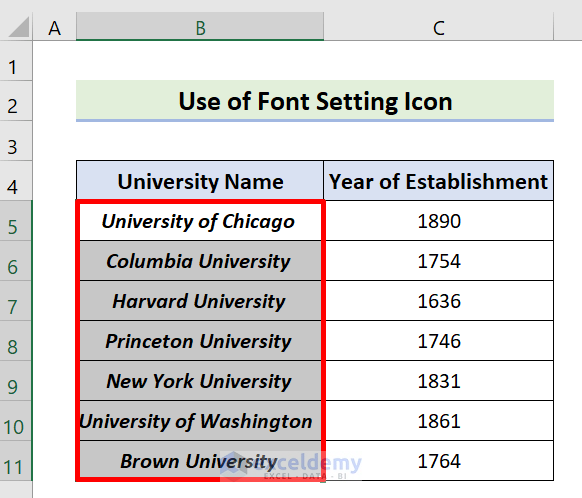
The font style is applied in the selected cells.
Read More: [Fixed!] Excel Default Font Is Not Changing
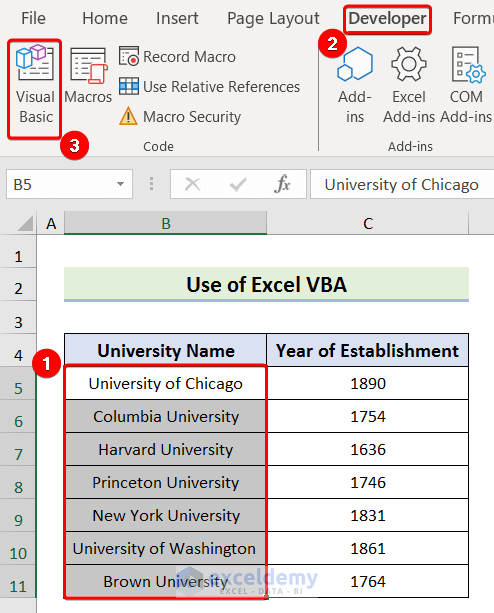
Method 3 – Using VBA
We can also change the font style in Excel using VBA.
Steps:
- Select a cell or a range of cells.
- Go to the Developer tab > Code group > Visual Basic to open Visual Basic Editor. Or press ALT+F11.
- Go to the Insert tab > Module.
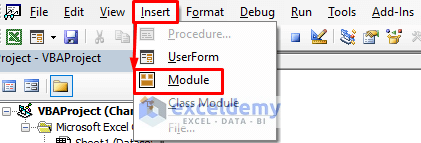
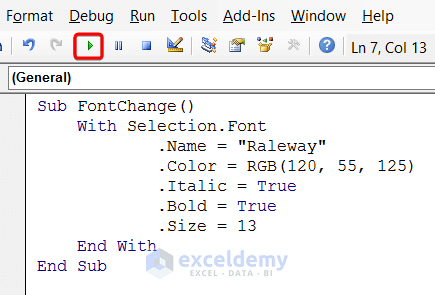
- Copy the following VBA code and paste it into the Module window that opens:
Sub FontChange() With Selection.Font .Name = "Raleway" .Color = RGB(120, 55, 125) .Italic = True .Bold = True .Size = 13 End With End Sub - Click the Run button or press F5 to run the code.
The font style according to the VBA code is applied.
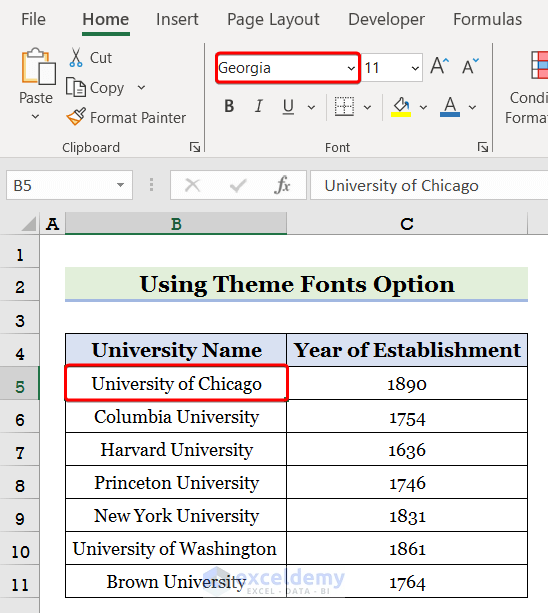
Method 4 – Using the Theme Fonts Option
To change font style across a workbook, we can use the Theme Font option. This helps to keep a consistent look throughout your whole workbook. The font style in cells that already contain data will not be affected. So, this method works best for cells without any information in them yet.
Steps:
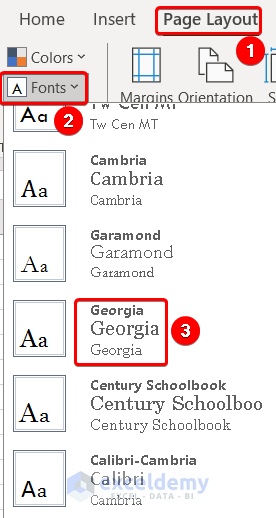
- Go to the Page Layout tab > Themes group > Fonts.
- Pick a font for the blank cells.
All newly inserted data will have the defined font automatically applied.
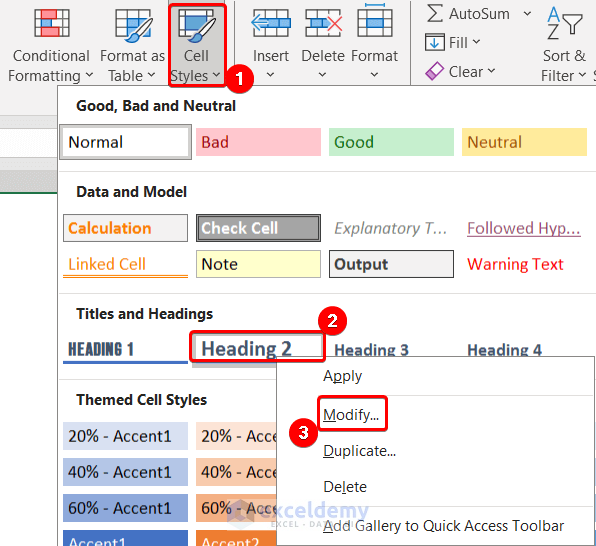
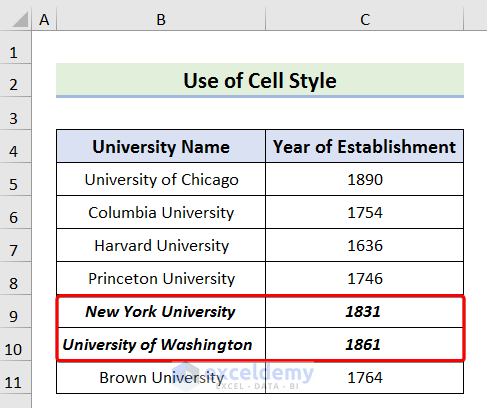
Method 5 – Applying Cell Styles
The Cell Styles option can be used to change font styles easily. Just modify a font pattern in Cell Styles, and then apply it with a single click to change the font style quickly. In addition to the font, we can also set a specific number style, alignment, borders, and modify other features using the Cell Styles option.
Steps:
- Go to the Home tab > Styles group > Cell Styles.
- Right-click on Heading 2 and select Modify from the context menu.
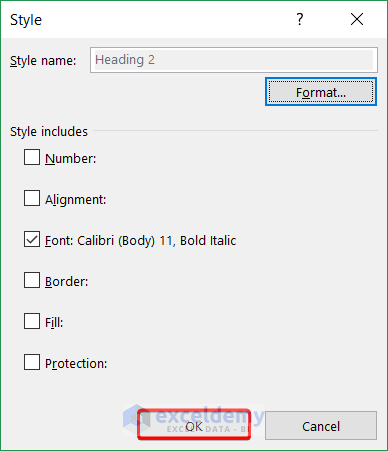
A Style dialog box will appear.
Check only the Font box and click on Format.
 A Format Cells dialog box will pop up.
- Define the font style as desired.

- Click OK again in the Style box.
- Select a range of cells and apply the modified cell style.
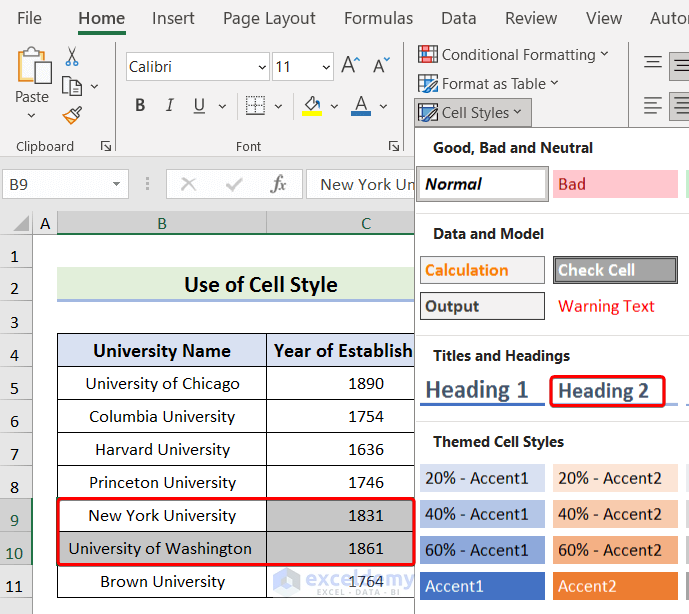
The font style is changed with just one click.
Read More: How to Change Font in Excel to All Caps
Download Practice Workbook
Frequently Asked Questions
How do I change the font style for a specific part of the text within a cell?
To change the font style for a specific part of the text within a cell, select the specific part and use the features from the Font group of the Home tab.
Is it possible to use the Theme Fonts option to change the font style of a certain cell?
No, unless that cell is the only blank cell in the workbook. The Theme Fonts option changes the font style of all the blank cells of the entire workbook.
What are the shortcut keys to change the font size in Excel?
The shortcut keys to change the font size in Excel are:
- To increase the font size: Alt + H, F, G.
- To decrease the font size: Alt + H, F, K.
Related Articles
- How to Increase Font Size for Printing in Excel
- How to Change Font in Excel for All Sheets
- [Fixed!] Unable to Change Font Color in Excel
- How to Change Font Within Formula in Excel
- [Solved!] Font Changes Automatically in Excel
<< Go Back to Excel Fonts | Excel Cell Format | Learn Excel
Get FREE Advanced Excel Exercises with Solutions!
