Method 1 – Create Outline of GST Bill Format
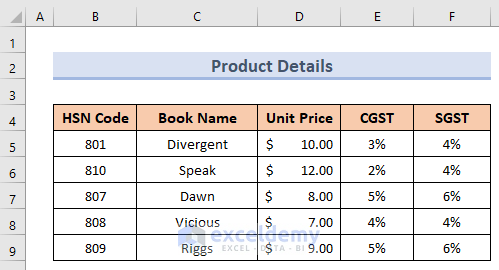
- Create a basic dataset of the products, like the image below.
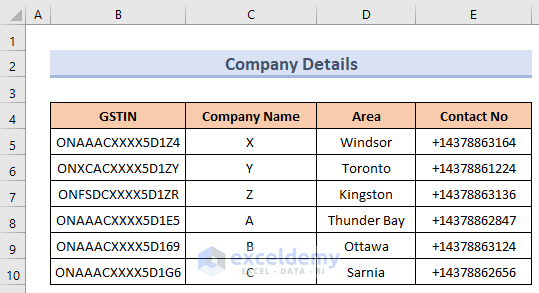
- We need to create another dataset of the Company Details like the one below in another sheet.
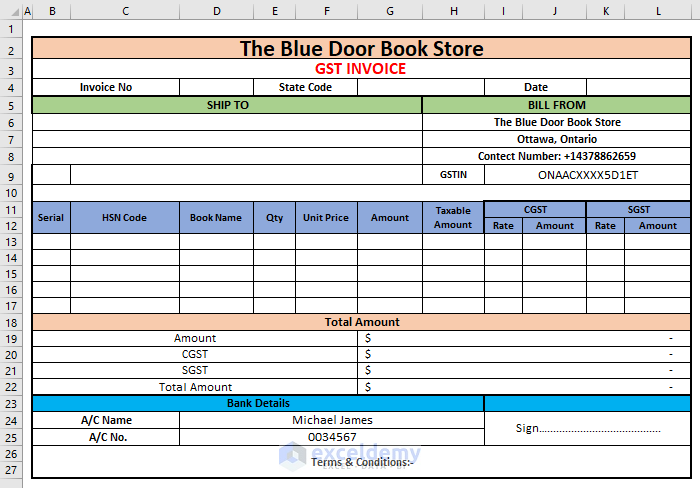
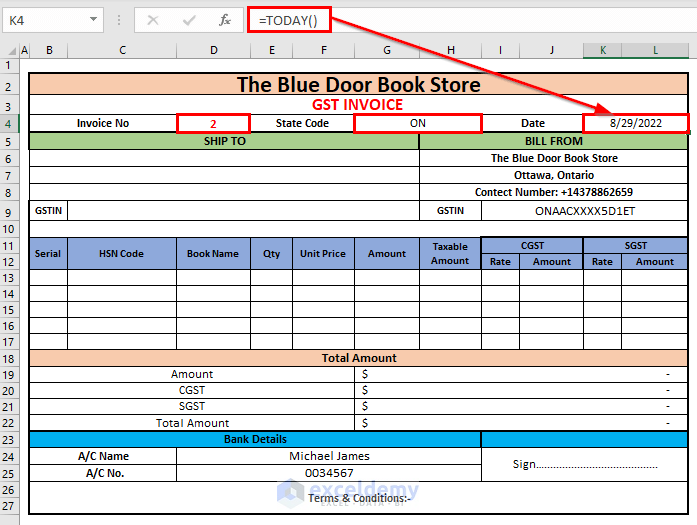
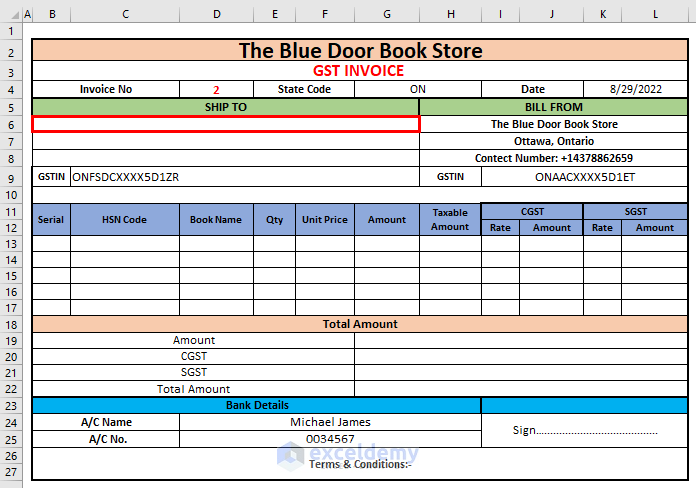
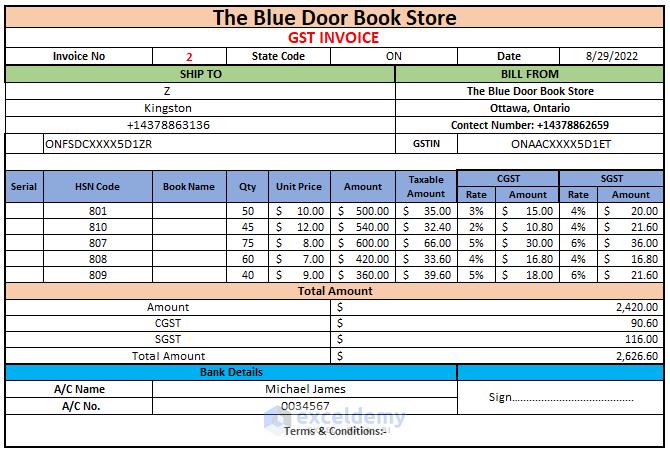
- Create the basic outline of the GST invoice for the seller. We created the basic outline for The Blue Door Book Store.
- Give some basic fixed inputs in the required places. Fill up the indicated cells first.
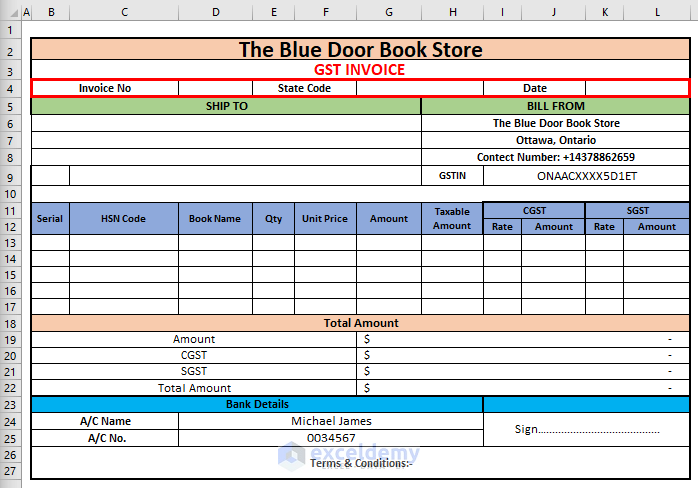
- Type 2 as Invoice No, ON as State Code (code for Ontario), and for having today’s date, we used the TODAY function.
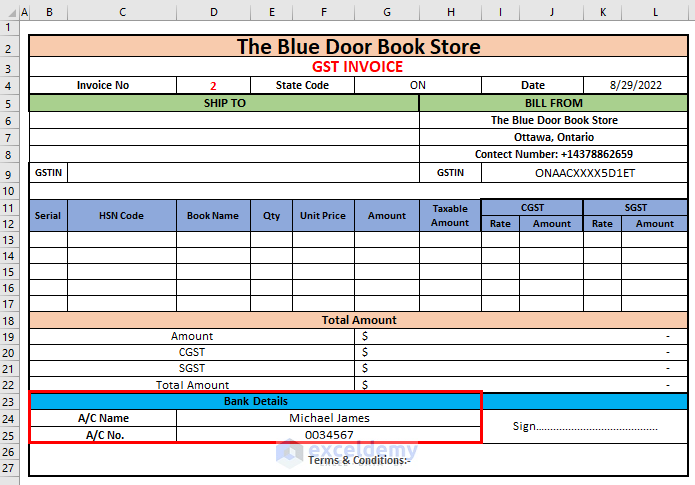
- Fill in the banking details.
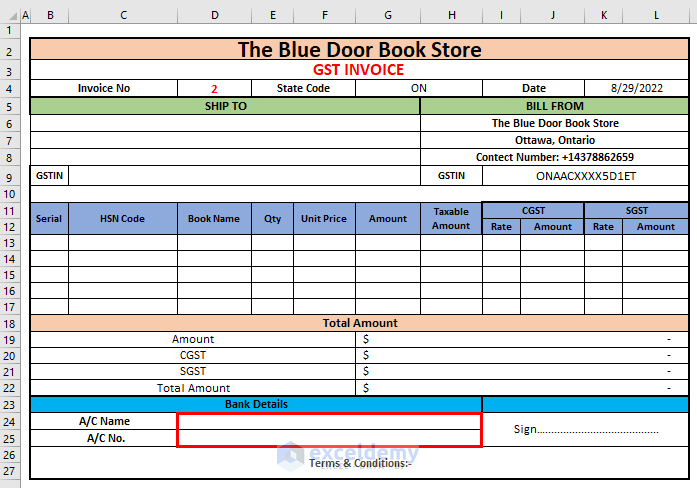
- Use your desired A/C Name and A/C No. (we used Michael James and 0034567).
Method 2 – Make Dropdown List
- Make a dropdown list for the GSTIN numbers of the companies to whom the products will be supplied.
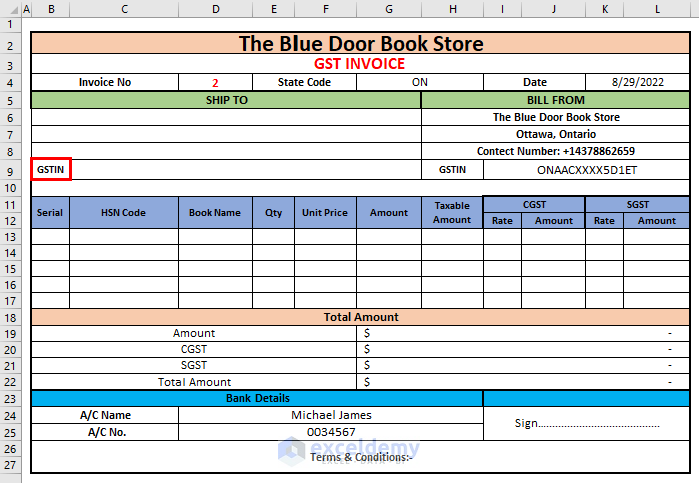
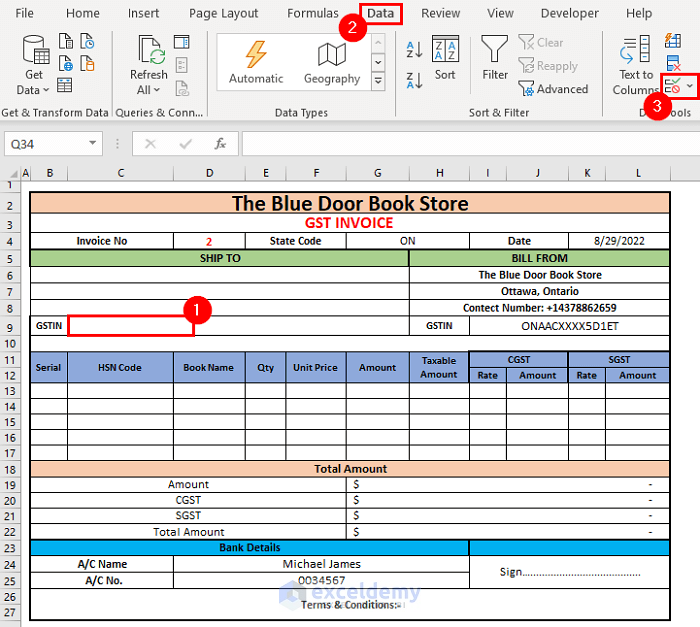
- Select cell C9 where you want to have the dropdown list.
- Go to the Data tab >> Data Tools Group >> Data Validation option.
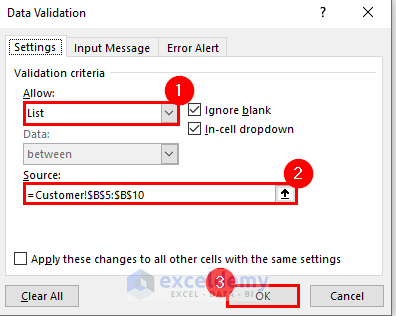
- The Data Validation dialog box will open.
- Select the List option in the Allow field.
- Select cells ($B$5:$B$10) in the Source box and press OK.
Customer is the sheet name, and ($B$5:$B$10) is the range containing the GSTIN numbers in that sheet for different companies.
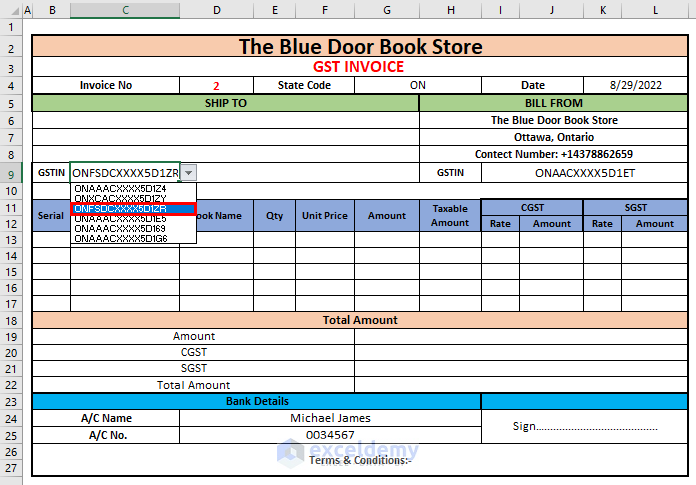
- Get the dropdown sign in our desired cell and now we can choose any of the numbers from this list. We selected the GSTIN number ONFSDCXXXX5D1ZR for this example at first.
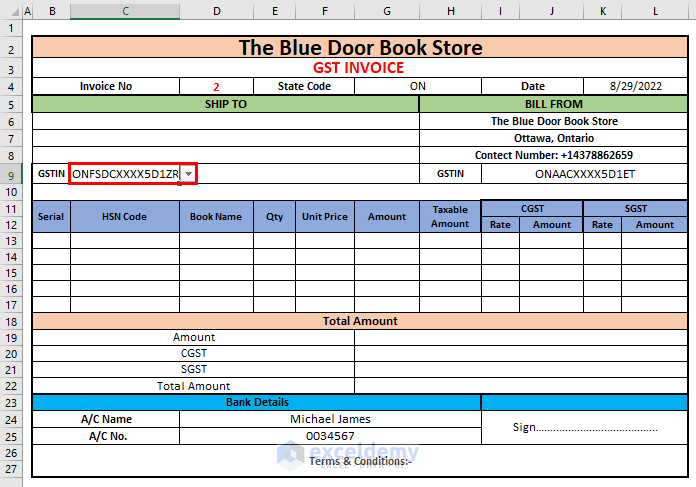
- The selected number will appear in cell C9.
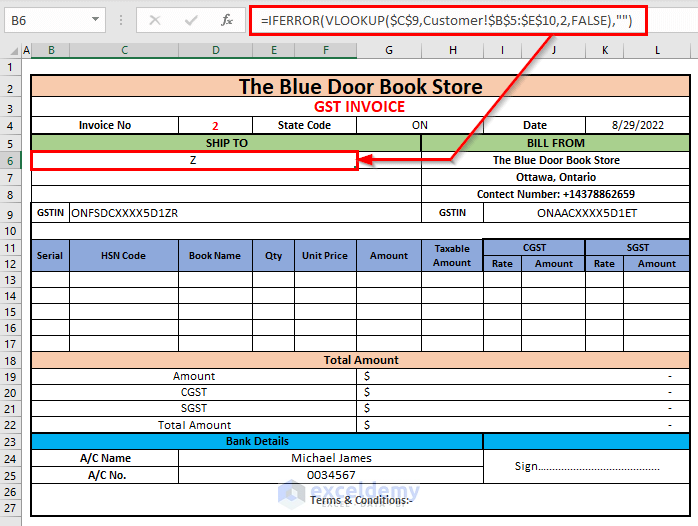
- Use the GSTIN number to look for the values of the Company Name in the Customer sheet and then have this value in the indicated region.
- Type the following formula in the selected region and press Enter:
=IFERROR(VLOOKUP($C$9,Customer!$B$5:$E$10,2,FALSE),"")- Get the Company Name, Z, for the GSTIN number ONFSDCXXXX5D1ZR.
$C$9 is the lookup value, Customer!$B$5:$E$10 is the table array where Customer! is the sheet name, 2 is the column number of which we want the values and FALSE is for an exact match. If sometimes the VLOOKUP function returns an error then the IFERROR function will convert it into a Blank.
- Use the following formula and press Enter to get the Area of the company:
=IFERROR(VLOOKUP($C$9,Customer!$B$5:$E$10,3,FALSE),"")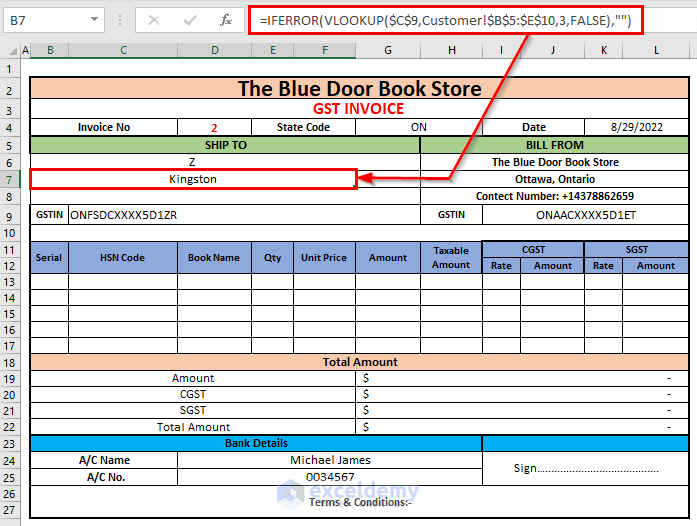
- Type the following formula and press Enter in the following region to get the Contact No. of the company:
=IFERROR(VLOOKUP($C$9,Customer!$B$5:$E$10,4,FALSE),"")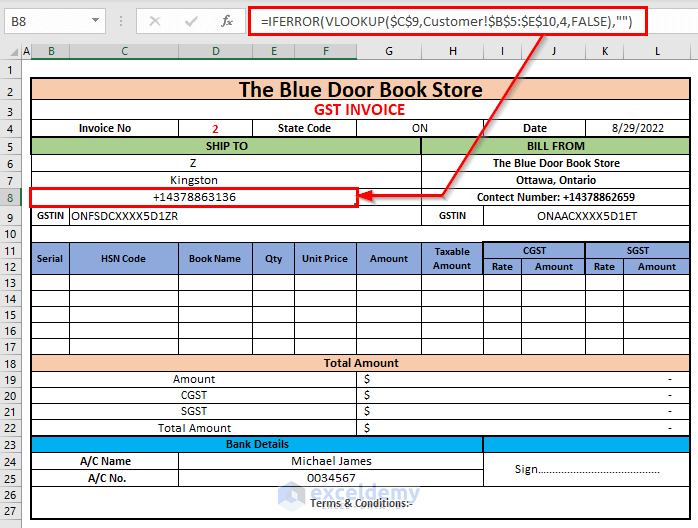
- See that we have the following Company Name, Area and Contact No. for the corresponding GSTIN number ONFSDCXXXX5D1ZR.
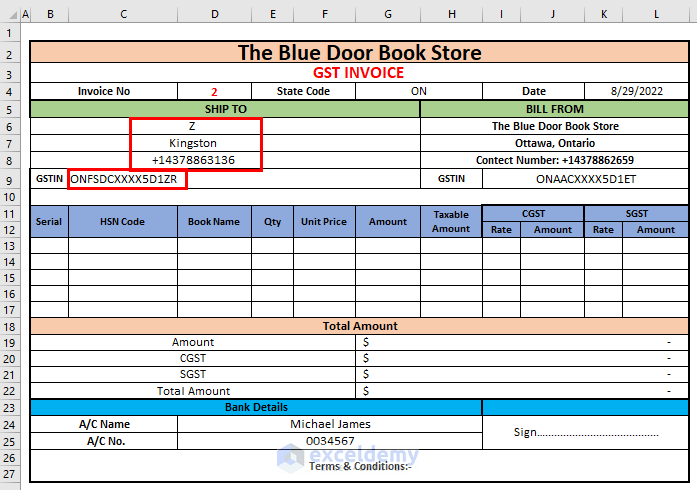
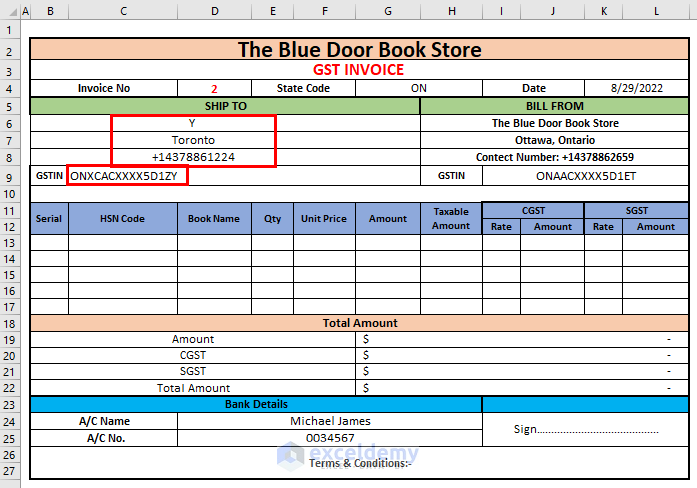
- Change the GSTIN number by using the dropdown list of the corresponding Company Name, Area, and Contact No. will also be changed.
Method 3 – Apply Excel Formula to Modify GST Bill Format
Now we will use some Excel formulas for making an automated GST bill format.
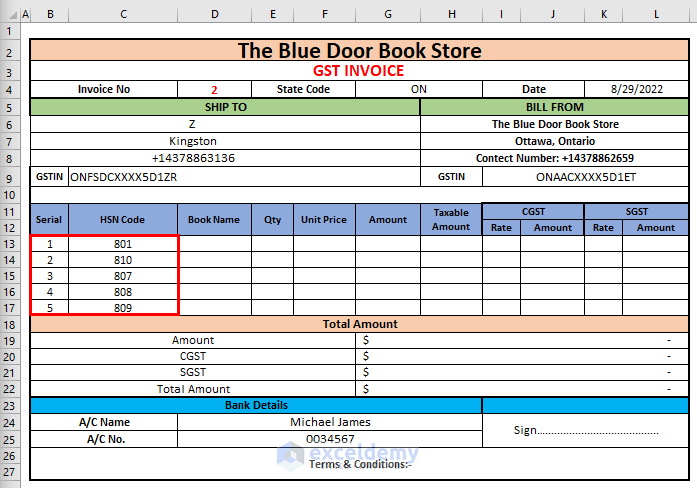
- Type the Serial Numbers and HSN Codes of your products in the Serial and HSN Code columns.
- Use the HSN Code to look for the values of the Product Name in the Product sheet and then have this value in cell D13.
- Type the following formula in cell D13 and press Enter.
=IFERROR(VLOOKUP(C13,product!B5:F9,2,FALSE),"")C13 is the lookup value, product!B5:F9 is the table array where product! is the sheet name, 2 is the column number of which we want the values and FALSE is for an exact match. The VLOOKUP function returns an error then the IFERROR function will convert it into a Blank.
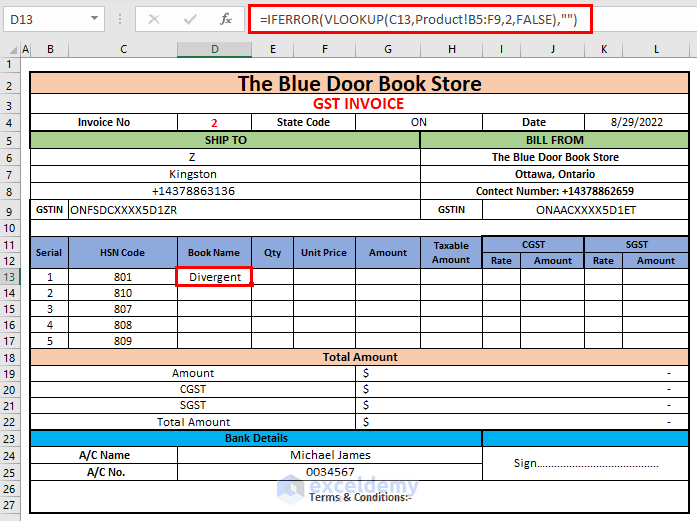
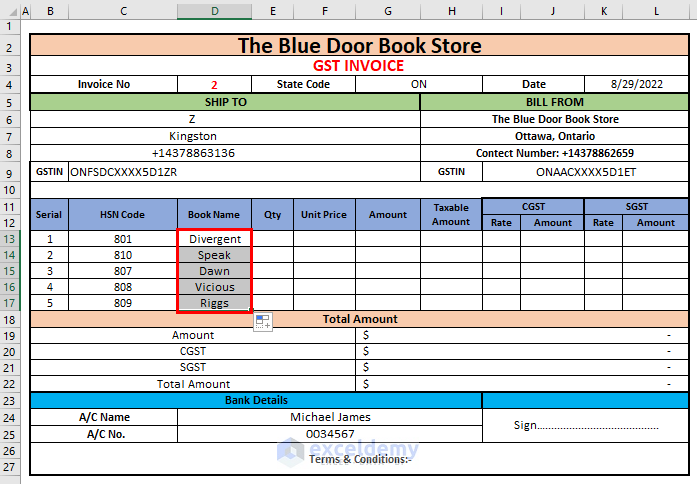
- Drag the Fill Handle tool down. Get the Book Names in the Book Name column.
- Type the following formula in cell F13 and press Enter.
=IFERROR(VLOOKUP(C13,product!B5:F9,3,FALSE),"")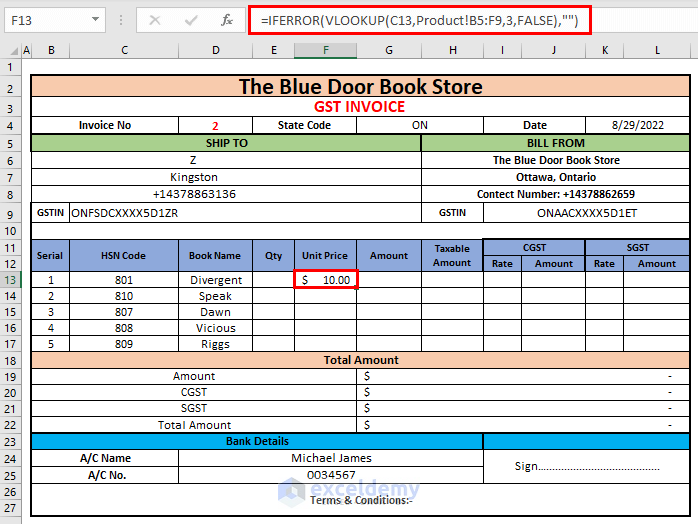
- Drag the Fill Handle tool down. Get the Unit Prices in the Unit Price column.

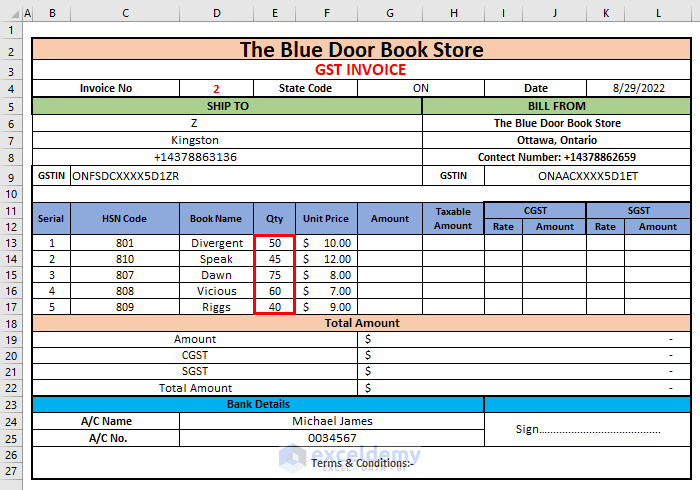
- Type the number of your products in the Qty column.
- Get the prices by multiplying the Qty and Unit Price in the Amount column.
=E13*F13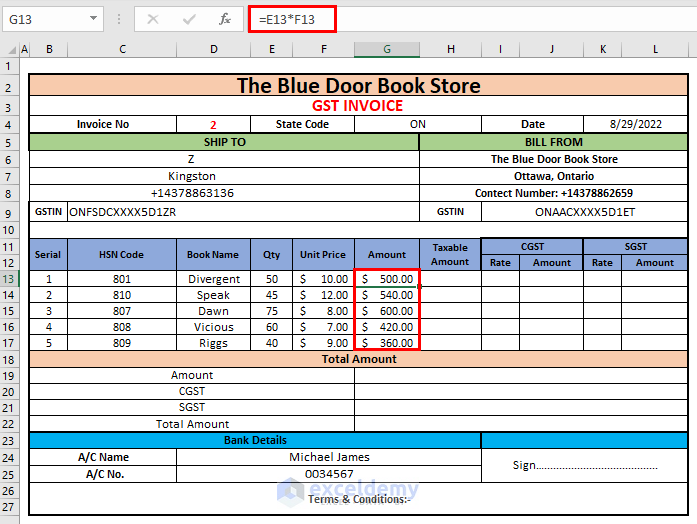
- Get the CGST rates by using the values of the HSN Codes by using the following formula:
=IFERROR(VLOOKUP(C13,product!B5:F9,4,FALSE),"")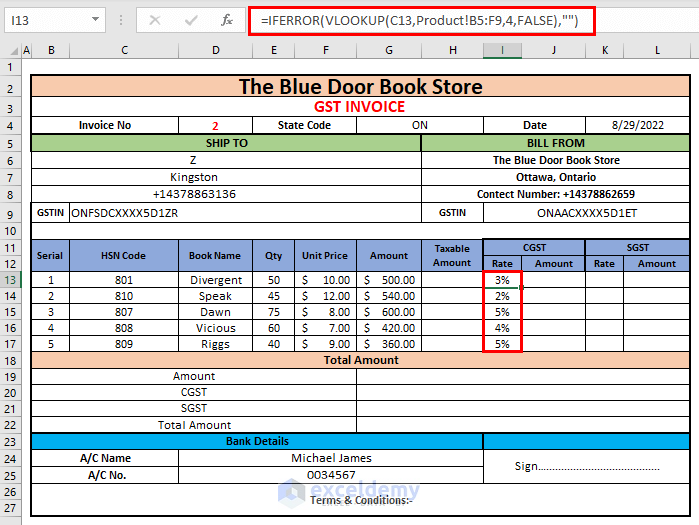
- Get the SGST rates by using the values of the HSN Codes by using the following formula:
=IFERROR(VLOOKUP(C13,product!B5:F9,5,FALSE),"")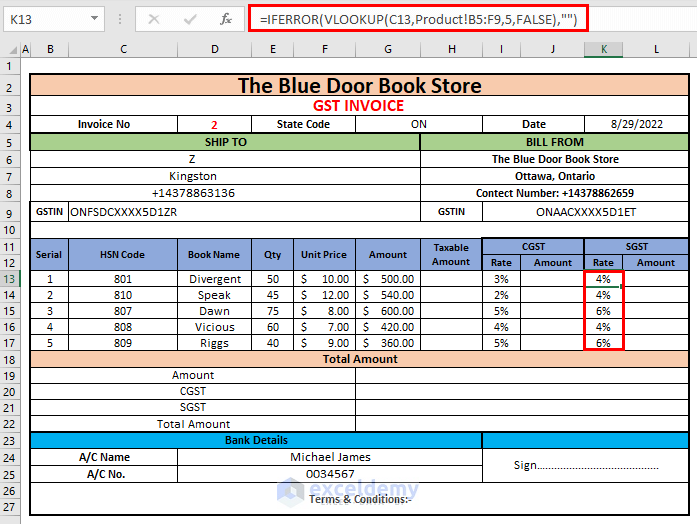
- Get the CGST Amount by using the following formula:
=G13*I13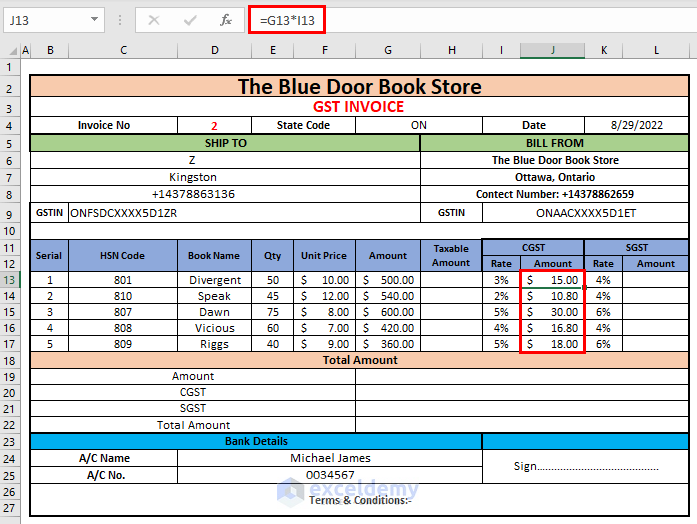
- We used the following formula for having the SGST Amount.
=G13*K13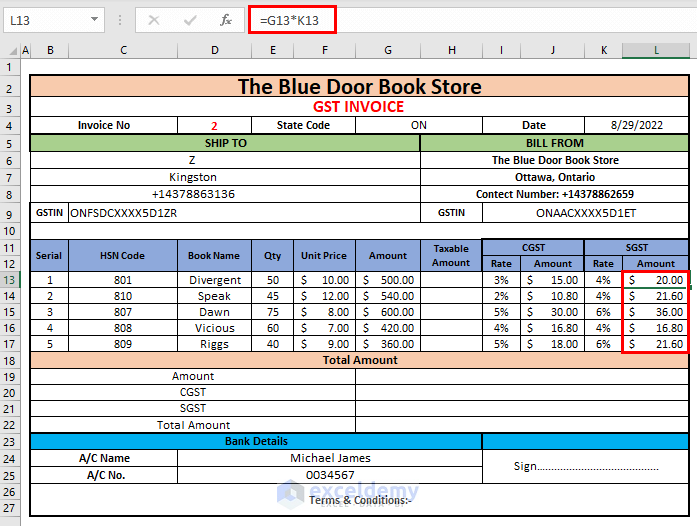
- To calculate the Taxable Amount, we will use the following formula:
=J13+L13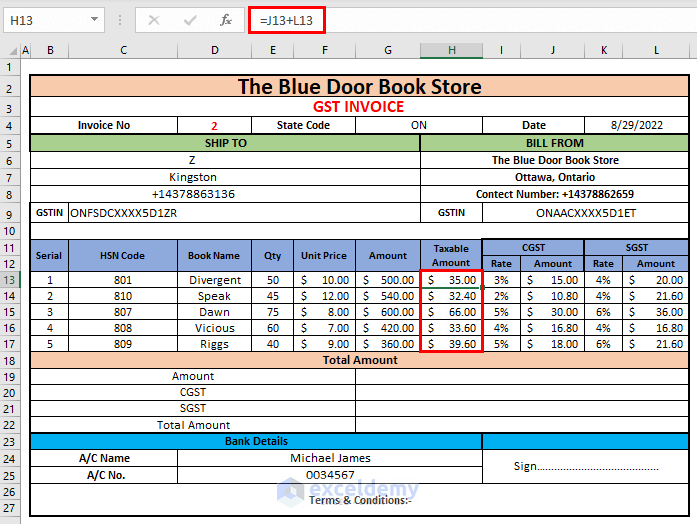
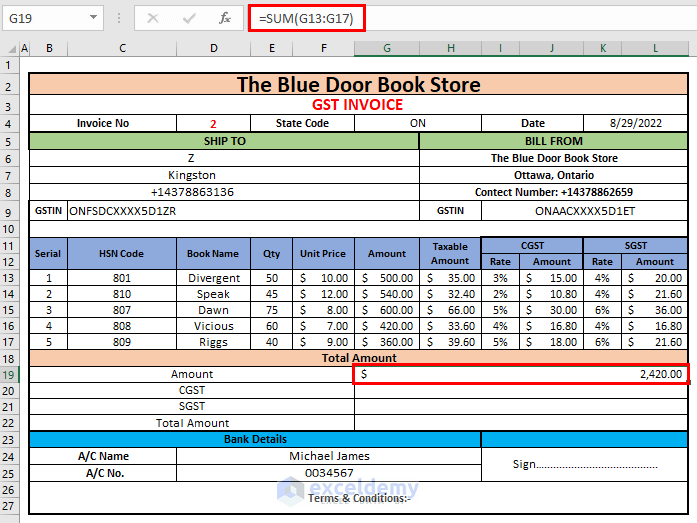
- By using the following formula, we will sum up the amounts of the products:
=SUM(G13:G17)The SUM function will add up the values of the Amount column.
- To get the total CGST Amount, we will use the following formula:
=SUM(J13:J17)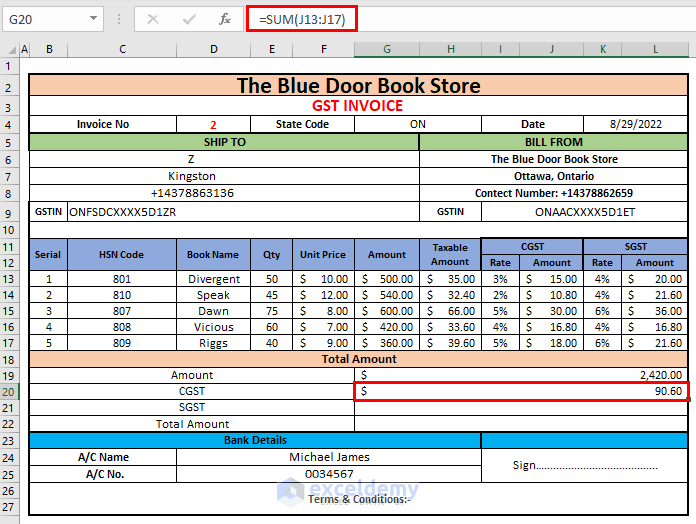
- To sum the SGST Amount, we will use the following formula:
=SUM(L13:L17)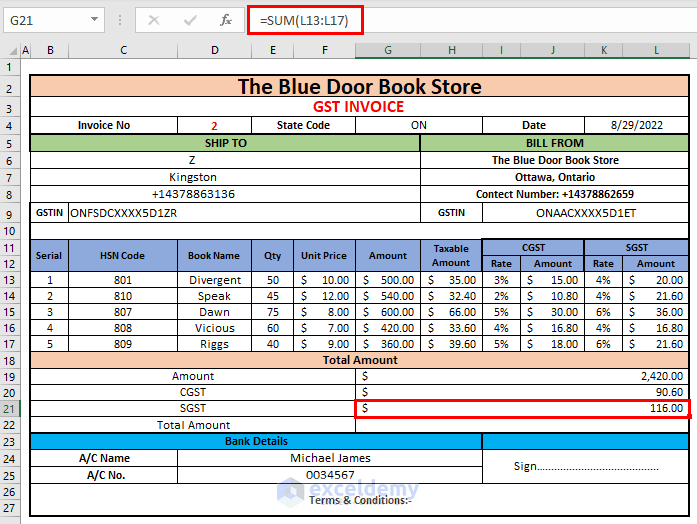
- After having all of these amounts, we will sum up them by using the following formula to get the Total Amount.
=SUM(G19:L21)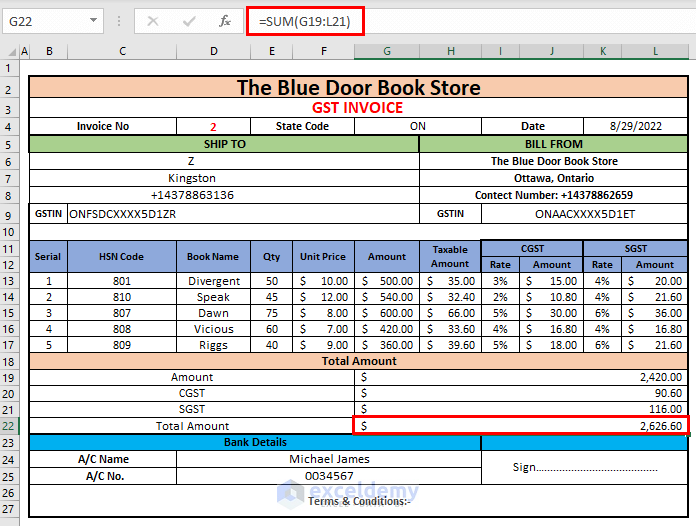
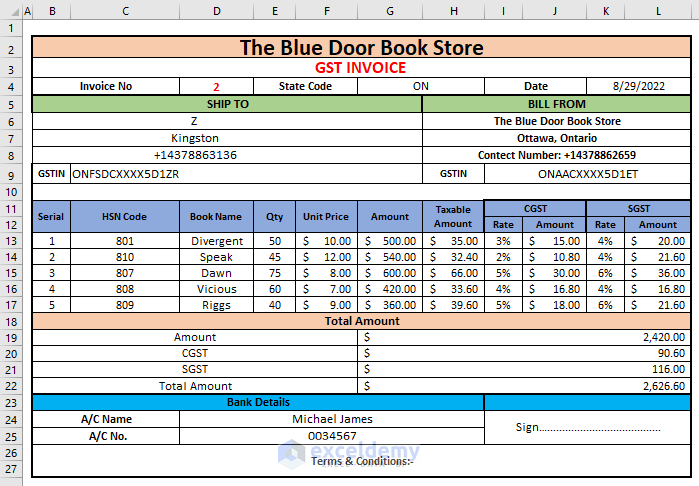
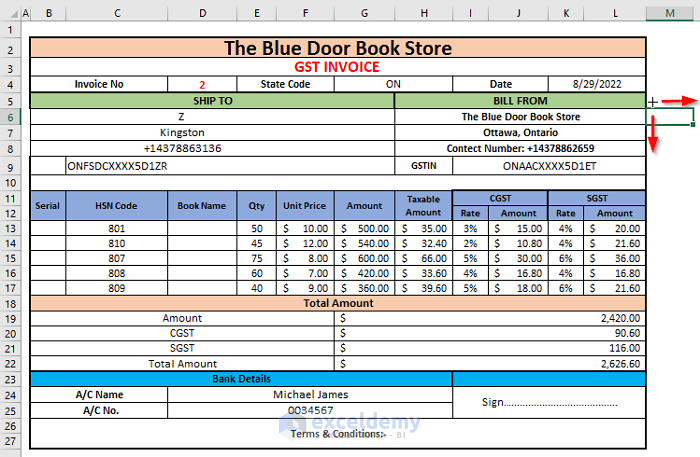
- After performing all of these calculations, we will get the following bill form.
Method 4 – Save and Resume Bill Format in Excel
Use two VBA codes to refresh the bill form for performing calculations for new data and saving the bill.
- Go to the Developer tab >> Visual Basic editor.
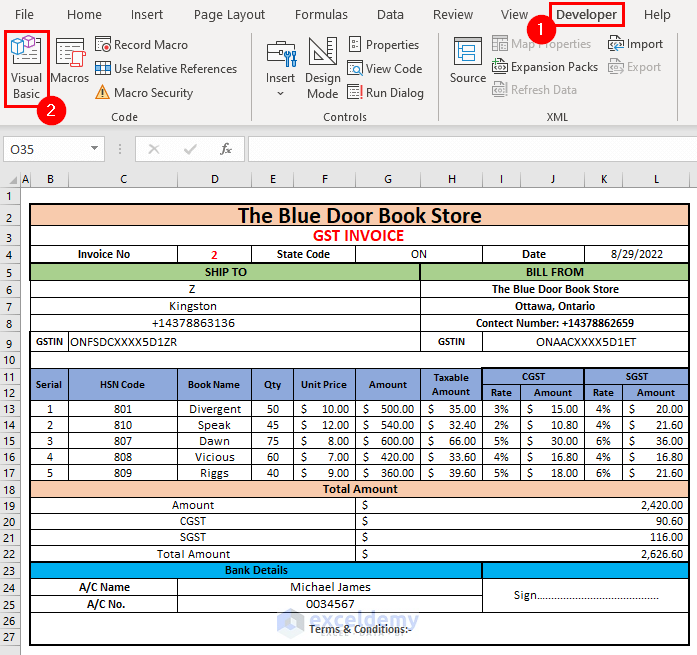
- The Visual Basic Editor will open up.
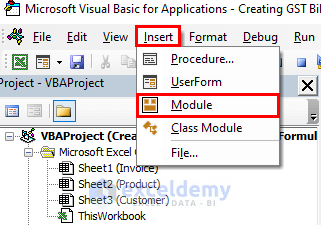
- Go to the Insert tab >> Module option.

- A Module will be created.
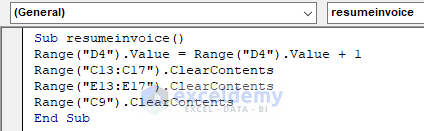
- Write the following code for resuming the sheet.
Sub resumeinvoice()
Range("D4").Value = Range("D4").Value + 1
Range("C13:C17").ClearContents
Range("E13:E17").ClearContents
Range("C9").ClearContents
End Sub
This code will clear these ranges and add up 1 with the value in the cell.
- Go to Insert tab >> Module Option again.
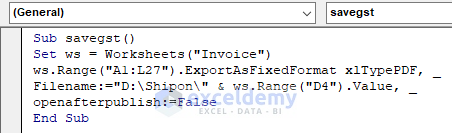
- Type the following code for saving the code in your desired location.
Sub savegst()
Set ws = Worksheets("Invoice")
ws.Range("A1:L27").ExportAsFixedFormat xlTypePDF, _
Filename:="D:\Shipon\" & ws.Range("D4").Value, _
openafterpublish:=False
End Sub
The Invoice is the sheet name, and (A1:K27) is the range of the sheet you want to save.
- Go to Developer tab >> Insert Group >> Button option.
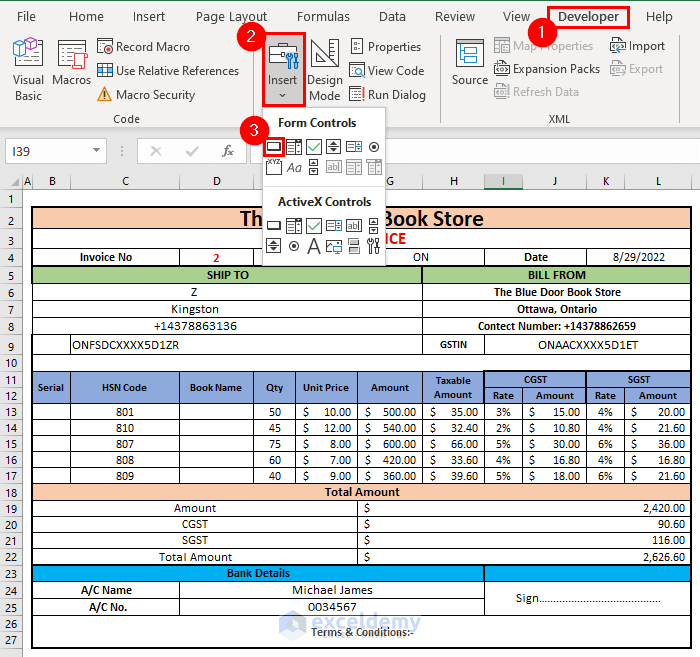
- A plus sign will appear, and drag down and right this sign like the following figure.
- The Macro name dialog box will open up like the one below.
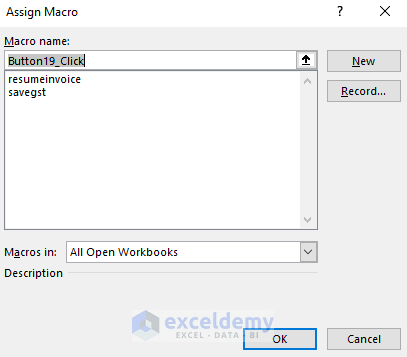
- Select the resumeinvoice macro name for creating a button for resuming the operation and press OK.
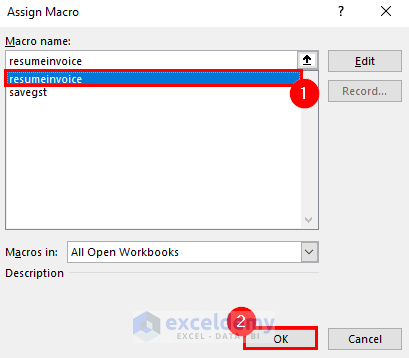
- We edited the name of the button as Resume.
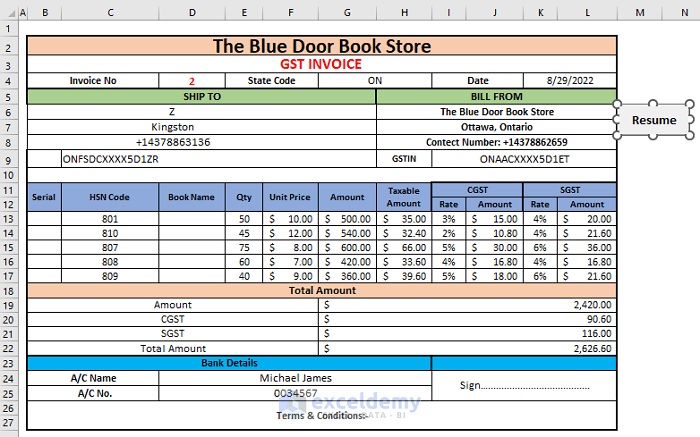
- Create a Save button for saving the bill form as a PDF using the savegst macro name.
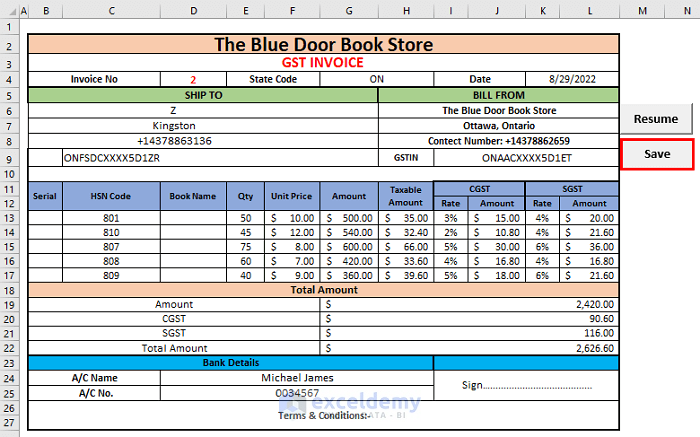
- After pressing the Save button, the bill form will be saved as a PDF displayed below in your desired location.
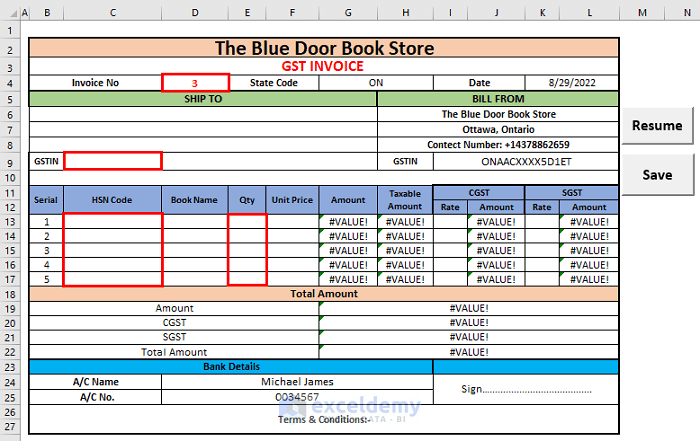
- After pressing the Resume button, the Invoice No will be increased by 1, and the values of the indicated boxes will be removed.
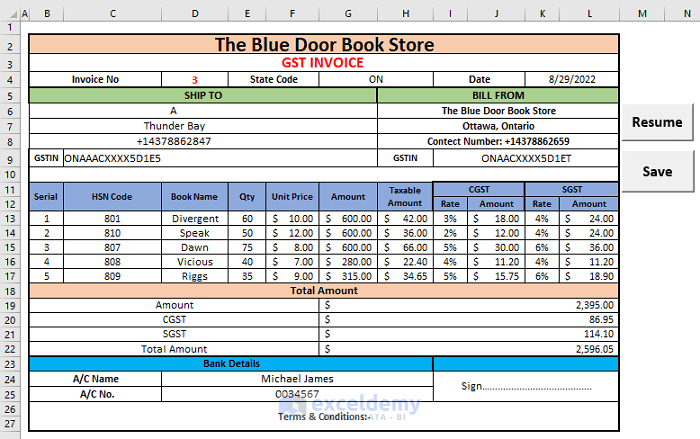
- Give the inputs in the indicated boxes of the previous figure. We can get a new bill form like the one below.
Things to Remember
- We can increase or remove the number of steps to create a GST bill format according to our needs.
- In order to save the bill on your pc using the VBA code, you have to clearly mention the path correctly.
Download Practice Workbook
You can download the free template from here.
Related Articles
- How to Create a Tally GST Invoice Format in Excel
- How to Make GST Export Invoice Format in Excel
- Proforma Invoice Format in Excel with GST
- How to Create GST Rental Invoice Format in Excel
- Create Non GST Invoice Format in Excel
<< Go Back to Excel Invoice Templates | Accounting Templates | Excel Templates
Get FREE Advanced Excel Exercises with Solutions!
